Pork Riblets

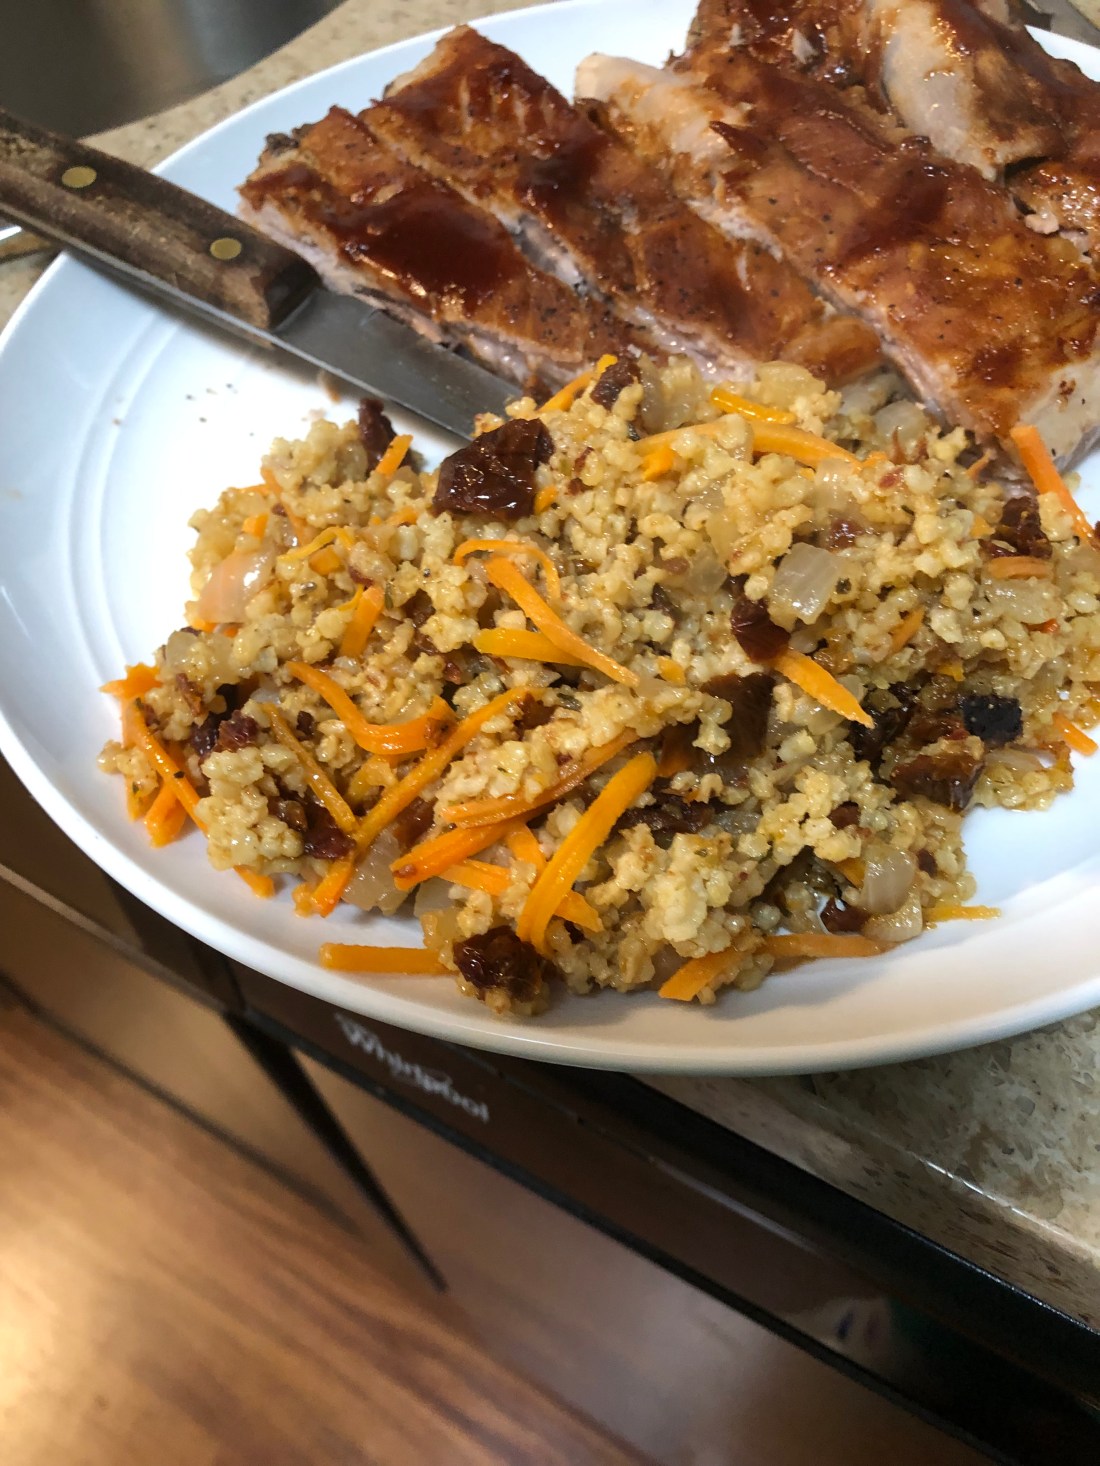
I’ll admit it, my very favorite thing in the whole world is pork ribs – any way you want to cook them, but I generally prefer them plain except when I make one of my low or sugar-free sauces. When I lived in Tempe, Arizona, we often visited a small Chinese restaurant in our neighborhood and I loved their ribs, which were in fact riblets. Wondering what riblets are? They are what the butchers usually cut off from the bottom of the ribs and often throw away so you can find them generally on the less expensive side if the butcher decides to sell them rather than just throw them away which is happening more and more in my local market. I find them very succulent because while they have some fat, they are mostly meat and bones. I always try to buy the packages they contain the least amount of fat. I also steam them in my oven slow and low for several hours which keeps them moist (I don’t own a grill). So here’s how I make my riblets (I made my St. Louis ribs the same way).

Here’s how they look before they’re cooked:

Preheat oven to 300 degrees. Spray an oven proof dish large enough to hold the riblets with non-stick spray. Add:

6-12 riblets which are seasoned with:

Salt

Ground Black Pepper

Garlic Powder

Add:

1/4-1/2 inch of water

Cover tightly with aluminum foil and bake for 1 1/2 to 2 hours. Remove from oven, turn oven up to 400 degrees, and place the riblets on a small baking sheet (spray it as well) and brush with:

Your favorite barbecue sauce (see my recipe for spicy honey sauce under sauces)

Bake for 5 minutes to heat the sauce before turning the riblets over and brushing with sauce again before baking another 5 minutes. If some caramelization of the sauce is desired, they can be broiled as well. Enjoy! Serves 2-4 depending on what else you’re serving and how much those people eat.

Honey Barbeque Sauce

I gave you a recipe for barbeque sauce when I made the Barbeque Beans side dish a while ago (see recipe under side dishes). That one included some oil so here’s an oil free, spicy recipe that I just love and I hope you will too. I’m making some pork Ribbletts tomorrow and since my usual Organicville Barbeque Sauce isn’t available at my local store at the moment, I decided to try making my own. I’ll pass on the recipe for the ribbletts tomorrow.

In a small saucepan combine:

1 cup tomato sauce

1/4 cup honey (maple or date syrup, coconut or agave nectar)

1/4 cup white vinegar (or apple cider)

2 tablespoons molasses

1/2 teaspoon salt

1/4 teaspoon ground black pepper

1/4 teaspoon smoked paprika

1/4 teaspoon onion powder

1/4 teaspoon garlic powder

1/4 teaspoon chili sauce (in the Asian section of your market just be sure to purchase one without any sugar) (Optional)

1/2 teaspoon sriracha (Optional)

1/4 teaspoon cumin

Stir or whisk together and taste. Just remember that all these flavors will be accentuated as the sauce reduces. Heat over medium heat until it just starts to bubble then reduce to low and simmer for about 15-20 minutes until thickened. Add additional salt, etc., if needed per your taste. Makes about 1 1/2 – 1 3/4 cups of sauce.

Creamy Turkey Tenderloin with Garlic and Shallots

Here’s a one dish wonder that’s very easy to make and so delectable to eat. When we don’t want to heat up the oven on these hot summer nights, this is a great recipe to fall back on. It’s pretty simple to make and takes very little time, less than a half hour to prepare. The addition of the garlic and shallots adds some flavor as well as heat (we’re talking over a tablespoon of minced garlic here). This would also work well with skinless boneless chicken breasts or pork tenderloin.

First, dry off using paper towels, one:

1 pound (approximately) turkey tenderloin

Then slice it in half lengthwise to expose the tendon running down the middle (that tough white string). Remove the tendon, easier if you cut the tenderloin so that the tendon is on the outer part of one half. On a plate or pie plate (I used a paper plate) combine:

2 tablespoons gluten-free all purpose flour

1/4 teaspoon sea salt

1/4 teaspoon ground black pepper

1/4 teaspoon paprika

1/4 teaspoon garlic powder

Whisk to make sure the herbs are even throughout the flour mixture. Dredge each half of the turkey tenderloin in the flour mixture, on both sides. In a 12″ skillet, heat over medium high heat:

1 tablespoon olive oil

When the oil is shimmering, add the turkey pieces, lower the heat to medium and saute the turkey on each side for approximately 3-5 minutes or until firm, turning once.* Remove from the skillet and add:

3-4 small shallots, sliced and/or diced

1-2 tablespoons minced garlic

You may need to add a little more (about 1 teaspoon) olive oil. Sauté over medium low heat for about 1 minute until the shallots are softened and the garlic is just beginning to brown. Add to the skillet:

1/2 to 3/4 cups chicken (or turkey) stock (start with 1/2 cup and add more if the mixture needs thinning after the next step)

Scrap the bottom of the skillet to release the browned bits left from the turkey. Mix together:

1 cup dairy-free milk (I used oat but for a creamier texture, use a non-dairy creamer)

1 1/2 tablespoons gluten-free flour

Whisk to combine before adding to the skillet. Stir the ingredients to mix thoroughly and continue stirring until the sauce thickens before reducing the heat to low, about 2-3 minutes. Add the turkey pieces back into the sauce and simmer for several minutes to reheat the turkey. Serves 2-4. I served mine over brown rice but it would pair just as well with mashed potatoes, mashed sweet potatoes, quinoa, sorghum or millet, or even a puree of root vegetables.

*The amount of time needed to cook the turkey will depend on the thickness of the turkey slices.

String Beans with Garlic Sauce

I used to love vegetables with garlic sauce. I’d order them, especially eggplant or green beans, whenever I went to an Asian restaurant. A friend recently saw a TikTok video showing how to make them and forwarded it to me. Of course, I had to change a few things to make it suitable to those of us with allergies but it’s a very simple, easy, quick recipe. Enjoy!

First, wash and cut the ends (both) off:

1 pound string beans, green, yellow, purple, doesn’t matter

Next, cut them in half and set aside. In a 12″ high sided skillet, heat over medium high heat:

1 tablespoon olive oil

When the oil is shimmering, add:

1/2 large sweet onion, thinly sliced

1 tablespoon minced garlic OR 6 garlic cloves, thinly sliced

Reduce heat to medium and saute until just starting to brown. Add the string beans along with:

1/4 cup soy sauce substitute (see recipe under Sauces)

1/4 cup stock (vegetable, chicken, doesn’t matter unless you want to keep it vegan)

1 teaspoon sriracha (optional)

1 teaspoon sesame oil (optional)

Salt and pepper to taste

Cover and simmer over medium low heat for about 5 minutes until the string beans begin to get tender. If you like your string beans a little crunchy, cook them a little less and if you like them soft, cook them a little more. Remove the cover and put the heat back up to medium high, stirring the beans constantly until most of the liquid is absorbed and reduced by at least half. It will thicken considerable as it reduces. Serves 4.

6-Minute Sweet Potato Crumpets

What is a crumpet you ask? Well, I’ve seen it described as a spongier English muffin that is made on the griddle rather than in the oven. But English muffins are also made on the griddle. Another description says that crumpets are spongy whereas English muffins are bready. I think that’s probably the best description. So I decided to refer to these as crumpets even though they are not cooked on the stovetop but are cooked in the microwave, therefore making them very quick and easy to make. They could also be baked in a 350 degree oven for about 10-12 minutes. The recipe makes 1 crumpet although while one was cooking, I began another thereby using the entire can of pureed sweet potato to make a total of 8. For a sweeter crumpet, see variations below.

In a small bowl, about 3-4 cups, mix together:

1 tablespoon ground flax

3 tablespoons warm water

Whisk together and let sit for about 3 minutes until it becomes flax gel (egg substitute). At that point, add:

2 tablespoons pureed sweet potato

Whisk to combine before adding:

2 tablespoons sorghum flour

1/2 teaspoon baking powder

about 1/16 teaspoon sea salt (a generous pinch)

1 tablespoon oat milk

Whisk again to combine before pouring the batter into a 2-cup glass bowl (I used Pyrex storage bowls) sprayed with a non-stick cooking spray. Microwave on high for 2-3 minutes (the 2-cup Pyrex storage bowl took 3 minutes; 1 tried 2 1/2 minutes but the bottom wasn’t cooked). Remove from microwave and flip onto a cooling rack. Let cool for 5-10 minutes before dusting the bottom with a little sorghum flour. Let sit for several hours before toasting or place in small baggies. Can be frozen for several weeks, that is if you have any leftover.

With a little of the sugar-free blackberry jelly I made last week. Delicious!

VARIATIONS:

Use pumpkin puree instead of sweet potato

Use tahini instead of sweet potato (or other seed or nut butter); more milk may be needed if using a thicker butter

Add a pinch of cinnamon or allspice

Add 1 teaspoon of date syrup, maple syrup, agave or coconut nectar for a little sweeter crumpet

Use 2 tablespoons of jelly or jam in place of the sweet potato – you may need to adjust the milk and/or flour depending on the consistency of your jelly or jam

Asian-Style Sorghum Salad

There are so many great grains out there for those of us who can’t digest gluten or potatoes. Here’s one that takes a little longer to make, only because sorghum takes such a long time to cook but is really delicious and quite different from any other grain. As usual, feel free to use variations listed below if a non-Asian type of salad is desired. Enjoy something other than pasta or potatoes!

Cook in 2 quarts of boiling water:

1 cup washed sorghum*

1 teaspoon sea salt

Once water boils, reduce heat to medium high and boil uncovered for 50-60 minutes or until sorghum is soft. Rinse under cold water.

While the sorghum is boiling, prepare:

1/2 to 3/4 cup shredded carrots

2 cups shredded Chinese cabbage

1 cup diced jicama (or diced water chestnuts)

1 cup stringed and sliced pea pods

Combine in a large bowl. Then make the dressing. Pour into a 2-cup jar:

1/4 cup soy sauce substitute (see recipe under sauces/condiments/dressings)

1/2 cup olive oil

1/4 cup sesame seeds

2 teaspoons toasted sesame oil

2 tablespoons rice vinegar

1 teaspoon fish sauce (Optional)

2 tablespoon date syrup

1/2 teaspoon chili paste (or wasabi paste)

1 teaspoon finely minced garlic or ginger (Optional)

Shake vigorously to emulsify although the oil will separate if not used immediately so it will need to be repeated prior to use. Once the sorghum is cooked, rinsed and cooled, pour into the bowl of vegetables and add the dressing. Toss to combine and serve.

*Sorghum has a waxy outer shell that needs to be rinsed off before cooking.

VARIATIONS:

Italian Sorghum salad: Use diced tomatoes, cucumbers, parsley or basil, carrots, peas, etc., with an Italian style dressing.

Sorghum “Potato-style” salad: Add some diced onion, celery, hard-boiled eggs, and a mayonnaise dressing.

Indian Sorghum salad: Use chickpeas, broccoli, carrot, cucumber, spinach, or zucchini along with a curry or tahini-based dressing.

Kohlrabi Slaw

Most cole slaws are pretty easy to make especially if you buy a pre-sliced bag of cole slaw mix which usually includes green and red cabbage along with shredded carrots. I’m always looking for new types of cole slaw and a cooking show I watched recently added kohlrabi to it and I remembered the kohlrabi from my childhood. My sister, brothers, and I would be weeding the garden and see the kohlrabi bulbs, cut them off, and eat them like apples. So delicious! And my mother would be so angry with us because she’d planned on cooking them for supper.

This reminds me of that because they’re raw. If you don’t like kohlrabi or can’t find it in your supermarket, jicama would work just as well. Some thin slices of apple or pear would be great in this as well.

Combine in a large bowl:

1 1/2 cups thinly sliced kohlrabi

1 cup shredded carrots

1 1/2 cups thinly sliced red cabbage (I sliced it thin and then cut the slices in half)

1 1/2 cups thinly sliced white cabbage (I used Chinese but any white or green cabbage works)

In a glass jar combine:

1/2 cup olive oil

1/4 cup rice vinegar (white or apple cider would also work)

2 tablespoons honey

1 teaspoon celery seeds

1 tablespoon sriracha (optional)

Put the lid on the jar and shake vigorously for about a minute or until emulsified. Pour over the vegetables and stir to mix the vegetables and dressing (I used tongs for this). Serve chilled. Makes 6 servings.

Italian Millet

Millet is my newest favorite grain. It’s so simple to cook and it takes on other flavors so easily just as rice does. But unlike most rice dishes, millet is lower in simple carbs and higher in complex carbs so a great alternative to those watching their blood sugar levels. Here’s a really easy recipe that incorporates some of the great Italian flavors we all enjoy – sun-dried tomatoes, olive oil, onion and garlic. This is definitely NOT a low-fat side dish! I used vegetable stock rather than a meat stock because most vegetable stocks have a nice mushroom flavor which adds umami to the dish. Be sure to use sun-dried tomatoes in oil because some of that oil will be used in cooking the dish.

First, cook per package directions (except using stock instead of water):

1/2 cup millet

in 1 1/2 cups vegetable stock

Generally, this means toasting the whole millet in a little oil and then adding it to the boiling stock, covering and cooking on low heat for 30-40 minutes until the liquid is absorbed and the millet is soft. I like to take it off the heat at this point, leave the cover for a few minutes and then fluff the millet with a fork.

In the same skillet, heat until shimmering:

2 tablespoon olive oil (from a jar of sun-dried tomatoes)

Add and cook until tender, over medium heat:

1 medium onion, diced

1 cup shredded carrots* (optional)

When the onion is translucent, add:

1/2 cup diced sun-dried tomatoes

2 teaspoons minced garlic (about 2 cloves)

1 teaspoon cumin (or turmeric)

2 teaspoons Italian herb mix (or dried thyme, oregano, marjoram, and basil)

Mix thoroughly so that the onion mixture is covered with the herbs. Continue cooking until the tomatoes and garlic are heated through, 2-3 minutes. Stir in the cooked millet. If the millet is cold, continue to cook over medium low heat for 3-4 minutes to reheat the millet. Serves 4.

*I like a lot of vegetables in my grains so I added a cup of shredded carrots with the onions.

Turkey with Pea Pods

My father managed a dairy farm so beef was a staple in our family. My mother used to make beef and pea pods, always one of everyone’s favorites. Here’s my version using turkey tenderloin rather than beef. Serves 2-3.

Into a gallon food storage bag, add:

2-3 tablespoons arrowroot

1/4 teaspoon salt

1/4 teaspoon garlic powder

1/8 teaspoon ground black pepper

Shake (close first) to combine and then add:

6-8 ounces turkey tenderloin, cut into slices (about 1/8″ thick)

Seal and shake to coat the turkey with the arrowroot mixture. Put in the refrigerator for at least 1 hour but up to overnight. When ready to start cooking, heat a 12″ skillet over medium heat with:

1 tablespoon olive oil

When shimmering add and saute until slightly softened:

1 medium onion, cut in half and then thinly sliced

2 teaspoons minced garlic (2 cloves)

1 large or 10 baby carrots, thinly sliced on the diagonal

5 celery stalks, thinly sliced on the diagonal

6-8 ounce bag of pea pods, remove the strings and then cut into several pieces on the diagonal

1 medium sweet bell pepper, sliced thin

In a 2 cup bowl, combine:

1 cup soy sauce substitute (if you can have soy, feel free to use soy sauce but reduce to 1/2 cup and increase the stock to 3/4 cup)

1 tablespoon fish sauce

1/2 tablespoon sesame oil

1/4 cup chicken (or turkey) stock

1 1/2 tablespoons arrowroot (or tapioca starch)

1 teaspoon siracha (optional)

Whisk to combine. In a separate skillet, heat over medium heat:

1 tablespoon olive oil

1 teaspoon sesame oil

When shimmering, add the turkey and saute, turning once, until cooked about 2 minutes per side depending on thickness. I had to do this in 2 batches since the turkey shouldn’t be crowded in the pan (we don’t want it to steam!). Add to the vegetables. When all the turkey is combined with the vegetables, stir in the sauce mixture and cook for about 1 minute until thickened and coating all the vegetable mixture. If needed, add more chicken stock by tablespoon. Serve, garnished with sesame seeds and/or sliced scallion greens.

Sesame Noodle Salad

It’s been very hot in Minnesota so I don’t feel much like cooking never mind eating something hot. I’ve been looking for salad recipes and this one is scrumptious and quite easy to put together. Most of the vegetables are raw which means some cutting but very little cooking. Boiling noodles, no problem there. And the sauce can be whisked together very easily. Add some cold meat if you like; I added some grilled chicken breast to mine but even without that, it’s very filling and delicious. This recipe makes two servings as a main dish or 4 as a side dish.

First, put a pot of water on to boil for the pasta. When the water boils add:

6-8 ounces Thai rice noodles or whatever type of gluten-free pasta your family likes

1 teaspoon salt

Cook following package directions. I used the Thai Kitchen brown rice noodles which you throw in boiling water and remove from heat, let sit in the hot water for 5 minutes then drain and put in a bowl of cold water until ready to use.

Next, prepare the vegetables. I can’t eat raw onions or sweet pepper so I sauteed them for several minutes to soften on the cooktop but feel free to add them raw if you like them that way. Into a medium (4-quart sized bowl), combine:

6-8 (depending on size) baby onions (the white parts of the scallions, should be about a half-inch in diameter; these are sometimes called spring onions)

1/2 of a yellow, orange, or red sweet bell pepper, sliced thin

8-10 baby carrots, grated, diced, chopped (I used the food processor for this) or one regular-sized carrot

2 baby cucumbers, peeled and diced

4 stalks of celery, diced

1 small can diced water chestnuts OR 1/2 medium jicama, diced

Next, make the sauce. In a small bowl add:

2 1/2 tablespoons soy sauce substitute (see recipe under sauces/condiments/dressings)

2 tablespoons seed or nut butter (I used my pumpkin seed butter)

1 1/2 tablespoons toasted sesame seeds

1 tablespoon rice vinegar

1 tablespoon date syrup

1/2 teaspoon garlic puree (or crushed garlic)

1/2 teaspoon hot sauce or siracha (more if you want it quite spicy; I think 1 teaspoon would have been better)

1-3 tablespoons hot water to bring the sauce to the right consistency

Whisk together everything except the water. If the sauce seems too thick (it should be the consistency of a creamy salad dressing), add the water a little at a time.

Pour the sauce over the vegetables, drain the noodles and toss them with:

1 tablespoon toasted sesame oil

and add them to the bowl and mix to combine. Cut:

1-2 scallion greens

On the diagonal as a garnish. Add more sesame seeds as a garnish as well (about 1 tablespoon). Serve.

To serve as a main dish, add some diced grilled chicken breast; diced beef; shredded turkey breast; or other protein like grilled tofu. This would be the perfect vehicle for leftover rotisserie chicken or turkey breast.