Vegan Creme Brulee

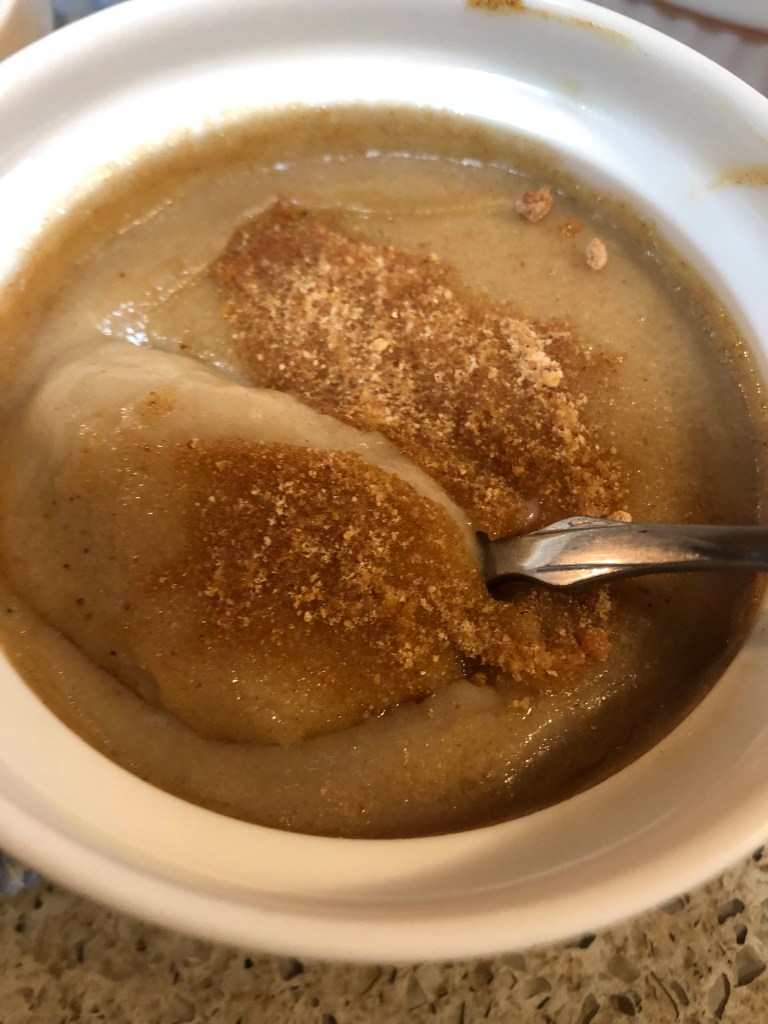
No eggs, no dairy – how can one possibly make creme brulee without these things? At least one that actually tastes good? Well, here’s how. Although it’s much more a pudding than a custard, this tasty vanilla creme brulee will satisfy anyone’s desire for a rich, creamy dessert. If you don’t have a brulee torch, simply put the ramekins under the broiler for a couple of minutes – be sure to watch them closely!

In a 2-quart saucepan whisk vigorously:

1 3/4 cups non-dairy milk (any milk except soy) – for a richer creme brulee, use 1 cup of non-dairy creamer and 3/4 cup milk*

1/4 cup avocado oil (or other mild tasting oil)

3 tablespoons arrowroot

1/4 cup date sugar

3/4 teaspoon agar

2 teaspoons vanilla extract

pinch of sea salt

Whisk until the arrowroot, agar and date sugar are all dissolved. Place over medium heat, whisking often, until the mixture thickens and you see small bubbles along the outer edge of the pot. Remove from heat and pour into 1/2 cup ramekins and let cool on the counter for about 1 hour before covering with plastic wrap and refrigerating until thoroughly chilled, 2-3 hours. Before serving, sprinkle the top of each ramekin with:

1/4 to 1/2 teaspoon of date sugar

Using either a torch or the broiler, caramelize the sugar. This should take about 1 minute per ramekin with the torch and about 3-5 minutes under the broiler. Date sugar doesn’t caramelize as easily as cane sugar and will not get hard. Let sit for about 5 minutes before serving.

*If using a creamer that has added fat, reduce the amount of oil added to the milk or omit it entirely.

Carolina Mustard Barbeque Sauce

I’ve recently found that tomatoes and tomato-based sauces bother my stomach so I’ve been searching for alternatives, especially since my favorite foods are ribs and wings. Here’s one that’s very tasty and easy to make. I used a jar of dill pickle mustard that I had in my cupboard and wow, that a great taste! Only takes a couple of minutes to mix and can be frozen if you don’t use it all. I made a batch of chicken wings with it.

In a small bowl (about 2 cups) combine:

1/2 cup mustard – any mustard will work – I’ve used the dill pickle mustard as well as my usual stone ground and both made very delicious sauce

1/4 cup honey (date sugar, coconut or agave nectar, maple or date syrup would also work)

1/4 cup avocado oil

1/4 cup white vinegar (rice or apple cider vinegar would also work)

1 small can green chilis (about a 4-ounce size; I used mild but feel free to use a hotter variety if your family likes them)

1/2 teaspoon cumin

1/2 teaspoon ground black pepper

1/2 teaspoon garlic powder

Using an immersion blender, blend until smooth. Brush on ribs or wings or serve on the side once the meat is cooked. Makes about 1 3/4 cups of sauce. If you don’t have an immersion blender, use a regular blender.

I brushed the sauce on the wings before baking them for 40 minutes in a 350 degree oven.

Broiled (or Grilled) Eggplant

Here’s another very easy side dish that’s just yummy if you like eggplant, especially if you love it as much as my grandson does! This would work for zucchini or yellow squash as well.

First, wash, remove stem end, and peel*:

1 large Italian eggplant (or multiple other smaller ones), about 1-1 1/2 pounds

Cut into 1/2″ slices crosswise. Place on a cooling rack over your sink (or if you have a very large sink, in your sink). Once all the slices are on the rack, sprinkle with:

1/2 teaspoon sea salt

Be sure to sprinkle on both sides. Then place a baking sheet on top of the slices and weigh them down with something heavy like canned goods or a bag of flour. Let sit for approximately 30 minutes. You’ll see that they are now wet. Remove tray and weight before washing each slice under cool water. Dry using paper towels or a clean kitchen towel.

Preheat the broiler in your oven or start the grill. If using the broiler as I did, spray a baking sheet large enough to hold all the slices comfortably with non-stick cooking spray. Place the slices on the sheet and then sprinkle each slice with:

Garlic powder

Ground black pepper

Herb of choice (I used an Italian seasoning mixture but any herb your family likes will work)

Spray the tops of the slices with more cooking spray (I use avocado oil spray but whatever you normally use will work). Place under the broiler for approximately 10 minutes until the slices begin to soften and turn golden brown. Remove and turn them over, return to the broiler and broil for an additional 5-10 minutes. Serve immediately. A nice pasta sauce would compliment them nicely.

If you’re grilling the eggplant slices, spray each side with cooking spray and sprinkle with the herbs before placing on the grill.

*FYI, I peeled strips off my eggplant and found that they were very tough and inedible after broiling.

Korean Vegetable Pancakes

I’m constantly looking for new ways to serve vegetables so when I came across this recipe for Yachae Jeon (Korean vegetable pancakes), I had to try it and see if it would work gluten-free. I used to eat something like these at a local Vietnamese restaurant except they called them scallion pancakes. Quite easy and quick to make with a food processor and oh so tasty especially with the dipping sauce.

First, into the bowl of food processor:

1 small to medium zucchini (about 6-7 inches long), cut into chunks

6 ounces of sliced mushrooms

1 small sweet potato (I used 2 very small purple sweet potatoes), peeled and cut into chunks

1 medium carrot, chunked (I used about 3/4 of a cup of shredded carrot)

1 jalapeno pepper (Optional), seeded and chunked

1 bunch scallions (roots removed), cleaned and cut into chunks

It may require several batches in the food processor. Process the vegetables until they are small pieces so they’ll cook quickly in the pancake.* You should have about 4-5 cups.** Next, in a large mixing bowl combine:

1 1/2 cups gluten-free all-purpose flour

1/4 cup arrowroot

2 teaspoons baking powder

1/2 teaspoon salt

1/4 teaspoon pepper

1/4 teaspoon cumin

1/2 teaspoon garlic powder

1/2 teaspoon onion powder

Stir to combine before adding:

1 1/2 cups water (room temperature)

Whisk to combine before stirring in the finely chopped vegetables. Let the mixture sit for 10-15 minutes before cooking. In a 10-12″ skillet, heat over medium heat:

1 teaspoon olive oil (or spray with cooking spray)

Using a 1/2 cup measure, scoop out pancake mixture and place in skillet, using a spoon (or the back of the measuring cup), to flatten into a round disk about 6″ in diameter. Cook over medium low heat until bubbles appear, just like a regular pancake (in my case, it was really bubble holes in the pancake that I saw). Flip and cook 3-4 minutes on the other side before increasing the heat to medium high to brown the pancake on both sides, about 1 minute per side. Place on a cooling rack in the oven to keep warm while cooking the remainder of the pancakes. Serve hot with the following dipping sauce. Makes 6-8 pancakes.

DIPPING SAUCE

Combine in a small bowl:

2 tablespoons soy sauce substitute

1 tablespoon rice vinegar

1 teaspoon date syrup (or agave syrup or honey)

1 teaspoon toasted sesame oil

1 teaspoon toasted sesame seeds

1/8 teaspoon garlic chili sauce (or your hot sauce of choice) (Optional)

*If you don’t want to use a food processor simply cut all the vegetables into thin strips like shredded carrots you buy in the supermarket or grate them on a box grater.

**These are just my suggested vegetables. Feel free to use whatever vegetables your family might like but the scallions really are the only ones required. I thought about adding a few garlic cloves as well as a crunchy vegetable like jicama or water chestnuts as well.

Asian Coleslaw

I do love a good coleslaw. I’ve put several recipes for it on my blog over the years and here’s another one that I think is up there near the top. Quick and easy to make, it tastes delicious. Of course, if you can use real soy sauce, feel free but use only half as much as the soy sauce substitute. And I know, more brown food! Can’t seem to stop making brown things.

To make the sauce whisk together:

1/3 cup rice vinegar

1/3 cup avocado oil

5 tablespoons seed or nut butter (I used pumpkin seed butter but tahini would also work well)

1/3 cup soy sauce substitute (or 3 tablespoons soy sauce) (SEE recipe under SAUCES)

3 tablespoons date sugar (or honey, agave or coconut nectar, or date syrup)

1 teaspoon garlic puree

1 tablespoon freshly grated ginger (Optional)

1 teaspoon sesame oil (toasted preferably)

1/4 cup toasted sesame seeds

Whisk until thoroughly blended and then pour over:

5 cups shaved green cabbage (or Napa cabbage, even some bok choy would work)

2 cups shaved red cabbage

1 cup shredded carrots

1 cup diced water chestnuts

1 cup diced Asian pear*

6 scallions, chopped (reserve a few of the chopped greens for garnish)

Mix thoroughly (I used a serving fork) to combine the sauce with all the ingredients. Makes 8-10 servings.

*Asian pears aren’t very sweet and are very firm. If you can’t find Asian pears, feel free to add another chopped fruit such as pineapple. Regular apple or pear won’t work very well here. Jicama would also work but not add any sweetness but you could substitute some apple juice for some of (or all of) the oil. You may want to omit the date sugar if you add pineapple or apple juice.

Zucchini and Turnip Fritters

I love finding easy side dishes to replace the starch of potatoes, rice, or pasta. Here’s one that’s healthy as well as delicious that your family will love because it’s fried! The golden brown goodness of these fritters will get even your children to eat them. Feel free to change up the vegetables – I used zucchini, purple top turnip and carrots but one made with yellow squash, kohlrabi, and butternut squash would also work, or maybe you’d prefer zucchini, celery root, and parsnips. The seasonings can also be switched up – instead of garlic powder and coriander, how about dill, marjoram, basil, thyme, cumin or even some curry. Have fun with this one.

In the bowl of a food processor, place:

1 medium zucchini, cut into sections lengthwise and then quartered

1 medium purple top turnip, ends removed, peeled, and quartered*

8-10 baby carrots, rainbows make a pretty patty

Pulse until well grated. While the vegetables are grating heat over medium heat in a 12″ high-sided skillet:

about 1/4 inch of oil (I used a mixture of olive and avocado oil)

Pour the grated vegetables into a medium-sized bowl and add:

1/4 cup gluten-free all-purpose flour

1 teaspoon baking powder (aluminum free)

1 teaspoon salt

1/4 teaspoon ground black pepper

1/2 teaspoon garlic powder (not salt)

1/4 teaspoon coriander

2-4 green onions, chopped, both green and white sections

Stir to combine thoroughly. Scoop out portions using a 1/4 cup measure. Form into patties. Place in the hot oil and fry until golden brown, about 3-4 minutes, flip and do the same on the other side. Remove and drain on a paper towel to remove excess oil, season with a little more salt. Serve immediately. Makes 2-4 servings depending on what else you’re serving with them and your family’s appetites!

*The purple top turnip has a very mild flavor while the yellow turnip (or rutabaga) is much stronger.

Thai Chicken Tenders

My husband loved chicken tenders. I think more because they’re usually deep fried than for their texture which I find generally to be stringy because they’re often overcooked. I found an adaptable recipe online so I decided to give them a try. It’s quite an easy recipe to make but I’d suggest you make the sauce first so the tenders don’t sit around after frying waiting for the sauce. Like most things that are fried, once dipped in the sauce, they will quickly lose their crunch so serve immediately after you finish preparation. Makes 2 servings.

First, put the oil on to heat. In a deep 12″ skillet heat over medium high heat:

approximately 3/4″ of oil (I used a mix of olive and avocado oil)

Next prepare the sauce. In a small saucepan, whisk together:

1/3 cup soy sauce substitute

1 tablespoon date sugar

1/2 tablespoon sriracha sauce

1 teaspoon pumpkin seed butter (or any butter you like – sunflower, peanut, tahini, etc.)

1 teaspoon grated ginger (optional)

2 tablespoons water (more may be added if the sauce gets too thick)

1-2 teaspoons arrowroot (I used 2 and the sauce got much too thick)

1 teaspoon minced garlic or garlic puree

Cook over medium heat until thickened. I had to add about 1/4 cup of water to thin mine out and I think now that I probably should have made it even thinner so that the sauce wasn’t as thick on the tenders but I didn’t mind it since the sauce is so delicious!

Next coat ONE POUND of chicken tenders. Mix together in a shallow dish:

1 cup gluten-free panko bread crumbs

1/4 teaspoon sea salt

1/8 teaspoon ground black pepper

1/4 teaspoon paprika (or if you want them really spicy, use red pepper flakes instead)

In a separate shallow dish add:

1/2 cup non-dairy milk

1 teaspoon rice vinegar

Dip each tender into the milk to coat and then into the crumb mixture. Gently place in the oil that should now be at 350 degrees (after you add the tenders if the oil is still at temperature, reduce heat from medium high to medium). Cook on the first side for approximately 3-4 minutes before turning and browning on the other side for another 2-3 minutes or until firm. Remove from fat. Be sure not to crowd the tenders in the skillet. Drain on paper towels. When all the tenders are fried, dip each one into the sauce making sure to coat evenly. Serve immediately. Garnish with fresh cilantro or green scallions.

I know, I know, more brown food. But as Anne Burrell says “Brown foot GOOD!”

Easy Oatmeal Granola

I don’t usually post anything about the recipes that I try that don’t turn out well but here’s one I made last night which failed in what it was supposed to be but became an inspiration for something else. I’ve always loved granola but there’s always something, often times raisins or nuts in it, that I can’t have (never mind all the sugar!). The oatcakes recipe I tried to make last night failed miserably – all it wanted to do was crumble. I thought and thought today, what can I do with this? Don’t want to throw it out, it tastes good, maybe use it as a topping for a pear brown betty. Then it hit me – it’ll make really tasty granola. So I added some pumpkin seeds, freeze dried raspberries and some small pieces of chopped dates and guess what – I was right! Oh so delicious! Here’s the basic recipe for the “oatcakes” which you can then add any number of dried fruits and nuts/seeds to for a delicious granola. Just watch out cuz it’s addictive!

Line a medium sized sheet pan with parchment paper. In a medium size bowl combine:

2 cups uncooked gluten-free oatmeal

1 cup gluten-free all-purpose flour

1/2 teaspoon sea salt

1/2 cup fine date sugar

In a small bowl (I used a 1 cup glass measure), combine:

1/4 teaspoon baking soda

1/4 cup hot water

Stir to dissolve the baking soda before adding:

1/2 cup avocado oil

Optional at this point maybe add one or two spices:

1 teaspoon cinnamon, nutmeg, allspice, cardamom

1/4 – 1/2 teaspoon ground cloves, mace, coriander, ginger

Stir into the dry ingredients, the mixture will be crumbly but try to bring it together as much as possible. Spread out on the sheet pan and cool in the refrigerator for 15-20 minutes before baking. Preheat oven to 400 degrees about 5 minutes before the mixture is ready to bake. Bake for approximately 20 minutes until the top is golden brown. Remove from oven and cool before breaking up and putting in a storage container (I used a gallon food storage bag). Add any number of ingredients such as:

1/4 cup pumpkin seeds, sunflower seeds, sesame seeds, hemp hulls

1/4 cup of any type of nuts (if you can eat nuts) like chopped cashews, almonds, walnuts or pecans (roasted of course)

1/4 cup small pieces of chopped dates

1/4 cup freeze-dried fruit such as raspberries, strawberries, etc.

1/4 cup dried fruit like cranberries, blueberries, cherries, etc. – even raisins for those who can eat them!

I must be quite slow on the uptake – it occurred to me while I was typing this that the original recipe writer probably wanted us to use cooked oatmeal rather than uncooked! I’ll have to try it that way.