Turkey Bacon wrapped Dates with Sausage (dairy-free, gluten-free)

This is a very quick, delicious appetizer.  These take minutes to make and after you either broil them in the oven, or air fry, the dates get slightly gooey and just envelope the sausage.  The bacon gets crispy which adds the crunch needed to make this the perfect appetizer.  And its very easy to increase or decrease to fit your needs.

You’ll need:

  • 10 medjool dates, pitted
  • 5 slices of turkey bacon, cut in half (or any pork bacon)
  • 1 turkey Italian sausage (or any kind of sausage you like but it should be a little spicy), cooked and cut lengthwise into 5 pieces and then each piece cut in half to fit into the dates.  If you want more sausage in your dates, simply cook a second sausage and cut in bigger pieces.  I cut mine to fit snuggly into the date.
  • 10 toothpicks soaked in water

Slice open each date (remove seed if not pitted).  Insert a piece of the sausage and then wrap with the bacon.  Insert a toothpick so that it holds the ends of the bacon together.  Place each on a greased cookie sheet if you are going to broil them, or onto your air fry tray with the outside edge of the bacon facing downward.  Broil or air fry for 5-7 minutes then turn over and cook for another 5-7 minutes.

Decadent Carob Cake (dairy-free, gluten-free, egg-free, sugar-free, vegan)

This cake is so moist and fudgy that it doesn’t need any frosting.  That doesn’t mean that you can’t put some strawberry cream cheese frosting on it if you want, or even serve it with some non-dairy whipped cream or “ice cream”.  I simply serve mine with some of my strawberry jam or some fresh raspberries.  So satisfying for those with a sweet tooth.

Grease and flour a tube or bundt pan.  In a medium size bowl mix:

  • 2 cups brown rice flour
  • 1/2 cup tapioca flour
  • 3/4 cup carob powder (if you want, you can use cocoa)
  • 1 1/2 teaspoon baking soda
  • 1 1/2 teaspoon xanthan gum
  • 1/2 teaspoon sea salt

In a second bowl mix:

  • 1 cup pureed stewed prunes
  • 1/2 cup apple or pear sauce
  • 1 tablespoon stevia, 1/2 cup agave or coconut nectar, or 1/2 cup maple syrup (if you add the liquids, be sure to reduce the club soda by an equivalent amount)
  • 2 tablespoons vinegar
  • 1 tablespoon vanilla
  • 2 cups club soda

Mix the wet ingredients into the dry ingredients.  Be sure to mix thoroughly and then keep mixing for several more minutes (gluten-free flour needs more mixing than regular wheat flour).  Pour into the prepared pan and bake in a 375 degree oven for 45-60 minutes depending on the size of your pan and your oven.  Its done when a toothpick inserted into the cake comes out clean.  Cool in the pan for at least 10 minutes before turning out onto a cooling rack and then onto a serving plate.

You could also add some chopped dates, hemp hulls, coconut, or if you can eat them, even some chopped walnuts.

Dry Rub

This is a rub that can be used on any kind of meat although, my love of pork ribs  pretty much uses up all my rub.  Easy to apply, simply put 10-12 chicken wings, or 4-5 chicken legs, or a half rack of ribs, or some pork chops, or even a couple of steaks, in a zip bag with a couple of tablespoons of this rub and shake.  Once the meat is coated, be sure to massage it (or rub) it in so that the meat absorbs the dry rub.

I use a pint jar to mix this in:

  • 1/2 cup paprika
  • 2 tablespoons black pepper
  • 2 tablespoons sea salt
  • 1-2 teaspoons stevia, 1/2 teaspoon monk fruit powder, or 1/2 cup date sugar
  • 4 tablespoons herb mixture such as Mrs. Dash, McCormicks, or something like Grill Mates
  • 2 tablespoons garlic powder
  • 2 tablespoons onion powder
  • 1/4 cup carob powder or cocoa

Cover and shake the jar vigorously in all directions to mix the ingredients.  This will stay fresh in the air tight jar for several months.

Celery Root and Parsnip Mash

Celery root has a very strong flavor and if  you love the taste of celery, that’s a good thing.  However, if you’re wanting a mash to compete with mashed potatoes, strong celery taste isn’t the best thing.  I love parsnips and thought they would go very well with the celery root and I was right; if you like parsnips, you’ll love this side dish as much as I do.  The parsnips really compliment the celery root well, modifying the strong celery taste with the sweetness of the parsnip.

In a large pot (I used my 4 quart pan), add a steamer and water to just cover the bottom of the steamer.  This makes 6 servings.  Add:

  • 1 peeled and diced medium celery root
  • 3 medium parsnips, peeled and diced
  • 1/2 medium onion sliced and halved (I used a red onion and the mash almost looked like red skin potatoes when I was done) OR 1 leek cleaned and sliced OR 2 shallots diced
  • 2 cloves of garlic peeled

Steam until very tender.  Drain off the water.  I then moved the root and parsnips to a larger pot (you want a fairly deep one because these bounce when you whip them).  Using a masher, mash as much as you can by hand.

Add milk (I started with 1/4 cup of hemp milk) and 1/4 cup of avocado oil.  I then used my hand mixer to puree but you could also use your food processor or an immersion blender.  Add more milk if necessary to  get the consistency your family likes.  Be sure to add salt and pepper to taste.

TIP:  Just like mashed potatoes, feel free to “fancy” this up with some bacon bits, chives, non-dairy sour cream, or additional garlic.

Chocolate Figgy Hemp Cream (dairy-free, gluten-free, egg-free, sugar-free, vegan)

This is a very easy recipe to make if you have a blender or Vitamix.  And it turns out not only delicious but silky smooth and creamy.  Also, its adaptable to several other types of desserts — chocolate cream pie, fudgesicles (if you have a mold or even ice cube tray with wooden sticks), or pudding.

Put in your blender:

  • 1 ripe avocado (or 1/4 cup avocado oil – the oil has less avocado flavor so doesn’t add any taste to the dessert)
  • 1 cup of mashed figs*
  • 1/2 cup chopped dates (or 4 whole medjool dates)**
  • 1/4 cup cocoa powder or carob powder
  • 2 large scoops of protein powder
  • 2 cups hemp milk***
  • 2 teaspoons vanilla extract

Blend until smooth.  At this point, you can divide the mixture into pudding cups, fill ice cube trays, or place it in an ice cream freezer.  If you make ice cream with it, I suggest that when its ready, put the ice cream into small containers since if you freeze it in a larger container, like I did, you’ll have a very solid block of hemp cream that needs to be thawed before you can use it.  If you’re making a chocolate cream pie, pre-bake a ready made gluten-free crust and cool it before you add the pudding to the pie crust.

*You could also use 4 ripe figs, or 1 cup of stewed prunes.

**Whole Foods carries chopped dates with oat flour.

*** Coconut milk or soy milk will also work in this recipe.

Spoodles (sweet potato noodles) with vegetables (dairy-free, gluten-free, egg-free, soy-free, vegan)

Here’s another recipe to help us use up all those fresh vegetables we have during these summer months.  And again, its one you can adapt to your vegetable overload.  The only thing you may want to get from the store are the spoodles or coodles (carrot noodles). Either work great in this recipe.  I like it plain but you could easily add a curry sauce or if you can use soy, a hoisin-based sauce.  Makes 4 serving.

Dice:

  • 1 medium onion
  • 2 cloves garlic, medium sized
  • 1 small zucchini
  • 1 small yellow squash
  • 1/2 cup pea pods or 1 cup green peas, or 1 cup green beans

Add 3 tablespoons olive oil to a large skillet and when the oil is hot, add the diced vegetables.  If you are planning to add a sauce, use less oil.  Saute over medium heat until onion is translucent.  Add the pea pods, peas or green beans and 1 pound of spoodles or coodles.  Reduce heat to medium low, cover, and cook, stirring occasionally, until the noodles are tender, about 15 minutes for sweet potato and 20 minutes for carrot noodles.

Simple curry-sauce:

In a small sauce pan, heat 2 tablespoons oil then add 1 teaspoon to 1 tablespoon of curry, depending on your taste and cook for approximately 30 seconds until you can smell the curry.  Add 2 tablespoons of all purpose gluten-free flour.  Whisk and cook for several minutes.  Whisk in 1/2 to 1 cup (the amount of milk depends on how thick you want your sauce) of your favorite milk (coconut milk works great here but rice, hemp, almond also work fine).

Baked Haddock with Tomatoes and Basil

This is my preferred way to eat haddock.  Its so tasty and gives me the acidity that I really like to have with fish.  Takes only about a half hour in the oven to cook.

Add 1 tablespoon olive oil to a 9×12″ oven dish to cover bottom (you can also use an olive oil spay to coat the bottom of the dish; Trader Joe’s has one that contains nothing but olive oil).

Add 1 pound haddock cut into serving size pieces.

Add:

  • 1/4 cup sliced onion
  • 1 teaspoon diced garlic (1 medium sized garlic clove)
  • 12-15 basil leaves, torn into pieces
  • Salt and pepper to taste along with any other herbs you like (I use Mrs. Dash’s original because I like the flavor it gives this fish).

If you’re like me and have an over-abundance of fresh tomatoes at the moment, you can peel and chop 6-8 fresh, medium-sized tomatoes and sprinkle them over the fish.  If not, an 16 ounce can of diced tomatoes works just fine.

Bake at 400 degree for roughly 30 minutes depending on thickness of your fish (if your haddock is very thin, 20 minutes would probably be enough).  This works for any fish, not just haddock, cod and halibut also work great in this recipe.

Serve over red quinoa or brown rice with your favorite veggies.  Sauteed bok choy goes great with this recipe.

Battered Fish (gluten-free, egg-free, dairy-free)

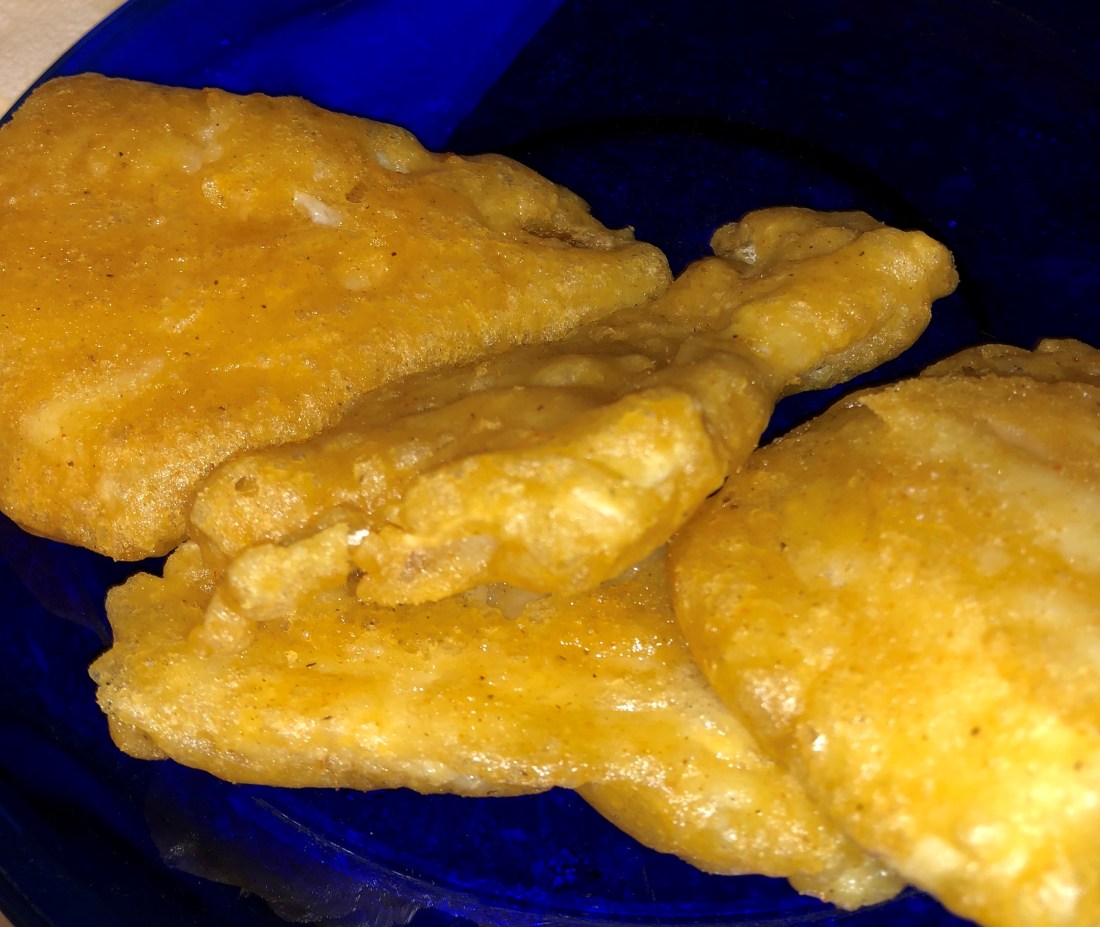
I like baked fish, sautéed fish, and even fried fish although how many of us who are gluten-free often get to eat fried fish!  This makes a very crunchy on the outside, flakey and moist on the inside.  I find that spending a little more and buying the fresh fish produces a much tastier meal than using frozen fish which, I think, gets soggy when thawed out and cooked.

My husband, however, is convinced that the only way to eat fish is fried so I developed this recipe primarily for him.  And he’ll eat more of this than probably anything else I make for him, other than desserts.  For a normal family, this will serve 4; for my husband, this is 2 servings!

In a gallon freezer bag, mix:

  • 1/2 cup gluten-free flour (Bob’s Red Mill 1 for 1 or your favorite all purpose works fine)
  • Salt, pepper, garlic powder, paprika, or other herbs to your taste (this always makes me remember Emeril telling his audience, “I don’t know where you buy your flour, but mine comes unseasoned”).  I generally use about a teaspoon of each except less of the ground pepper.

Cut into serving sized pieces, trying to keep thicker and thinner pieces separated (TIP: so if you have a “normal” piece of haddock, one end is probably thinner than the other and one side is probably thicker than the other so you want to make sure the thicker pieces are cut together so that the fish will cook evenly).

  • 1 pound of fresh haddock, sole, or other white fish, cut into serving size pieces

Add fish pieces to the freezer bag, close, and shake fish until covered in flour.

Mix in a shallow bowl:

  • 1/2 cup gluten- free flour
  • 1/4 cup cassava flour (this adds a lot of crunch to the batter)
  • 1 teaspoon baking powder
  • Salt, pepper, garlic powder, etc., to your taste
  • 1/2 cup club soda, you may need more to get the batter to the proper consistency.

Whisk until blended.  The batter should be the consistency of pancake batter, thin but not too runny.

Add  oil to a 10-12 inch fry pan (or you can use an electric skillet where you can more easily control the temperature); oil should be 1 inch deep in the pan at a minimum.  I always use a combination of avocado and olive oil.

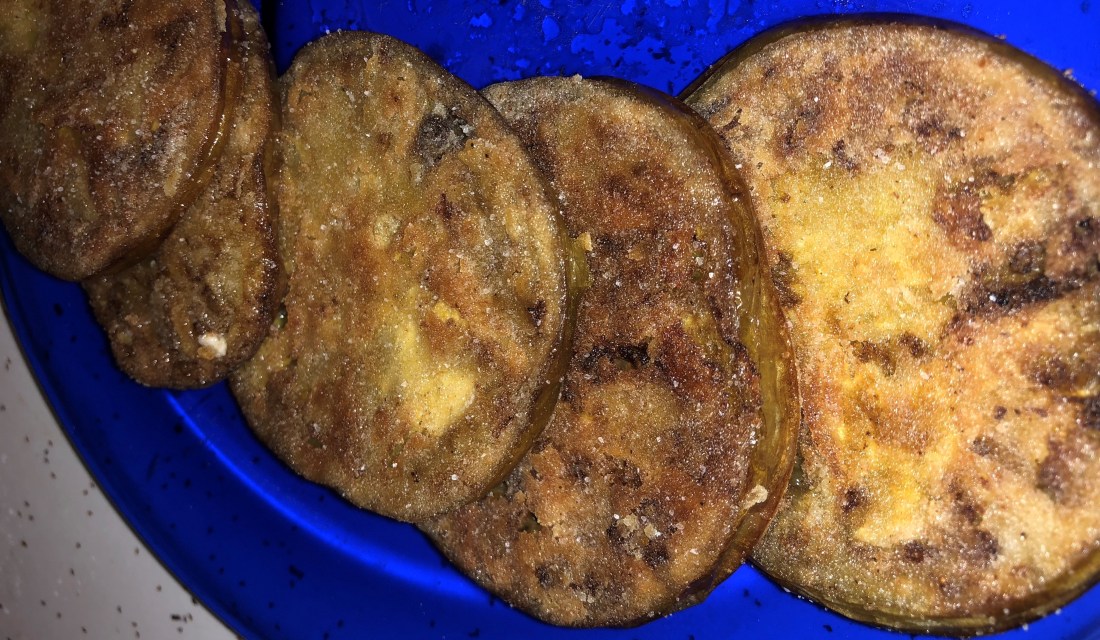
Remove each piece of fish from the flour mixture and dip into the batter.  When the oil is hot (350-375 degrees), add the thicker  pieces first being sure to place them in the oil closest to you first and then ending with the piece of fish away from you.  Cook on each side until golden brown (thicker pieces will take 3-5 minutes per side while the thinner pieces will only take 2-3 minutes per side).  Remove to a paper towel to drain excess oil; salt and serve.

Cauliflower and Sweet Potato Patties

I love sweet potatoes any way I can get them.  For a long time, I was content with just baking them and serving them with margarine and cinnamon or dicing and steaming them and then whipping them with margarine and spices.  This recipe goes a step further producing a silky, smooth interior with a crunchy fried exterior.  So yummy and so easy to do.  The hardest part is probably putting enough oil in the pan so that the patties don’t touch the bottom of the pan and burn.  Sweet potato will burn very quickly so be sure to add at least a half inch of olive oil to your pan and get it good and hot before you add the patties.  Fry over medium heat once the oil gets hot.

Mix:

  • 1 cup mashed cauliflower (I love the purple variety but any will do; 1 small cauliflower will make right around 1 cup of mash)
  • 3/4 cup of baked sweet potato (one medium sweet potato will yield just about 3/4 cup)
  • 4 tablespoons of sweet potato flour (or all purpose gluten free flour)
  • 1 tablespoon of ground flax seed (or you could use a mixture of flax, chia and hemp seeds ground)
  • 1/4 teaspoon of spice (I used cinnamon but allspice, ground cloves, ground ginger or nutmeg will work as well depending on your taste)
  • Salt and ground pepper to taste (I used 1/2 teaspoon of salt and 1/4 teaspoon of pepper)

With a hand mixer on low speed, mix the cauliflower and sweet potato until well blended and the cauliflower is broken down.  Add the remaining ingredients and mix well.  Heat the oil (I used my 12 inch fry pan and cooked all 4 patties at once) and oil your hands.  Make four patties using your hands (each should be about 1/2 cup of mixture and you may need to put a  little more oil on your hands after the second patty).

Fry on each side for about 2-3 minutes until golden brown.  Remove to paper towels to remove any excess oil and then transfer to plates.  These are very soft, not firm like meat patties so treat them with care.

TIP:  These would also be great with a little maple syrup over the top.

Fried Green Tomatoes (gluten-free, egg-free, vegan)

I’ve been focused on fresh fruits and vegetables the last few weeks and here’s yet another one!  Although our favorite tomato is a nice juicy red or yellow (or orange) ripe tomato, our second favorite is fried green tomatoes.  They are just so high in fat and calories that we only let ourselves indulge in them once during  the summer (well maybe two or three times depending on how many green tomatoes we have).  I’ve found, over the years, that you really don’t need to deep fry them, pan frying them works just fine and reduces the amount of oil.  Using gluten-free flour also works fine.

In a large fry pan, heat olive oil (it really is the best one for us all to eat, helps reduce our cholesterol and triglycerides).  You want the oil to be at least 1/2 inch deep in the pan.  Heat over medium heat so that it doesn’t burn.

Put in a large plastic freezer bag,

  • 1/2 cup gluten-free flour mix, such as Bob’s Red Mill 1 for 1
  • 1/4 teaspoon salt
  • 1/8 teaspoon ground pepper
  • 1/4 teaspoon garlic powder
  • 1/8 teaspoon paprika

Shake vigorously to mix.  The amounts and types of seasonings for the flour can vary depending on your tastes.

Wash and slice

  • 3-4 medium size green tomatoes (or 2 large)

You should end up with about 5 slices per tomato or a total of 15-18 slices which, at least in this family, feeds 2 people.

Add half the tomato slices to the flour mix, close the bag, and shake to cover the tomato slices.  Drop a bit of flour in the oil and if it sizzles, the oil is ready.  Add the slices and brown on each side approximately 5 minutes or until browned.  Remove to a platter covered with paper towels and salt.  Repeat until all the slices are fried.  Try not to stack the slices on the platter since they will then steam and get soggy.  You can place them in the over on a low heat (200 degree) to stay warm if needed if you are using a small fry pan.  I use my large 14 inch pan and can fry them all in 2 batches.  They will stay very hot on the inside for 10-15 minutes without the oven.

I haven’t tried using my air fryer for these; maybe next year!