Fish Casserole

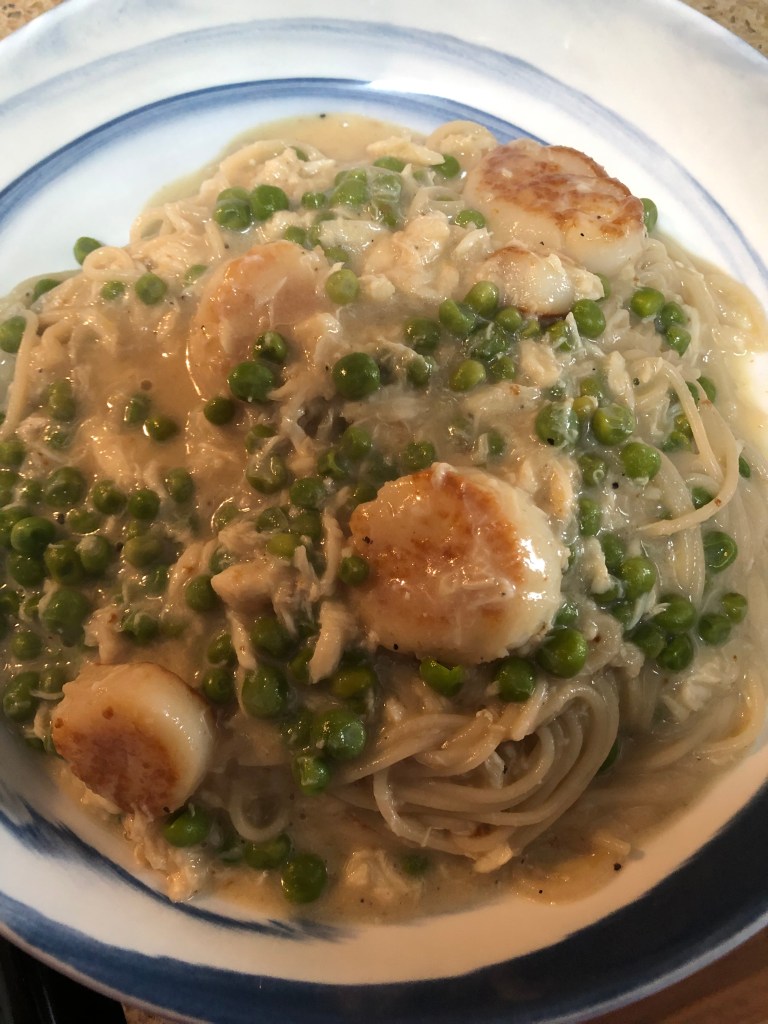
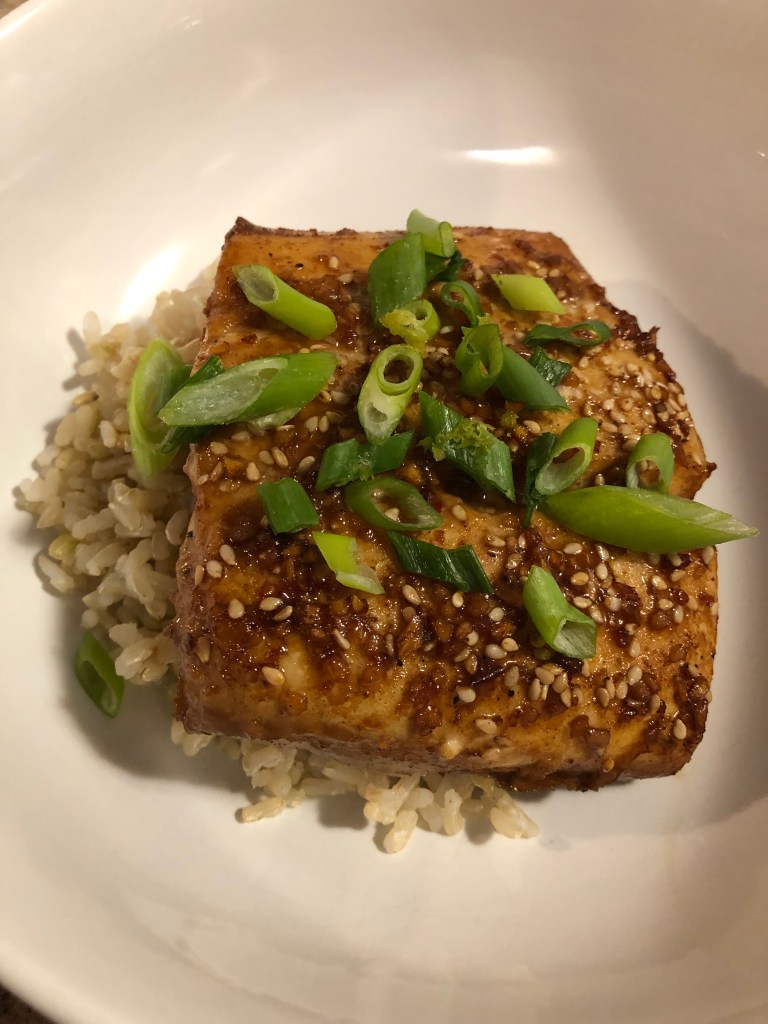
I baked a beautiful halibut fillet yesterday but it was too much for just me. I’ve had a craving for tuna casserole for several weeks now so decided to mix the leftover halibut in with the tuna and wow, what a delicious, warm, comforting bite. I grew up on things like tuna casserole since my mother worked as a teacher and I began helping her cook meals when I was about ten. This was always a quick and easy meal to put together, but of course, we used canned soup and tuna along with frozen peas and regular pasta. Nothing I use today except the canned tuna and frozen peas. I find having grown up on it and not having fresh tuna until I was well into my 20s, that I prefer the canned stuff even though it’s not politically correct these days to use it. Feel free to use fresh if your family prefers it.

Preheat oven to 350 degrees. Spray a casserole dish (I found that my 12″ deep skillet made just enough to fill my 9x9x3″ baking dish). Put 3 quarts of water on to boil in a large pot. Chop either by hand or in a food processor:

1 small onion

4-5 stalks celery

8 ounces of baby bella mushrooms

2 medium carrots

Over medium heat, heat 1 tablespoon olive oil in a 12″ skillet with deep sides. Add the chopped vegetables along with:

1 cup frozen peas (or fresh if you have them)

2 cloves of garlic, minced

Salt and pepper to taste

1 teaspoon dry thyme

Cook, stirring occasionally until onion is translucent and carrot is softened, about 5 minutes. In the meantime, add one box (4 servings) to the boiling water of:

gluten-free pasta (I used a mixture of the heart of palm linguini which I love and some brown rice pasta)

Cook per package instructions. When the vegetables are ready, add:

2 cans tuna (I use the Safe Catch, low mercury brand that you don’t drain)

about 1/2 pound cooked white fish (such as halibut, haddock, cod), flaked

1 cup chicken stock (another 1 cup below for a total of 2 cups of chicken stock or fish stock if you have it)

In a small bowl, combine:

1 cup chicken stock

2 heaping tablespoons all-purpose gluten-free flour

Combine with a whisk until smooth before adding to the vegetables. Stir constantly until mixture is thickened. Add the strained pasta and place in the prepared baking dish. Top with a bread crumb mixture or French fried onions if desired. Bake for approximately 30 minutes. Serves 4.

Seafood Capellini with Lemon Sauce

Bought some beautiful scallops the other day and wondered what I could do with them. I also had a jar of crabmeat in the refrigerator and since I’ve been carving some seafood pasta, I decided to try something a little different. Generally, one can’t mix lemon juice with dairy since it curdles the milk. However, we don’t use dairy milk but plant-based milks so that doesn’t apply here. Basically, I made a white sauce with oat milk, grated in the rind of one lemon and stirred in the lemon juice, added the seafood and voila! Feel free to use whatever pasta and seafood your family enjoys.

First, put on a pot of water to boil for the pasta. Cook pasta according to box instructions. Also in a small pot, boil (or steam):

1 cup frozen green peas

Next, in a medium saute pan, heat over medium high:

1/4 cup olive oil

When the oil is very hot add:

8-10 sea scallops (dried thoroughly)

Reduce heat to medium and saute on each side for approximately 1-2 minutes depending on the thickness of the scallops. Remove from the heat, reduce heat to medium low and stir in:

1/4 to 1/3 cup gluten-free all-purpose flour

Stir to combine the two, the flour should absorb all the oil. Stir while it cooks for 1-2 minutes. Add:

Grated rind of one lemon

Juice of 1 lemon

1 1/2 cups non-dairy milk (NOT soy)

Salt and pepper to taste

Whisk to combine and continue whisking over low medium heat until the mixture thickens. Stir in the seared scallops and whatever other seafood your family likes. Add cooked pasta and strained peas. Serve immediately.

Easy Seafood Stew (or Bisque)

I enjoy many types of seafood – from various white fish to multiple shellfish. I happened to have a small piece of swordfish, not enough for a meal, as well as some canned clams and bay scallops on hand, bought a small fresh jar of lump crabmeat and made a seafood stew. Leave out the vegetables and it’ll be a bisque instead. Fairly easy to make and doesn’t take very long either. Feel free to vary the fish ingredients to your family’s taste. I wanted to use a lobster tail but couldn’t find one here in Minnesota. Delicious!

In a medium (4 quart) saucepan, heat over medium high heat:

1 tablespoon olive oil

When it’s shimmering add:

1/2 medium onion, diced

4-5 celery stalks, diced

2 cups kale, cleaned, stalks removed and leaves chopped*

Stir to combine, reduce heat to medium low and cook for approximately 6-8 minutes or until kale is softened. Remove to a bowl. Add to the saucepan, increasing heat to medium high:

1/2 pound bay scallops

1/2 pound white meat fish (I used swordfish but any white fish – cod, halibut, etc. works), cut into small chunks, about the size of the scallops

1/4 pound small shrimp (optional for those who can eat shrimp)

Stir and saute for 3-4 minutes until fish is cooked and then add:

1 tablespoon olive oil

2-3 tablespoons gluten-free, all-purpose flour

2 teaspoons Old Bay seasoning (optional)

Stir to combine and let simmer for a minute before whisking in:

2 cups non-dairy milk (anything except soy which won’t thicken)

Continue to whisk until milk heats and mixture thickens. Add:

1 small can minced clams (including the liquid)

4 ounces of fresh crabmeat (I checked out the canned, much less expensive but it also included loads of salt as well as sugar)

the cooked vegetables

1 small to medium potato, diced and cooked (whatever potato your family likes)

Salt and pepper to taste. Reduce heat to low and simmer for several minutes to allow the fish and vegetables to heat through. If desired, garnish with chopped green onions or chives. Serves 4.

*If you don’t like kale, adding some frozen peas would be just as delicious.

To make the stew into a bisque, simply delete the vegetables.

Baked Asian-style Halibut

I’m always looking for new ways to cook fish to make it more interesting and succulent. Here’s one that’s really mouth wateringly good! And so easy to make and quick to make. In less than 45 minutes, you can have dinner ready with this one. While I used Halibut, any dense white fish will work like haddock or cod. Make sure your fish steaks are at least an inch thick.

Preheat oven to 425 degrees. Spray a baking dish with non-stick spray that will comfortably hold the fish (I used my 5″x 8″ dish). Dry with paper towels:

2 halibut steaks (6-8 ounces each)

Place them in the prepared baking dish. In a small bowl mix:

1 teaspoon sesame oil

3 tablespoons date syrup (honey, agave, etc., would also work)

3 tablespoons soy sauce substitute (see recipe under sauces)*

1 tablespoon fish sauce

1 teaspoon lime juice (juice from 1/2 lime)**

1 teaspoon grated or finely minced ginger

1 teaspoon minced garlic

1/2 teaspoon chili sauce (or 1/2 teaspoon hot sauce) [Optional]

Whisk to combine and pour over the fish. Sprinkle over the fish:

1 tablespoon toasted sesame seeds

Bake 20-30 minutes depending on the thickness of the fish. After about 15 minutes, open the oven and baste the fish with the surrounding sauce. When cooked, remove fish from oven and let sit for a couple of minutes before serving. Garnish with:

thinly sliced greens from 2 scallions

**zest from 1 lime (zest before slicing and juicing the lime)

*Of course, use soy sauce instead of the substitute if there’s no allergy to soy. Use 2 tablespoons soy and 1 tablespoon hoisin sauce in place of the soy substitute sauce.

Serve over rice to soak up the tasty sauce. Makes 2 servings.

White Fish with Lemon Garlic Sauce on Sautéed Bok Choy

Any white fish will work with this recipe – cod, flounder, sole, swordfish or even sea bass (my very favorite fish!). The most difficult part of the whole recipe is roasting the garlic and that’s really very easy in the oven. If you’re not familiar with the process, here are the instructions:

Heat oven to 400 degrees. Peel most of the paper off the outside of the head of garlic being careful to leave the head intact. If a faster process is desired, the cloves can be separated and baked individually, it takes about half the baking time of doing a whole head. With kitchen scissors, trim about 1/4 inch off the top of the head, or each individual clove. Drizzle with 1 or 2 teaspoons olive oil per head. Wrap in parchment paper and bake for about 30-40 minutes depending on the size of the heads (or 15-20 if doing individual cloves). Cool then press the bottom of each clove to squeeze out the garlic. Stores in the refrigerator for 2 weeks or in the freezer for 3 months. Be sure to open windows or turn on the stove vent because the kitchen, and whole house if you have a small house, will be filled with the aroma of roasted garlic.

For each pound of fish, preheat oven to 350 degrees, prepare a baking dish large enough to accommodate the fish without crowding. Spray with non-stick cooking spray or coat with olive oil. Dry the fish with paper towels, salt and pepper to taste and arrange in the dish. Bake, depending on thickness, 15-35 minutes, until fish is flaky but still moist. Fish turns quite white in color when it’s cooked.

Want to make it vegan? Use firm tofu in place of the fish but fry it in a skillet instead of baking.

Make the lemon garlic sauce. In a small bowl, mix together:

1/2 teaspoon mashed roasted garlic (about 1 clove)

juice of 1 lemon

1/2 cup vegan mayonnaise*

salt and pepper to taste

Set aside and prepare the bok choy. In a large 12″ skillet, heat over medium:

1 teaspoon olive oil, then add:

1 small onion diced

6-8 baby bok choy, cleaned and cut in half or quarters

1 teaspoon minced garlic (or some of the roasted garlic)

Cook, stirring for the first few minutes, then reduce heat to medium low and cook 5-7 minutes until the onion and bok choy are softened.

Place the sautéed bok choy in the bottom of a serving dish, add a serving of the fish. Spoon about 2 teaspoons of sauce over each fish, garnish with scallions, chives or dill (chopped). Serves 4.

*Don’t have any vegan mayonnaise? See my recipe under sauces for egg-free mayonnaise.

Crusted Tilapia

I’m always looking for new recipes for fish. This one is very tasty and very easy to make. It reminded me of fried fish but is baked in the oven. That’s because of the high fat content in the mayonnaise. Feel free to use any fish, adjusting the proportions to fit the size of your fish portions. I used tilapia but the original recipe used halibut so it works for pretty much any fish. Simple and quick to make. Serves 4.

Preheat oven to 400 degrees. In a small bowl mix:

3/4 cup mayonnaise*

1/3 cup gluten-free bread crumbs

2 tablespoons dried parsley (or 1/4 cup fresh chopped)

1/2 teaspoon dried thyme and basil (or 1 teaspoon of each fresh, chopped)

1 tablespoon lemon juice

1 tablespoon sesame seeds

Salt and pepper to taste

Whisk to combine. In a non-stick baking dish** (again size depends on type of fish you use, mine was a 9×12), arrange:

1 pound of fish filets (with the tilapia, that’s four large pieces)

Spread the mixture equally over each piece of fish, covering the top completely. Bake in preheated oven 20-40 minutes depending on the thickness of the fish (the tilapia is quite thin and only took 20 minutes). Serve with lemon wedges or tartar sauce.

*If you’re allergic to eggs like me, there are now several brands of vegan mayonnaise available which are delicious and work well in this recipe.

**There’s enough fat in the mayonnaise so greasing the pan isn’t necessary.

Salmon Pasta Salad Revisited

Every July 4th my mother would make what she called simply, salmon salad. It was a mayonnaise based pasta salad with canned salmon, crab and baby shrimp. I made one and put it on this site last year or the year before with a vinaigrette base. So now that I’ve found a vegan mayonnaise I can eat that doesn’t contain eggs or soybean oil, I decided this year to update this salad because it’s one of my very favorites. My mother always served blueberry muffins with it but I figure who needs all those added carbs! so I just serve the salad with the addition of more vegetables than just the onion and celery my mom used. Hope you enjoy this as much as I do. By the way, feel free to use a 16 ounce can of salmon, cleaned if you don’t have access to the fresh!

Bring an 8 quart pot of water to the boil, salt the water generously and add:

4 ounces gluten-free shells (you can use elbows or any other shape but my mom always used shells)*

When the pasta is about 2 minutes from being cooked add:

1-2 cups frozen peas (unless you have wonderful fresh peas!)

When the pasta is cooked, drain into a large colander and rinse with cold water until cool. I will often fill the pot I cooked the pasta in with cold water (it takes several times before the pot cools off) and then place the colander in it after I’ve sprayed the heck out of the pasta with cold water. I leave it in there for only about 5 minutes before it’s cool enough to add to the mixing bowl. While the pasta boils (or the water), heat an 8″ skillet over medium high heat with:

1 teaspoon olive oil

Add skin side down:

8 ounce (or so) salmon filet

Cook the salmon for 3-5 minutes on the skin side and then turn. Note, if it doesn’t come right off the skillet, it’s not ready to turn. Cook on the meat side for 2-3 minutes and then flip again to the skin side. Cover and reduce heat to medium low and continue cooking for another 5-10 minutes depending on the thickness of your salmon steak. Remove from heat, uncover and move the salmon to a plate to cool. When cool, flake with a fork and add to the vegetable mixture.

In a large mixing bowl (I actually use a 2 gallon plastic container), combine:

3-5 scallions, sliced on the diagonal

5-6 stalks of celery diced

1 medium, peeled and diced (and I also seed mine) cucumber

8 ounces of crab meat

8 ounces of baby shrimp (if you can eat them, I can’t so I leave them out)

In a smaller bowl combine:

1 1/2 cups vegan mayonnaise

2 tablespoons dill pickle relish

1 tablespoon honey

1 tablespoon dried parsley

1 tablespoon lemon juice

NOTE: I had a half bag of snow peas left over from the Moo Goo Guy Pan so I destringed them, cut them in half (or thirds if really long) and added them with the peas to the boil – delicious! Some diced jicama or water chestnuts would also go very nicely in this salad.

Whisk to combine and then pour over the vegetables after adding the pasta, peas, and fish in the mixing bowl. Stir to combine and then cool in the refrigerator for about an hour to let all the flavors meld. I like to serve it over some lettuce or as I did now, pea shoots. Serves 4-6.

*Whole Foods makes wonderful organic chickpea shells. Only 37 grams of carbs per serving which is quite good for pasta, along with 21 grams of protein. And note, we only use 2 servings instead of 4 so it cuts down on the total carbs per serving even more.

Curried Trout

I try to eat more fish but somehow it doesn’t always seem to happen. I found some fresh trout at the store yesterday and wondered about different ways to cook it. This is the one I found; of course, those of you who’ve been following me for awhile know my addiction to curry! I wondered since I’d never thought about curry and fish prior to finding a recipe but decided to give it a try. And it is delicious! Adds a spicy flavor to the fish which is quite tasty and baked in the oven keeps it nice and moist. I used trout but I’m pretty sure any milder fish will work. I also bought some flounder that I put in the freezer, maybe I’ll try currying it next week. Very easy and cooks in about a half hour depending on the thickness of your fillet.

Preheat oven to 425 degrees. Spray a baking dish large enough to hold the fish.

Dry with a paper towel:

2-4 fish fillets (1 – 2 pounds of fish)

Place in the baking dish, skin side down. Whisk in a small bowl:

1 1/2 – 3 tablespoons vegan margarine (butter if you can have it) or avocado oil

1/2 to 1 teaspoon curry powder

1/4 to 1/2 teaspoon ground turmeric

1/4 to 1/2 teaspoon garlic powder

1/8 to 1/4 teaspoon sea salt

If cooking 2 fillets, use the smaller amount, 4 fillets use the larger. If margarine (or butter) is used, spread evenly on the fillets. If oil is used, pour evenly across the fillets. Bake 15-20 minutes for thinner fillets and 30-35 minutes for thicker ones. Serve on a bed of rice or lentil pilaf with a tossed salad.

I cooked my fillets for 30 minutes.

Seared Sea Bass with Pears (dairy-free, gluten-free, soy-free, refined sugar-free)

Food bloggers, even those like me, buy a lot of cookbooks. I found one this past week, Cooking Whole30, by Melissa Urban which had some interesting recipes, many those of us with allergies can use without modification. One, probably because it’s my favorite fish, struck my fancy except it used butter and peaches, two things I can’t eat. However, it’s been my experience that pears can often be substituted for other fruits so I thought it was worth a try. Here’s the result, DELICIOUS!

For 2 servings:

4 teaspoons avocado oil

2 sea bass fillets (cod, halibut or other dense fish could be used instead of the sea bass)

Salt and pepper to taste

1 medium pear sliced

1 teaspoon rice vinegar

1/2 teaspoon of Wasabi powder

In a medium skillet, heat 2 teaspoons avocado oil then add the fish (dry it with a paper towel first so it doesn’t splatter the oil). Use medium heat and brown well on the skin side first then turn and cover to cook the meat of the fish for several minutes. Turn back to the skin side to finish cooking. This should take less than 10 minutes.

Remove the fish from the pan, salt and pepper to taste, and cover to keep warm while you sauté the pears. Add the pears directly to the fish skillet and cook for 3-4 minutes over medium heat, turning them once to brown on both sides. Add 1 teaspoon rice vinegar and cook for another minute. Add 1/2 teaspoon wasabi powder to the remaining avocado oil and whisk to combine.

Plate the fish, spoon the pieces of pear equally over both pieces of fish. Then drizzle the wasabi oil over each piece of fish. Add some salad to the plates and serve.

While the fish is cooking, core (and peel if you want but that gets rid of the fiber and the skin will be tender when the dish is finished). Also make a salad to accompany the fish:

For the salad:

Baby red romaine (or use any lettuce your family likes)

3 inches of an English cucumber sliced

2-3 of the pear slices, cut into pieces

Non-dairy cheese crumbles

Nuts or seeds (I used pumpkin seeds) (Optional)

Light Italian Dressing: In a small 1 cup jar, add 1/2 cup avocado oil, 1/4 cup rice vinegar, 1 tablespoon agave nectar, 1/2 teaspoon salt, 1/4 teaspoon ground pepper, 1 teaspoon garlic powder, and 1 teaspoon Italian herb blend. Put the lid on the jar and shake vigorously for several minutes.

Baked Fish in Paper

I love this fish! Mainly because I use sea bass but any dense fish works well. A sole or flounder wouldn’t do for this dish but cod, trout or salmon would work well. And it’s very versatile because you can use whatever vegetables you like. Quick and easy to put together if you can wrap a sandwich in waxed paper (if you were alive when we used to have to do this rather than using a baggie!), or can fold down a paper bag, you can do this, it isn’t difficult.

For 4 meals, you’ll need:

4 4-6 ounce pieces of fish

Lemons, sliced into 8-16 slices

1 small onion sliced

2 cups of diced vegetables – here you can use anything you want – have a couple of picky kids who don’t like the same veggies, use different ones for different packets – pea pods, mushrooms, yellow or zucchini squash, thinly sliced potato (white or sweet), grated carrot, broccoli, sweet pepper, cauliflower, whatever you want or like. Of course, if you use things like pea pods and pre-grated carrot, it is even easier, 1/2 cup for each piece of fish

Salt and pepper to taste

Cooking spray

Parchment paper

Tear off four approximately 18×12″ pieces of parchment paper. Spray with the non-stick spray – DON’T FORGET THIS STEP OR IT WILL STICK TO THE PARCHMENT PAPER! Place 2-4 slices of lemon on each paper (the number you use will depend on the size of your fish.

Next, add one piece of fish to each paper and then heap the vegetables on top, doesn’t matter if they fall off slightly. Salt and pepper to taste. Once you have the vegetables you want on each paper, take the short sides of the paper and lift them up and fold like you would a paper bag until they rest on top of the fish and vegetables.

Then fold the ends like on a package you’re wrapping, fold each side in and then the entire end under the package.

Place the four packets on a sheet tray with edges or a baking dish. Bake in a 350 degree oven for 35-45 minutes depending on the thickness of the fish. The packets will expand with the steam the vegetables let off (along with the lemon). Because of this steam, the fish generally doesn’t dry out because it’s sealed in the paper.

Using kitchen scissors, cut the paper (YOU DO NOT WANT TO TRY TO UNWRAP THE PACKET!). Be careful of the steam released when you cut it, you don’t want to burn yourself.

Using a spatula, lift each piece of fish onto a plate along with the vegetables (you don’t want to serve the lemon slices). The fish is delicious as is or you can serve with extra lemon slices or a tartar sauce. I often make a sauce using an avocado based vegan mayonnaise and some Chosen Lemon Garlic dressing mixed together.