Caramelized Cabbage with Bratwurst

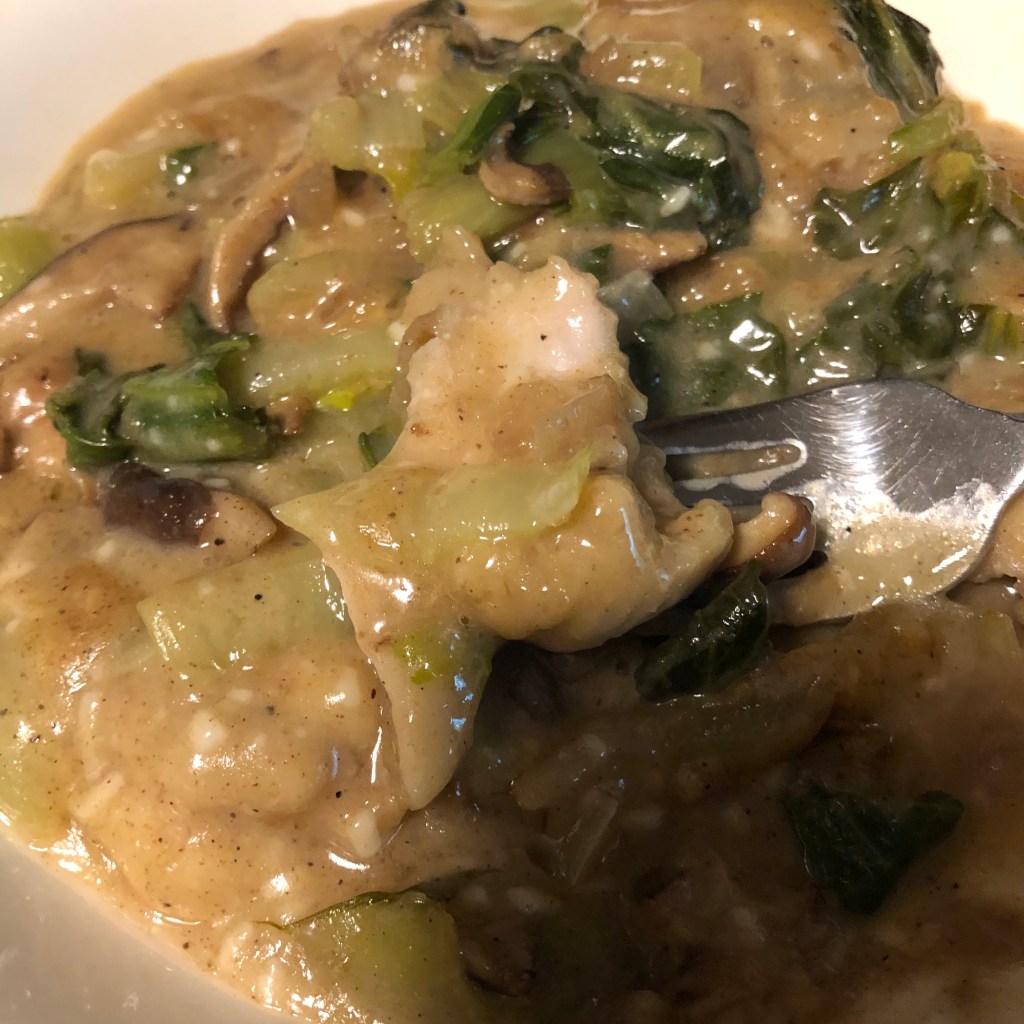
I follow another food blogger who writes about traditional German recipes and every once in a while one comes along that sounds pretty good to me and easily adapted to allergy free. As usual, feel free to adjust to your tastes. Leave out the bratwurst and the dish becomes a side dish. It would also be very good with some diced apple or pear, much like the braised cabbage recipe on my blog.

In a large, high sided skillet, over medium high heat:

2 tablespoons olive oil

When shimmering add:

2 medium onions thinly sliced

12 ounces cole slaw mix (or small white cabbage shredded)

2 large baby bok choy washed and sliced into chunks

Salt and pepper to taste (I used about 1 teaspoon of my Herbamare and 1/4 teaspoon pepper)

2 teaspoons date syrup (or date sugar if you don’t have date syrup, or 1 teaspoon agave)

Stir to combine and then stir every minute or so to keep the bottom from burning. When sizzling, reduce heat to medium and continue stirring every minute or two until caramelized, about 15-20 minutes. The onion and the cabbage will release liquid as they cook and that needs to evaporate before the mixture can begin to caramelize. Most important to stir often once the liquid is gone. Deglaze the pan with:

1 1/2 cups chicken stock (or 1 cup stock and 1/2 cup white wine if you can have it)

Add:

1 bay leaf

1 teaspoon lightly crushed caraway seeds (I put them in my spice mill for about 2 pulses)

Stir and reduce heat to medium low and simmer until about half the liquid has evaporated, about 10 minutes. Sauce should thicken slightly as it reduces.

As the cabbage mixture is simmering, in a separate skillet over medium high heat:

1 tablespoon olive oil

Add:

4 pork bratwurst, casings removed*

Brown on all sides then reduce heat to medium, cover, and let cook until cooked through, about 7-8 minutes. Slice into bite size pieces and add to the cabbage mixture. Be sure to remove the bay leaf before serving. Can be served over noodles.

*Feel free to use any sausage your family prefers.

Oatmeal and Pear Cookies

This are very easy to put together and tastes delicious. Per usual, I can’t eat apples, peaches, nectarines, etc., but if you can, this cookie would work with any of those fruits, probably cherries as well. Just be sure that the fruit is not overripe or the mixture will be too wet.

In a medium bowl, combine:

1 tablespoon ground flax

1/3 cup aquafaba

Whisk and let sit for at least 5 minutes then add:

2 tablespoons avocado oil (or coconut oil)

1/2 cup agave or honey (or date syrup)

1/2 cup diced pears (or other fresh fruit)

1 teaspoon vanilla extract

Combine and add:

1 cup quick gluten-free oats

3/4 cup all purpose gluten-free flour

1 teaspoon xanthan gum (or guar gum)

1 1/4 teaspoons ground cinnamon

1/4 teaspoon allspice

1 1/2 teaspoon baking powder

1/4 teaspoon salt

Stir until all the dry ingredients are mixed into the wet. Set aside and let sit for 45-60 minutes. Preheat oven to 325 degrees. Prepare a large cookie sheet by covering it with parchment paper (or a silicone mat). Scoop by tablespoon the cookie dough placing cookies at least 1 inch apart (they don’t spread). Bake for 13-15 minutes. Makes approximately 18 cookies.

Easy Swordfish Steak

This is a very simple recipe. All you need is a nice piece of swordfish, a skillet, a little olive oil and a couple of lemon slices, oh and don’t forget the salt and pepper!

To serve two:

1-2 swordfish steaks, approximately 3/4 of a pound

In a medium size skillet (depending on if you have 1 or 2 steaks), over medium high heat:

1 tablespoon olive oil

When shimmering, add:

1-2 swordfish steaks which are dried and seasoned with salt, pepper and garlic powder

Sauté for about 3-4 minutes, depending on the thickness of the steaks. Want to get a nice sear on the first side before turning. Flip and cook again for 2-3 minutes depending on thickness. Cover with:

3-4 lemon slices per steak

Cover the pan and cook for another 3-4 minutes, again it depends on the thickness. Steaks should be solid to the touch but don’t overcook or they will dry out.

Turkey Hash

Hash is a favorite of mine. It’s so tasty and so versatile. Any meat, any vegetables can be used in hash. It’s not just corned beef hash anymore! After I made the roasted turkey breast the other day, I had over half the breast left (since there’s only one of me and the recipe served 4). I’d already cooked plenty of sweet potatoes (but there’s nothing wrong with cooking more!) and had some rainbow carrots in the freezer. Hash is so easy to make, hope you’ll give it a try.

I served this with the leftover turkey pear gravy! Oh so delicious

In a large skillet (12″), heat over medium heat:

2 tablespoons olive oil

When shimmering add:

1 medium onion diced

3-5 celery stalks, diced

When the onion is becoming translucent, add:

2 cups diced cooked sweet potato (or white if you prefer)

1 cup cooked rainbow carrots, sliced or diced

2 not quite ripe pears, peeled and diced

1-2 teaspoons minced garlic

Salt and pepper to taste

Mix to combine and continue cooking until sweet potatoes start to brown. Stir in:

2-3 cups cooked turkey, diced

Lower heat to medium low and cover. Cook for approximately 2-3 minutes until turkey is hot. Remove lid, stir. At this point, if eggs are allowed in your diet, crack 4 eggs on top of the hash, cover and cook until eggs are ready. Serves 4.

Roasted Turkey Breast with Pears and roasted sweet potatoes

I’m always looking for new ways to cook chicken and turkey. A couple months ago, I blogged a recipe for pork loin with a pear gravy. It came out so good I wondered how pear would go with turkey. Turns out placing sliced pears (or you could use apples) under the skin of the turkey breast keeps it moist while it’s roasting (just be sure not to over cook it!). And yes, I made gravy and added some cooked pears to it, oh so delicious!

Preheat oven to 400 degrees. To feed four:

4-5 pound bone-in turkey breast

Clean thoroughly, removing any feathers or pin feathers left behind along the outside of the skin. Push your fingers under the skin and break the membrane holding the skin to the meat. Prepare a baking dish large enough to hold the turkey along with 2 cups of diced sweet potato. Spray the dish with non-stick cooking spray. Place the turkey in the dish, skin side up.

Wash, peel, core and slice:

1 medium, not too ripe pear making sure all the slices are about the same thickness

Place the pear slices, overlapping slightly between the skin and the meat of the turkey breast. When the pears are in place, , salt and pepper the pears. Using small skewers, pin the skin to the meat to hold the pears in place. Salt and pepper the skin (I also used some garlic powder along with some sage).

Peel and dice up (large pieces) 2 medium sweet potatoes and place around the breast, spray the sweet potatoes with a non-stick cooking spray (or before you add them, add 1 tablespoon of olive oil to them and stir to coat). Salt and pepper the potatoes. (My mother always used white potatoes.)

Bake at 400 degrees for approximately 20 minutes then reduce heat to 350 degrees for about an hour to 75 minutes or until the breast measures 155 degrees when a thermometer is inserted in the thickest part. (It should be cooked to 160 degrees but it will continue cooking after you take it out of the oven.)

Remove the pins and the skin. Cover loosely with a large pan or, if no alternative is available, aluminum foil (should be a last resort!). Let rest for about 10 minutes before slicing. Serve with the pear slices.

If gravy is desired in a 4 cup saucepan heat:

1 cup turkey (or chicken) stock

1 medium ripe pear, peeled cored and mashed

Bring to a boil. While it’s heating whisk together:

1/2 cup turkey (or chicken stock)

2 tablespoons all purpose gluten-free flour

When the stock is boiling, whisk in the flour slurry and keep whisking until the mixture thickens, turning it down to medium heat after adding the slurry. Simmer for about 5 minutes to cook the flour and serve. If you have lumps of flour or large chunks of pear, feel free to run the gravy through a medium sieve to remove them before serving.

“Irish” Potatoes

I hit 200 recipes on the site the other day! This is a recipe I learned from a dear departed friend of mine. She called it Irish potatoes. Easy side dish to prepare and very delicious. My grandson would rather have this with a meal than practically anything else. He especially likes to have the leftovers for breakfast the next day with eggs (and bacon if his mother will let him!).

For 4 people, I use:

2 medium to large sized russet potatoes, peeled and diced*

2 medium sized sweet potatoes, peeled and diced (I had some purple on hand but any sweet potato will work)

1 medium onion, diced

1-2 sweet peppers, diced

1 teaspoon minced garlic

1/4 cup olive oil

Salt and pepper to taste

Place the diced potatoes in a pot of cold water, just covering the potatoes, and cook until a fork will pierce but not split the pieces. If the potatoes cook to fully done, they will be mushy when you fry them.

In a skillet large enough to have a single layer of potatoes (about 12″) heat over medium heat:

1/4 cup of olive oil (or other if preferred)

Add:

Diced onion

Diced pepper (I used the yellow and orange because I can’t digest the green)

Cook until the onions and peppers are softened. Add the potatoes and garlic, salt and pepper. Stir to combine and cook for about 3-5 minutes depending on the size of the potatoes before turning and repeating. A crispy outside and soft inside is what we want here but hard to achieve if you flip the potatoes too often or too soon. Also difficult if there’s not enough oil in the pan. Might have to reduce the heat if the sweet potatoes start to brown too quickly (they will burn easier than the russet chunks). The dish is ready when a majority of the potatoes are crispy and golden brown. Feel free to garnish with chopped parsley.

*Try to make the dices roughly the same size so that they will all cook at the same speed. Having large and smaller pieces will give you mushy fried potatoes since the smaller ones will cook so much faster.

Seafood Linguini

This is a dish I’ve been making for years, thought I’d already posted it but I don’t find. It’s a nice change of pace from pasta with a tomato-based sauce. And very easy to make, just be sure not to overcook the bay scallops and the calamari! Cooking the pasta takes a lot longer than making the sauce. And of course, feel free to use the seafood your family likes best. Makes 2 servings.

First, put on a pot of water to boil for the pasta.

Cook 1/2 box of gluten-free linguini according to package directions. Be sure to salt the water when it comes to a boil before adding the pasta.

When there’s about 5 minutes left on the pasta cooking time add to the boiling water:

1 cup green peas (thaw out if using frozen)

When the pasta is almost cooked, heat a medium saucepan with a high edge over medium heat. Add:

1/4 cup olive oil*

When the oil is hot, reduce heat to medium low and add:

1 finely diced scallion

When the scallion is translucent, add:

1/2 pound bay scallops

2 teaspoons minced garlic (for a more garlicy flavor, add more minced garlic)

1/2 pound small cleaned shrimp

Cook over medium low heat for about a minute or two, just until the shrimp are starting to color, then add:

1/2 pound cleaned and sliced calamari (I use both the parts, chop up the tentacles just a little into bit size pieces)

1 small can chopped or baby clams with the liquid**

Cook for about 30 seconds, the calamari don’t take very long at all to cook. They will change color just a little, especially the tentacles and the white slices will curl when they are cooked. Immediately take the pan off the heat, cover if the pasta isn’t quite ready.*** Add:

Juice of 1/2 lemon

When the pasta and peas are drained, put back into the pot and add the sauce. Cover and let sit for 5-10 minutes so that the pasta can absorb some of the sauce. Toss, season with salt and pepper to taste. Serve garnished with minced chives.

*For a lower fat sauce, reduce the olive oil to 1 tablespoon and add 1/4 cup clam juice when you add the scallops and shrimp.

**Feel free to use fresh clams in the shell but add them before the scallops and cover the pan for about 2 minutes, or until they are just starting to open, before adding the remaining ingredients.

***To avoid overcooking the seafood, I generally cook the pasta before I make the sauce. Drain the pasta and rinse to remove residual starch. Place the strainer in the pot with a little water in the bottom, cover so that there’s a little steam to keep the pasta warm while you make the sauce, and place over a very low heat.

****I used chickpea pasta and I wouldn’t recommend it for this dish. I also only had spaghetti which is a little thick and didn’t play well with the seafood. Linguini is really the pasta to use.

Pumpkin Pie

My daughter-in-law loves pumpkin, anything pumpkin. I made a dairy-free pumpkin cheesecake for her one of the first times I met her. So I’ve been trying to figure out how to make a pumpkin pie without eggs. I finally found a recipe I could adapt and it’s sooooooooo good! Creamy just like the original, all those warm spices. If you don’t like maple syrup or don’t want that prominent flavor in the pie, feel free to substitute agave or coconut nectar, or even honey, or a mixture of sweeteners. I find that maple syrup compliments pumpkin (and sweet potato) very nicely. I also found 1/2 too sweet for my taste but perfect for my daughter-in-law and son.

Preheat oven to 400 degrees. If using a pre-formed gluten-free pie crust (frozen), be sure to take it out of the freezer before you start mixing the filling so it can thaw. If making pie crust (see recipe under desserts), only one crust is needed.

Filling:

1 15ounce can of pumpkin puree (or sweet potato)

1/3 to 1/2 cup maple syrup depending on the sweetness level desired

1 cup non-dairy milk (NOT SOY)

1 tablespoon avocado oil (can be skipped if want fat free)

2 tablespoons corn starch (or arrowroot)

1 teaspoon vanilla extract

2 teaspoon pumpkin pie spice (or add individual spices: 1 teaspoon cinnamon, 1/2 teaspoon nutmeg, 1/2 teaspoon ground ginger, 1/2 teaspoon allspice, 1/4 teaspoon ground cloves)

Whisk until well mixed, it will be thin. Pour into prepared pie crust, place on a baking sheet slightly bigger than the pie plate, and bake for 50-60 minutes or until center of the pie doesn’t wiggle when moved. (I baked mine for 55 minutes, turned off the oven and left the pie in it for 15 minutes before removing.) Refrigerate until cold before serving. Makes 6-8 servings.

TIP: To avoid cracking of the pie, keep out of drafts while it cools and do not refrigerate until mostly cooled. DO NOT COVER until completely cooled.

TIP: For a slightly firmer pie, reduce the milk to 3/4 cup and don’t add the oil.

Chicken “Divan”

Traditionally Chicken Divan is made with heavy cream, eggs, and broccoli. I can’t eat any of those things so I’ve revised the recipe. I used bok choy and mushrooms for my vegetables but feel free to use broccoli or any other vegetables that your family likes.

In a large skillet, heat:

1 tablespoon olive oil

When the oil is hot, over medium heat add:

1 large shallot diced

6 ounces of sliced mushrooms

Let cook for 2-3 minutes until mushrooms are starting to wilt and shallot is turning translucent. Add:

2 cups chopped bok choy including greens (or your vegetable of choice)

Stir in the bok choy along with:

1/4 cup chicken stock

Cover and let steam until bok choy is tender, 3-5 minutes. Remove cover to let the stock reduce. When the stock is basically gone, remove from heat to a separate dish.

In a gallon food storage bag mix:

3 tablespoons gluten-free all purpose flour

1/4 teaspoon salt (or herbamare)

1/8 teaspoon ground pepper

1/8 teaspoon garlic powder

Mix together and add:

6-8 skinless, boneless chicken thighs, or 4 boneless skinless chicken breasts

Seal the bag and shake to coat the chicken pieces in the flour mixture.

Heat over medium heat in the same skillet:

2 tablespoons olive oil

When shimmering, add the chicken making sure not to overfill the skillet. As the chicken browns, 3-5 minutes, turn and brown on the other side. Remove from heat onto a plate and repeat if needed. Preheat oven to 400 degrees. Add to the oil:

the dredging flour

If the flour doesn’t combine with all the oil, add more flour until the oil and flour mixture is pasty. Whisk to remove any lumps and over low heat, cook for 2-3 minutes until the flour is slightly browned and cooked. Add:

1 cup chicken stock

Whisk in the stock to remove any lumps. Bring to a simmer and add:

1 cup non-dairy milk (NOT SOY!)

Simmer over low heat until the sauce thickens then add:

4 ounces non-dairy parmesan cheese grated

Whisk to combine and let simmer for several minutes or until the cheese starts to melt. Cut the chicken into large pieces. Add any juices to the sauce.

In a 8×10″ baking dish, arrange the chicken pieces with the vegetable mixture on top. Pour the sauce over the vegetables. Bake for 30-40 minutes , sauce should be bubbling.

Serve with rice or mashed potatoes. Serves 4-6.

NOTE: I got my flour a little too brown; you may have a lighter sauce.

Turkey Imperial

I enjoy turkey just as much as chicken and it’s always a nice change from the chicken grind. But it can be very dry if overcooked. Here’s a recipe that comes out moist and delicious! Lots of flavor and very easy to make if you can find turkey breast fillets. If not, use chicken breasts, remove the tenderloin and pound out the breasts to about 1/2 thickness. Serves 4.

4 turkey breast fillets or 4 chicken breasts pounded to 1/2 inch*

Preheat oven to 425 degree and spray a large baking dish with non-stick spray. The fillets or breasts should fit comfortably in the dish without touching. Salt and pepper the meat and set aside. In a small bowl mix:

1 cup gluten-free bread crumbs

1/3 cup dairy-free parmesan cheese, grated (Follow Your Heart makes a great one)

4 tablespoons olive or avocado oil (or vegan margarine or butter melted)

1 heaping teaspoon minced garlic

1 teaspoon dried thyme (or 2 teaspoons fresh minced thyme)

2 teaspoons dried parsley (or 2 tablespoons chopped fresh parsley)

1/2 teaspoon Herbamare (or sea salt)

1/8 teaspoon ground pepper

Mix to combine making sure all the bread crumbs are moistened. Spread evenly over the fillets or breasts. Bake for about 20-25 minutes until the fillets are 160 degrees and the crumbs are well browned. Serve with a sauce:

1 cup chicken or turkey stock

1/2 cup non-dairy milk of choice (NOT soy)

whites of 3 scallions diced

2 teaspoons spicy mustard

Whisk mustard into the stock mixture and heat in a saucepan over medium heat. When hot add a slurry made with:

2 tablespoons gluten-free all purpose flour

1/3 cup non-dairy milk

Whisk the slurry into the stock mixture and continue whisking until it thickens, about 2 minutes.

Be sure to put the sauce UNDER the fillets so that the crumb mixture stays crunchy. Garnish with the greens from the scallions.

*If the turkey fillets are too thin (want about 1/2 inch thickness), stack several, I think I actually had to stack 3 in one case. If the turkey is too thin, it will get dried out before the topping browns.