Air Frier Turkey Tenderloins

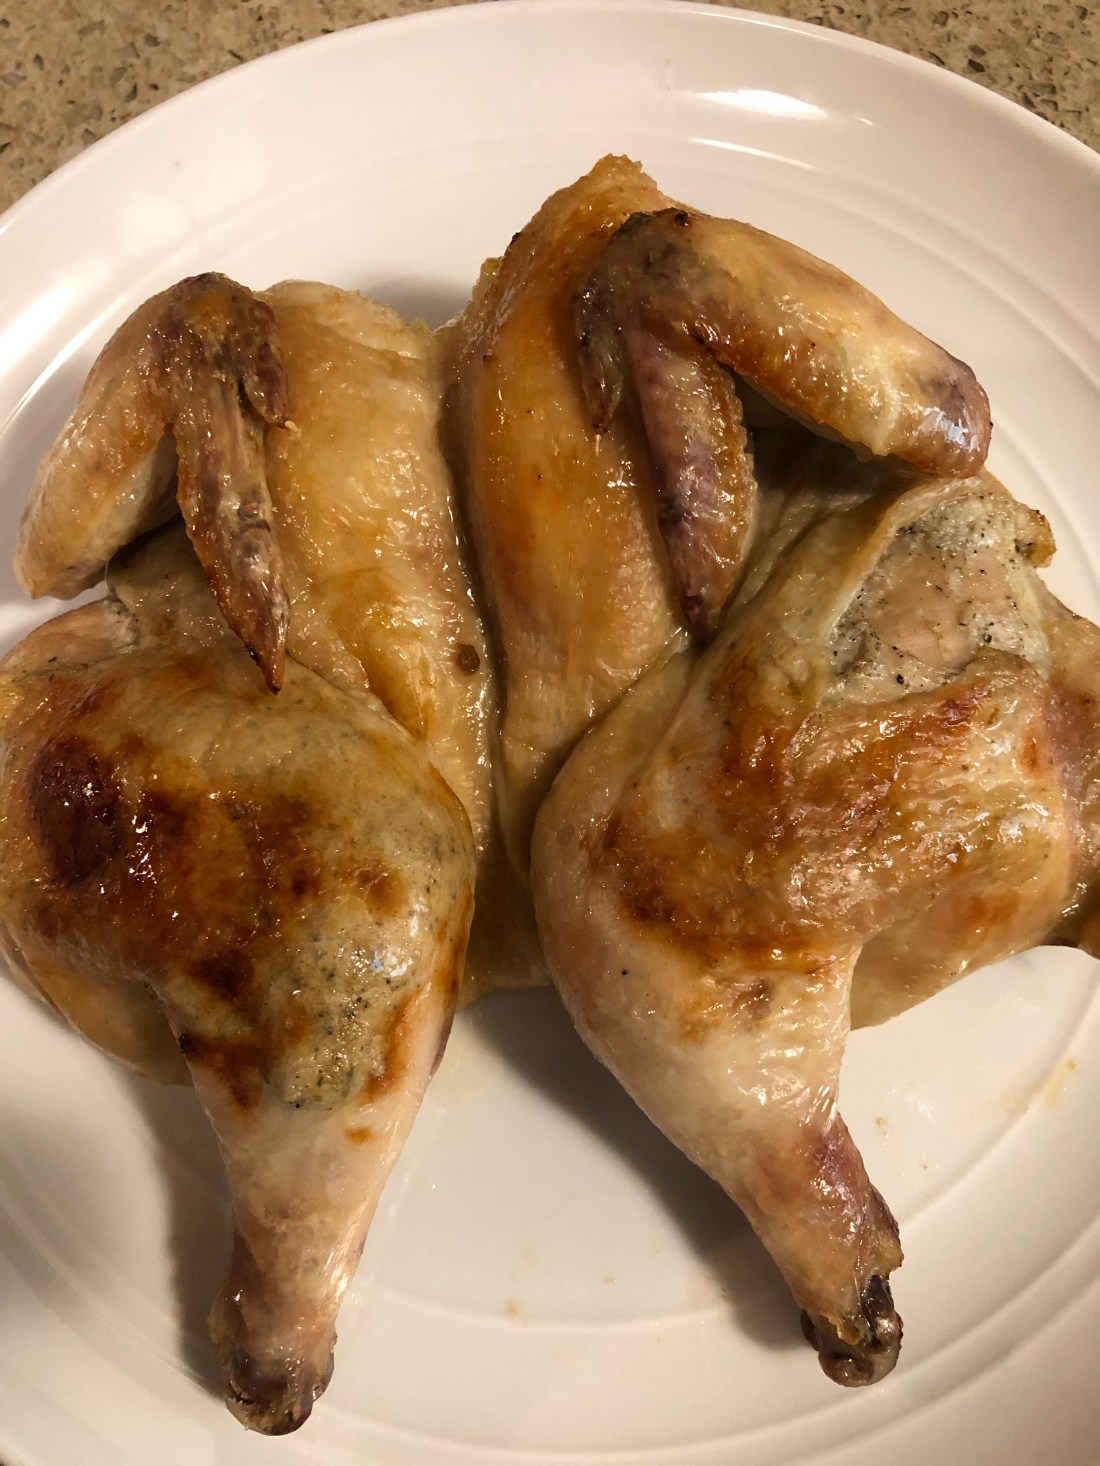
With all my food allergies, protein is difficult sometimes. And since I live alone, most meats except for individual things like pork chops or chicken pieces are always too much for one meal. So when I find turkey tenderloins, I always buy several packages and freeze the tenderloins individually. And then look for new and different ways to cook them. If you have an air fryer, this is so easy and quick. Otherwise, it could be cooked in the oven but it’ll just take a little longer. Of course, the essential thing about tenderloins, whatever type of animal they come from is not overcooking them and drying them out. This air fryer method worked very well for that. And, of course, this rub works on any protein, not just animal. And try mixing it up with different herbs and spices.

Preheat air fryer at 400 degrees for about 5 minutes.

Spray the air fryer basket with non-stick spray.

In a small bowl, combine:

1 teaspoon paprika

1 teaspoon garlic granules (or powder)

1/2 teaspoon dried thyme

1/2 teaspoon sea salt

1/4 teaspoon ground black pepper

1 teaspoon dried sage

1/2 teaspoon onion powder

Using paper towels, dry:

2 turkey tenderloins

Once dry, rub with:

1-2 tablespoons olive oil

Then sprinkle the rub mixture over the tenderloins being sure to coat both sides. Using dry hands, rub the herb mixture into the tenderloins. Place in the air fryer basket and cook for 12-15 minutes. Turn and repeat. Check turkey temperature (should be at 165 degrees) before removing. Let rest about 5 minutes before slicing.

Easy Roasted Turkey Breast

Turkey is easy to overcook producing a dry, not very appetizing meat. If you don’t have a meat thermometer, I would suggest you invest in one. It makes cooking meats, especially poultry, much easier.

Turkey can also be rather bland so it needs help to bring out the flavor. This recipe combines a number of herbs to do just that. If you have time, rub the turkey breast, under the skin as well as on the skin, with the herb rub and then refrigerate for several hours.

Watch the turkey breast carefully while baking and take the internal temperature often after about 50 minutes so that it doesn’t get above 160 on the meat thermometer. This is meant for 2 people but the breast can serve up to 4, just increase the vegetables. As with many of my recipes, feel free to change out the herbs to suit your family’s taste as well as the vegetables – any root vegetables will work in this recipe.

Preheat oven to 350 degrees. Prepare a baking dish a little larger than the turkey breast and spray with non-stick cooking spray or coat with a non-dairy margarine. In a medium bowl combine:

1 large onion, sliced

5-6 celery stalks (I used celery hearts so if you have whole celery, reduce this number), cut into large pieces

12-15 baby rainbow carrots, exclude the orange ones

1 medium sweet potato, peeled and cut into medium-sized cubes*

2 tablespoons olive oil

If some of the baby carrots are on the larger size, cut them in quarters so all the vegetables will cook evenly. Mix the vegetables together to coat them with oil. In a small dish combine:

1/2 teaspoon dried thyme

1/2 teaspoon sea salt

1/4 teaspoon ground black pepper

1/2 teaspoon garlic granules

1/4 teaspoon dried marjoram

1 teaspoon dried sage

Mix the herbs together to combine. Add about 1/4 of the herb mixture to the vegetables and mix once again. Pour the vegetables into the prepared baking dish. Using paper towels, dry thoroughly:

2 1/2 to 3 pound turkey breast (this is a half breast)

Pull up the turkey skin and sprinkle the flesh with the herb mixture, reserving some for the other side. Rub into the flesh and then fold back the skin onto the meat and sprinkle a little more herb on the skin. Place the breast on top of the vegetables skin side down and sprinkle the remaining herb mixture on the bottom of the breast, rubbing it in. Flip the turkey breast so that the skin side is up. Roast in the oven for approximately 25 minutes per pound or until internal temperature is 160 degrees.** Remove from the oven and place the turkey on a serving platter, loosely cover with foil and let rest for about 10-15 minutes.

Spoon the roasted vegetables into a serving bowl.*** When the breast is rested, cut and serve. If desired, pan gravy can be made with the fat in the pan by adding gluten-free, all-purpose flour until all the oil is absorbed (probably about 2 tablespoons) and then cook the flour for several minutes over medium heat before adding approximately 1 cup of chicken (or turkey) stock for each tablespoon of flour used. Or, for fat free gravy, heat 1 1/2 cups of chicken (or turkey) stock over medium high heat. Whisk 2 tablespoons of gluten-free all-purpose flour into another 1/2 cup of cold chicken stock and whisk into the stock on the stove. Whisk constantly until the mixture comes to a boil and is thickened.

*If your family doesn’t like sweet potatoes, simply add the orange carrots and perhaps some cubes of red-skin or Yukon gold potatoes.

**FYI, my turkey breast was 2.8 pounds and I cooked it for 1 hour and 20 minutes before it reached 160 degrees. Remember it will continue to cook when removed from the oven and covered with foil.

***The carrots weren’t cooked when I removed the turkey so I increased the oven temperature to 425 degrees and cooked the vegetables for about 20 minutes more. This not only cooked the carrots but it also browned the sweet potatoes making them a little crunchy.

Spatchcocked Roasted Cornish Game Hen

This is a very simple recipe as long as you have a sharp pair of kitchen shears. Spatchcocking is cutting out the backbone of the chicken and laying it flat. It cooks faster and is easier to grill, just don’t try to stuff it or you’ll have to tie it back up!

Preheat the oven to 375 degree. Spray a large baking dish with non-stick spray. For each hen, prepare a mixture of:

2 teaspoons pureed garlic*

1/8 teaspoon herbamare (or plain sea salt)

1/8 teaspoon dry sage**

dash of black pepper

Spatchcock each hen by cutting along the backbone on each side using a sharp pair of kitchen shears, cutting the bones attached to the backbone. Wash the inside of the bird and then dry thoroughly using paper towels. Discard the backbone. Release the skin from the meat by inserting your finger between the skin and the meat and shifting it to loosen. (I personally prefer to just cut along one side of the backbone to open the chicken (or hen) since I’m a lover of the tail, a bad taste inherited from my grandmother.)

Next, take 1/2 of the garlic mixture and rub it in one side of the hen between the skin and the meat. Repeat on the other side with the other half of the garlic mixture. Place in the prepared pan and repeat for the other hens you want to cook. Generally, one hen per person depending on their size and what else you’re serving with them. I actually only ate half a hen. Larger birds will feed more people but they generally average about 1 1/2 pounds per bird.

Rub the skin of the birds with oil and bake 45-55 minutes depending on how your oven temperature runs or until the thigh meat measures 175 degrees.

*I bought pureed garlic but it’s fairly simple to puree whole garlic cloves by using the flat side of a knife. Place the peeled garlic clove(s) on a cutting board and sprinkle with salt. Smash with the flat side of a large knife and then pull the knife towards you to smear the garlic and voila, pureed garlic. Or use a small food processor to puree cloves.

** I happen to love sage with poultry but if you don’t, feel free to use thyme, rosemary or whatever other herb your family prefers.

Easy Farmhouse Chicken Casserole

I know, again with the chicken! But there are just so many delicious ways to cook chicken and here’s another one. Easy and quick to make with pre-cooked chicken, this casserole covers all the bases with protein, starch and vegetables all in one mouth-watering package. So if you have some chicken (thighs, drums, breasts whatever) or leftover rotisserie chicken, this is a great way to use it up that your family will enjoy.

Make sure your oven rack is in the upper half of the oven. Preheat oven to 425 degrees. Grease a 9×13 casserole (or spray with non-stick spray). Over medium high heat, heat a medium sized Dutch oven and add:

1 tablespoon olive oil

4 slices of bacon, diced

Cook bacon until it’s crisp. If you don’t want to eat the bacon fat, drain it before adding:

1 tablespoon olive oil (3 tablespoons if you drained the bacon fat off)

1 medium onion, diced

3-4 celery stalks, diced

1 cup thinly sliced carrots (or shredded)

1 cup frozen peas

Reduce heat to medium and cook until vegetables are softened. Stir into the vegetables:

1/4 cup gluten-free, all-purpose flour (I had to use 1/3 cup to absorb all the oil)

3 cups chicken stock

1 cup non-dairy milk (anything EXCEPT soy)*

1/4 teaspoon dried thyme

1 teaspoon dried sage

1/4 teaspoon ground black pepper

1/2 teaspoon sea salt

Stir, being sure to scrape the bottom of the pot to get all those wonderful drippings from the bacon. Cook, stirring frequently until sauce is thickened, about 3-5 minutes. Add:

3 cups diced or shredded chicken

3 cups diced and cooked potatoes (I used a mix of sweet and Russet potatoes)

Turn off heat. Pour (or ladle like I had to) the chicken mixture into the prepared casserole dish. In a medium bowl combine:

1 cup gluten-free bread crumbs

2 tablespoons avocado oil

Using a fork, mix thoroughly so that the bread crumbs are combined with the oil. Add:

1 cup gluten-free French-fried onions (or forget the bread crumbs and just use onions, oh so tasty!)

Spread the bread crumb mixture evenly over the casserole and bake for 15-20 minutes. Cool slightly before serving. Serves 6-8 generously.

*The original recipe called for cream. Silk now makes a non-dairy cream which you could use in place of the non-dairy milk for a richer sauce. The Silk cream is coconut based.

Chicken Cacciatore

There are probably as many recipes for chicken cacciatore on the internet as there are recipe sites. But here’s another one that’s easy to prepare and tastes oh so good! The chicken stays fairly moist (because it’s browned before stewing), the portobellos add some depth to the dish and the sauce is rich and succulent. Using boneless, skinless chicken thighs cuts down on the cooking time so this can be ready in about 40 minutes for a fairly quick midweek supper.

Trim fat and dry with paper towels:

6-8 boneless, skinless chicken thighs

Salt and pepper lightly. Over medium heat begin heating a Dutch oven and add:

1 tablespoon olive oil

Add the chicken thighs and cook, about 4-5 minutes before turning and browning on the other side. If the chicken sticks to the bottom of the pan when trying to turn it, it’s not ready to turn so brown a little longer. Once browned on both sides, remove to a plate and add to the pan:

1 medium onion, diced

5-6 stalks celery, chopped

3 large or 5 medium portobello mushroom caps, cleaned and chopped

3/4 cup diced carrots

Lightly salt and saute until the onion is translucent and the celery and mushrooms are softened. Add:

2 teaspoons minced garlic

1 1/2 tablespoons gluten-free all-purpose flour

Mix to combine and cook out the flour over medium low heat for a minute before adding:

2 cups chicken stock (or 1 cup white wine and 1 cup chicken stock, or 1 cup chicken stock and 1 cup mushroom stock)

1/2 teaspoon dried thyme

1/2 teaspoon dried sage

14-15 ounce can diced tomatoes, drained

Stir to combine and then place the chicken thighs into the stock, pushing down to cover. Be sure to add any juices that have accumulated on the plate as well. Cover the pot and reduce heat to low simmer and cook for 20-25 minutes until chicken reaches 175 degrees internally. It will start falling apart when completely stewed so don’t worry if you don’t have a meat thermometer to measure the internal temperature. Add:

2 tablespoons tomato paste

Stir to combine. Serve over rice, pasta, or potatoes. I’ve discovered at my local Whole Foods Market, a heart of palm pasta (365 brand) that is very low in carbs and very tasty so I added a bag of it (drained and rinsed) about 10 minutes before the cacciatore was done. Serve with parmesan cheese if desired. Serves 4.

Chicken Canzanese

When I first saw the listing for Chicken Canzanese in the chicken bible, I thought it was a Chinese dish but turns out it’s a very old Italian recipe. I’ve resized and revamped it for those of us with allergies. It originally made eight servings so I’ve reduced it to 4. I’ve also changed the white wine in the original to chicken stock plus a touch of rice vinegar and honey. Since I’m used to using dried herbs rather than fresh, I’ve also reflected that change in this recipe. I hope you enjoy it as much as I did!

Preheat oven to 325 degrees. In an ovenproof skillet (about 10-12 inches), heat over medium high heat:

1 teaspoon olive oil

Add:

1 ounce prosciutto cut into 1/4 inch cubes*

Cook, stirring frequently, until just starting to brown. Add:

3 teaspoons chopped garlic

Cook, stirring often, until garlic just starts to brown. Transfer the prosciutto and garlic to a small bowl. Dry with paper towels:

4-5 chicken thighs, skin on

Dust them with pepper to taste (no salt is necessary in this recipe because of the salt in the prosciutto. Replace the skillet on the heat and add:

1 teaspoon olive oil

the 4-5 chicken thighs, skin side down

Cook until well browned on the first side (about 5 minutes) then turn over and brown on the meat side, reducing heat to medium (about 5 more minutes). Transfer the chicken to a plate. Drain all but 2 tablespoon of the oil from the skillet (the chicken will release quite a bit of fat). Add to the skillet over medium heat:

2 tablespoon all purpose gluten-free flour

Whisk to combine and let the flour cook for about 30 seconds while whisking before adding:

2 cups of chicken stock

drizzle of rice vinegar (about 1/4 teaspoon)

drizzle of honey (about 1/2 teaspoon)

1/4 to 1/2 teaspoon dried rosemary (depending on your taste)

1/2 teaspoon dried sage

dash (1/8 teaspoon) ground cloves (or add 2 whole cloves – just remember to remove them before serving)

2 bay leaves

1/4 teaspoon red pepper flakes (optional depending on your taste)

Whisk to combine and cook until slightly thickened. Add the prosciutto, garlic, and chicken (skin side up) to the skillet, nestling the chicken into the sauce. Bake in preheated oven for about 1 to 1 1/2 hours. After about 15 minutes check and see if the sauce is bubbling; if it is reduce oven temperature to 300 and cook until chicken is tender. Sauce should have thickened but if it’s still thin, remove the chicken from the sauce (move to a plate and cover) and cook the sauce on the stovetop for a few minutes until reduced to approximately 1 1/2 cups. Remove from the heat and whisk in:

1 tablespoon vegan margarine

1 tablespoon lemon juice and 1/4 teaspoon lemon zest

Stir to combine and then pour the sauce around the chicken. Remove the bay leaves (and whole cloves if used) before serving. Serve over rice, mashed potatoes, or polenta.

*Prosciutto can become tough if fried when very thinly sliced so it’s recommended that a 1/4″ piece be used to cut “chunks” for this recipe. However, my deli wasn’t able to provide a “slab” of prosciutto because of shortages now due to the pandemic so I used the thinly sliced prepackaged prosciutto instead. Seemed to work alright but I simply chopped it into larger pieces than 1/4″.

Stuffed Turkey Rolls

I found some turkey breast filets at the store the other day and wondered how to cook them without drying them out. Turkey breast filets can be either too thick or too thin; these were very thin. I used to make a turkey “napoleon” for my husband and I wondered if it would work as a roll. It not only worked, but they turned out delicious. The stuffing can be made ahead and is enough to stuff 6-8 turkey filets depending on their size. Of course, any stuffing recipe will work but I made my sausage and mushroom stuffing, adding half a pear for a little sweetness and it turned out succulent. The stuffing is the most time consuming part of this process.

Serves 3-4.

To make the stuffing, over medium a 10″ skillet, heat:

2 tablespoons olive oil

When hot, add:

1/2 medium onion, finely diced

2 small stalks celery, finely diced

1/2 medium pear, minced

3 ounces mushrooms, finely diced

Stir and reduce heat to medium low. Cover the vegetables for about 5 minutes until they are tender. While they cook, break up 2 slices of bread (I used the quick oat bread recipe on this blog). If using a different bread, be sure to crumble into small pieces. When the vegetables are soft, add them along with the oil to the bread crumbs, mix thoroughly. To the skillet add:

4 ounces sausage, any kind your family likes

Cook thoroughly, breaking it up as it cooks into a “minced” meat consistency (like hamburger). This should only take a couple of minutes. Add to the stuffing mix along with:

Salt and pepper to taste

1/2 to 1 teaspoon of ground sage

If your turkey filets are square, you’ve hit the jackpot! Mine were triangular. Add about 1/3 cup of the stuffing on the longer side of the filet and pull the smaller side over it. I used bacon to wrap and hold the roll but I would suggest using porchetta instead because the bacon had too strong a flavor and almost overpowered the turkey roll.

Once rolled and wrapped, secured with toothpicks if necessary, place in a 10″ skillet with a little oil so that the bacon doesn’t stick. Cook over medium heat for approximately 2-3 minutes per side, getting all four sides.

While the turkey rolls are cooking, heat 2 tablespoons olive oil in another 10″ skillet. When hot add:

3 ounces of mushrooms

1/2 medium pear, minced

Cook for a 2-4 minutes, salt and pepper to taste and add:

2 tablespoons all purpose gluten-free flour

Stir to combine so that all the oil is floured and cook over medium low heat for 1-2 minutes to cook the flour. Add:

1 1/2 to 2 cups turkey (or chicken) stock

Stir to combine and stir constantly until thickened into a gravy.

Serve the turkey rolls over mashed potatoes (or rice), adding gravy to each of the servings. Enjoy!

Roasted Turkey Breast with Pears and roasted sweet potatoes

I’m always looking for new ways to cook chicken and turkey. A couple months ago, I blogged a recipe for pork loin with a pear gravy. It came out so good I wondered how pear would go with turkey. Turns out placing sliced pears (or you could use apples) under the skin of the turkey breast keeps it moist while it’s roasting (just be sure not to over cook it!). And yes, I made gravy and added some cooked pears to it, oh so delicious!

Preheat oven to 400 degrees. To feed four:

4-5 pound bone-in turkey breast

Clean thoroughly, removing any feathers or pin feathers left behind along the outside of the skin. Push your fingers under the skin and break the membrane holding the skin to the meat. Prepare a baking dish large enough to hold the turkey along with 2 cups of diced sweet potato. Spray the dish with non-stick cooking spray. Place the turkey in the dish, skin side up.

Wash, peel, core and slice:

1 medium, not too ripe pear making sure all the slices are about the same thickness

Place the pear slices, overlapping slightly between the skin and the meat of the turkey breast. When the pears are in place, , salt and pepper the pears. Using small skewers, pin the skin to the meat to hold the pears in place. Salt and pepper the skin (I also used some garlic powder along with some sage).

Peel and dice up (large pieces) 2 medium sweet potatoes and place around the breast, spray the sweet potatoes with a non-stick cooking spray (or before you add them, add 1 tablespoon of olive oil to them and stir to coat). Salt and pepper the potatoes. (My mother always used white potatoes.)

Bake at 400 degrees for approximately 20 minutes then reduce heat to 350 degrees for about an hour to 75 minutes or until the breast measures 155 degrees when a thermometer is inserted in the thickest part. (It should be cooked to 160 degrees but it will continue cooking after you take it out of the oven.)

Remove the pins and the skin. Cover loosely with a large pan or, if no alternative is available, aluminum foil (should be a last resort!). Let rest for about 10 minutes before slicing. Serve with the pear slices.

If gravy is desired in a 4 cup saucepan heat:

1 cup turkey (or chicken) stock

1 medium ripe pear, peeled cored and mashed

Bring to a boil. While it’s heating whisk together:

1/2 cup turkey (or chicken stock)

2 tablespoons all purpose gluten-free flour

When the stock is boiling, whisk in the flour slurry and keep whisking until the mixture thickens, turning it down to medium heat after adding the slurry. Simmer for about 5 minutes to cook the flour and serve. If you have lumps of flour or large chunks of pear, feel free to run the gravy through a medium sieve to remove them before serving.

Chicken Saltimbocca

If you like sage, think about your Thanksgiving stuffing, you will LOVE this recipe! I especially enjoyed the fried sage on the top, something I’d never done but oh how delicious! This recipe is fairly easy as long as each individual step is followed and the chopping and slicing is done in advance.

This recipe serves four:

3 tablespoons olive oil

4 ounces prosciutto, sliced

8-10 large sage leaves, plus 3 tablespoons minced (or 3 teaspoons dried sage)

1 pound boneless chicken, breast and/or thighs, sliced (the thinner its sliced the faster it will cook)

1/4 teaspoon sea salt

1/8 teaspoon ground black pepper

1 onion, minced

2 teaspoons minced garlic

1 tablespoon all purpose gluten-free flour

3 cups chicken stock

8 ounces gluten-free vermicelli or spaghettini

2 tablespoons capers, rinsed (optional)

2 tablespoons butter substitute

1/2 teaspoon lemon zest plus 3 tablespoons juice

First, in a large skillet (or a Dutch oven) with high sides, heat, medium high, 1 tablespoon olive oil until it shimmers. Add the prosciutto pieces as individually as possible because unlike bacon, they will not fully separate as they cook, cook until crisp, about 4-5 minutes, reducing heat slightly if needed. Remove the prosciutto from the skillet and place the sage leaves in the oil and cook them until crisp, about 30-40 seconds. Place prosciutto and sage on a paper towel.

Next, dry the chicken, then sprinkle with the salt and pepper. Heat another 1 tablespoon of oil in the skillet, again medium high heat, add the chicken in a single layer and cook, not stirring, until it starts to brown, 1-2 minutes. Then stir it and cook until nearly cooked through, about 2-3 minutes or longer depending on thickness. Remove to a bowl, cover and keep warm.

Add the last tablespoon of oil to the skillet and add the onions. Cook over medium heat until translucent and starting to brown. Stir in the garlic and minced sage and cook until just fragrant, about 30-40 seconds. Stir in the flour and cook for about 1 minute. Add 1 cup of chicken stock, scrape down the sides of the skillet and stir to smooth out any lumps, simmer until reduced by about half, about 5-6 minutes.

Stir in the remainder of the stock and the pasta. Increase heat to medium high and cook at a slow boil until pasta is tender, about 10-12 minutes. Stir frequently. The sauce should thicken more during this cooking.

Lastly, add the chicken back in along with the capers (if used), butter substitute, lemon zest and juice, stir to combine and cook for another minute or two until the chicken is heated. Remove from heat and add any additional salt and/or pepper that may be needed. Cover and let sit for about 5 minutes and it will absorb any extra sauce into the pasta.

Sprinkle with the prosciutto and fried sage leaves and serve.

Easy Creamed Turkey Soup with Vegetables (dairy-free, gluten-free)

This is an easy way to use up extra turkey (or chicken if you prefer). I didn’t have a lot of soups growing up because my father wasn’t a “soup” guy. But a long-time friend really loved creamed soups and when she was dying of cancer, one of the few things I could always get her to eat was my cream of chicken or turkey soup. So here’s the recipe revamped without the dairy or gluten.

In a medium size Dutch oven, heat:

2 tablespoons olive oil

Add:

1 cup diced onion

1 cup diced celery

1/2 cup diced turnip and/or parsnip

1 teaspoon turmeric

1 teaspoon dry sage

Saute over medium heat until onions are translucent. Add:

2 tablespoons gluten-free all purpose flour and stir to mix and absorb all the fat. Let cook for several minutes before adding:

2 cups chicken or turkey STOCK (use stock not broth for a stronger flavor)

1 small bag of mixed vegetables (if you’re like me, remove the corn; wish someone would make mixed frozen vegetables without corn!)

Cover, reduce heat to low and let simmer until vegetables are cooked, 10-15 minutes.

The soup will thicken while it simmers so stir occasionally so that it doesn’t stick to the bottom of the pan.

When the vegetables are cooked, add 1 cup of non-dairy milk and 1-2 cups of cooked brown rice. Heat and serve.

Variations if you don’t care for sage or tumeric, or just want a different taste!

Italian: Add 1 tablespoon diced garlic and substitute thyme, basil, marjoram, and/or rosemary for the sage and tumeric.

Indian: Use a peeled and diced sweet potato instead of the turnip/parsnip. Add 1 tablespoon of curry powder instead of the sage and before the flour. Curry powder needs to develop its flavor so cook it for a few minutes before adding the flour and stock.

Mushroom: Add a 6-8 ounce box of sliced baby bella or whatever mushrooms you love instead of the mixed vegetables.

Vegan: Use vegetable stock instead of chicken or turkey and delete the meat. Add a drained can of your favorite beans.