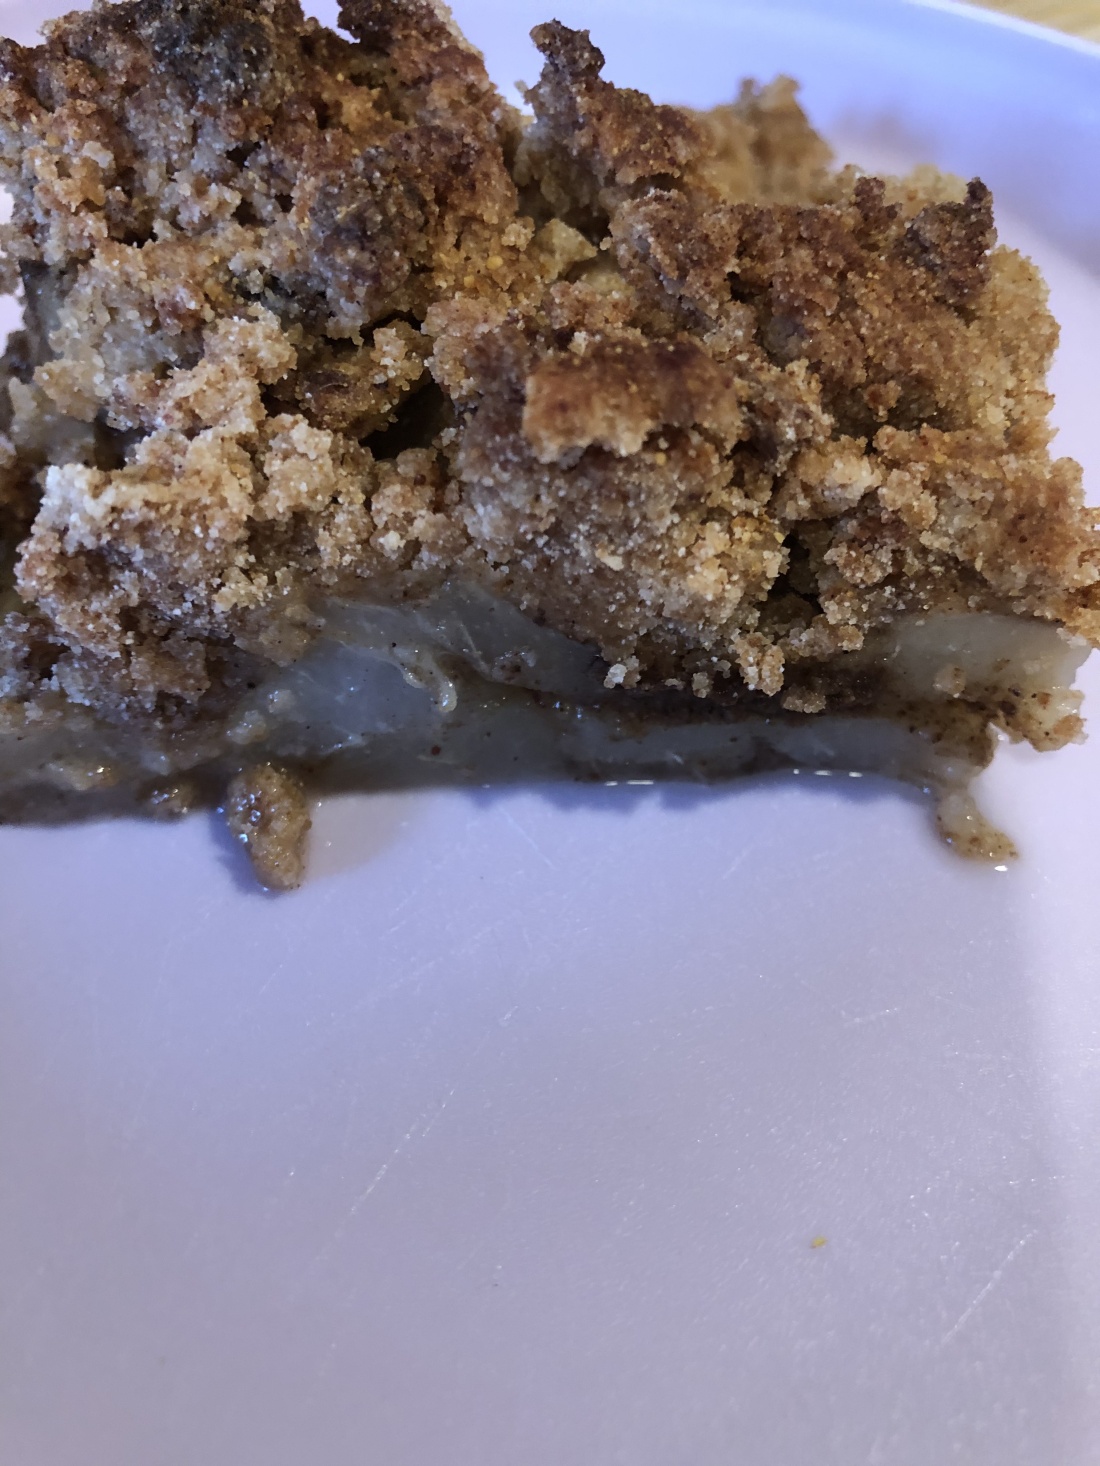
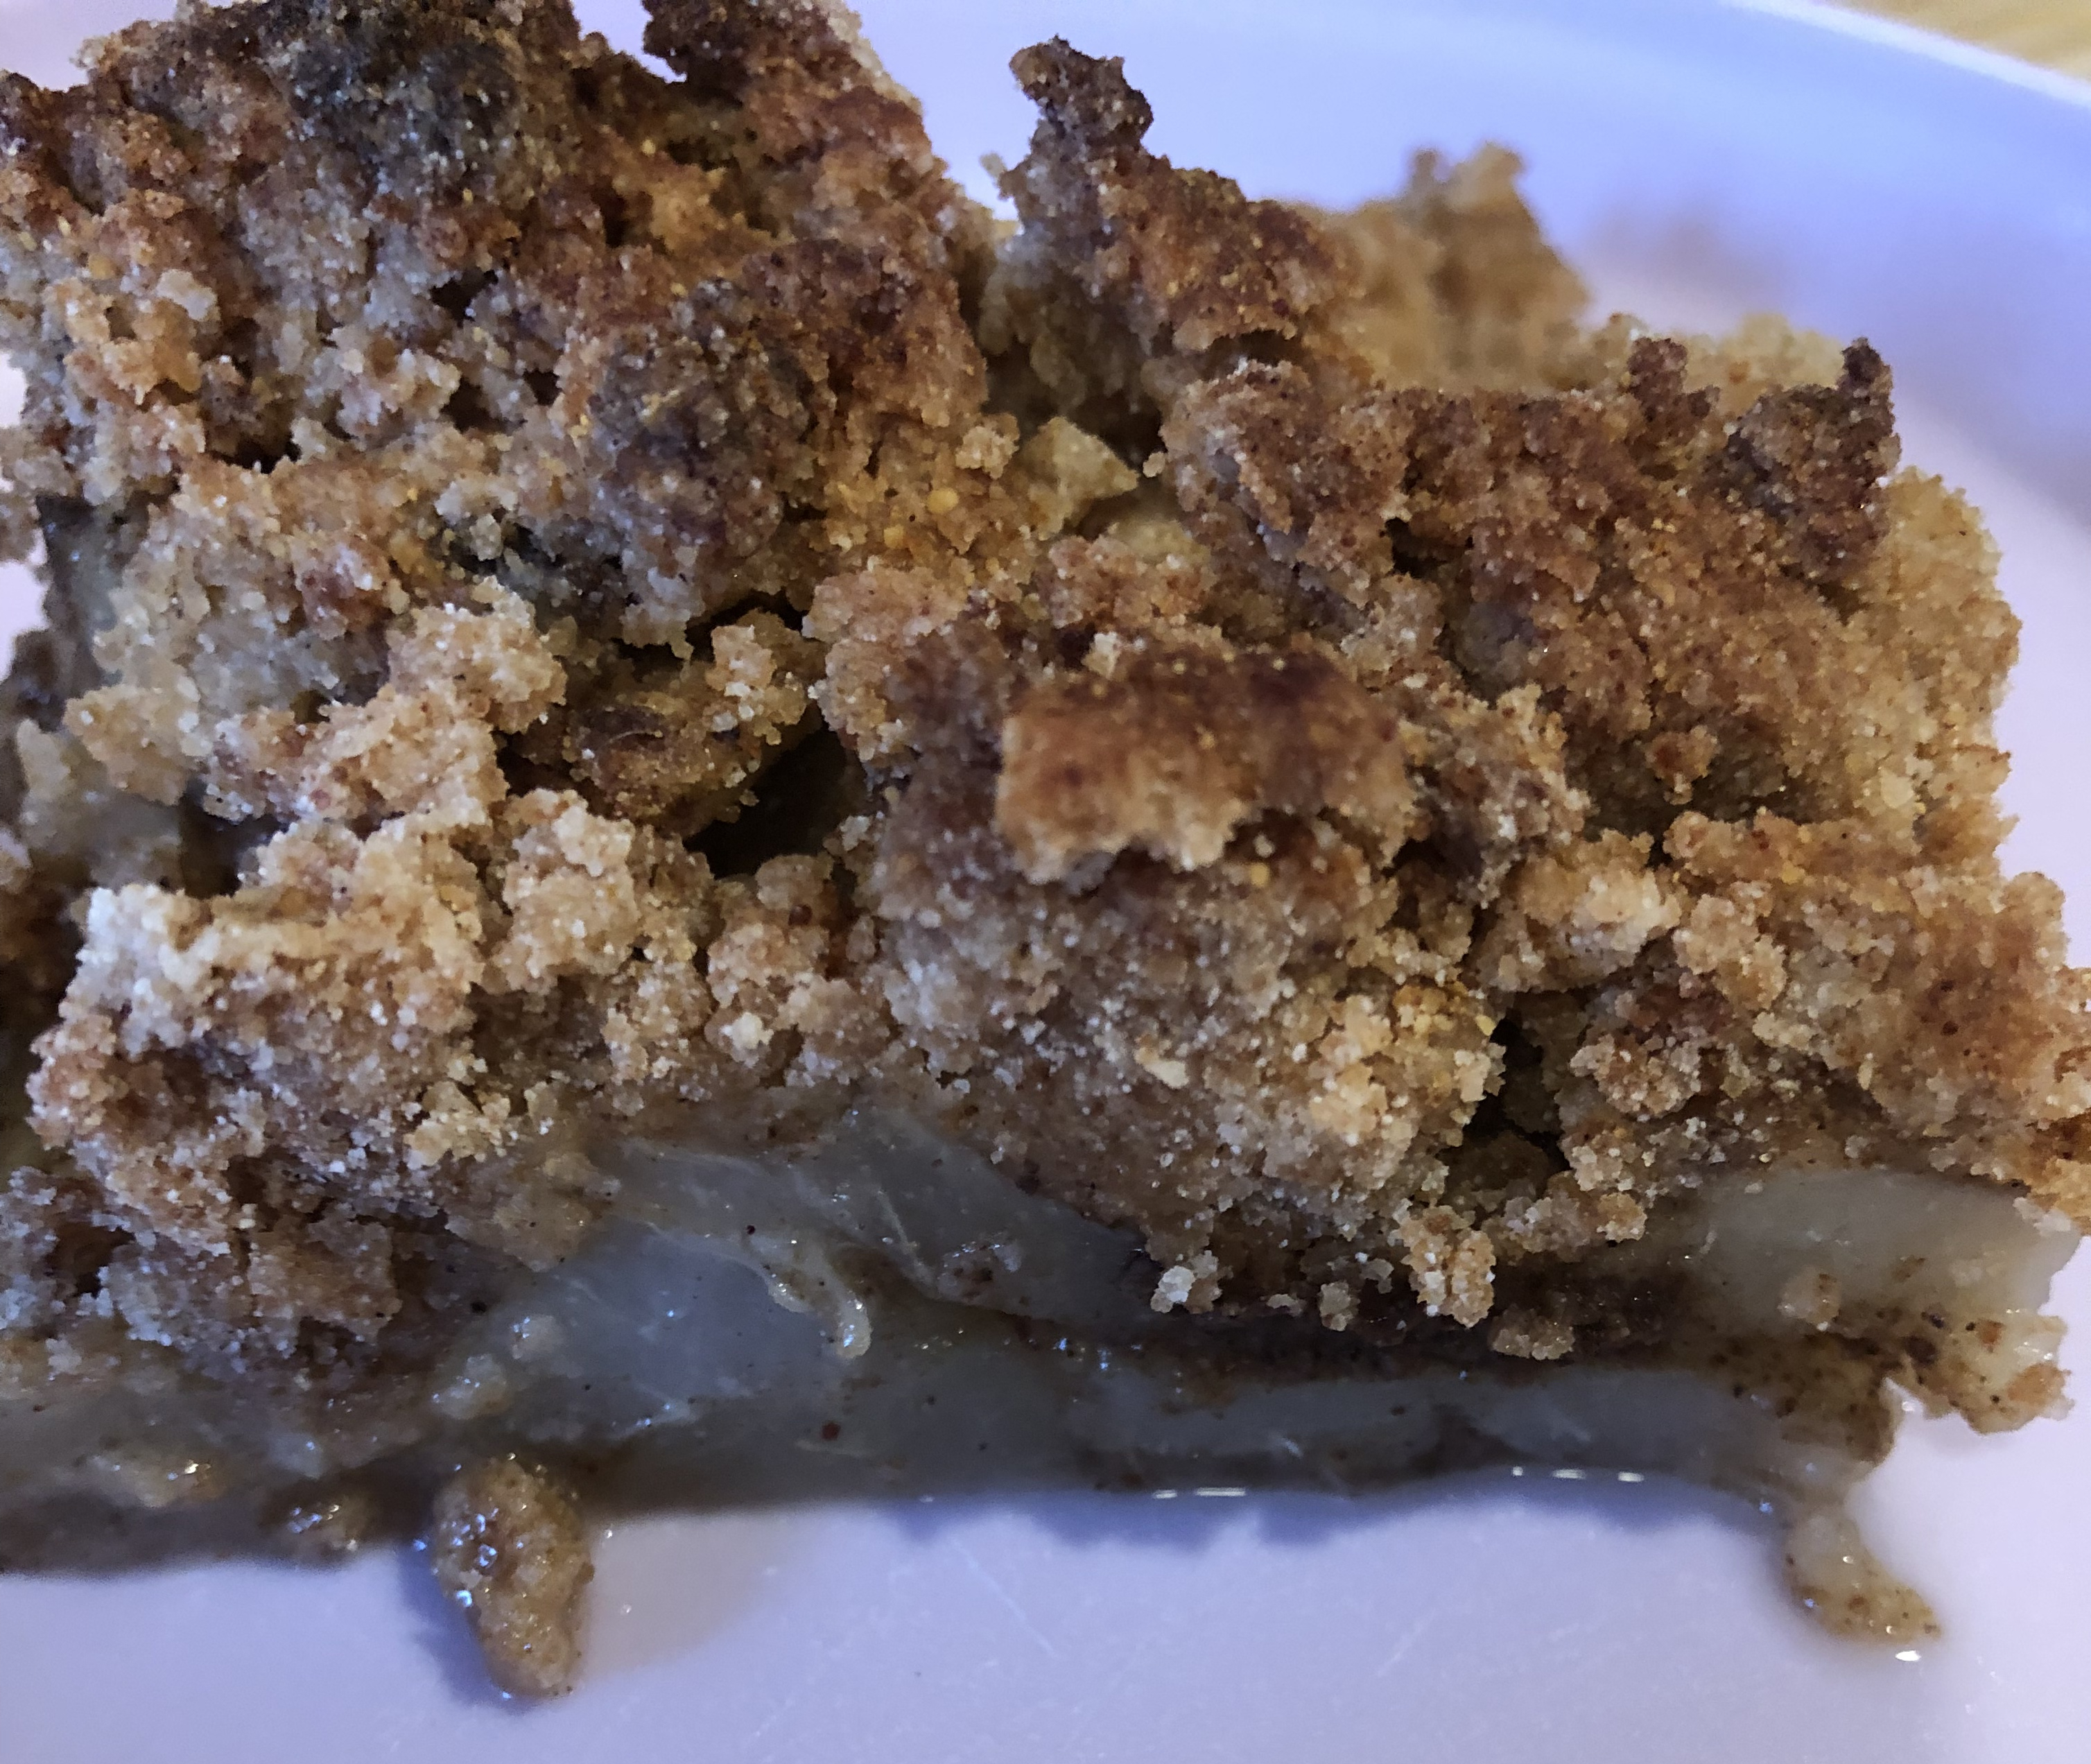
I was looking on the internet the other day for alternatives to pumpkin pie for Thanksgiving and found this using apples. I think it would be excellent with most fruits. It’s more like what we’d call in the United States a crumble. Easy to make and tasty, the most difficult part is peeling and cutting up the fruit. I used pears but apples, peaches, plums, figs, raspberries or blackberries, would work very well. And any combination of spices that your family likes would work as well as the three I used, cardamom, allspice, or ginger for example.
First, preheat oven to 350 degrees then peel and cut up:
about 2 pounds of fruit (4 cups, I used four large pears)
Try to make the fruit all the same size so it cooks evenly. Toss the fruit with a mixture of:
1 tablespoon date sugar (or any granulated sugar you like)
1 teaspoon cinnamon
1 teaspoon nutmeg
1/4 teaspoon cloves
Lightly grease a 9″ pie plate then pour in the fruit. In the same bowl as you had the fruit, mix together:
3/4 cup melted vegan butter or avocado oil
1/2 cup granulated sugar (any kind)
1/4 cup brown sugar (again I used date)
1 tablespoon rice vinegar
1 teaspoon vanilla
Whisk to combine until the sugar is dissolved. If you can use eggs, feel free to substitute 1 egg for the vinegar (be sure to cool the vegan butter before adding the egg). Once combined, add the following ingredients which you’ve sifted together:
1 cup all-purpose, gluten-free flour
2 teaspoons baking powder (if you used an egg reduce this to 1/2 teaspoon)
1/4 teaspoon salt
Stir to mix thoroughly, mixture will be thick and almost crumbly if you didn’t use the egg. Spread over the fruit and then sprinkle with another teaspoon of granulated sugar. Bake for 45 to 50 minutes until crust is fully cooked. Let cool before serving for easy cutting. Can be topped with any non-dairy cream or whip.
Quick breads are so easy to make and so delicious to eat. Flavorful with warm spices, they take minutes to mix together and, when gluten-free, can take almost an hour to bake. But definitely worth it. Here’s a pumpkin quick bread recipe that will delight your whole family. I used allspice and ground cloves but feel free to use cinnamon, nutmeg, and/or ginger (pumpkin pie spices) instead. Various flours can also be used including all-purpose (I use the 1 to 1) but whatever one you choose will work. For a lighter bread, eliminate the protein powder and use an additional half cup of one of the other flours.
First make some flax gel by combining in a small dish:
2 tablespoons ground flax meal
1/4 cup warm water
Whisk to combine and set aside to gel. Preheat oven to 350 degrees. Spray a bread pan (9×5″) with non-stick cooking spray and set aside. Into your mixer’s bowl or a medium bowl (if using a hand mixer), add:
1 cup pumpkin puree
1/3 cup maple syrup (date or agave syrup, honey)
1/4 cup avocado oil
1 tablespoon vanilla
1 tablespoon rice vinegar
Mix until combined before adding:
1 cup oat flour
1/2 cup millet flour
1/2 cup quinoa flour
1/2 cup pumpkin protein powder (or another 1/2 cup of any of the flours)
2 teaspoons allspice
1/2 teaspoon cloves
1/4 to 1/2 cup date sugar (depending on your taste)
the flax gel
1/2 cup dried cranberries (optional, you could use chocolate or carob chips instead)
1/4 cup pumpkin seeds (optional to sprinkle on top in the pan)
Mix until all ingredients are well combined. This is a thick dough. Spoon into the prepared bread pan and smooth the top. Sprinkle with the pumpkin seeds if desired. Bake for 50-60 minutes. When a toothpick inserted in the center comes out clean cook for another 5 minutes. Cool on a rack. Great warm or toasted the next day. Will keep for several days in an airtight container.
I’ve recently found that tomatoes and tomato-based sauces bother my stomach so I’ve been searching for alternatives, especially since my favorite foods are ribs and wings. Here’s one that’s very tasty and easy to make. I used a jar of dill pickle mustard that I had in my cupboard and wow, that a great taste! Only takes a couple of minutes to mix and can be frozen if you don’t use it all. I made a batch of chicken wings with it.
In a small bowl (about 2 cups) combine:
1/2 cup mustard – any mustard will work – I’ve used the dill pickle mustard as well as my usual stone ground and both made very delicious sauce
1/4 cup honey (date sugar, coconut or agave nectar, maple or date syrup would also work)
1/4 cup avocado oil
1/4 cup white vinegar (rice or apple cider vinegar would also work)
1 small can green chilis (about a 4-ounce size; I used mild but feel free to use a hotter variety if your family likes them)
1/2 teaspoon cumin
1/2 teaspoon ground black pepper
1/2 teaspoon garlic powder
Using an immersion blender, blend until smooth. Brush on ribs or wings or serve on the side once the meat is cooked. Makes about 1 3/4 cups of sauce.If you don’t have an immersion blender, use a regular blender.
I brushed the sauce on the wings before baking them for 40 minutes in a 350 degree oven.
I gave you a recipe for barbeque sauce when I made the Barbeque Beans side dish a while ago (see recipe under side dishes). That one included some oil so here’s an oil free, spicy recipe that I just love and I hope you will too. I’m making some pork Ribbletts tomorrow and since my usual Organicville Barbeque Sauce isn’t available at my local store at the moment, I decided to try making my own. I’ll pass on the recipe for the ribbletts tomorrow.
In a small saucepan combine:
1 cup tomato sauce
1/4 cup honey (maple or date syrup, coconut or agave nectar)
1/4 cup white vinegar (or apple cider)
2 tablespoons molasses
1/2 teaspoon salt
1/4 teaspoon ground black pepper
1/4 teaspoon smoked paprika
1/4 teaspoon onion powder
1/4 teaspoon garlic powder
1/4 teaspoon chili sauce (in the Asian section of your market just be sure to purchase one without any sugar) (Optional)
1/2 teaspoon sriracha (Optional)
1/4 teaspoon cumin
Stir or whisk together and taste. Just remember that all these flavors will be accentuated as the sauce reduces. Heat over medium heat until it just starts to bubble then reduce to low and simmer for about 15-20 minutes until thickened. Add additional salt, etc., if needed per your taste.Makes about 1 1/2 – 1 3/4 cups of sauce.
I’m updating this recipe. Just spoke with my son and daughter-in-law who said it was good but it wasn’t sweet enough! I admit, I don’t like my desserts as sweet as most people so I’ll adjust the recipe so that those of you who want a sweeter cake can still use this recipe.
I love carrot cake but I love my carrot cake to be more like a spice cake with some carrots in it. So unlike most carrot cakes, I add more spices. If you don’t, feel free to stop with the cinnamon. I was easily able to divide this cake into two bowls and mix some ground walnuts into one bowl (for my son and his family) and some chopped dates and pumpkin seeds into the other for me. This cake only takes one bowl and is fairly easy to mix even for me with 2 rotator cuff tears.
First, preheat oven to 350 degrees. Grease and flour 2, 8″ baking pans (I used one square and one round so that I knew which was which!). In a medium-large bowl, combine:
3 tablespoons ground flax
7 tablespoons warm water (1/3 cup + 1 tablespoon)
Whisk to combine and then let sit for 5 minutes or so to form flax gel. When ready add to it:
1/3 cup avocado oil
1/4 cup maple syrup
Whisk or stir to combine and then add:
1 scant cup unsweetened fruit sauce (apple, pear, peach, oh pineapple would be good) [I actually only had 7/8 of a cup and it worked fine]
1/2 to 1 cup date sugar (depending on how sweet you want it)
3/4 teaspoon sea salt
1 1/2 teaspoons baking powder
1 1/2 teaspoons baking soda
1 teaspoon ground cinnamon
1/2 teaspoon ground allspice
1/2 teaspoon ground cardamom
1/4 teaspoon ground cloves
Stir or whisk to combine. Add:
3/4 cup non-dairy milk
Stir or whisk to combine (by now the whisk will be having a difficult time so use a hand mixer if necessary). Add:
1 cup grated carrots
1 1/2 cups all-purpose gluten-free flour
1 cup oat flour
Stir to combine adding another 1/4 cup of non-dairy milk if necessary. Stir in:
1/2 to 3/4 cup chopped walnuts, feel free to mix it up using chopped pumpkin seeds, sunflower seeds, and/or dates, chopped raisins, cranberries, or dried pineapple also work (Optional)
Spoon the batter equally between the two pans and bake for 40-50 minutes or until a toothpick inserted into the center comes out clean (I would actually bake it about 5 minutes more after the toothpick comes out clean). Don’t worry if it’s slightly overbaked since gluten-free baked goods take longer to cook than regular ones, it still comes out fine.
Remove from oven and let cool, on a cooling rack, for 15-20 minutes before removing from pan. Let cool completely before frosting or serving. For faster cooling, place in the refrigerator for about a half hour. Serves 8-12.
Vegan “Cream Cheese” Frosting
One just has to have cream cheese frosting on carrot cake! I’ve tried several nut-free, tofu-free recipes for vegan cream cheese and none of them worked very well until I found this one, delicious! Of course, if you don’t care for sweet potatoes, it may not be your cup of tea. It uses white flesh sweet potatoes which are starchier and not as sweet as the ones we’re used to here in the U.S. They can be called Japanese, Hannah, or Batata.
Wash, peel and dice:
1 large or 2 medium-sized white flesh sweet potatoes
Since we don’t want to add any liquid to the sweet potatoes, it’s very important that they are steamed rather than boiled. Steam until fork tender. Place in a small to medium bowl. Using a potato masher, mash and then measure out 2 cups.
Transfer the 2 cups to another medium bowl (or the same one if it used all the mashed potatoes). Add:
1/3 cup avocado oil
Juice from one lemon (about 2 tablespoons)
1 teaspoon white vinegar
1/8 teaspoon salt
There’s the basic recipe for vegan “cream cheese”. To make it into frosting, whip in using a hand mixer:
1/4 to 1/2 cup maple syrup, agave nectar, honey, etc.
1/2 teaspoon vanilla extract
Will frost two layers of a naked cake (no frosting on the sides).
One just has to have cream cheese frosting on carrot cake! I’ve tried several nut-free, tofu-free recipes for vegan cream cheese and none of them worked very well until I found this one, delicious! Of course, if you don’t care for sweet potatoes, it may not be your cup of tea. It uses white flesh sweet potatoes which are starchier and not as sweet as the ones we’re used to here in the U.S. They can be called Japanese, Hannah, or Batata.
Wash, peel and dice:
2 medium-sized white flesh sweet potatoes
Since we don’t want to add any liquid to the sweet potatoes, it’s very important that they are steamed rather than boiled. Steam until fork tender. Place in a small to medium bowl. Using a potato masher, mash and then measure out 2 cups.
Transfer the 2 cups to another medium bowl (or the same one if it used all the mashed potatoes). Add:
1/3 cup avocado oil (coconut would also work)
Juice from one lemon (about 2 tablespoons)
1 teaspoon white vinegar
1/8 teaspoon salt
There’s the basic recipe for vegan “cream cheese”. To make it into frosting, whip in using a hand mixer:
1/4 to 1/2 cup maple syrup, agave nectar, honey, etc. (or more to taste)
1/2 teaspoon vanilla extract
Will frost two layers of a naked cake (no frosting on the sides).
My husband loved these pickles. It was the only way I could get him to eat cucumbers so I made them often. It’s a quick and easy thing to do. The longest part of the process is peeling the cucumbers so feel free if the peels don’t bother you to leave them on. And it’s so variable – by simply changing the type of vinegar and herbs/spices used, the taste changes completely. I’ll give you some variations at the end of the basic recipe.
In a 3-cup bowl combine:
1/2 to 1 cup water, depending on how strong you want the pickle
1 cup vinegar (I use a blend of white and rice – a strong and a mild vinegar)
2 teaspoons date sugar
1/4 teaspoon alum (keeps the cucumbers crunchy)
1/2 teaspoon sea salt
Add:
6 mini cucumbers, sliced
That’s the basic recipe and they are very good just this way. I like to change it up though so think about adding the following, remembering that spices are always better once they’re a little roasted.
Variations:
1/2 teaspoon of: mustard seed, cumin seed, celery seed, coriander seed or just one of these
2 bay leaves
1/2 small onion, thinly sliced or several scallions, sliced
1 tablespoon of: fresh dill weed or 1 teaspoon of dried dill weed
1 tablespoon of: fresh tarragon or fresh rosemary or fresh thyme or fresh basil or parsley
Using all white vinegar makes for a very pungent pickle where you may want to increase the date sugar or even use a couple of tablespoons of honey or agave nectar
Using all rice vinegar will make a very mild pickle where the date sugar can be totally eliminated
As I said at the top, changing the vinegar, and there are plenty of them out there these days, will totally change the taste of these pickles so use the vinegars your family likes best
I do love zucchini, it’s one of my go to vegetables. It’s delicious and versatile. This recipe is so easy to make (if you have a mandoline) but not difficult if you don’t, just slice the zucchini as thin as possible with a knife. Makes 2 servings.
Wash and trim off the stem from:
10-12 baby zucchini*
Using a mandoline or sharp knife, slice lengthwise into strips, discarding the skin slices (unless you manage to find organic baby zucchini!). Place strips into a medium bowl and toss them with:
1 tablespoon vinegar (whatever your family likes)
Spray the air fryer tray with non-stick spray and place the strips in one layer into the tray (took me 2 batches to cook them all). Place in the air fryer at 375 degrees. If you don’t have an air fryer oven, cook in your regular oven at 375 degrees for approximately 10 minutes, turning once. Cook for 5-6 minutes before turning them over and cooking until they begin to get crisp, another 2-3 minutes. If they start to get too brown, remove them or they will taste bitter. Salt and season however you like – i.e., garlic powder, onion powder, cumin, coriander, etc.
*If you have a Trader Joes near you, they sell packages of baby zucchini. I used one package.
The Chicken Bible strikes again! I had a package of boneless, skinless chicken thighs and wondered, what am I going to do with these? So out came the Chicken Bible and this recipe struck my fancy. I love fried foods but don’t make them often because of the mess, all that fat and because they are especially unhealthy for diabetes. Nothing shoots up glucose levels more than fried foods. We’ve all got to indulge in something sinful now and again so I thought I’d give it a try. Turned out very easy to make, the only part I didn’t like was, of course, cleaning up after frying. If you have a deep frier use it instead of a skillet on the stovetop! Makes 2-3 servings.
First, make the marinade by combining in a medium bowl:
1/4 cup soy sauce substitute
2 tablespoons rice vinegar
1 tablespoon freshly grated ginger
1 tablespoon minced garlic
2 teaspoons date syrup
1/4 teaspoon sea salt
Whisk to combine before adding:
1 1/4 to 1 1/2 pounds (6-8) boneless, skinless chicken thighs, fat trimmed off and cut into 1″ wide strips*
Stir to combine chicken with the marinade. Let sit on the counter for about 30 minutes. While the chicken marinates, prepare the pans needed as well as the dredge. So, line two medium baking sheets with parchment paper, set one aside and place a drying rack on top of the second and place 2-3 layers of paper towels on top of the drying rack. Set aside. In a pie plate or large soup plate, place:
1 cup tapioca starch (cassaba flour, corn starch if you can have it, potato starch, or arrowroot would also wok)
1/2 teaspoon sea salt
1/4 teaspoon pepper
Whisk to combine and set aside until chicken is ready. When the chicken is done marinating, using tongs, pull out all the chicken from the marinade, letting any excess drip back into the bowl and place it in the tapioca starch mixture. Using your hands, coat each piece individually and place on the first baking sheet (the one with just the parchment paper), being sure to knock off any excess starch. Repeat until all the pieces are coated.Set aside the marinade for later use.
Next, in a 12″ skillet with high sides or a small Dutch oven, heat 2-3 inches of:
Oil (I used a mixture of olive and avocado but feel free to use your normal oil)
Be sure to also use a thermometer so that you can heat the oil to 375 degrees and keep it between 350 and 375 while cooking the chicken. While the oil heats, look over the chicken. If there is still patches of white starch, using a cooking brush (or spoon) brush with the marinade to moisten.
When the oil is to temperature, using the tongs, place individual pieces of chicken into the oil from back to front (place them in the oil away from you then towards you). Don’t overcrowd the oil. It took three batches to cook all my chicken. Cook about 4-6 minutes depending on thickness, turning over once. Place on the second baking sheet (the one with the paper towels) using either the tongs or a slotted spoon. Salt lightly as you remove them from the oil. Serve the chicken with lemon wedges – don’t squeeze the lemon on them until you serve them or they’ll get soggy! I served mine with some air fried zucchini squash slices – delicious. See recipe under side dishes.
*With the thigh skin side up (that’s the side that has the film over it), long side towards you, slice crosswise into 1″ strips. You should get about 4 slices per thigh. Don’t worry if some come out in triangles, cubes, etc., since some pieces will come off the main parts of the thighs.
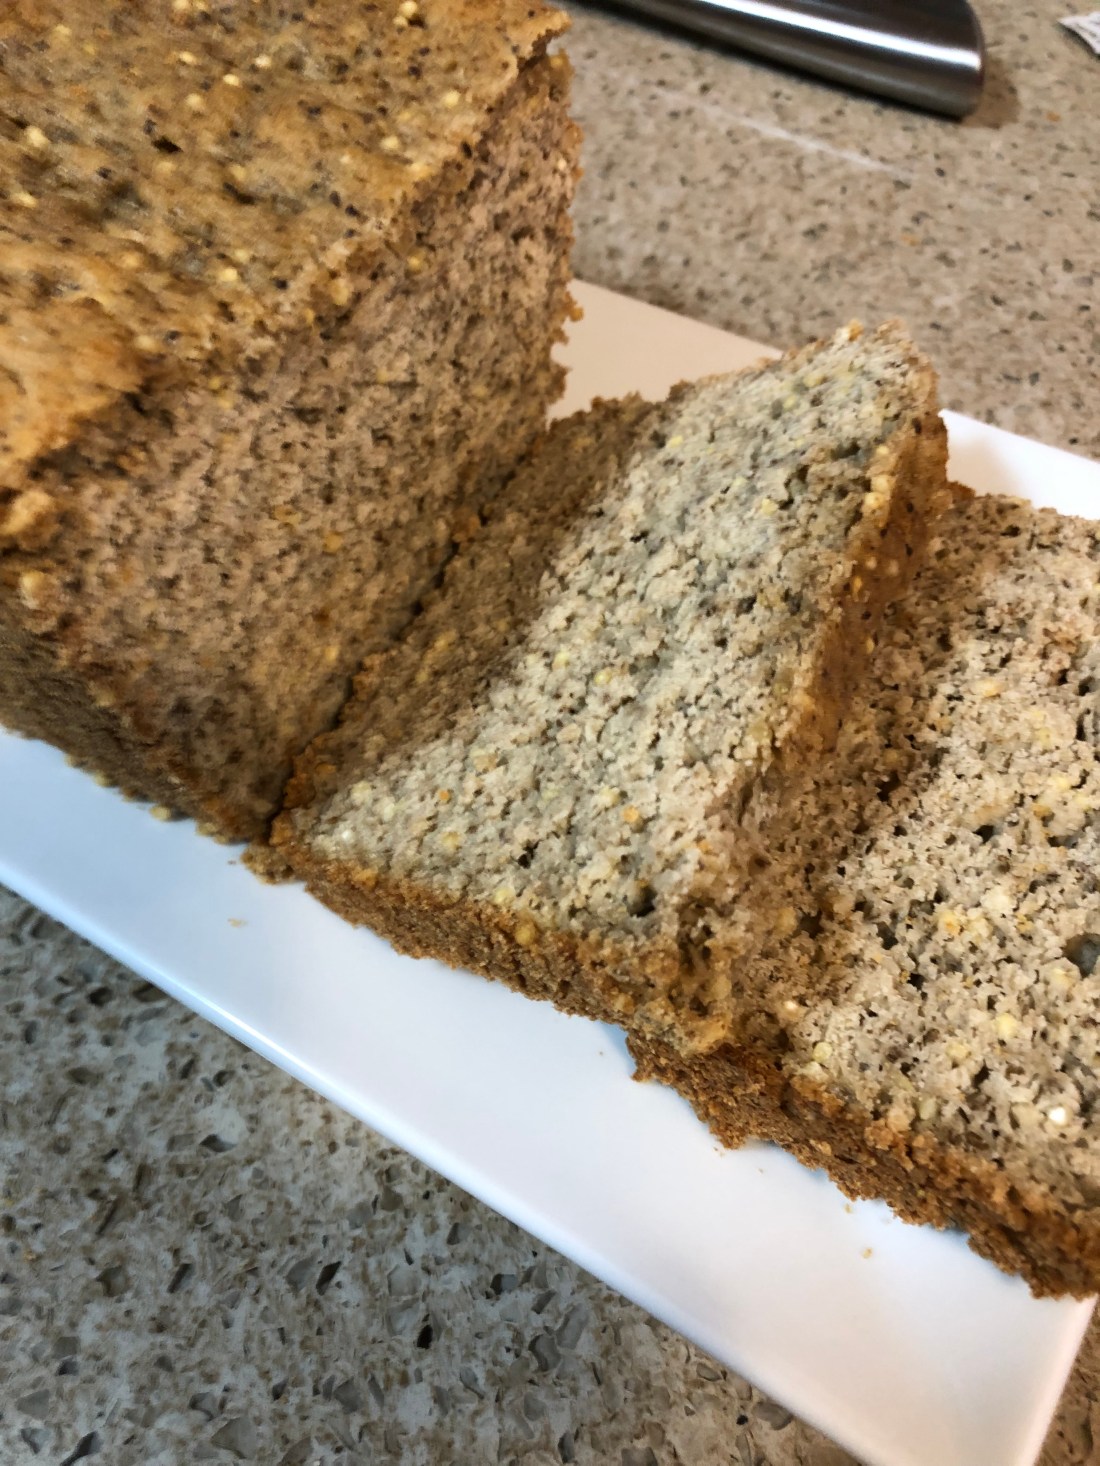
I’ve often said on this blog that I’ve been searching for a bread recipe that doesn’t turn out like a brick or is gummy. That’s very difficult when eggs aren’t included in the recipe. Flax gel and other egg substitutes just don’t seem to work well in breads. I may, however, have finally found the answer. Here’s a bread recipe that I’ve just made, raises very nicely, is very easy to make, even with the yeast. It’s really not that difficult to use yeast, the correct temperature to activate yeast is between 98 and 101 degrees so lukewarm like baby formula. And it tastes delicious!
Grease an 8×4″ loaf pan.In a 2-cup bowl, heat in the microwave for 40-45 seconds:
1 cup non-dairy milk
When you take it out, stir it a little then test it with your finger or put a drop on your wrist. It should be lukewarm, your body temperature so if you put a drop on your wrist, it shouldn’t feel hot or cold. If it feels cool, put it back in the microwave for 5-10 seconds more. If it feels too hot, stir with a metal spoon and whisk in:
2 teaspoons date sugar
This should help cool it down but test it again. If it already feels lukewarm on your wrist go ahead and add the date sugar along with:
2 1/2 teaspoons active dry yeast
Whisk in the yeast and set aside for 10-15 minutes. If your yeast/milk mixture doesn’t start bubbling (foaming) in the first 5 minutes, it’s no good, throw it out and start again.
While the yeast works, in a large bowl combine:
1 cup millet flour
1 cup oat flour
1/2 cup arrowroot
1/2 cup tapioca starch (or flour)
1/4 cup quinoa flour
1/4 cup whole millet (optional)
1 teaspoon baking powder
1/2 teaspoon baking soda
1/2 teaspoon sea salt
Whisk to combine, leaving a pit in the middle of the dry ingredients. In a small bowl combine:
5 tablespoons ground chia seeds
1 cup warm water (again test on your wrist for lukewarm)
3 tablespoons oil
2 teaspoons vinegar
Let sit for a couple of minutes (3 or 4). Add to the dry ingredients and then add:
the yeast mixture
the chia mixture
Stir to combine wet and dry ingredients but be careful not to overmix or your bread will be tough. Spoon into the prepared loaf pan, pushing down the dough to release any air bubbles and gaps along the sides of the pan. Set in a warm place for 40-50 minutes or until dough reaches the top of the loaf pan.* Preheat oven to 350 degrees. Bake the bread for 60 minutes. Remove and cool completely (3-4 hours at least) before cutting.
*I brushed the top of the loaf with avocado oil so that the top didn’t get dried out while rising. When I removed it from the oven, I brushed it again with the oil to soften the top crust which likes to crumble with this bread.