Garlic Boneless Chicken Thighs

I apologize for not having a photograph to go with this post. These got eaten up so quickly after I made them that I didn’t manage to get a photo. Nonetheless, this is worth the read. One of the quickest and easiest ways to cook boneless chicken thighs (you could also use boneless chicken breasts if you wanted but they might take a little longer if cooked whole). Prep and cook time is about twenty minutes. And it’s very versatile – substitute the listed herbs for a different flavor or serve it with different sides (I made mine with some Thai brown rice noodles that we all love, gluten-free of course). The sauce that cooks with the chicken coated the noodles for a delightful bite. Serves 4.

First, clean and dry:

1 1/2 to 2 pounds boneless skinless chicken thighs (about 6-8 depending on size)

Next, coat the thighs with the following mixture:

  • 1 teaspoon onion powder
  • 1 teaspoon garlic powder
  • 1/2 teaspoon dried thyme (or 1 teaspoon fresh chopped)
  • 1/2 teaspoon dried marjoram (or 1 teaspoon fresh chopped)
  • 1/2 teaspoon salt
  • 1/4 teaspoon black pepper
  • a pinch of cayenne pepper (optional)

Coat each thigh evenly on both sides. Heat a large skillet with 2 tablespoons olive oil over medium high heat. Add the chicken thighs, spread flat and cook for 5 minutes until golden and crispy. Flip over to other side and cook for 2-3 minutes. Remove the chicken to a plate (take the skillet off the heat while you do this so the oil doesn’t burn). Add:

  • 2 tablespoons garlic puree or minced garlic

Move pan back to the heat, reduce to medium and sauté until you can smell it, about 30-45 seconds. This is a good time to put a large pot of water on to boil if you plan on serving the thighs with a type of pasta. Add to the pan:

  • 1 cup chicken stock
  • 8 ounces of sliced mushrooms
  • 1/2 cup of frozen peas
  • half of a medium onion, diced
  • 3 stocks of celery, diced

Stir the contents of the pan, scraping up any browned bits from the bottom with a wooden spoon. Bring the stock and vegetables to a boil before adding the chicken back into the pan being sure to add any liquid that’s on the plate along with the chicken. Let mixture simmer and reduce for about five minutes until it’s reduced to about half. Add:

  • 1/2 cup non-dairy milk (or if you can have it, 1/2 cup white wine)*

Continue simmering until chicken is cooked which should only take a couple more minutes. Remove from the heat and taste for seasoning, add more salt and pepper if needed. Remove chicken to a plate and toss whatever pasta (or rice) into the sauce, top with the cooked chicken thighs and serve immediately. Sit back and watch it disappear!

*If you add wine instead of the milk, add with the stock and vegetables.
Mango Chicken Salad

Before I get to the recipe, I want to apologize to all my followers for the lack of posts the past several months. Mid-February was hectic with finishing packing up my apartment and then moving in with my son and his family. I finally unpacked the last of the boxes last week and feel at home once again. I’ve been collecting new recipes the past three months and will get them posted this coming week. But lets start with one of my favorite foods – chicken salad.

I eat a lot of chicken salads this time of year and I try to vary the flavors to make them more interesting. I alternate between vinaigrette and mayonnaise based salads. I’ve also changed them by doing a honey mustard vinaigrette, a creamy cole slaw dressing as well as an avocado one.

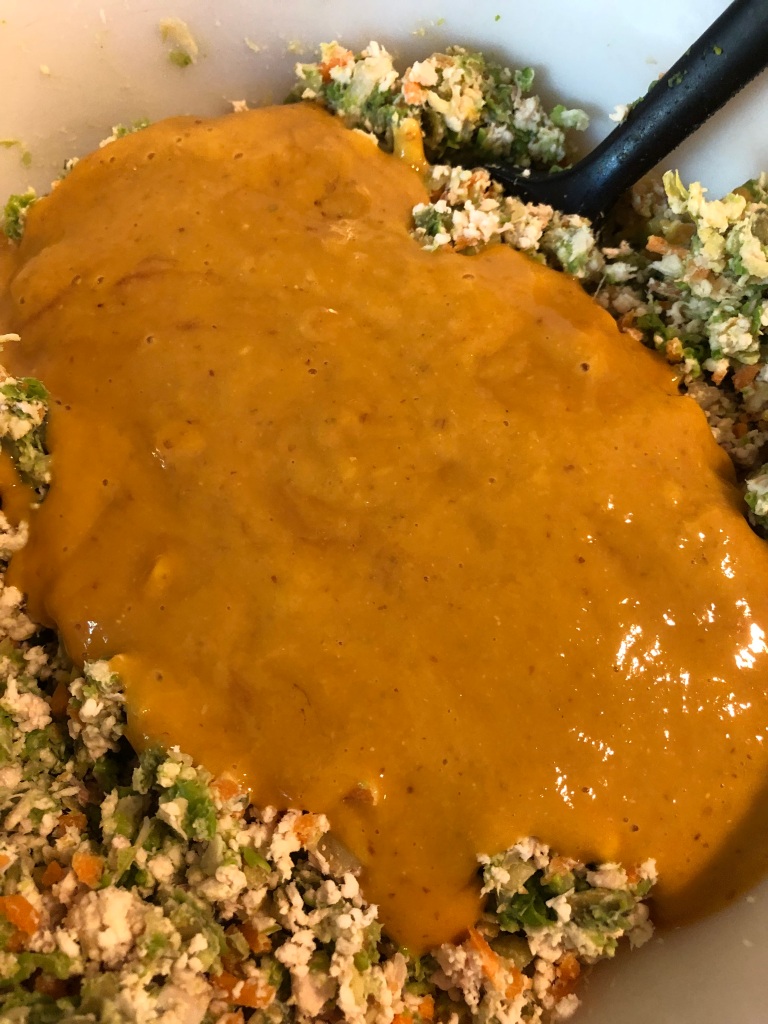
Several days ago while at my local market, I found some very ripe mangos and wondered how they might taste in my chicken salad. So I peeled and cut them up in my food processor, added the vinaigrette ingredients and tried mixing a small amount into a little chicken salad mix. Delicious!

If you haven’t tried mango, think of a peach on steroids. But be sure they are ripe or their sweetness doesn’t come through. Right now the yellow variety is in season so look for one that is completely yellow and getting soft to the touch. When ripe, the skin will pull right off once started with a knife.

Start either with the chicken or the mango dressing, either way works.

For the mango vinaigrette, in the bowl of a food processor or blender add:

2 peeled and sliced mango (not the seed of course)

1/4 cup olive or avocado oil

2 tablespoons mustard (whatever kind your family prefers)

2 tablespoons date syrup

1/4 cup rice vinegar (if using a different vinegar, probably use less since the rice is very mild)

1/2 teaspoon salt

1/4 teaspoon pepper

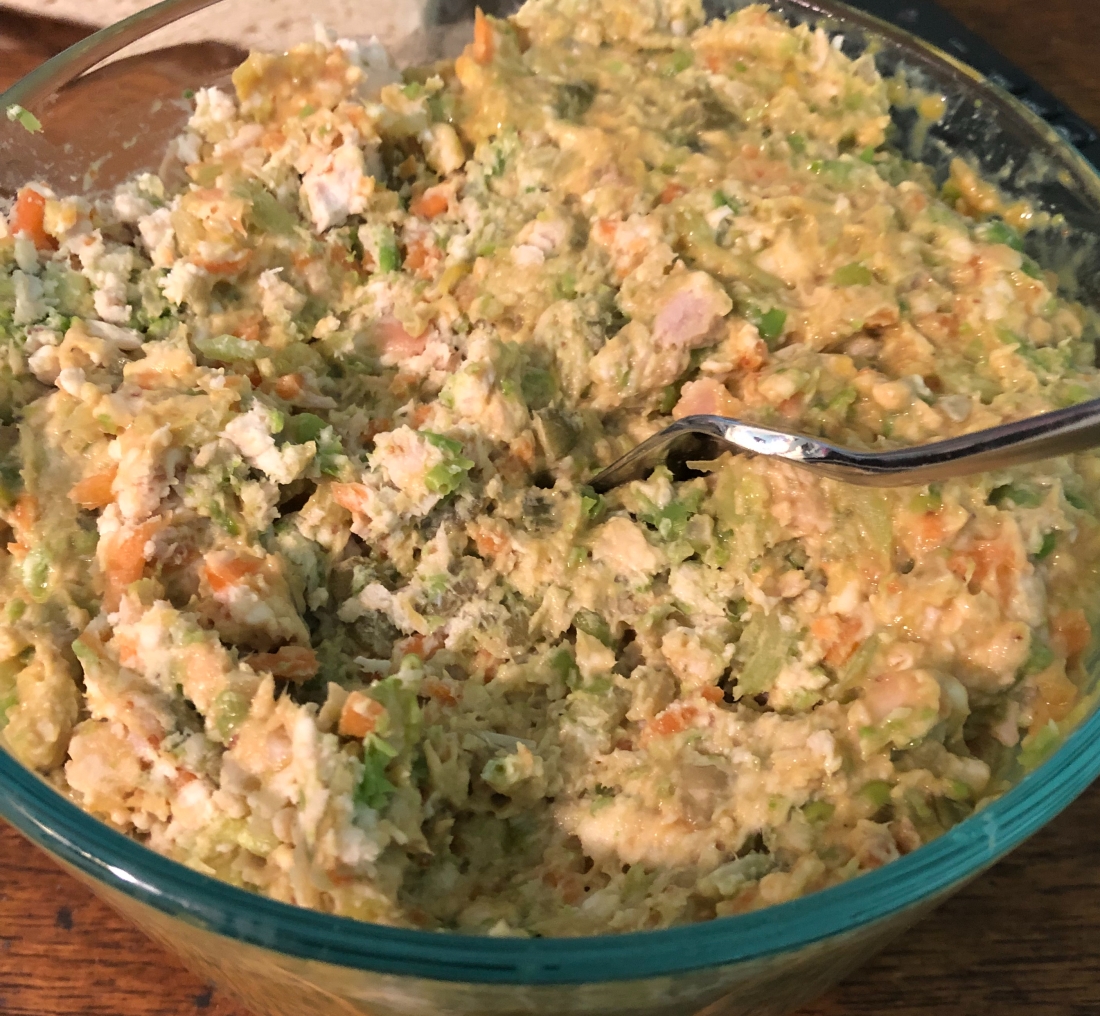
Blend until no lumps of mango remain. Makes about 1 1/2 cups of vinaigrette. That’s enough to make about five cups of chicken salad. I used a rotisserie chicken that was missing it’s wings and one thigh and leg.

About 4 cups chicken

3-4 stalks celery

1/2 cup pumpkin seeds (or another nut if you can have them)

1/2 cup shredded carrot

1/2 cup cooked peas

I like to grind the chicken, celery, pumpkin seeds and carrots in the food processor which makes a smoother salad. It’s a trick a friend who worked for a caterer taught me. Easy then to stuff it into a hollowed out tomato. It also makes a creamier sandwich.

Makes approximately 6 cups of salad.

Asian Style Lemon Chicken with Vegetables

One of my favorite Italian dishes is Lemon Chicken. I also love Asian chicken and looked on-line for a recipe but of course, with all my allergies, I didn’t find one that would work. So here’s my own recipe. I added a bunch of vegetables so that it’s a balanced meal. It can be served with either rice or noodles. Serves 4 generously.

Cut into chunks:

1 1/2 pounds boneless, skinless chicken breasts

Put the pieces into a large food storage bag and add:

1/4 cup arrowroot

Shake to cover the chicken completely with the arrowroot, adding a little more if necessary. You may need to separate the pieces during this process to be sure they are completely covered with the arrowroot. Let sit in the refrigerator for about a half hour. In a large skillet, heat over medium heat:

2 tablespoons olive oil

1 tablespoon sesame oil

When hot but not smoking, saute:

1 medium onion, diced

6-8 stalks celery, sliced on the diagonal (I use celery hearts so if using a whole celery, you might use less stalks)

8 ounces of sliced mushrooms

3/4 cup grated carrot (or 2 carrots thinly sliced on the diagonal)*

Reduce heat to low medium and continue to saute until the onion is translucent. While the vegetables cook, combine in a 3-4 cup bowl:

grated lemon rind from 2 lemons

1/2-2/3 cup fresh lemon juice (about 2 1/2 lemons)

1 cup chicken stock

1/4 cup date sugar (or agave or coconut nectar, honey)

1 tablespoon garlic puree (or 2 teaspoons minced garlic)

2 tablespoons arrowroot

Whisk until well combined and set aside. Heat in a deep skillet over medium high heat:

2-3 inches oil (I use a combination of olive and avocado oil)

Add to the vegetables:

1 cup bean sprouts (I used canned and drained the liquid before adding them)

1 can chopped or sliced water chestnuts

1 can sliced bamboo shoots

Stir to combine and add the sauce mixture, after whisking again. Stir as the sauce thickens, about 1 minute. Reduce heat to simmer or remove from heat. In 2 batches, fry the chicken pieces being sure to separate them into individual chunks before frying. Fry until browned on each side, about 4-5 minutes depending on the size of the pieces. You will probably need to reduce the heat to medium as the frying continues or the oil will get too hot to completely cook the chicken before it’s too brown on the outside. Drain each batch on paper towels and salt before adding to the vegetable mixture. After stirring in the second fried batch of chicken, the dish is ready to serve and should still be hot but if it’s cooled, reheat for 1-2 minutes over medium. Serve over rice or noodles. Garnish with sesame seeds and/or sliced scallions.

*Of course, other vegetables can be used such as bok choy, pea pods, string beans, etc.

Herbed Baked Chicken Breasts

This is a tasty, easy and quick recipe. Feel free to change up the herbs you use so that you get the flavors your family prefers. I like thyme and marjoram so those are the two I used but the paprika and garlic powder are staples for this recipe. It only takes a couple of minutes to get the herb rub together and cut the breasts in half (lengthwise) so total, this recipe takes less than a half hour before ready to eat.

First, preheat oven to 425 degrees. Line a baking sheet with parchment paper. Dry off:

2 chicken breasts, about 6-8 ounces each

Using a long knife, hold a breast upright against the palm of your hand and cut in half to produce two approximately equal portions of chicken breast. Repeat with the second breast. Next place the breasts on the prepared baking sheet and sprinkle with:

1-2 tablespoons olive oil.

Rub to coat the breast pieces evenly. Wash your hands. Next, in a small bowl combine:

1 teaspoon paprika

1 teaspoon dried thyme

1/2 teaspoon dried marjoram

1/2 teaspoon garlic powder

1 tablespoon date sugar (or coconut sugar)

3/4 teaspoon sea salt

1/2 teaspoon ground black pepper

Sprinkle the herb mix on one breast at a time and rub to coat. Repeat until all pieces are covered on both sides. I sprinkled all the breasts at once so by the time I got to the third one, the herb rub was a paste instead of dry. That’s why I suggest you sprinkle the rub on one piece at a time! Bake for 15-20 minutes, or until internal temperature reaches 165 degrees. The time needed will depend on the thickness of the breast pieces. My pieces were about a 1/2″ thick and took around 16 minutes. Don’t overcook or the breasts will be dry. Be sure to let the meat rest for about 5 minutes before cutting. Serves two generously.

Honey Garlic Chicken Wings

I’ve posted other wings recipes. This one is slightly different because it mixes a little tomato paste into the soy sauce substitute base along with some pureed garlic (find it in grocery store next to minced garlic in the Ethnic Foods aisle; Emperor’s Kitchen has an organic one). It also omits any coating, other than spices, on the wings themselves so no extra carbs from flour or breadcrumbs. Added to the delicious flavor and the fact that they take only a couple of minutes to prepare and a half hour to 40 minutes to bake, they can’t be beat!

In a gallon food storage bag combine:

up to 3 pounds split chicken wings

1 teaspoon paprika (sweet or smoked, whichever your family prefers)

1 teaspoon onion powder (NOT salt)

1/2 teaspoon sea salt

1/8 teaspoon ground black pepper)

Press the air from the bag before sealing, seal the bag and then massage the spices into the wings. In a small bowl mix together:

1/4 cup soy sauce substitute (see recipe under sauces)

2 tablespoons honey

1 tablespoon tomato paste

1/2 teaspoon sesame oil*

1 teaspoon pureed garlic

1/8 teaspoon Garlic Chili Sauce (OPTIONAL)

Add half to two-thirds of the sauce to the bag and shake to coat all the wings. Place on a baking sheet lined with parchment paper (be sure there’s room between each wing) and bake at 400 degrees for 15-20 minutes. Remove and brush with the remaining sauce and turn the wings over so that they brown on both sides. Bake for another 15-20 minutes (depending on size, larger may need a few more minutes) and serve. Garnish with sesame seeds, sliced scallions or chopped parsley.

*TIP: This can be omitted for totally oil free wings. Pour your 1/2 teaspoon of sesame oil into the tablespoon (or quarter cup measure) that you’ll use for the honey and swish it around to coat. This will let the honey slip right out.

You can find the recipe for my Cole slaw under Soups and Salads.

Chicken with Eggplant and Zucchini

My search for tasty and easy chicken recipes has landed another one! This one doesn’t come from the Chicken Bible but is a combination of a recipe I found on-line and what I had in my refrigerator. Once everything is peeled and diced, including the chicken, it’s so simple to put together. Planning ahead is necessary with this recipe however since the chicken must be marinated for at least an hour in the refrigerator after dicing.

First, mix together the marinade in a gallon storage bag or large bowl:

3 tablespoons extra virgin olive oil

3 tablespoons fresh lemon juice

1 tablespoon minced garlic (about 2 cloves)

1/4 teaspoon salt

1/8 teaspoon ground black pepper

Then dice up:

2 skinless, boneless chicken breasts

Add to the marinade, and after closing the bag, swish around the chicken to make sure it’s completely covered in the marinade. If you want a stronger lemon flavor, add:

Grated rind of 1 lemon

While the chicken is marinating, prepare the vegetables:

4-6 small cipollini onions, peeled and quartered*

1 medium zucchini, washed and diced

1 pound eggplant (any type will work, I used 4 small graffiti eggplants), peeled and diced

1 clove garlic (about 1 1/2-2 teaspoons minced)

When the chicken is almost ready, heat a 10″ skillet over medium heat with:

1 tablespoon olive oil

When the oil is hot, add:

onions and garlic

Cook for 2-3 minutes just until the onions turn translucent. Then add the:

Zucchini

Eggplant

And cook another 5-7 minutes until the vegetables are softened. Remove to a bowl and set aside. Put the skillet back over the heat and add the:

Marinade and chicken mixture

Cook over medium heat for 3-5 minutes until chicken is cooked through and sauce is beginning to reduce. Stir the vegetables back into the skillet and serve immediately. Serves 4-6.

*Don’t have cipollini onions and your local supermarket doesn’t carry them? They are small and slightly sweet becoming much sweeter after cooking. So feel free to use a different sweet onion in their place but cut smaller.

Thai Chicken Tenders

My husband loved chicken tenders. I think more because they’re usually deep fried than for their texture which I find generally to be stringy because they’re often overcooked. I found an adaptable recipe online so I decided to give them a try. It’s quite an easy recipe to make but I’d suggest you make the sauce first so the tenders don’t sit around after frying waiting for the sauce. Like most things that are fried, once dipped in the sauce, they will quickly lose their crunch so serve immediately after you finish preparation. Makes 2 servings.

First, put the oil on to heat. In a deep 12″ skillet heat over medium high heat:

approximately 3/4″ of oil (I used a mix of olive and avocado oil)

Next prepare the sauce. In a small saucepan, whisk together:

1/3 cup soy sauce substitute

1 tablespoon date sugar

1/2 tablespoon sriracha sauce

1 teaspoon pumpkin seed butter (or any butter you like – sunflower, peanut, tahini, etc.)

1 teaspoon grated ginger (optional)

2 tablespoons water (more may be added if the sauce gets too thick)

1-2 teaspoons arrowroot (I used 2 and the sauce got much too thick)

1 teaspoon minced garlic or garlic puree

Cook over medium heat until thickened. I had to add about 1/4 cup of water to thin mine out and I think now that I probably should have made it even thinner so that the sauce wasn’t as thick on the tenders but I didn’t mind it since the sauce is so delicious!

Next coat ONE POUND of chicken tenders. Mix together in a shallow dish:

1 cup gluten-free panko bread crumbs

1/4 teaspoon sea salt

1/8 teaspoon ground black pepper

1/4 teaspoon paprika (or if you want them really spicy, use red pepper flakes instead)

In a separate shallow dish add:

1/2 cup non-dairy milk

1 teaspoon rice vinegar

Dip each tender into the milk to coat and then into the crumb mixture. Gently place in the oil that should now be at 350 degrees (after you add the tenders if the oil is still at temperature, reduce heat from medium high to medium). Cook on the first side for approximately 3-4 minutes before turning and browning on the other side for another 2-3 minutes or until firm. Remove from fat. Be sure not to crowd the tenders in the skillet. Drain on paper towels. When all the tenders are fried, dip each one into the sauce making sure to coat evenly. Serve immediately. Garnish with fresh cilantro or green scallions.

I know, I know, more brown food. But as Anne Burrell says “Brown foot GOOD!”

Cucumber Boats

It’s getting very hot here in Minnesota, will hit the mid-90s this coming week. I wanted an easy, lighter meal and had seen cucumber boats on-line stuffed with tuna salad. These work best with regular cucumbers but I generally buy either the English or the mini cukes so that’s what I used. If you also use the mini cucumbers, pulse the salad in the food processor for a few seconds to grind it up. It fits in the smaller boats much better that way. Any kind of salad will do – I made some curried chicken salad but tuna would also work.

First thing, prepare the salad:

1 rotisserie chicken, meat removed from the bones and pulsed in the food processor for a few seconds

4 stalks celery, chopped

1/4 to 1/2 cup pumpkin seeds (or walnuts if not allergic)

Mix the dressing in a separate bowl:

1 to 2 tablespoons green curry paste

1/2 teaspoon sea salt

1/4 teaspoon ground black pepper

1 cup vegan mayonnaise (if not allergic to eggs, feel free to use any mayonnaise)

2 teaspoons mustard

1 teaspoon to 1 tablespoon sriracha (optional)

1 tablespoon lemon juice

1/2 teaspoon garlic granules

1/4 cup dill pickle relish (optional)

Pour the dressing over the chicken mixture and stir to incorporate. Salad is ready. Next, peel and cut lengthwise:

12 mini cucumbers (probably 2 regular sized cucumbers)

Using a small spoon, remove the seeds to create the “boats”. Fill with the salad and serve. May be garnished with sliced scallions, chopped chives or chopped parsley.

Chicken and Rice with Caramelized Onions and Cranberries

This recipe is quite involved and takes some time but it’s not a difficult dish to make. And to be sure, every minute spent on this is well worth the effort! The herbs and spices used amp up the flavor profile and adding some freshly grated lemon zest and lemon juice at the end takes it over the edge! Rather than adding the lemon juice at the end, some sliced lemons on the side would also work.

First, peel, cut in half and then thinly slice:

2-3 medium-sized sweet onions

If you don’t have sweet onions, add 1 teaspoon date sugar when you cook them. Let them sit while heating a medium-sized Dutch oven over medium heat with:

2 tablespoons olive oil

When the oil is shimmering add:

1 1/2 to 2 pounds bone-in chicken thighs or boneless, skinless chicken breasts

that are seasoned with:

1/2 teaspoon sea salt

1/4 teaspoon pepper

If using skin-on, bone-in thighs, cook skin side down. Loosely arrange chicken in pan (may take more than one batch). Brown on all sides, about 6-8 minutes. Remove to a plate. Drain all but 2 tablespoons oil from the pan before adding the onion slices. Reduce heat to medium low and cook, stirring frequently until well caramelized (browned). If not using sweet onions, here’s where to add the:

1 teaspoon date sugar

It can take 25-30 minutes to caramelize the onions because they need to cook slowly so that they don’t burn, we want them browned – caramelized, not burned. Once the onions are ready, add to the pot:

4 garlic cloves, minced (about 4 teaspoons minced garlic)

2 teaspoons freshly grated ginger (or 1/2 teaspoon dried ginger)

1 teaspoon fresh thyme (or 1/4 teaspoon dried thyme)

1/2 teaspoon ground coriander (or cardamom, nutmeg, or allspice)

1/2 teaspoon ground cumin

1/8 teaspoon saffron threads, crushed

Sauté for about 30 seconds until the herbs and spices are fragrant before adding:

6 ounces sliced mushrooms (Optional, peas would also work)

2 cups chicken stock or bone broth

the browned chicken pieces and any juices on the plate

If using skin-on thighs, be sure the browned side is up. Cover and let simmer for 20 minutes. Add to the pot:

1 1/2 cups uncooked rice*

1/3 cup dried fruit (I used cranberries but raisins or dried cherries would also work)

Stir in the rice and fruit, bring to a boil, reduce heat to low, cover and cook for another 30 minutes or until rice is tender and chicken is cooked. Most of the liquid should be gone from the pot so be careful not to burn the dish. Remove the chicken from the pot, moving the pot off the heat and re-cover so that it stays hot. Remove skin if using skin-on chicken and let sit for 8-10 minutes before slicing the meat (and removing the bones if using bone-in chicken). Add the chicken back into the pot along with:

1/2 teaspoon lemon zest

1 tablespoon juice

3 tablespoons fresh cilantro or parsley (Optional)

Stir to combine. Reheat until the chicken is heated through and serve. Serves 4-6.

*I used pre-cooked brown rice in my dish so I cooked the chicken 30 minutes before adding the frozen rice and then cooked it only an additional 10 minutes.

Since I don’t care for cilantro and don’t think much of parsley either, I sprinkled some green onions on top of my dish.

Easy Karaage (Japanese Fried Chicken)

The Chicken Bible strikes again! I had a package of boneless, skinless chicken thighs and wondered, what am I going to do with these? So out came the Chicken Bible and this recipe struck my fancy. I love fried foods but don’t make them often because of the mess, all that fat and because they are especially unhealthy for diabetes. Nothing shoots up glucose levels more than fried foods. We’ve all got to indulge in something sinful now and again so I thought I’d give it a try. Turned out very easy to make, the only part I didn’t like was, of course, cleaning up after frying. If you have a deep frier use it instead of a skillet on the stovetop! Makes 2-3 servings.

First, make the marinade by combining in a medium bowl:

1/4 cup soy sauce substitute

2 tablespoons rice vinegar

1 tablespoon freshly grated ginger

1 tablespoon minced garlic

2 teaspoons date syrup

1/4 teaspoon sea salt

Whisk to combine before adding:

1 1/4 to 1 1/2 pounds (6-8) boneless, skinless chicken thighs, fat trimmed off and cut into 1″ wide strips*

Stir to combine chicken with the marinade. Let sit on the counter for about 30 minutes. While the chicken marinates, prepare the pans needed as well as the dredge. So, line two medium baking sheets with parchment paper, set one aside and place a drying rack on top of the second and place 2-3 layers of paper towels on top of the drying rack. Set aside. In a pie plate or large soup plate, place:

1 cup tapioca starch (cassaba flour, corn starch if you can have it, potato starch, or arrowroot would also wok)

1/2 teaspoon sea salt

1/4 teaspoon pepper

Whisk to combine and set aside until chicken is ready. When the chicken is done marinating, using tongs, pull out all the chicken from the marinade, letting any excess drip back into the bowl and place it in the tapioca starch mixture. Using your hands, coat each piece individually and place on the first baking sheet (the one with just the parchment paper), being sure to knock off any excess starch. Repeat until all the pieces are coated. Set aside the marinade for later use.

Next, in a 12″ skillet with high sides or a small Dutch oven, heat 2-3 inches of:

Oil (I used a mixture of olive and avocado but feel free to use your normal oil)

Be sure to also use a thermometer so that you can heat the oil to 375 degrees and keep it between 350 and 375 while cooking the chicken. While the oil heats, look over the chicken. If there is still patches of white starch, using a cooking brush (or spoon) brush with the marinade to moisten.

When the oil is to temperature, using the tongs, place individual pieces of chicken into the oil from back to front (place them in the oil away from you then towards you). Don’t overcrowd the oil. It took three batches to cook all my chicken. Cook about 4-6 minutes depending on thickness, turning over once. Place on the second baking sheet (the one with the paper towels) using either the tongs or a slotted spoon. Salt lightly as you remove them from the oil. Serve the chicken with lemon wedges – don’t squeeze the lemon on them until you serve them or they’ll get soggy! I served mine with some air fried zucchini squash slices – delicious. See recipe under side dishes.

*With the thigh skin side up (that’s the side that has the film over it), long side towards you, slice crosswise into 1″ strips. You should get about 4 slices per thigh. Don’t worry if some come out in triangles, cubes, etc., since some pieces will come off the main parts of the thighs.

More brown food! Can’t seem to get away from it.