Pumpkin Bread Pudding

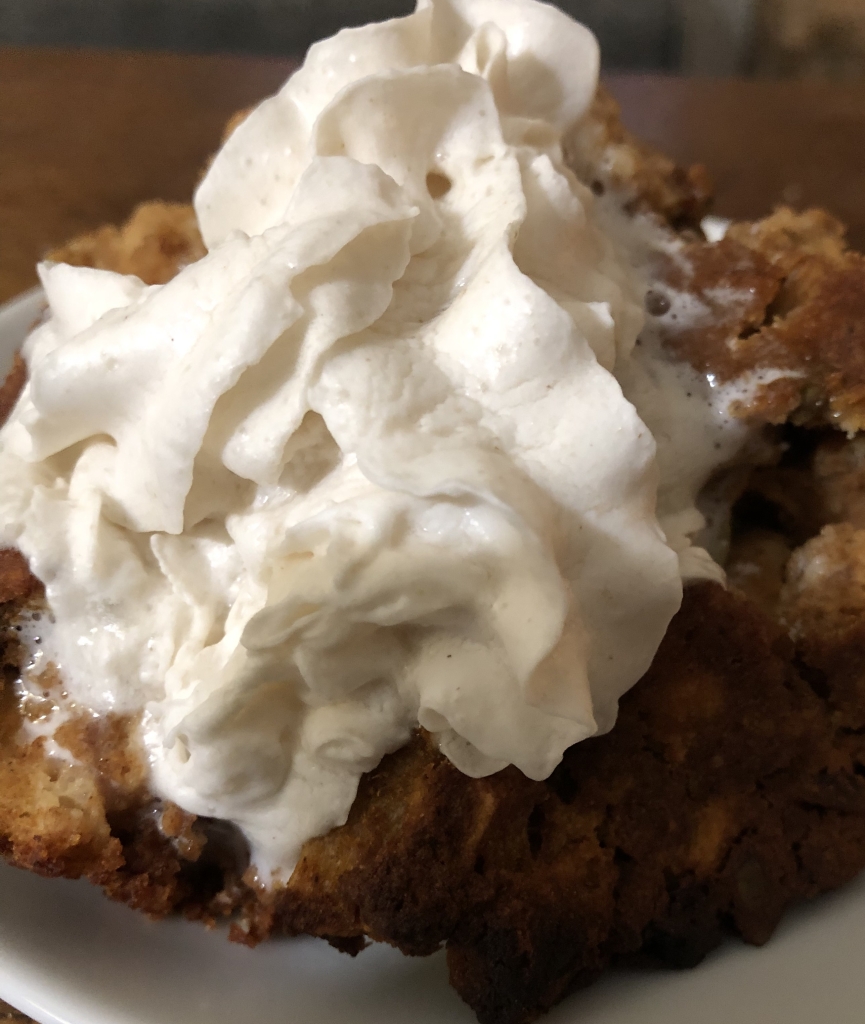
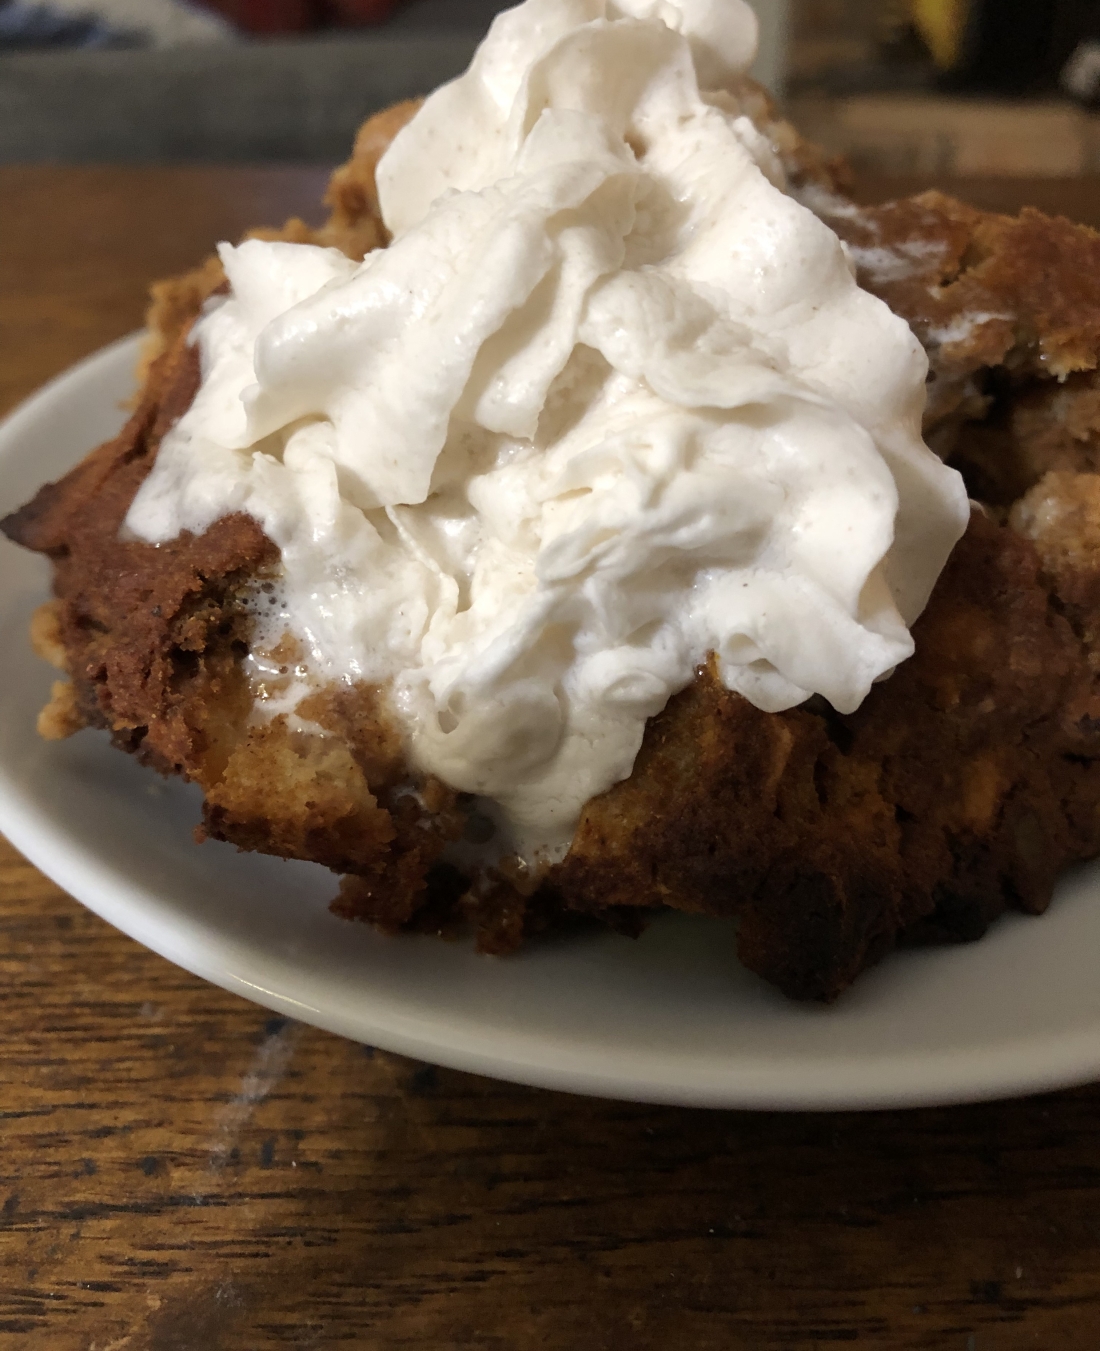
I remember my mother making chocolate bread pudding, my father’s favorite, when she had stale bread. That usually happened in the fall and winter months since bread pudding really is a heavy dessert that wouldn’t go well during warmer months. Yet this gluten-free bread pudding I found to be much lighter than what I remember. I haven’t had or made bread pudding in years although it’s come to my attention a lot in recent months watching bakers make a variety of bread puddings on the Food Network. And of course, there was a long stretch when bread just wasn’t a part of my diet since I wasn’t particularly fond of those bricks of rice bread that crumbled if you tried to eat them and weren’t really that tasty. But gluten-free breads have come a long way in the last several years. I hope you enjoy this as much as my family did! Feel free to change up whatever you need to for your family’s tastes. For example, if nuts are in your diet, chopped walnuts or pecans would work instead of the pumpkin seeds. And raisins or currants can be substituted for the dried cranberries. Serves 8-12 depending on serving size.

Preheat oven to 350 degrees. Grease the bottom and sides of a 9×15″ baking pan. In a large bowl whisk to combine:

  • 1 cup date sugar (or coconut; syrups would work as well)
  • 1 teaspoon ground cinnamon (or allspice)
  • 1 teaspoon ground nutmeg
  • 1 15ounce can pumpkin puree
  • 1 tablespoon baking powder (because we’re not adding any eggs)
  • 2 tablespoons arrowroot
  • 1/4 teaspoon salt
  • 1/3 cup pumpkin protein powder

Add:

  • 3 cups non-dairy milk (anything except soy)
  • 1 teaspoon vanilla extract

Whisk until smooth before adding:

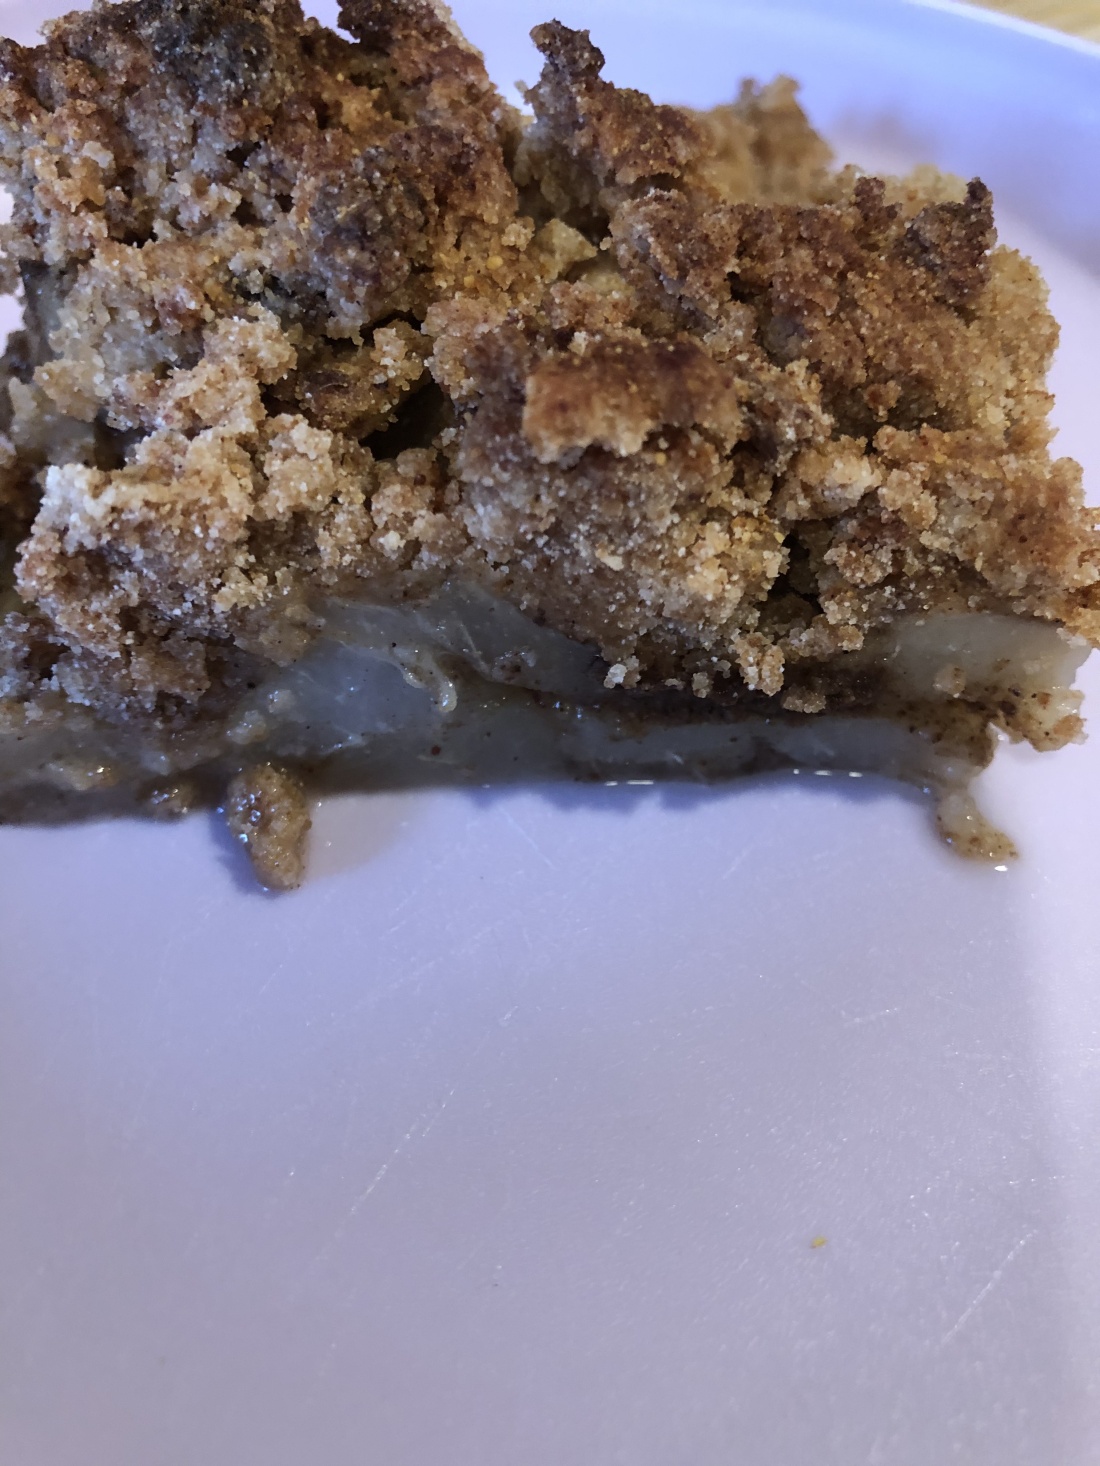
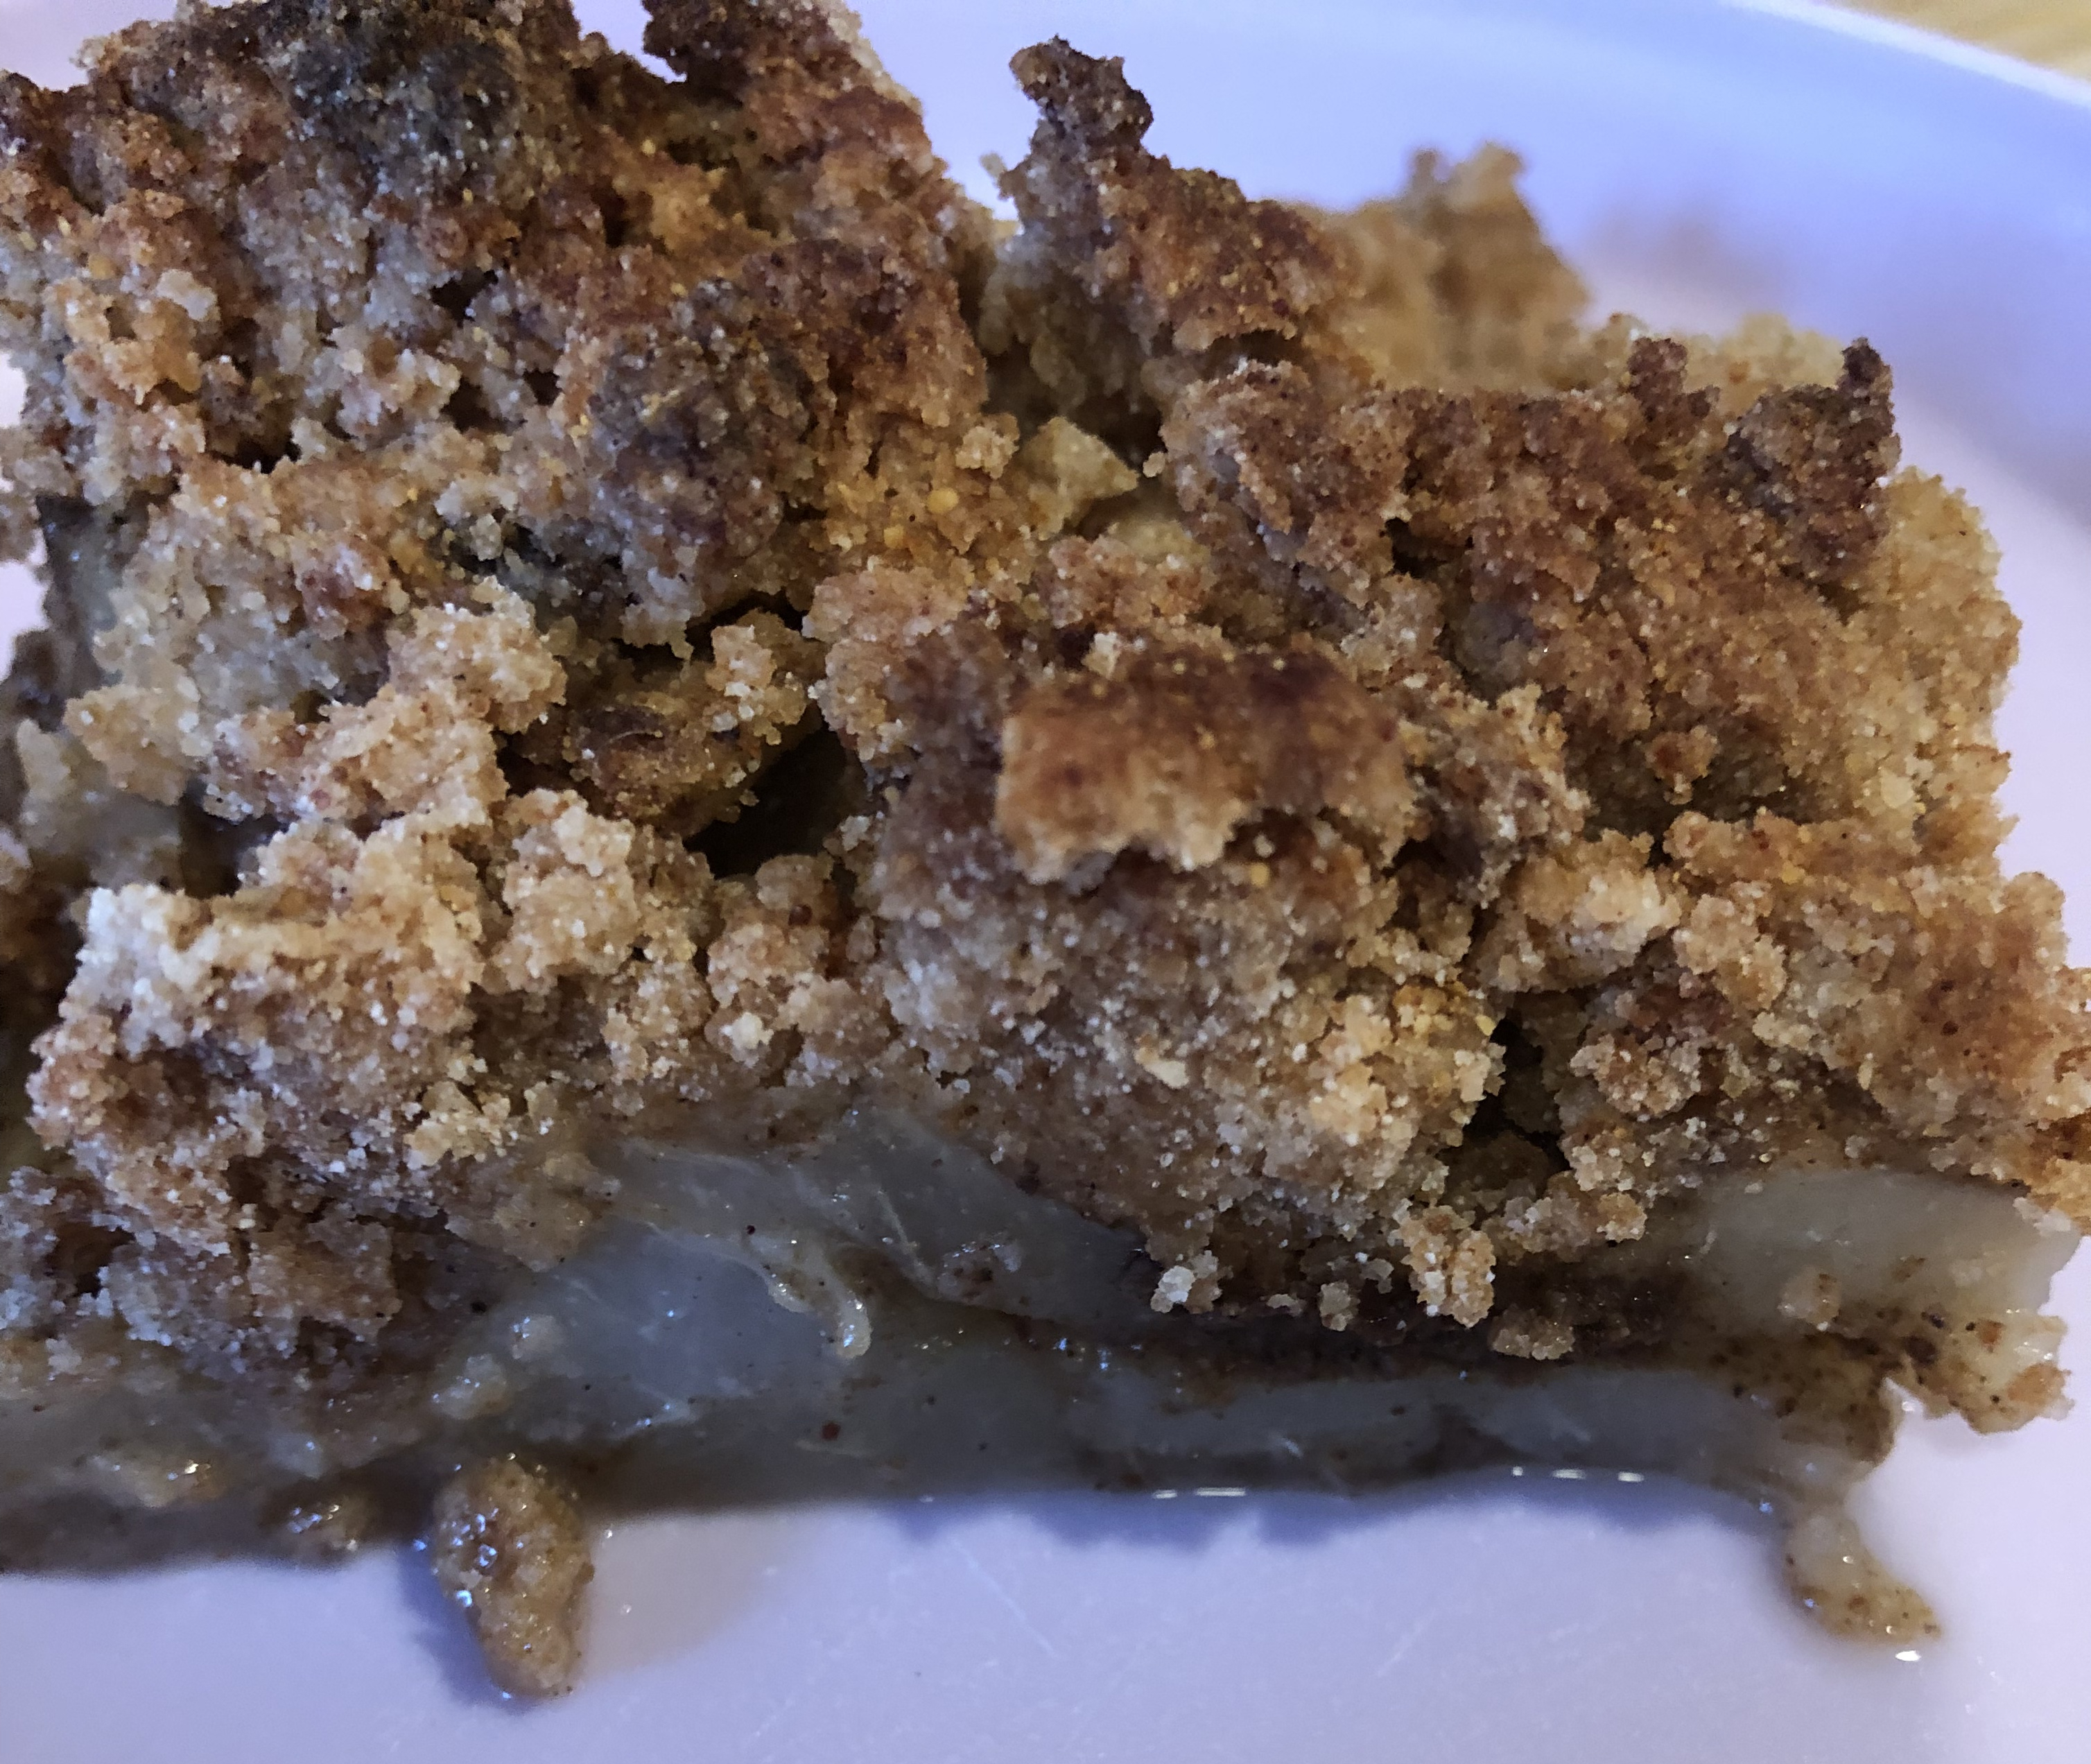
  • 6 cups diced stale bread (I used an entire 8 ounce loaf, 12 slices)
  • 1/2 cup pumpkin seeds
  • 1/2 cup dried cranberries

Stir to combine and refrigerate for at least 15 minutes. I let mine sit in the fridge for almost 2 hours before I got around to baking it. Spoon the mixture into the prepared pan and bake 50-60 minutes or until a toothpick inserted in the middle comes out clean. Let stand at least ten minutes before serving. Serve warm with your family’s favorite “nice” cream or non-dairy creamer if desired. Refrigerate any leftovers.

Swedish Fruit Pie

I was looking on the internet the other day for alternatives to pumpkin pie for Thanksgiving and found this using apples. I think it would be excellent with most fruits. It’s more like what we’d call in the United States a crumble. Easy to make and tasty, the most difficult part is peeling and cutting up the fruit. I used pears but apples, peaches, plums, figs, raspberries or blackberries, would work very well. And any combination of spices that your family likes would work as well as the three I used, cardamom, allspice, or ginger for example.

First, preheat oven to 350 degrees then peel and cut up:

  • about 2 pounds of fruit (4 cups, I used four large pears)

Try to make the fruit all the same size so it cooks evenly. Toss the fruit with a mixture of:

  • 1 tablespoon date sugar (or any granulated sugar you like)
  • 1 teaspoon cinnamon
  • 1 teaspoon nutmeg
  • 1/4 teaspoon cloves

Lightly grease a 9″ pie plate then pour in the fruit. In the same bowl as you had the fruit, mix together:

  • 3/4 cup melted vegan butter or avocado oil
  • 1/2 cup granulated sugar (any kind)
  • 1/4 cup brown sugar (again I used date)
  • 1 tablespoon rice vinegar
  • 1 teaspoon vanilla

Whisk to combine until the sugar is dissolved. If you can use eggs, feel free to substitute 1 egg for the vinegar (be sure to cool the vegan butter before adding the egg). Once combined, add the following ingredients which you’ve sifted together:

  • 1 cup all-purpose, gluten-free flour
  • 2 teaspoons baking powder (if you used an egg reduce this to 1/2 teaspoon)
  • 1/4 teaspoon salt

Stir to mix thoroughly, mixture will be thick and almost crumbly if you didn’t use the egg. Spread over the fruit and then sprinkle with another teaspoon of granulated sugar. Bake for 45 to 50 minutes until crust is fully cooked. Let cool before serving for easy cutting. Can be topped with any non-dairy cream or whip.

Pear and Blackberry Crumble

Sorry that I’ve not been able to post new recipes for the last several months. Early in July, I fell and severely injured my left leg and was bedridden for almost six weeks. Then, earlier this month my doctor discovered several basal cell carcinomas; one on my right arm and the other on my nose. So I’m in the midst of dealing with that.

One way I’ve often dealt with cheering myself up is with food which is probably one of the reasons I now suffer from so many allergies and sensitivities. Today, I put together a crumble using pears along with what I think is it’s perfect pairing – blackberries. Easy to do, don’t even need a mixer; just a couple of bowls and a mixing spoon. And oh so delicious and much healthier than, oh say, pie or cake.

First, place a piece of parchment paper in the bottom of an 8″ baking pan (square works best). Preheat oven to 350 degrees. In a medium mixing bowl combine:

  • 3-4 slightly unripe pears, peeled then sliced or diced
  • 1/2 pint blackberries
  • 2 tablespoons all-purpose gluten-free flour
  • 1 teaspoon spice – cinnamon, nutmeg, allspice, etc., whichever you like best
  • Dash of sea salt (about 1/8 teaspoon)

Mix to combine. In the second medium size bowl combine:

  • 1 cup gluten-free rolled oats (preferably organic)
  • 1/4 cup gluten-free all-purpose flour
  • 1/3 cup date sugar (or coconut)
  • 1/2 teaspoon salt
  • 1/3 cup avocado oil (or melted vegan butter if you can use it)

Stir to combine until all the dry mixture is moistened. Spread about half the oat mixture in the bottom of the prepared pan. Add the fruit mixture, spreading evenly in the pan and then finally distribute the remainder of the oat mixture evenly over the top of the fruit. Bake for about an hour depending on the ripeness of the fruit. Serve hot or warm with either a non-dairy frozen ice “cream” or I like it with just a bit of oat milk. Makes 6-8 servings.

Asian Style Lemon Chicken with Vegetables

One of my favorite Italian dishes is Lemon Chicken. I also love Asian chicken and looked on-line for a recipe but of course, with all my allergies, I didn’t find one that would work. So here’s my own recipe. I added a bunch of vegetables so that it’s a balanced meal. It can be served with either rice or noodles. Serves 4 generously.

Cut into chunks:

1 1/2 pounds boneless, skinless chicken breasts

Put the pieces into a large food storage bag and add:

1/4 cup arrowroot

Shake to cover the chicken completely with the arrowroot, adding a little more if necessary. You may need to separate the pieces during this process to be sure they are completely covered with the arrowroot. Let sit in the refrigerator for about a half hour. In a large skillet, heat over medium heat:

2 tablespoons olive oil

1 tablespoon sesame oil

When hot but not smoking, saute:

1 medium onion, diced

6-8 stalks celery, sliced on the diagonal (I use celery hearts so if using a whole celery, you might use less stalks)

8 ounces of sliced mushrooms

3/4 cup grated carrot (or 2 carrots thinly sliced on the diagonal)*

Reduce heat to low medium and continue to saute until the onion is translucent. While the vegetables cook, combine in a 3-4 cup bowl:

grated lemon rind from 2 lemons

1/2-2/3 cup fresh lemon juice (about 2 1/2 lemons)

1 cup chicken stock

1/4 cup date sugar (or agave or coconut nectar, honey)

1 tablespoon garlic puree (or 2 teaspoons minced garlic)

2 tablespoons arrowroot

Whisk until well combined and set aside. Heat in a deep skillet over medium high heat:

2-3 inches oil (I use a combination of olive and avocado oil)

Add to the vegetables:

1 cup bean sprouts (I used canned and drained the liquid before adding them)

1 can chopped or sliced water chestnuts

1 can sliced bamboo shoots

Stir to combine and add the sauce mixture, after whisking again. Stir as the sauce thickens, about 1 minute. Reduce heat to simmer or remove from heat. In 2 batches, fry the chicken pieces being sure to separate them into individual chunks before frying. Fry until browned on each side, about 4-5 minutes depending on the size of the pieces. You will probably need to reduce the heat to medium as the frying continues or the oil will get too hot to completely cook the chicken before it’s too brown on the outside. Drain each batch on paper towels and salt before adding to the vegetable mixture. After stirring in the second fried batch of chicken, the dish is ready to serve and should still be hot but if it’s cooled, reheat for 1-2 minutes over medium. Serve over rice or noodles. Garnish with sesame seeds and/or sliced scallions.

*Of course, other vegetables can be used such as bok choy, pea pods, string beans, etc.

Old Fashioned Cake Donut Muffins

It’s a snowy day here in Minnesota so I’m stuck at home. Days like this always give me an urge to bake. It comes from the days, growing up, when my father who worked for the Town road crew, could be out all day and often into the night plowing snow and salting the roads. He’d stop home once or twice in a twelve-hour period and be hungry and want a fresh thermos of coffee. On days like that, I’d bake cookies, muffins, cupcakes, anything portable but his favorite thing was my old fashioned cake donuts. I found a recipe yesterday, not allergy friendly of course, for donut muffins (Dianne on allrecipes.com) and I managed to make it allergy free. Hope you enjoy these. Make a single batch (6-7 small muffins) or a double batch (12-14). Either way, it takes longer to measure out all the ingredients than it does to mix them together and get the dough in the muffin tin! Very quick and easy.

Preheat oven to 375 degrees. Spray a mini or small muffin tin and set aside. For a single batch, in a medium bowl combine:

1 cup gluten-free all-purpose flour

3 tablespoons date sugar

2 1/2 teaspoons baking powder

1/4 teaspoon salt

1/2 teaspoon ground nutmeg (those of you who follow me regularly know I don’t like nutmeg but in old fashioned donuts, it just has to be nutmeg!)

Stir to combine before adding:

1/2 cup non-dairy milk

2 tablespoons avocado oil (or any melted butter, margarine or shortening)

Stir until just combined. Portion into the baking sheet. Try to get all the muffins around the same size. Bake for 18-20 minutes. Let cool for 5 minutes or so before removing from the baking pan. If desired, top with the following:

Dip each muffin’s top into:

1/4 cup avocado oil (or melted butter, margarine or shortening of your choice; should be enough for all the muffins)

Then dip into a mixture of:

1/4 cup date sugar

1 teaspoon ground nutmeg (cinnamon, allspice, etc., would also work just fine)

Let cool a few more minutes before serving, if they last that long!

*I used a small muffin pan (about 2″ diameter at the top and a double batch made 12).

Pumpkin Scones

The Asian pear scones were so delicious – moist and flavorful – that I decided to try another scone. These pumpkin scones are also very moist, with warm spices. Perfect served warm for breakfast with a cup of coffee or tea. And easy to make.

In the bowl of a food processor (or a medium size bowl) combine:

1 3/4 cups all-purpose gluten-free flour

1 1/4 teaspoons xanthan gum (or guar gum)

1/2 cup date sugar

1 tablespoon baking powder

1/4 teaspoon salt

1 teaspoon allspice (or cinnamon)

1/4 – 1/2 teaspoon ground cloves (or nutmeg, ginger, pumpkin pie spices, cardamon)

1/4 cup Spectrum shortening (or full fat solid coconut oil or congealed olive oil*)

Pulse until crumbly (or use a pastry cutter or fork to combine until crumbly). Place mixture in a medium bowl. Add:

1/2 cup oat milk

1/2 cup + 1 tablespoon pumpkin puree

Mix until just combined. Spray a small baking sheet (9×15) or line with parchment paper. Turn the mixture out onto the baking sheet and form into a flattened circle approximately 8″ diameter. Using a wet knife, cut into quarters and then cut each quarter in half to form 8 triangles. Arrange pieces approximately 1″ apart on the baking sheet and refrigerate for 15-20 minutes. Bake at 400 degrees for 25 minutes (20-30 depending on your oven), or until the top is slightly firm when pressed and the scones are slightly darker in color. Cool.

OPTIONAL:

Glaze with a mixture of monk fruit confectioners sugar (approximately 2 tablespoons) and 1-2 teaspoons maple syrup. Add 1-2 teaspoons water as needed to form a thin glaze, or more maple syrup. Drizzle over scones.

*Put the olive oil in the freezer about an hour before you need it and it will solidify.

Quick Pumpkin Bread

Quick breads are so easy to make and so delicious to eat. Flavorful with warm spices, they take minutes to mix together and, when gluten-free, can take almost an hour to bake. But definitely worth it. Here’s a pumpkin quick bread recipe that will delight your whole family. I used allspice and ground cloves but feel free to use cinnamon, nutmeg, and/or ginger (pumpkin pie spices) instead. Various flours can also be used including all-purpose (I use the 1 to 1) but whatever one you choose will work. For a lighter bread, eliminate the protein powder and use an additional half cup of one of the other flours.

First make some flax gel by combining in a small dish:

2 tablespoons ground flax meal

1/4 cup warm water

Whisk to combine and set aside to gel. Preheat oven to 350 degrees. Spray a bread pan (9×5″) with non-stick cooking spray and set aside. Into your mixer’s bowl or a medium bowl (if using a hand mixer), add:

1 cup pumpkin puree

1/3 cup maple syrup (date or agave syrup, honey)

1/4 cup avocado oil

1 tablespoon vanilla

1 tablespoon rice vinegar

Mix until combined before adding:

1 cup oat flour

1/2 cup millet flour

1/2 cup quinoa flour

1/2 cup pumpkin protein powder (or another 1/2 cup of any of the flours)

2 teaspoons allspice

1/2 teaspoon cloves

1/4 to 1/2 cup date sugar (depending on your taste)

the flax gel

1/2 cup dried cranberries (optional, you could use chocolate or carob chips instead)

1/4 cup pumpkin seeds (optional to sprinkle on top in the pan)

Mix until all ingredients are well combined. This is a thick dough. Spoon into the prepared bread pan and smooth the top. Sprinkle with the pumpkin seeds if desired. Bake for 50-60 minutes. When a toothpick inserted in the center comes out clean cook for another 5 minutes. Cool on a rack. Great warm or toasted the next day. Will keep for several days in an airtight container.

Spice Cookies (with pumpkin)

This is a revision of my Gingerbread Cookies that I posted a couple of years ago. Gingerbread cookies and ginger snaps are my favorite kinds of cookies but this past year, I’ve found that ginger, as well as cinnamon, bother me. But one of my favorite things about Christmas is that I allow myself to indulge in a batch of gingerbread cookies. How am I supposed to do that this year? Well, I revised the recipe taking out the cinnamon and ginger and replacing it with allspice (my favorite spice) along with some ground cloves and coriander. I’ve found in the past that these cookies don’t affect my blood sugar unless I eat too many which is easy to do, they’re so delicious!

In a large bowl (or the bowl of a table-top mixer), beat until combined:

1 cup shortening (such as Spectrum)

1/2 cup date sugar

1 teaspoon monk fruit powder

Beat on medium speed until well mixed. Add:

1/2 cup agave nectar (date syrup, honey or coconut nectar would also work)

1/4 cup unsulfured molasses

1/2 cup pumpkin puree (or sweet potato puree)

2 teaspoons vanilla extract

Mix on medium speed until combined. Add the dry ingredients a cup at a time (combine them in a large bowl first):

1 cup millet flour

1 cup tapioca (or cassaba) flour/starch

1/2 cup arrowroot

1/2 cup sweet sorghum flour

1 teaspoon allspice

1/2 teaspoon ground cloves

1/2 teaspoon coriander

1 teaspoon xanthan gum

1 teaspoon salt

Mix until well combined. If using a hand mixer, best to add half the dry ingredients and then use a large spoon because the dough too thick for a hand-mixer. Form into a round disk and wrap in plastic. Refrigerate for 1/2 to 1 hour.

Preheat oven to 350 degrees. Line baking sheets with parchment paper. Unwrap the dough spreading out the plastic wrap to cover the countertop. Put a sheet of parchment paper over the top and roll out to 1/8 to 1/2 inch depending on your taste. Cut using a cookie cutter or a knife and place on the baking sheets. These cookies don’t spread so they can be baked close together. Repeat until all dough is used. Bake 10-20 minutes depending on thickness and your taste (soft or crunchy). When the cookies are still soft to the touch but browned (which is hard to tell with the molasses in them!), they’re cooked. Cool on cooling racks.

For a simple frosting combine (for every 4 cookies):

2 tablespoons monk fruit confectioners’ sugar

1 teaspoon milk/vanilla/extract (I used some of my coffee)

Whisk to combine. Use immediately, it will harden fairly quickly.

Asian Pear Scones

I’ve only had scones a couple of times and found them to be very dry and crumbly. So I was hesitant to try this recipe but I had a very large Asian pear that would make three servings of fruit, way to much to eat at one time. So this recipe offered me a nice alternative. And, oh my, what a delicious, fluffy, scone! The pear added flavor along with the allspice I used. Asian pears are less juicy and much crisper than other pears like Bosc or Bartlett, they have more of an apple consistency. If you don’t have any Asian pears on hand (they can be difficult to find unless they’re in season which is the late fall), use a very firm pear so that it isn’t too juicy. If you have a riper pear, don’t add as much liquid which would mean none since there’s only a 1/4 cup of non-dairy milk in this recipe.

First, preheat oven to 375 degrees. Line a medium to large baking sheet with parchment paper. Then make a flax egg by combining:

1 tablespoon ground flax

3 tablespoons warm water

Whisk to combine and set aside for several minutes until it forms a gel. While that’s happening, grate:

1 very large Asian pear (or two smaller pears), washed, cored, and peeled – want about 1 cup of grated pear

In the bowl of a food processor (or if you don’t have one, into a medium bowl), combine:

1 1/2 cups all-purpose gluten-free flour

1/2 teaspoon guar gum

1/4 teaspoon salt

2 teaspoons baking powder

1/3 cup fine date sugar

1 teaspoon spice – cinnamon, allspice, nutmeg, cardamom, etc.

1/3 cup Spectrum shortening (or vegan butter) – without a food processor, use a pastry fork to cut the shortening into the dry ingredients

Pulse until the shortening is combined with the dry mixture. Add:

1 cup grated pear

1/4 cup non-dairy milk

flax gel from above

Pulse until all ingredients are combined. Remove from machine and using a large serving spoon, spoon onto the prepared baking sheet (makes six) and let sit on the counter for 5-10 minutes before baking for 15-20 minutes. Store in an airtight container on the counter for up to 3 days or in the refrigerator for up to a week. They can be frozen as well.

Oatmeal Cookies

My husband’s favorite cookie was oatmeal with raisins. I’m allergic to grapes so raisins are out for me. Instead I rehydrated some dried cranberries and used those instead. But chocolate or carob chips would work just as well. Easy to make, this is a very thick batter which doesn’t spread and has just a slight rise in the oven so don’t worry about spreading them too far apart on the cookie sheet. Depending on how large you make them, I got 16 from the mixture, you’ll make 15-24 cookies. I also shaped them into disks so they started out flat.

Preheat oven to 350 degrees and line two medium cookie sheets with parchment paper. In a small bowl, mix together:

1 tablespoon ground flaxseed

3 tablespoons warm water

Whisk to combine and let sit for approximately 5 minutes to form a flax gel. In a medium mixing bowl combine:

1/2 cup avocado oil (or other mild flavored oil)

3/4 cup fine date sugar

Whisk to combine before adding:

flax gel

1 teaspoon vanilla extract

1/4 cup non-dairy milk (any kind)

Mix until smooth. Add:

3/4 cup all-purpose gluten-free flour

1/4 cup protein powder

1/2 teaspoon allspice*

1/4 teaspoon ground cloves

1/2 teaspoon baking soda

1/2 teaspoon salt

1/2 to 1 cup rehydrated raisins, cranberries or chips (chocolate or carob)

Mix until combined. Dough is very thick and shapeable but still a little sticky. Scoop into balls, approximately 2 tablespoons each, flatten and place on prepared sheets. Bake for about 12-14 minutes until firm. Let cool on sheets for a few minutes before transferring to a cooling rack. Store in air-tight bags or containers for about 4 days or freeze for up to three months. If freezing, place wax or parchment paper between layers of cookies.

*Or of course cinnamon if you can use it.