Mint Double Carob Chip Cookies

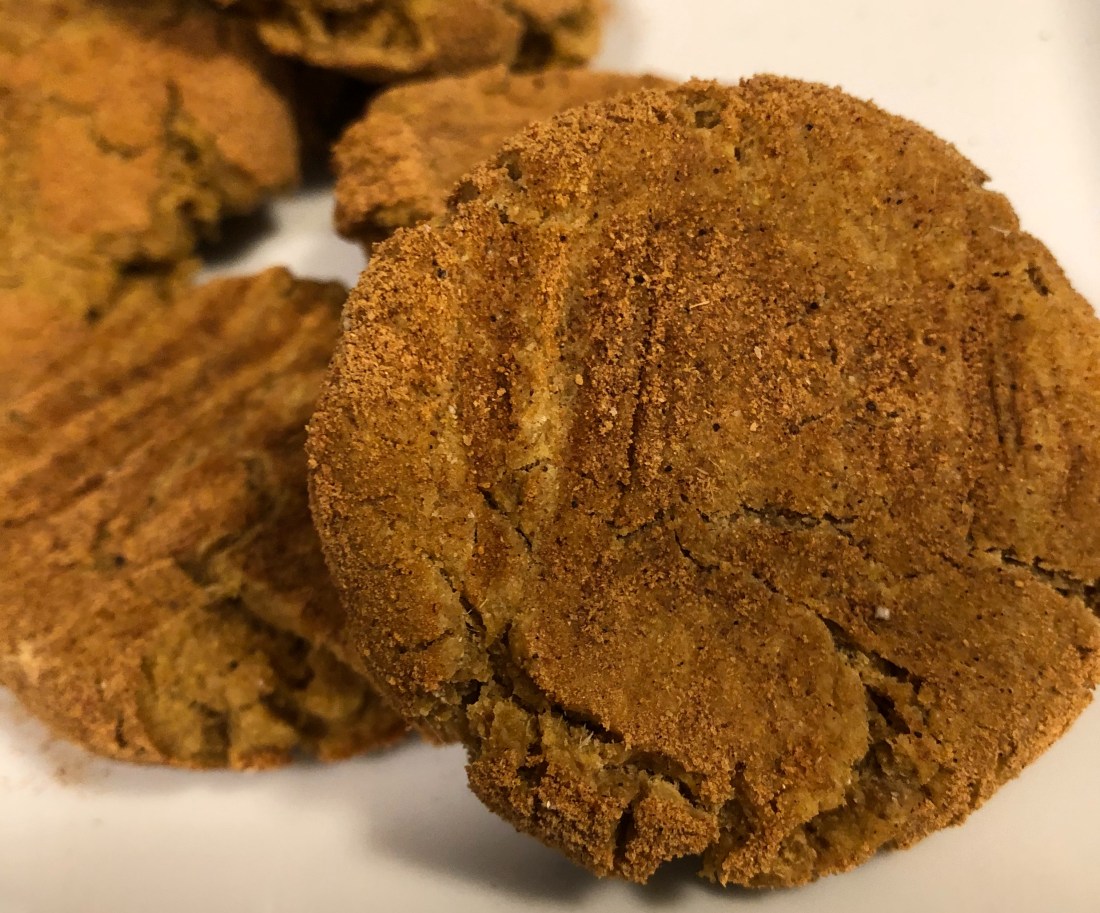
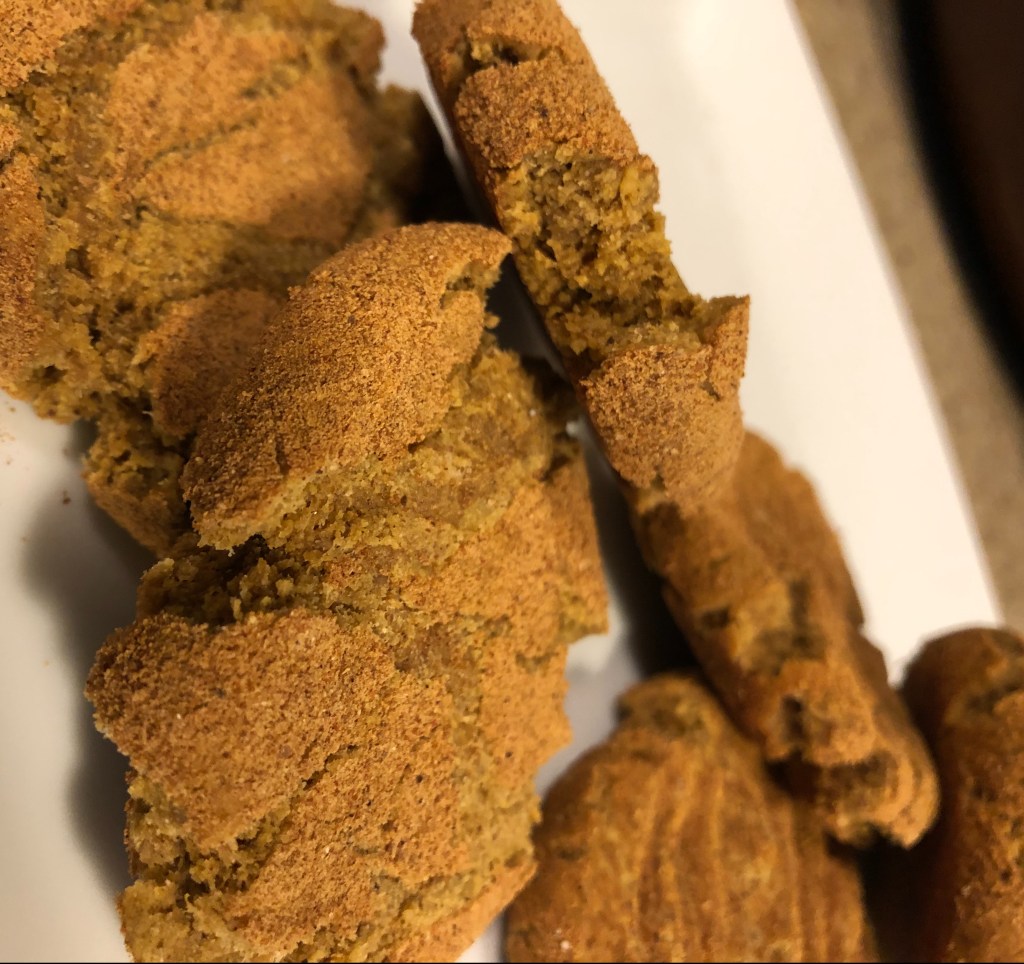
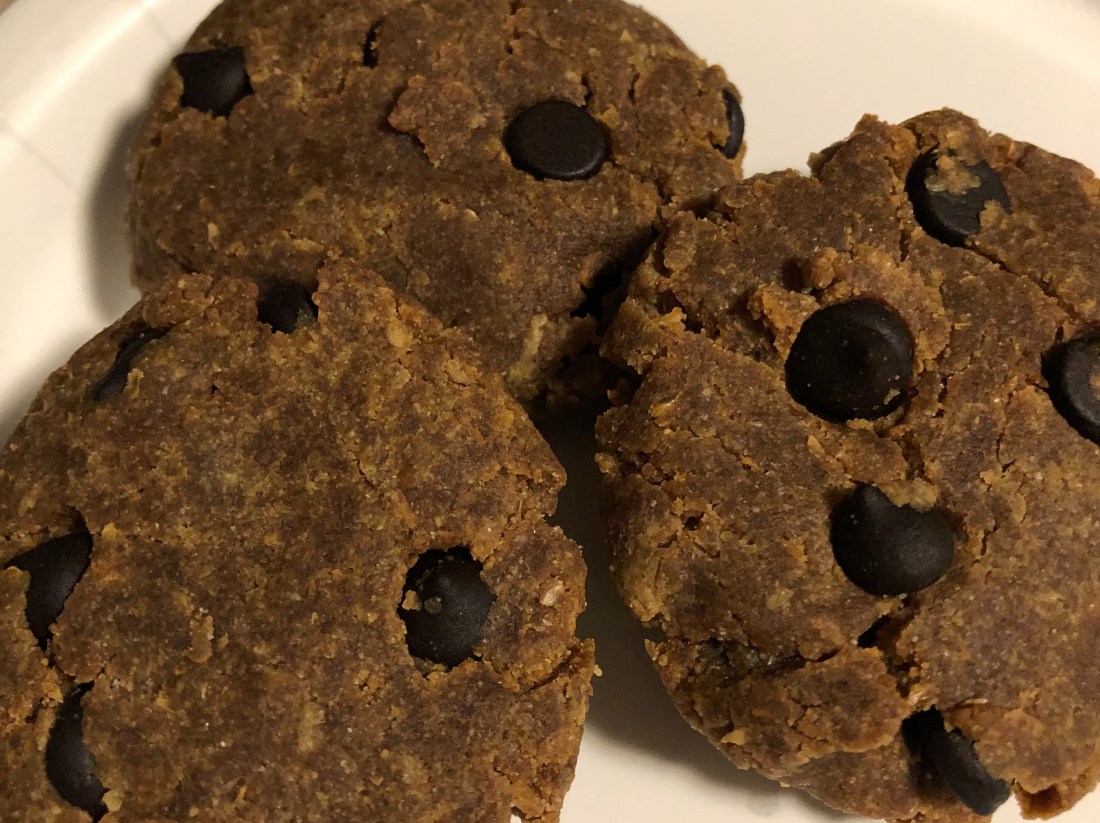
I revamped this recipe because chocolate and mint is a combination that my grandson absolutely loves! And I have to admit, they are pretty good. Be careful or you won’t have any batter to cook, the raw dough is that tasty!

Makes 24-30 depending on the size.

Preheat oven to 350 degree. Put parchment paper on the bottom of 2 cookie sheets (unless you have a large one that will hold 2 dozen at a time). Lightly spray with non-stick cooking spray.

In a small, heat safe bowl, soak 16-18 dried prunes in boiling water (approximately 1 cup should be enough). Be sure all the prunes are covered. Let sit for at least 5 minutes. While they are soaking, put together the flour mixture in a gallon food storage bag mix:

1 2/3 cups millet flour

1/3 cup sorghum flour

2/3 cup chickpea flour

2/3 cup arrowroot

2/3 cup potato starch (NOT flour)

Seal the bag and shake to thoroughly mix the flours. Be sure to refrigerate the unused flour mixture.

In a medium size food processor add:

Prunes

2 tablespoons of the prune soaking water

1/2 cup date or coconut sugar

1/3 cup agave, honey, date or coconut syrup

1/2 teaspoon mint extract (or about 2 dozen fresh mint leaves torn)

2 teaspoons vanilla extract

1 teaspoon vinegar

Blend until the prunes are smooth and the mixture has combined. Don’t worry if the prunes are entirely smooth since they will continue to blend with the next steps. Add:

1/3 cup avocado, sunflower, palm, or coconut oil (melted)

Blend again until the mixture is smooth. If the food processor is large enough add (if not scrap the prune mixture out of the food process and into a medium size bowl and add the dry ingredients):

1 1/2 cups gluten free flour mix (see above)

1 teaspoon xanthan gum

1/4 cup carob powder

1 teaspoon baking powder

1 teaspoon baking soda

1/4 teaspoon sea salt

Pulse until the flours are combined. Remove the dough from the food processor and stir in:

1/4 to 1/3 cup unsweetened carob chips

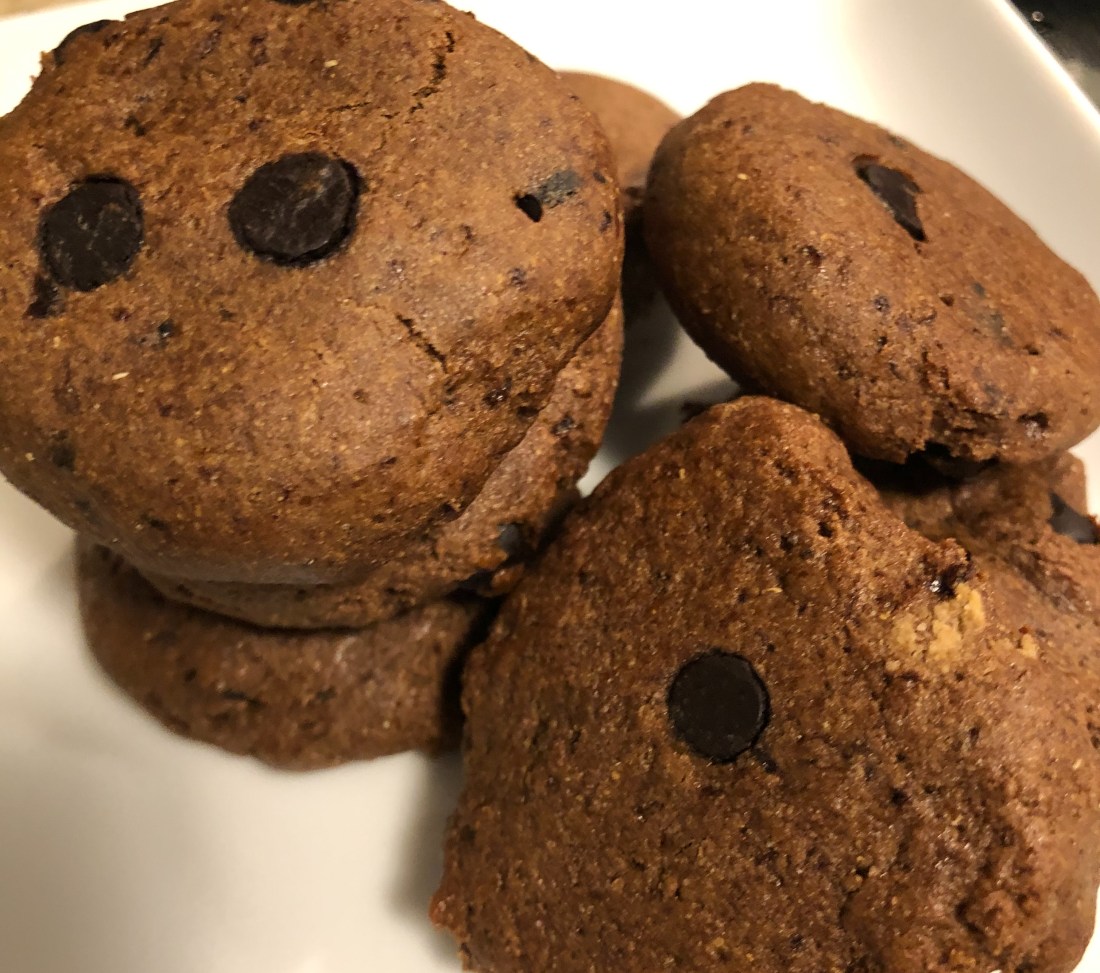
Mix thoroughly. Using a tablespoon measure or small cookie scoop, measure out the dough and form into approximately 1 inch balls (although slightly sticky, it’s easy to shape into balls using damp hands). Place the balls on a cookie sheet approximately 2 inches apart and, again with a slightly damp hand, flatten them to about a 1/2 inch in depth. Bake for 8-10 minutes; 8 minutes will give you a chewy, fudgy, softer center while 10 minutes will be chewy but not as fudgy in the center. Cool on the sheet for a few minutes before moving to a cooling rack.

Raspberry Bars

I’ve always preferred making bars instead of cookies, takes less effort and time and tastes just as good. So I was pleased to find a recipe for raspberry bars (my favorite berry) that I think came out pretty good with revamping.

Preheat oven to 375 degrees. Generously grease a 9×9″ baking dish being sure to grease at least a 1/2 inch up the sides. Combine in a food processor:

2/3 cup white rice flour

1/3 cup brown rice flour

3 tablespoons potato starch

2 tablespoons tapioca flour

1/3 cup date sugar

1/4 teaspoon salt

1/4 teaspoon xanthan gum

Pulse until blended. Add by spoonfuls:

2/3 cup shortening or vegan margarine

Pulse until combined and mixture forms pea like bits (it looks a lot like pastry crust. Remove 1/2 cup of the mixture to a small bowl. Press the remaining mix into the bottom and up the sides of the prepared baking dish.

Bake for 15-18 minutes until golden brown. While it’s baking, stir into the 1/2 cup of mix reserved:

2 tablespoons date sugar

1/4 cup hemp hulls (or any seed your family likes such as pumpkin or sunflower, chopped)

1/4 cup gluten-free old-fashioned oats

Set aside. In another small bowl mix:

1 cup sugar-free raspberry jam

1 cup fresh raspberries

zest of 1/2 a lemon

juice of 1/2 a lemon

Stir together, breaking up some of the raspberries, until combined. Spread this over the top of the hot crust when it’s comes out of the oven. Sprinkle the reserved flour/hemp/oat mixture over the top of the raspberries. Bake another 20-25 minutes until the top has browned and the filling is starting to bubble. Cool on a cooling rack and then in the refrigerator at least 2 hours before cutting into squares.

TIP: I left the other half of the bars in the baking dish, covered them and left them in the refrigerator overnight and they came out of the dish much cleaner the next day, keeping more of the bottom layer intact.

Sweet and Spicy Chicken

I’m always looking for new chicken recipes and here’s one that has some sweetness from a touch of honey, agave, maple or date syrup, some spice from the cumin and ground pepper, and a touch of citrus from orange. I was pleasantly surprised at that hint of orange in the flavor, very umami! And quite an easy recipe to make. Any chicken parts can be used however, I would recommend not mixing them so either thighs, drumsticks, or breasts. Serves 2-4.

In a 1 gallon food storage bag (or small mixing bowl, mix together:

1/2 cup sugar free ketchup (such as Organicville)

1/4 cup agave, honey, maple or date syrup

1 teaspoon orange zest (zest from 1 medium orange)

1/3 cup orange juice (from one orange)

1 teaspoon Herbamare (don’t have it? Use 1/2 teaspoon salt and 1/2 teaspoon of your favorite herb mix)

2 teaspoons minced garlic

2 teaspoons ground cumin

1/2 teaspoon ground black pepper

Dash of hot sauce (optional)*

Swish around in the bag (please zip-lock it first!) until combined.

Add:

6-8 chicken parts

Again swish around to be sure the chicken is thoroughly immersed in the marinade. Refrigerate for at least 30 minutes but I left mine for about 2 hours. [If you’re unsure about using the marinade that the chicken sat in, instead of mixing it in the bag, use a small bowl and when you add the chicken to the bag, only add half the marinade and reserve the other half to pour over the chicken for baking.]

Preheat oven to 375 degrees. Spray a baking dish with non-stick cooking spray and dump the entire contents of the bag into it, making sure the chicken is in a single layer in the dish. Bake 30-40 minutes depending on the size of your chicken pieces or until the internal temperature of the chicken reaches 165-170 degrees.

*A dash is generally around 1/8 of a teaspoon.

English Muffins

As I’ve previously mentioned I haven’t had much luck making gluten-free breads. I found a new method in a cookbook entitled The How Can It Be Gluten Free Cookbook. Their flour blend however includes dry milk powder which doesn’t work for those of us allergic to dairy. It’s also heavy on the carbohydrate flours – white rice, potato starch and tapioca. And their English muffin recipe includes eggs and cornmeal (for dusting the muffins). So I gave it a go and here’s what actually worked. I left their flour mixture the same, same ratios without the milk powder.

It took me awhile to try this because it is quite a long recipe and somewhat complicated but I finally decided if I took it step by step it wouldn’t be bad and it wasn’t. In fact, it was quite simple, just took a while to complete all the steps but the tasty muffins are definitely worth it. The frozen ones I was buying were tough on the outside, almost impossible to slice while these are easily split with a fork. Says it makes 10 but I got 11 and several of them are quite small so I think next time I make them, I’ll increase the individual muffins and perhaps only get 9 instead.

Prepare 2 medium size baking sheets by dusting with ground millet (or if you can use it, cornmeal which is the traditional coating for English muffins). It takes approximately 1/2 cup so process the whole millet in a food processor to a medium grind (coarse is too little and fine makes flour which doesn’t work either, we want it the consistency of cornmeal. Sesame or poppy seeds would also work.

In a large bowl combine:

4 tablespoons ground flaxseeds

2/3 cup aquafaba

Let sit for several minutes to form flax gel. While that happens, in a smaller bowl combine:

1 1/2 cups white rice flower

3/4 cup brown rice flour

1/2 cup potato starch (NOT potato flour)

1/4 cup tapioca flour or starch

3 tablespoons powdered psyllium husk

2 tablespoons date sugar

2 1/2 teaspoons instant yeast (or 1 packet which is 2 1/4 teaspoons)

Stir to mix in the yeast before adding:

2 teaspoons baking powder

1 1/2 teaspoons salt

Whisk into the flax gel:

2 cups warm water (approximately 110 degrees)

2 tablespoons oil or melted vegan margarine

In increments, with a hand mixer or heavy spoon (stand mixer would be better with a paddle if you have one), mix the flour mixture into the wet mix. When it gets too thick for the hand mixer, use your hands (with gloves) and keep mixing until the dough comes together. It’s about the consistency of cookie dough.

With wet hands form about 1/3 cup of dough into balls (I’ll probably do 1/2 cup of dough next time) and set them on the dusted baking sheets widely spaced, about 5 per sheet (so they have room to rise). I heated my oven by setting it at 170 degrees for approximately 2-3 minutes before turning it off. Cover the muffin balls with a clean kitchen towel and place in a warm place to rise for about 1 to 1 1/2 hours.*

Remove them from the oven and make sure the rack is on a lower-middle setting. Preheat oven to 350 degrees. Uncover the dough and using a greased spatula, flatten the balls to approximately 3/4 inch disks. Dust the tops with the millet (or cornmeal).

Spray a 12″ skillet with non-stick cooking spray. Heat over medium heat before placing 4-5 muffins in the pan. Brown over medium heat and brown on each side (about a minute per side). Repeat with the remaining muffins. If the muffins begin to puff up, gently press them down, doming isn’t what we want and means you’re probably cooking them too long. Transfer to a clean baking sheet lined with parchment paper.

Bake until firm, about 30-35 minutes, rotating baking sheet half way through cooking. Cool on a cooling rack for at least 15-20 minutes before splitting with a fork and toasting. Store unsplit muffins in a zip-lock bag for up to 3 days. I put 2 per sandwich bag, sucked out the air and then put the sandwich bags into a gallon freezer bag and put the extras in the freezer.

*In a previous life, when I lived in a house with steam heat radiators, I used to place my bread dough to rise on a towel on top of a radiator. It worked quite well as long as the heat didn’t get too hot while they were on there!

Pumpkin Chai Snickerdoodles

Get the feeling I’m really into pumpkin right now! I think it may be because I haven’t been feeling very well and knowing pumpkin can aid in calming an upset stomach, I’m turning to it to help me deal with stomach issues.

I’ve never had a snickerdoodle! Now that I’m allergic to chocolate (actually the caffeine in chocolate), I’m expanding my cookie horizons. Found this recipe on-line and thought it easily adjustable however, the cookies are not the easiest to make, especially if you’re new to cookie baking or don’t have a stand mixer like me. Treat them much like you would a peanut butter cookie – roll in sugar and then use a fork to flatten the balls.

Make Chai Sugar by mixing together:

1/3 cup date sugar

2 teaspoons cinnamon

1/2 teaspoon ginger

1/2 teaspoon allspice

1/2 teaspoon ground cardamom

1/4 teaspoon ground cloves

Set aside. Preheat oven to 375 degrees. Line 2 cookie sheets with parchment paper. In a large bowl mix:

1/3 cup aquafaba (if you don’t have a can of garbanzo beans handy or powdered aquafaba, substitute water)

2 tablespoons ground flaxseed

Let sit for several minutes to form flax gel and then add:

1/2 cup vegan shortening or margarine (I use Spectrum shortening)

1 cup date sugar

With a hand or stand mixer, beat on low/medium until the mixture is combined and almost fluffy. Add:

1/2 cup pumpkin puree

1 teaspoon vanilla

Mix to combine and then add:

1 cup all purpose gluten free flour

1/2 teaspoon baking soda

1/2 teaspoon salt

1/4 teaspoon allspice or nutmeg

1 teaspoon xanthan gum

Mix to combine before adding:

1 cup all purpose gluten free flour.

At this point, unless you have a stand mixer, it’s best to continue mixing with a large spoon or even, if you’ve washed your hands or are wearing gloves, with your hands. Mixture will be quite crumbly until all the flour is worked into the dough. The consistency reminds me of gingerbread cookies or sugar cookies. I used my hands and found the mixture combined quite easily. Scoop out by tablespoonful and roll into a ball (so you have to use your hands anyway!). The mixture shouldn’t be at all sticky but if it is, add a little more flour, 1 tablespoon at a time, until the stickiness is gone.

Roll each ball as you make them into the chai sugar mixture and place 1-2″ apart on the cookie sheet. When the sheet is full, using a fork, press down each ball into a flat disk.* Bake 8 minutes then check. If the cookies have puffed up (domed), flatten more with the fork. Bake an additional 2-3 minutes until the outside of the cookies are firm while the inside is still slightly underdone. Cool on sheet for several minutes before moving to a cooling rack.

*If you prefer, bake the balls for 8 minutes and then flatten them with the fork. Their appearance differs and I found the ones I flattened before baking were chewier. The smoother ones were flattened before baking (on the right) while the ones flattened after baking were rougher looking (on the left).

Easy Curried Pumpkin (or sweet potato) Soup

If you’ve been following me for any length of time, you already know how much I love curry! If I could, I would put curry in everything. Pumpkin soup has always been a favorite so I’m surprised I never thought to put curry in it. But today, here it is. And an easy, quick, very warming soup. Just perfect for these subzero days here in Minnesota. Makes 4 -6 servings.

In a high sided skillet or a large saucepan, heat over medium heat:

2 tablespoons olive oil

Add:

1/2 cup chopped onion

1 cup chopped mushrooms

Cook until onion is translucent and mushrooms are slightly browned. Add:

1-2 teaspoons madras curry powder (I used 1 1/2 and it was almost too spicy for me)

Stir and let cook on low heat until you can smell the curry, about a minute. Add:

2 tablespoons all purpose gluten-free flour

Stir in and let the flour cook for a minute. Slowly stir in:

2 1/2 cups vegetable stock (or if preferred chicken or turkey)

Cook for a minute and then add:

1 can (15 oz) pumpkin puree

1 cup non-dairy milk

1 tablespoon maple syrup

1/2 teaspoon salt

1/4 teaspoon pepper

1/4 teaspoon pumpkin pie spice (or just a sprinkle of nutmeg, cinnamon, cloves, allspice)

Combine and leave on the burner until the soup is thoroughly heated, about 2 minutes. Optional: Garnish with chopped scallions or chives.

Pumpkin Seed Butter Cookies

Peanut butter cookies are one of the most popular cookies on the planet but not for those of us with nut allergies. If you can use pumpkin seeds, this may be a cookie for you to try. I’ve been using pumpkin seed butter now for several years. It’s a very different taste, very nutty and earthy. I prefer the butter made from roasted pumpkin seeds but raw is also available; as one might expect, the roasted is brown while the raw is green in color. I haven’t been able to find pumpkin seed butter in a store so I order it online from Amazon where they have several varieties available. I’m sure a google search would find it available elsewhere online if you prefer not to use Amazon.

Just like regular peanut butter, pumpkin seed butter is available in sweetened and unsweetened forms. I prefer the unsweetened which is what is used in this recipe. If sweetened is used, reduce the amount of sugar in the mixture. Makes about 12 cookies.

You’ll need:

1/2 cup date sugar

1/4 cup warm water

1 teaspoon vanilla extract

1/2 cup pumpkin seed butter (room temperature)

1/4 cup ground flax seeds

1/2 cup brown rice flour

1/4 teaspoon sea salt

1/4-1/3 cup carob chips (or if you can use them chocolate chips)

Prepare a medium size cookie sheet by covering with parchment paper sprayed with non-stick spray. Preheat oven to 375 degrees. In a medium size bowl, mix together the date sugar and the water, stir until sugar is dissolved. Add the vanilla, whisk until smooth. Add the pumpkin seed butter, flaxseed, flour, salt and mix until combined. Add the chips and blend. Scoop out the dough by tablespoons and shape into balls and then flatten. Place about an inch apart on the cookie sheet and bake for approximately 10-12 minutes. These cookies won’t raise or spread much. Store in an airtight container or freeze if there are any left!

Vegetable Fritters

It’s not often that you’ll find me giving you recipes that require frying. Too much oil is as bad for a diabetic as too many carbohydrates or sugar. But I just couldn’t resist this recipe when I found it. And once I cooked them up, oh my, I did eat too much for lunch today! I did fry them but I think if I cook these again, I’ll probably oven fry them with a lot less oil (see tip at the bottom of the recipe).

You’ll need:

1 1/2 cups grated Russet potato (1 medium large potato) – soak the grated potato in cold water for 5-10 minutes to get out as much starch as possible since the starch is not a friend to fried foods, the cakes will brown better with less starch. Drain and dry with paper towels to get out as much of the moisture as possible*

1 cup grated sweet potato (about 1 medium)

1 cup grated carrots (about 1-2 medium) – I used the pre-grated from the store

1 cup grated red onion (onion has a lot of moisture so be sure to dry thoroughly with paper towels before adding)

If you have a food processor, this is the time to break it out and use it! It’s the easiest way to grate the potatoes, carrot and onion. In a large bowl, mix the above. Then add:

1 teaspoon salt

1/2 teaspoon ground pepper

1 teaspoon garlic powder

1/2 cup chickpea flour (DO NOT USE ALL PURPOSE GLUTEN-FREE FLOUR; many have potato starch in them and we just tried to remove the starch from the potato!)

1/4 cup aquafaba

2 tablespoons non-dairy milk (depending on how dry your mixture is)

Mix together until combined. If the mixture is too dry and won’t hold together, add the non-dairy milk. If the mixture is too wet and won’t hold together, add the tablespoons of flour until the mixture will bind together. Using a 1/4-1/3 cup measure, form into balls.

Heat over medium high heat in a 10-12″ skillet:

1/2-3/4 cups oil for frying (the oil should come up the side of the pan about a 1/2 inch)

When the oil is glistening, take a ball, flatten it and gently place it in the oil starting with the side nearest you. Being sure to not crowd the skillet, add additional flattened balls. Cook on the first side about 4-6 minutes until golden brown, turn and cook the same on the other side. If the fritters are browning too quickly, reduce the heat to medium. Then flip the fritter again and cook an additional 2-3 minutes on the first side. The cooking time will depend on how thick the fritters are; the thinner the less time they need to cook. Remove to a paper towel and salt immediately. Do not leave the fritters on the towel too long or they will get soggy. They can be placed on a cooling rack (on a cookie sheet) in a 200 degree oven to stay warm while the rest of the fritters cook.

  • * If like me, you don’t eat much potato, other than sweet potato, grated parsnip could be used instead

TIP: To oven fry, place the flattened balls on a greased (spray with non-stick spray) cookie sheet (with sides). Lightly spray the tops of the fritters with the non-stick spray) and bake in a 400 degree oven for approximately 20-25 minutes. Turn over half-way through the bake.

Lemon Garlic Chicken Drumsticks

One of my favorite Italian dishes is lemon chicken. Here’s an recipe that’s easy to make and ready in less than an hour. And need I add delicious! I think this is, like many Italian foods, going to taste even better tomorrow when I eat the leftovers. Serves 4.

You’ll need:

8-10 chicken drumsticks*

Herbamare (herbed sea salt) and pepper (available at specialty grocer stores, Whole Foods or Amazon)**

1 tablespoon olive oil

2 tablespoons vegan margarine

Zest of 1 lemon and 2 tablespoons juice

3 teaspoons minced garlic

Fresh parsley for garnish

Salt and pepper the chicken and let sit on the counter for 10-15 minutes so that it won’t be ice cold when you cook it. In a 12″ skillet, heat the oil and margarine over medium high heat until margarine starts foaming. If the chicken is too wet, be sure to dry with a paper towel, remember – wet meat doesn’t brown well and will spit oil! Reduce heat to medium and sauté chicken, turning to brown on all sides, this should take 6-8 minutes. Reduce heat to medium low (I actually started out on medium low but the drumsticks were getting too brown so I reduced my heat to low), cover and let cook 20-25 minutes until the chicken is cooked. Turn the chicken every 5-7 minutes making sure to move them around in the skillet as well.

In a small bowl, mix the grated lemon zest and juice along with the garlic. When the chicken is cooked, pour this mixture over the chicken, turning the chicken to be sure the sauce coats the pieces on all sides. Take off the heat and cover, let it sit for about 5-10 minutes. Garnish and serve.

  • * Chicken breasts would also work
  • ** Substitute sea salt mixed with some thyme, marjoram, and basil (or an Italian herb blend)

Upside Down Cake with Fruit

One of my mother’s favorite cakes was pineapple upside down cake. Since I can’t eat pineapple anymore, I used a different fruit for my upside down cake – pears. Turned out quite delicious and moist since pears are full of liquid which drained pineapple doesn’t have. Any fruit can be used for this cake and can be arranged decoratively – I just tossed mine in the bottom of the spring form pan but feel free to make one that’s prettier.

Preheat oven to 325 degrees. In a small bowl, whisk:

1/4 cup ground flax seed

1/2 cup aquafaba

Let sit while you get the baking pan ready. Using a 10″ spring form pan, or if authenticity is desired, a cast iron Dutch oven, spray the bottom with non-stick spray and add a round to fit of parchment paper. In a small sauce pan melt:

1/4 cup vegan margarine

Pour into the prepared pan and sprinkle with:

1/2 cup fine date sugar (the courser sugar doesn’t work as well here – you could use the date syrup squeeze bottle to squeeze 1/2 cup of syrup over the melted margarine instead)

Peel (if desired) 2 large pears, 2-3 apples. Also could use 1 1/2 cups mixed berries or pineapple rings. I also shaved a fresh piece of ginger and grated about 2 teaspoons on top of the pears. Cinnamon or allspice could also be sprinkled over the fruit in the pan.

Arrange the fruit on top of this mixture and set aside. In a medium bowl mix:

1 1/4 cups all purpose gluten-free flour

1/2 cup fine cornmeal

2 teaspoons baking powder

1/2 teaspoon sea salt

1/2 teaspoon baking soda

1 teaspoon xanthan gum or guar gum

In the smaller bowl, add to the flax gel:

3/4 cup date sugar

1 cup dairy free milk mixed with 1 teaspoon vinegar

2 teaspoons vanilla extract

Whisk until well mixed and then add to the flour mixture and either mix with a hand mixer or a spoon until combined. Do not over mix. Let sit for 5-10 minutes before pouring over the fruit (or pour over the fruit and let sit). Bake for 30-40 minutes and then reduce heat to 325 degrees and bake another 10-20 minutes or until a toothpick inserted in the center comes out clean. Cool in pan at least 15 minutes before removing from pan onto plate. Remove parchment paper.