I’m always looking for different gluten free bread recipes. Most of the light, fluffy gluten free breads use eggs for that lightness. But it is possible to make gluten-free breads using baking powder instead of yeast and/or eggs.
Preheat oven to 400 degrees. Liberally grease an 8×5″ loaf pan (preferably glass for even cooking). In a medium bowl, combine:
2 cups brown rice flour
1 cup of all-purpose gluten free flour (oat, white rice, etc., would also work)
1 teaspoon baking powder
1 teaspoon baking soda
1 teaspoon guar gum or xanthan gum
1/4 teaspoon salt
Whisk or stir to combine and aerate. In a smaller bowl, combine:
2 cups non-dairy milk
3 tablespoons oil
1 tablespoon vinegar
1 tablespoon maple syrup
Whisk or stir before adding to the dry ingredients. Using a large spoon or hand mixer on low, mix until combined. Batter will be the consistency of a cake batter. Pour into the prepared pan. Place in the middle of the oven. Bake for 50-60 minutes until a toothpick comes out clean or with a few dry crumbs. Cool completely before removing from the pan.
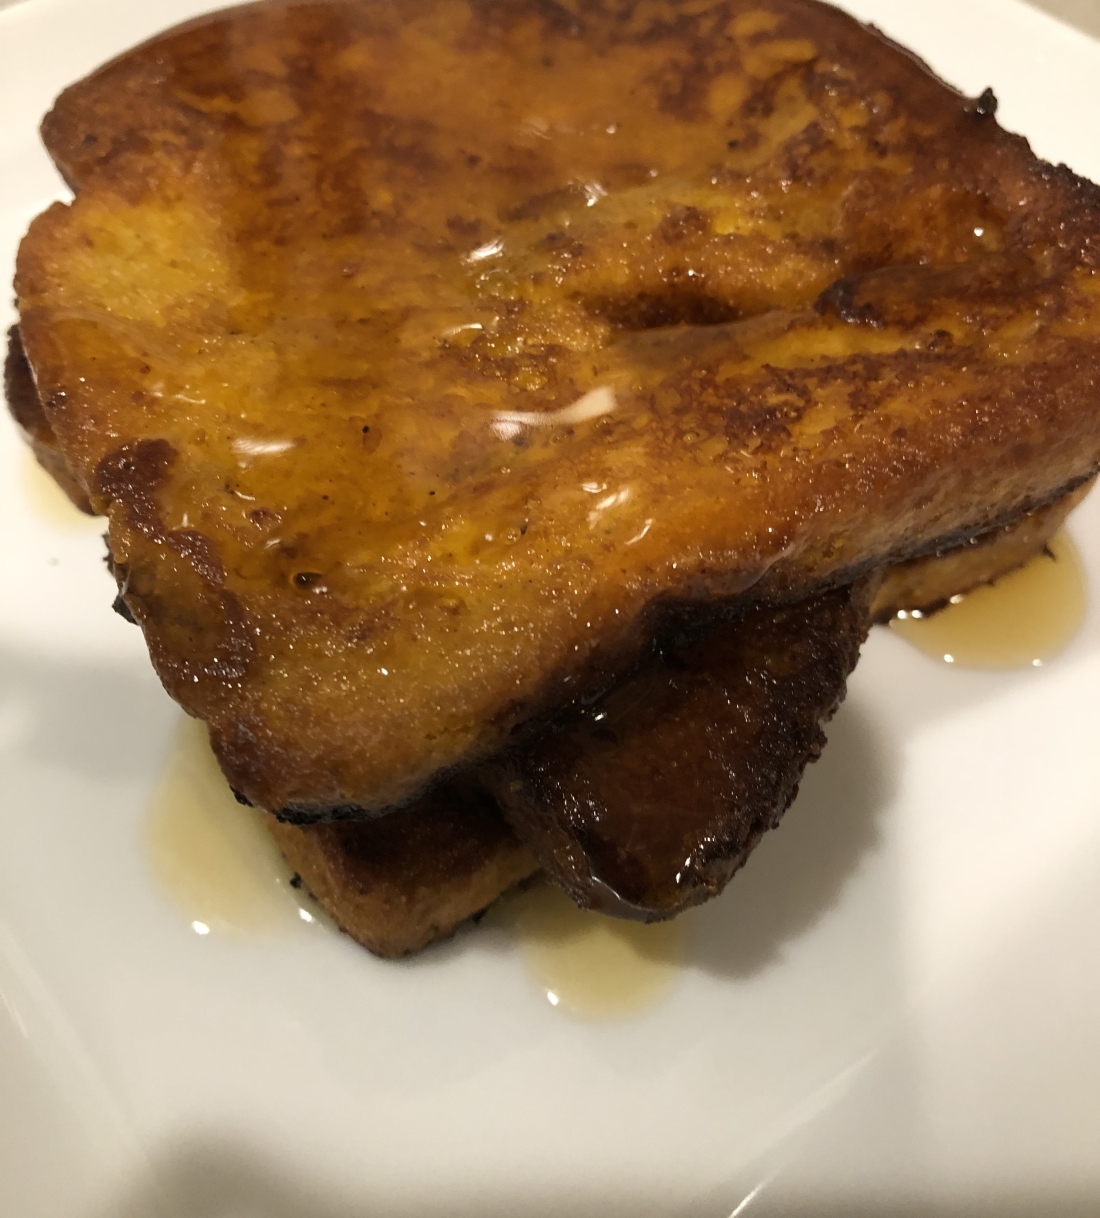
So good it doesn’t need maple syrup, not that you shouldn’t feel free to top this toast with a little. There is maple syrup in the recipe, so it already has some sweetness. I found putting syrup on the toast masked the flavor of the pumpkin and spices so if you must, a little dab’ll do you as the old saying goes. Of course, you can substitute sweet potato or squash puree for the pumpkin and the spices can also be altered depending on your family’s tastes.
In a one-inch-deep bowl combine:
1/4 cup pumpkin puree
1 cup non-dairy milk
1 tablespoon arrowroot
1 1/2 tablespoons pumpkin protein
2 tablespoons maple syrup
1/2 teaspoon nutmeg
1 teaspoon cinnamon (or allspice)
1/2 teaspoon vanilla extract
pinch of salt
Whisk together until well combined. Over medium high heat, in a large skillet heat:
2 tablespoons olive oil
Using a total of 8 slices of gluten-free bread, soak slices in the mixture (I found pressing down on the second side helps it absorb the pumpkin mixture). When the oil is hot, add the bread. Continue dipping slices until the skillet is full. Brown on the first side for about 3-4 minutes before turning and cooking on the second side for about the same time or until brown and crispy. You may want to turn them several times to get all sides browned and crispy. Add more slices as you remove those that are cooked. The last slice may need a little help absorbing the liquid since most of it will already be used. I took a spoon and scrapped the last remaining mixture onto the second side. Serve immediately. Makes 4 servings of 2 slices each.
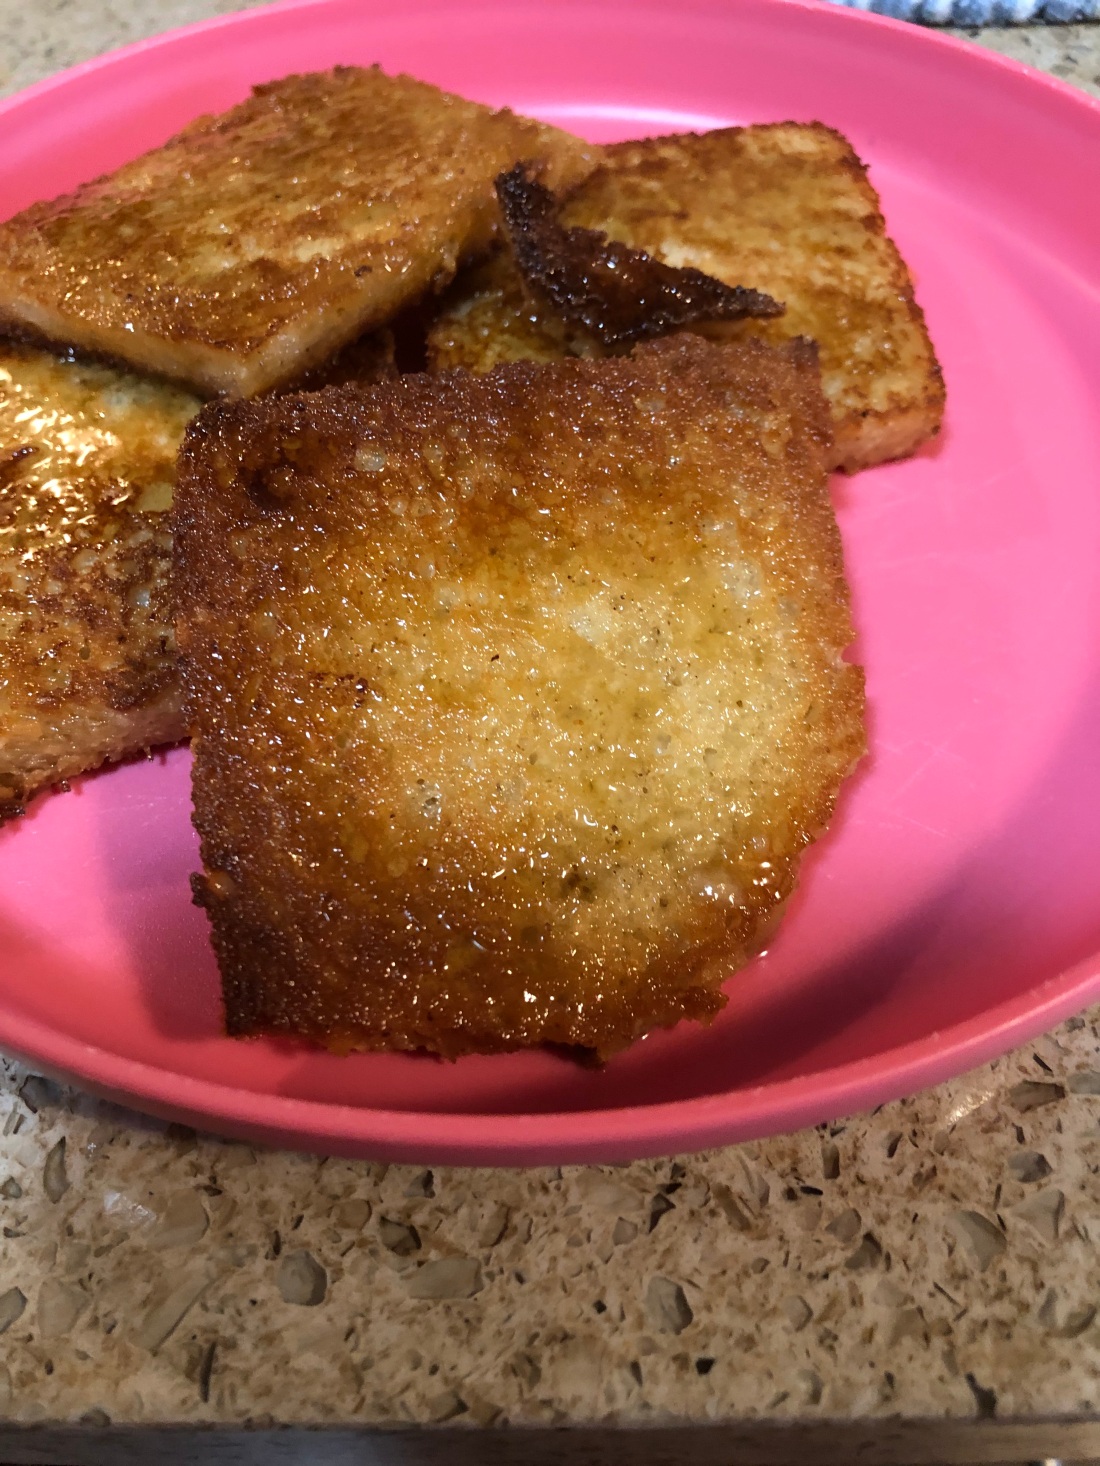
I’ve blogged a French toast recipe before now but I think this one is even easier and tastier than the previous one. This recipe is so easy a child can do it for themselves or parents. Just a couple of ingredients, which can be changed depending on the taste you’re looking for (i.e., nutmeg, cinnamon, allspice, cloves, ginger, etc.) on a particular day. I found, using hot oil, that the outside gets very crunchy while the inside stays soft and tender.
Whisk together in a 3-cup bowl (wide enough to put a slice of bread into):
3/4 cup non-dairy milk, your choice
1/2 teaspoon spice, again your choice (I prefer allspice but use whichever spice you like)
dash of salt
1/2 teaspoon vanilla extract
1 tablespoon arrowroot
Set aside and heat over medium high heat in a 12″ or larger skillet:
2 tablespoons oil
Dip into the milk mixture, one at a time:
6 gluten-free slices of bread, again your choice as to what kind*
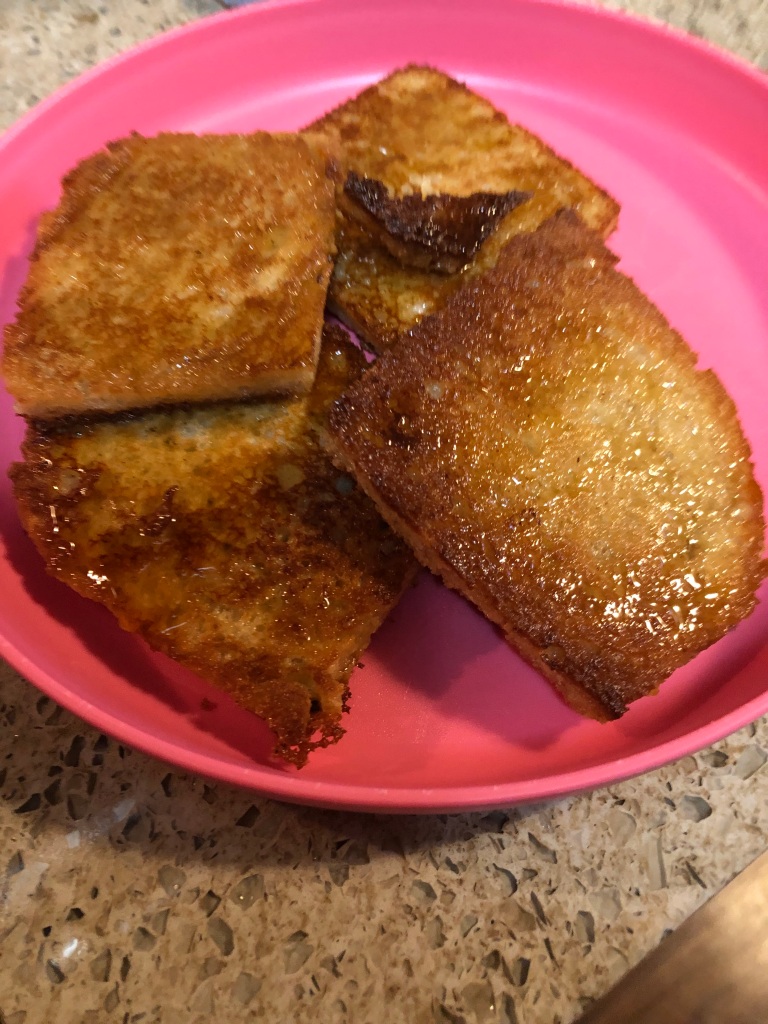
The milk mixture may take more than six slices depending on the density of your bread. You may want to do this before heating the oil and let the slices of bread sit for a minute in the milk mixture since gluten-free bread can be denser than other breads and may need to soak a little longer; remove each slice after soaking to a baking sheet if doing prior to heating the oil. The oil will splatter because of the liquid in the bread so use a splatter guard if possible. Once the bread begins to brown, reduce heat to medium after flipping the slices over. Brown on the second side; the hot oil will get them nice and crispy. It takes about 2-3 minutes per side. Serve with jam or maple, agave, or date syrup.
I know, more brown food!
*FYI, I made a batch of old-fashioned donut muffins, didn’t add the topping, sliced them in half crosswise and used them instead of bread and they were scrumptious! BTW, not the photo above.
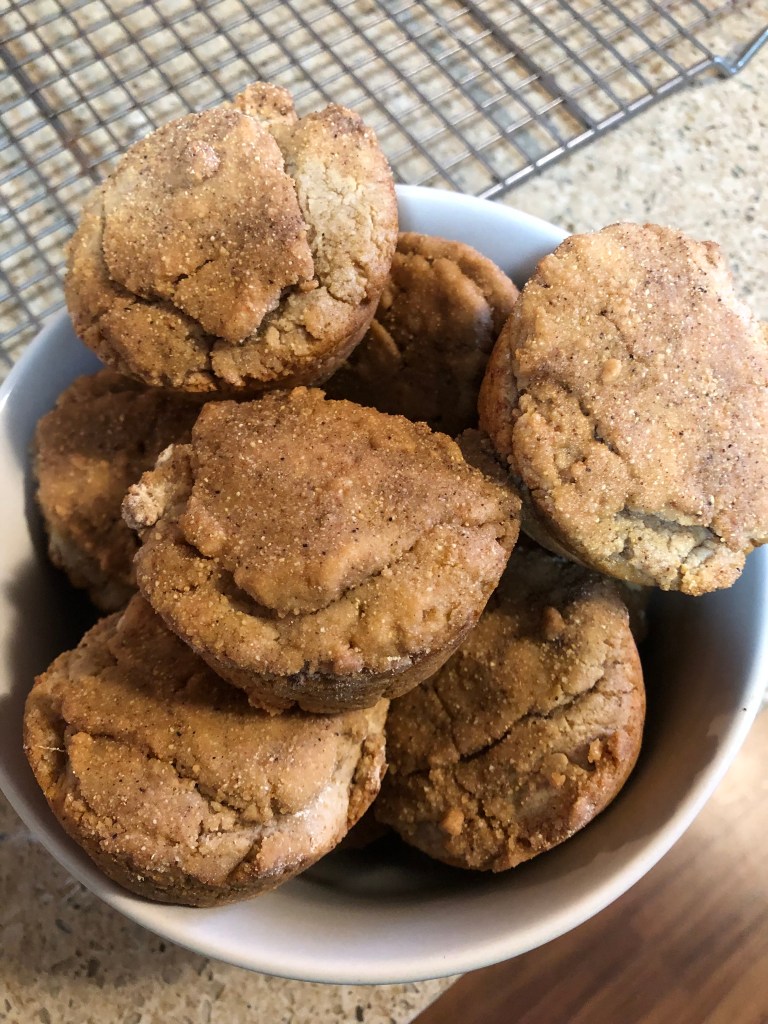
It’s a snowy day here in Minnesota so I’m stuck at home. Days like this always give me an urge to bake. It comes from the days, growing up, when my father who worked for the Town road crew, could be out all day and often into the night plowing snow and salting the roads. He’d stop home once or twice in a twelve-hour period and be hungry and want a fresh thermos of coffee. On days like that, I’d bake cookies, muffins, cupcakes, anything portable but his favorite thing was my old fashioned cake donuts. I found a recipe yesterday, not allergy friendly of course, for donut muffins (Dianne on allrecipes.com) and I managed to make it allergy free. Hope you enjoy these. Make a single batch (6-7 small muffins) or a double batch (12-14). Either way, it takes longer to measure out all the ingredients than it does to mix them together and get the dough in the muffin tin! Very quick and easy.
Preheat oven to 375 degrees. Spray a mini or small muffin tin and set aside. For a single batch, in a medium bowl combine:
1 cup gluten-free all-purpose flour
3 tablespoons date sugar
2 1/2 teaspoons baking powder
1/4 teaspoon salt
1/2 teaspoon ground nutmeg (those of you who follow me regularly know I don’t like nutmeg but in old fashioned donuts, it just has to be nutmeg!)
Stir to combine before adding:
1/2 cup non-dairy milk
2 tablespoons avocado oil (or any melted butter, margarine or shortening)
Stir until just combined. Portion into the baking sheet. Try to get all the muffins around the same size. Bake for 18-20 minutes. Let cool for 5 minutes or so before removing from the baking pan. If desired, top with the following:
Dip each muffin’s top into:
1/4 cup avocado oil (or melted butter, margarine or shortening of your choice; should be enough for all the muffins)
Then dip into a mixture of:
1/4 cup date sugar
1 teaspoon ground nutmeg (cinnamon, allspice, etc., would also work just fine)
Let cool a few more minutes before serving, if they last that long!
*I used a small muffin pan (about 2″ diameter at the top and a double batch made 12).
The Asian pear scones were so delicious – moist and flavorful – that I decided to try another scone. These pumpkin scones are also very moist, with warm spices. Perfect served warm for breakfast with a cup of coffee or tea. And easy to make.
In the bowl of a food processor (or a medium size bowl) combine:
1/4 cup Spectrum shortening (or full fat solid coconut oil or congealed olive oil*)
Pulse until crumbly (or use a pastry cutter or fork to combine until crumbly). Place mixture in a medium bowl. Add:
1/2 cup oat milk
1/2 cup + 1 tablespoon pumpkin puree
Mix until just combined. Spray a small baking sheet (9×15) or line with parchment paper. Turn the mixture out onto the baking sheet and form into a flattened circle approximately 8″ diameter. Using a wet knife, cut into quarters and then cut each quarter in half to form 8 triangles. Arrange pieces approximately 1″ apart on the baking sheet and refrigerate for 15-20 minutes. Bake at 400 degrees for 25 minutes (20-30 depending on your oven), or until the top is slightly firm when pressed and the scones are slightly darker in color. Cool.
OPTIONAL:
Glaze with a mixture of monk fruit confectioners sugar (approximately 2 tablespoons) and 1-2 teaspoons maple syrup. Add 1-2 teaspoons water as needed to form a thin glaze, or more maple syrup. Drizzle over scones.
*Put the olive oil in the freezer about an hour before you need it and it will solidify.
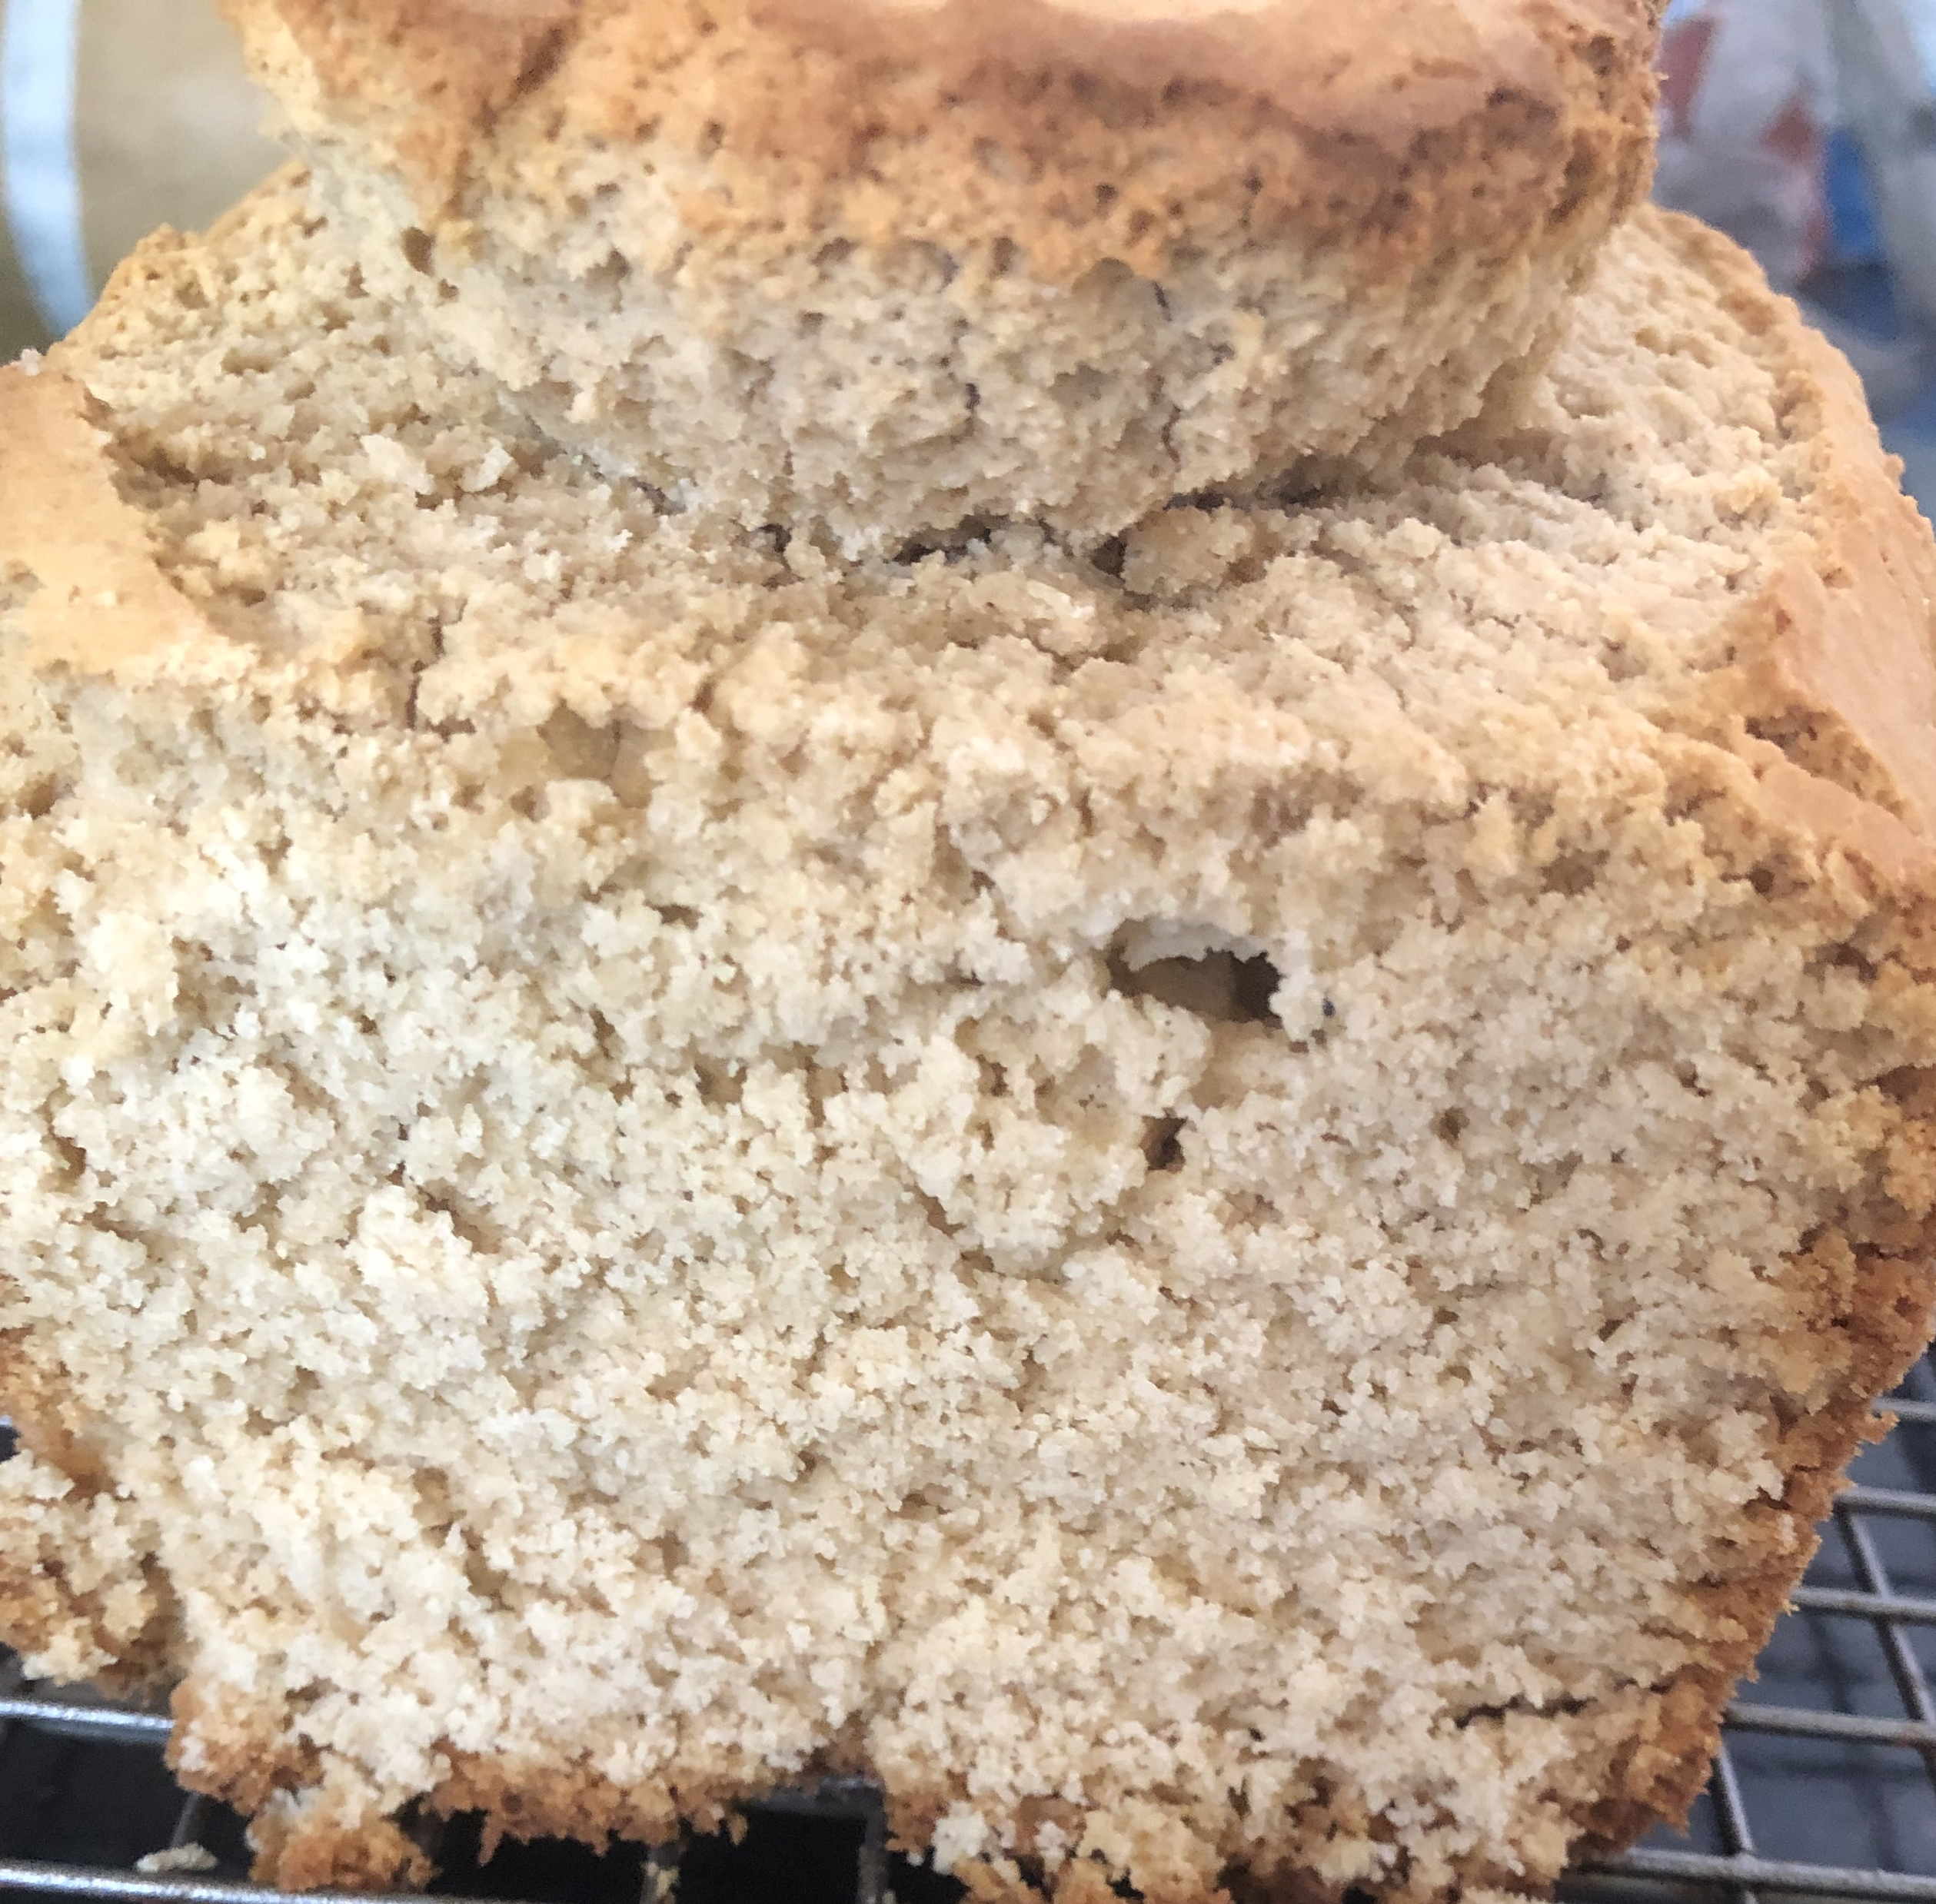
Quick breads are so easy to make and so delicious to eat. Flavorful with warm spices, they take minutes to mix together and, when gluten-free, can take almost an hour to bake. But definitely worth it. Here’s a pumpkin quick bread recipe that will delight your whole family. I used allspice and ground cloves but feel free to use cinnamon, nutmeg, and/or ginger (pumpkin pie spices) instead. Various flours can also be used including all-purpose (I use the 1 to 1) but whatever one you choose will work. For a lighter bread, eliminate the protein powder and use an additional half cup of one of the other flours.
First make some flax gel by combining in a small dish:
2 tablespoons ground flax meal
1/4 cup warm water
Whisk to combine and set aside to gel. Preheat oven to 350 degrees. Spray a bread pan (9×5″) with non-stick cooking spray and set aside. Into your mixer’s bowl or a medium bowl (if using a hand mixer), add:
1 cup pumpkin puree
1/3 cup maple syrup (date or agave syrup, honey)
1/4 cup avocado oil
1 tablespoon vanilla
1 tablespoon rice vinegar
Mix until combined before adding:
1 cup oat flour
1/2 cup millet flour
1/2 cup quinoa flour
1/2 cup pumpkin protein powder (or another 1/2 cup of any of the flours)
2 teaspoons allspice
1/2 teaspoon cloves
1/4 to 1/2 cup date sugar (depending on your taste)
the flax gel
1/2 cup dried cranberries (optional, you could use chocolate or carob chips instead)
1/4 cup pumpkin seeds (optional to sprinkle on top in the pan)
Mix until all ingredients are well combined. This is a thick dough. Spoon into the prepared bread pan and smooth the top. Sprinkle with the pumpkin seeds if desired. Bake for 50-60 minutes. When a toothpick inserted in the center comes out clean cook for another 5 minutes. Cool on a rack. Great warm or toasted the next day. Will keep for several days in an airtight container.
I’ve only had scones a couple of times and found them to be very dry and crumbly. So I was hesitant to try this recipe but I had a very large Asian pear that would make three servings of fruit, way to much to eat at one time. So this recipe offered me a nice alternative. And, oh my, what a delicious, fluffy, scone! The pear added flavor along with the allspice I used. Asian pears are less juicy and much crisper than other pears like Bosc or Bartlett, they have more of an apple consistency. If you don’t have any Asian pears on hand (they can be difficult to find unless they’re in season which is the late fall), use a very firm pear so that it isn’t too juicy. If you have a riper pear, don’t add as much liquid which would mean none since there’s only a 1/4 cup of non-dairy milk in this recipe.
First, preheat oven to 375 degrees. Line a medium to large baking sheet with parchment paper. Then make a flax egg by combining:
1 tablespoon ground flax
3 tablespoons warm water
Whisk to combine and set aside for several minutes until it forms a gel. While that’s happening, grate:
1 very large Asian pear (or two smaller pears), washed, cored, and peeled – want about 1 cup of grated pear
In the bowl of a food processor (or if you don’t have one, into a medium bowl), combine:
1 1/2 cups all-purpose gluten-free flour
1/2 teaspoon guar gum
1/4 teaspoon salt
2 teaspoons baking powder
1/3 cup fine date sugar
1 teaspoon spice – cinnamon, allspice, nutmeg, cardamom, etc.
1/3 cup Spectrum shortening (or vegan butter) – without a food processor, use a pastry fork to cut the shortening into the dry ingredients
Pulse until the shortening is combined with the dry mixture. Add:
1 cup grated pear
1/4 cup non-dairy milk
flax gel from above
Pulse until all ingredients are combined. Remove from machine and using a large serving spoon, spoon onto the prepared baking sheet (makes six) and let sit on the counter for 5-10 minutes before baking for 15-20 minutes. Store in an airtight container on the counter for up to 3 days or in the refrigerator for up to a week. They can be frozen as well.
I posted quite a while ago a recipe for English muffins made with yeast that are truly great and taste just like the original. But they take several hours of prep and quite a bit of work to make. Here, however, is one that is cooked in the microwave and takes about five minutes to put together (only because it takes a few minutes for the flax gel to thicken, if you can use an egg, it won’t take more than 2 minutes to put together. And I was quite surprised at how tasty they were. The recipe makes 2. Do what I say and not what I did – be sure they are cool before toasting them.
In a small bowl combine:
1 tablespoon ground flaxseed
3 tablespoons warm water
Whisk together and set aside. Grease (I used 1 teaspoon olive oil in each ramekin) 2, 3″ ramekins and set aside. In a small bowl (about 2 cups) combine:
1 tablespoon oil, vegan butter or margarine
2 tablespoons seed or nut butter
Microwave for 30 seconds to 2 minutes (depending on the kind of butter you use; my homemade pumpkin seed butter took a little over 1 minute). Whisk to combine and add:
2 tablespoons all purpose, gluten-free flour
1/2 teaspoon baking powder
1/8 teaspoon sea salt
1 tablespoon non-dairy milk
the flax gel (or 1 egg)
Whisk to combine before dividing equally between the two ramekins. Microwave for 1 to 1 1/2 minutes, remove and flip the muffins over in the ramekin (use an offset spatula). The bottom that is now the top looks wet. Microwave for another 30 seconds to 1 minute (smaller ramekins will take longer than larger ones). A toothpick inserted in the middle should come out clean and the top should look dry. COOL COMPLETELY! before toasting. And enjoy.
I’ve never been a fan of flavored coffee. When I drink a cup of coffee, I want to taste coffee. But the other day I saw spiced pumpkin latte on a menu and was fascinated. I looked up a recipe and found a version of this one on-line. It’s converted my thinking. I’m thinking I’ll try some other flavored coffees now. This one is so delicious, rich and creamy. But the best part is that now I can have 19 more mugs of spiced pumpkin latte without making flavoring. This recipe actually makes about 4 cups of syrup. If, like me, you use 1/4 cup of the syrup in each 2-cup mug, you’ll get 20 cups of rich and creamy latte. And like most of my recipes, feel free to adapt it to your taste by adding more or less instant coffee (or espresso) as well as adjusting the sweetener to your liking.
In a 2-quart saucepan combine:
1 15-ounce can of pumpkin puree
2 1/2 cups water
1/3 cup date syrup*
1/3 cup maple syrup
1 tablespoon pumpkin pie spice (adjust this to your taste as well)
1 tablespoon vanilla extract
3 tablespoons instant coffee (or espresso)
Whisk to combine all ingredients and cook over medium high heat until the mixture comes to a boil. Then reduce the heat to medium to medium low and cook until the syrup mixture coats the back of a spoon. I cooked it over medium low (I was afraid of burning it) so it took about 40 minutes to reduce. Makes 4 cups of syrup (more or less).
*Feel free to use your favored sweetener. If I make this for my son, I’ll probably use stevia.
Using the syrup to make a spiced pumpkin latte:
In a small saucepan (or if you want it faster, in a microwaveable large mug) heat:
2 cups non-dairy milk (oatmilk froths very well)
When hot combine with:
1/4 cup spiced pumpkin latte syrup (more if you want it stronger)
Heat until desired temperature. If you want the milk frothy, use a milk froth device or I used my immersion blender (don’t do this in the mug! you’ll have a mess of oatmilk all over your counter!). If desired top with a whipped non-dairy cream.
Using this syrup to make spiced pumpkin latte pudding (or creme brulee):
In a 2-quart saucepan combine:
1 cup spiced pumpkin latte syrup
2 1/2 cups non-dairy milk (DO NOT USE SOYMILK)
1/2 to 2 teaspoons instant coffee or espresso
In a small bowl combine:
1/2 cup non-dairy milk
3 tablespoons arrowroot
Whisk to combine and make a slurry before adding to the saucepan. Heat over medium high heat, whisking every few minutes (I usually whisk it almost constantly) until the mixture comes to a boil at which point it should also be thickening. Remove from the heat and pour into serving dishes. If creme brulee is desired, after the pudding cools, top with 1 teaspoon sugar in each dish and brulee. Makes approximately 6, 6-ounce servings.
I don’t usually post anything about the recipes that I try that don’t turn out well but here’s one I made last night which failed in what it was supposed to be but became an inspiration for something else. I’ve always loved granola but there’s always something, often times raisins or nuts in it, that I can’t have (never mind all the sugar!). The oatcakes recipe I tried to make last night failed miserably – all it wanted to do was crumble. I thought and thought today, what can I do with this? Don’t want to throw it out, it tastes good, maybe use it as a topping for a pear brown betty. Then it hit me – it’ll make really tasty granola. So I added some pumpkin seeds, freeze dried raspberries and some small pieces of chopped dates and guess what – I was right! Oh so delicious! Here’s the basic recipe for the “oatcakes” which you can then add any number of dried fruits and nuts/seeds to for a delicious granola. Just watch out cuz it’s addictive!
Line a medium sized sheet pan with parchment paper. In a medium size bowl combine:
2 cups uncooked gluten-free oatmeal
1 cup gluten-free all-purpose flour
1/2 teaspoon sea salt
1/2 cup fine date sugar
In a small bowl (I used a 1 cup glass measure), combine:
1/4 teaspoon baking soda
1/4 cup hot water
Stir to dissolve the baking soda before adding:
1/2 cup avocado oil
Optional at this point maybe add one or two spices:
Stir into the dry ingredients, the mixture will be crumbly but try to bring it together as much as possible. Spread out on the sheet pan and cool in the refrigerator for 15-20 minutes before baking. Preheat oven to 400 degrees about 5 minutes before the mixture is ready to bake. Bake for approximately 20 minutes until the top is golden brown. Remove from oven and cool before breaking up and putting in a storage container (I used a gallon food storage bag). Add any number of ingredients such as:
1/4 cup pumpkin seeds, sunflower seeds, sesame seeds, hemp hulls
1/4 cup of any type of nuts (if you can eat nuts) like chopped cashews, almonds, walnuts or pecans (roasted of course)
1/4 cup small pieces of chopped dates
1/4 cup freeze-dried fruit such as raspberries, strawberries, etc.
1/4 cup dried fruit like cranberries, blueberries, cherries, etc. – even raisins for those who can eat them!
I must be quite slow on the uptake – it occurred to me while I was typing this that the original recipe writer probably wanted us to use cooked oatmeal rather than uncooked! I’ll have to try it that way.