Raspberry Crumble Bars

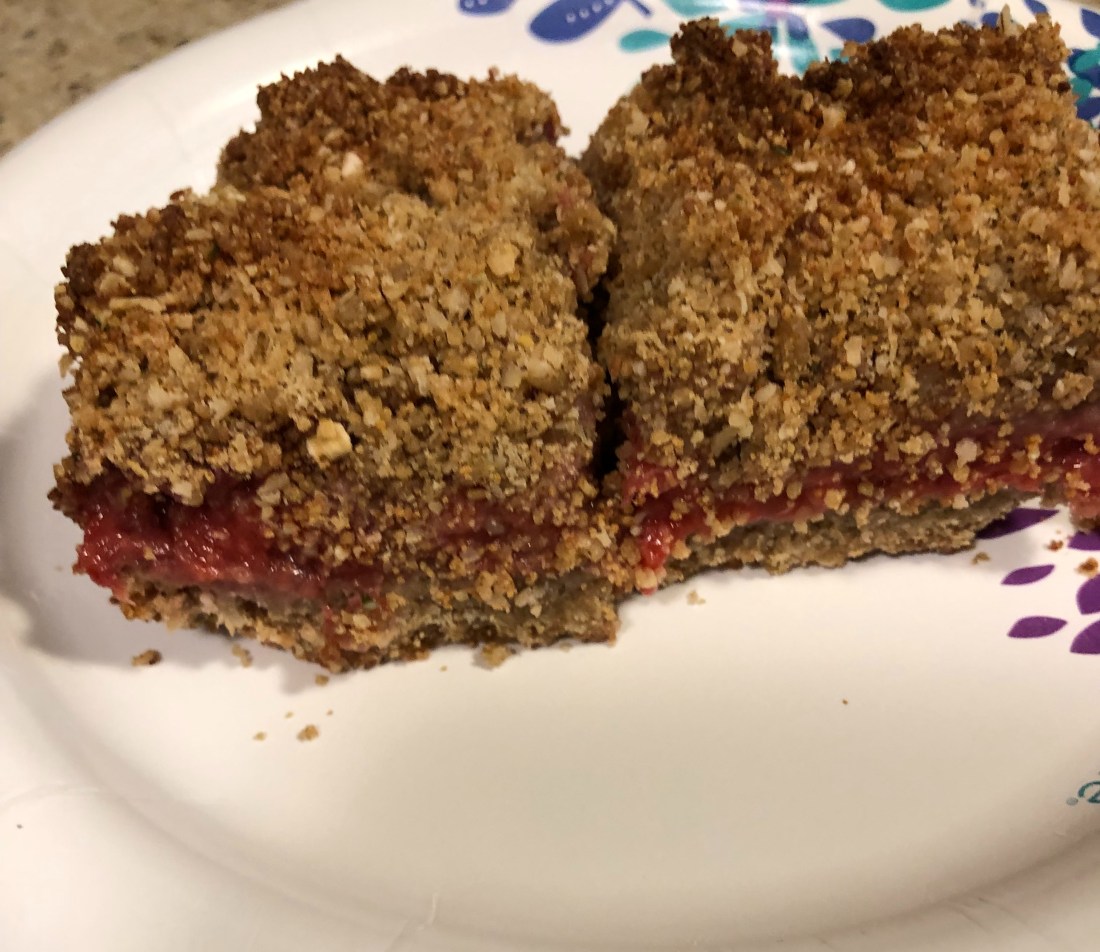
Well, after my fall, I’m recovering nicely and can finally stand on my bad leg for more than 10-15 minutes without it starting to throb. So, of course, the first thing I had to do was COOK! I haven’t cooked anything in almost 2 weeks and I was going crazy! I know I put up a recipe for raspberry bars a few months ago but I saw this one and it’s a lot healthier without all the fat or quite as many carbs as the other recipe. Hope you enjoy it as much I do.

Preheat oven to 375 degrees. Prepare an 8×8 baking pan by spraying with non-stick cooking spray and then lining with parchment paper (spraying the pan allows the paper to stick and makes pressing the crust layer into the pan much easier, especially since the paper should be one solid piece because we’ll use it to lift the finished product out of the pan to slice).

For the crust, in the bowl of a food processor combine:

1 1/4 cup rolled oats

3/4 cup millet flour (or sorghum flour)

1/2 cup date sugar

1/2 teaspoon cinnamon

Make a well in the middle of the dry ingredients before adding:

1/4 cup honey (or agave or coconut nectar)

1/2 cup seed or nut butter (I used pumpkin seed butter but tahini, almond, etc., would work)

1/4 cup ground seeds or nuts (or hemp hulls) **OPTIONAL

Pulse to combine. If mixture is too dry, add a couple of tablespoons of water. We want a mixture that sticks to itself, at least a little bit when squeezed together. Press 2/3 of the mixture into the bottom of the prepared pan. In a medium bowl mix:

2 cups fresh or frozen raspberries*

2 tablespoons lemon juice (about half a lemon)

2 tablespoons date sugar

2 teaspoons corn starch (or arrowroot)

Stir to combine. Spread over the crust covering it completely and try to make the raspberry filling as even as possible. Top with the remaining 1/3 of the crust mixture. Bake for 30-35 minutes or until top is golden brown. It’s very important to cool the bars completely before cutting. I cooled mine on the counter for several hours and then put it in the refrigerator for 4-5 hours.

*While I used raspberries, any fruit can be used for the filling – blueberries, strawberries, blackberries, apples, pears, peaches, etc. If using fresh fruit, reduce the corn starch (or arrowroot) to 1 teaspoon.

Stuffed Turkey Rolls

I found some turkey breast filets at the store the other day and wondered how to cook them without drying them out. Turkey breast filets can be either too thick or too thin; these were very thin. I used to make a turkey “napoleon” for my husband and I wondered if it would work as a roll. It not only worked, but they turned out delicious. The stuffing can be made ahead and is enough to stuff 6-8 turkey filets depending on their size. Of course, any stuffing recipe will work but I made my sausage and mushroom stuffing, adding half a pear for a little sweetness and it turned out succulent. The stuffing is the most time consuming part of this process.

Serves 3-4.

To make the stuffing, over medium a 10″ skillet, heat:

2 tablespoons olive oil

When hot, add:

1/2 medium onion, finely diced

2 small stalks celery, finely diced

1/2 medium pear, minced

3 ounces mushrooms, finely diced

Stir and reduce heat to medium low. Cover the vegetables for about 5 minutes until they are tender. While they cook, break up 2 slices of bread (I used the quick oat bread recipe on this blog). If using a different bread, be sure to crumble into small pieces. When the vegetables are soft, add them along with the oil to the bread crumbs, mix thoroughly. To the skillet add:

4 ounces sausage, any kind your family likes

Cook thoroughly, breaking it up as it cooks into a “minced” meat consistency (like hamburger). This should only take a couple of minutes. Add to the stuffing mix along with:

Salt and pepper to taste

1/2 to 1 teaspoon of ground sage

If your turkey filets are square, you’ve hit the jackpot! Mine were triangular. Add about 1/3 cup of the stuffing on the longer side of the filet and pull the smaller side over it. I used bacon to wrap and hold the roll but I would suggest using porchetta instead because the bacon had too strong a flavor and almost overpowered the turkey roll.

Once rolled and wrapped, secured with toothpicks if necessary, place in a 10″ skillet with a little oil so that the bacon doesn’t stick. Cook over medium heat for approximately 2-3 minutes per side, getting all four sides.

While the turkey rolls are cooking, heat 2 tablespoons olive oil in another 10″ skillet. When hot add:

3 ounces of mushrooms

1/2 medium pear, minced

Cook for a 2-4 minutes, salt and pepper to taste and add:

2 tablespoons all purpose gluten-free flour

Stir to combine so that all the oil is floured and cook over medium low heat for 1-2 minutes to cook the flour. Add:

1 1/2 to 2 cups turkey (or chicken) stock

Stir to combine and stir constantly until thickened into a gravy.

Serve the turkey rolls over mashed potatoes (or rice), adding gravy to each of the servings. Enjoy!

Stuffed Artichokes

Artichokes are one of my favorite vegetables that I don’t eat every often. This time of year, the fresh artichokes are really delicious and wonderfully large, very stuffable. And the stuffing part isn’t set in stone – I usually use a chicken stew but I made one of my curried vegetable pies yesterday and thought, when I saw a beautiful big artichoke in the store this morning, that the leftovers would be great stuffing for that artichoke! So this one is vegan but any type of stew, preferably a creamed stew, will work as filling.

Serves 4. Prepare 2 large artichokes:

Using a vegetable peeler, shave the stem and cut off the very bottom, like cutting off the bottom of a carrot or onion. The stem of the artichoke is quite edible, tastes just like the heart. Then cut the stem off at the base of the artichoke so that it will sit flat in the pot. Some people cut off the top half of the artichoke but I don’t bother, a few spines on the ends don’t bother me but feel free. Place the artichokes and stems in a steamer over water and cook until the leave are falling away from the center. Remove from the steamer and let cool (trust me you don’t want to do the next step when the artichokes are boiling hot!).

Preheat oven to 400 degrees. When the artichokes are cooled, fold back the leaves and remove the tiny center leaves to reveal the choke. Using a spoon, remove the choke trying not to break the outer leaves from the middle (but it’s okay if this happens, just lean the sections of the artichoke on the outside of the baking dish or against each other). It’s best to use a greased baking dish that is about the size of the artichoke, so for the 2 artichokes, 2 dishes are needed.

Dice the tender parts of the stems and add to the filling. For 2 jumbo artichokes, use about 4 cups of stew. SEE: Creamy Chicken Stew with Asparagus (leaving out the asparagus of course), Curried Vegetable Pie, Chicken or Turkey Pot Pie, etc. Top with seasoned bread crumbs – 1/4 cup gluten-free bread crumbs tossed with olive oil (or melted vegan butter or avocado oil) and herbs. Or if like me you have leftover curried vegetable pie, use the remaining crust as the topping (or cut out rounds of pie crust).

Bake in a 400 degree oven for about a half hour if the stew is cold, less if it’s already hot. And if topped with a raw pie crust, bake for about 40 minutes.

Caramelized Cabbage with Bratwurst

I follow another food blogger who writes about traditional German recipes and every once in a while one comes along that sounds pretty good to me and easily adapted to allergy free. As usual, feel free to adjust to your tastes. Leave out the bratwurst and the dish becomes a side dish. It would also be very good with some diced apple or pear, much like the braised cabbage recipe on my blog.

In a large, high sided skillet, over medium high heat:

2 tablespoons olive oil

When shimmering add:

2 medium onions thinly sliced

12 ounces cole slaw mix (or small white cabbage shredded)

2 large baby bok choy washed and sliced into chunks

Salt and pepper to taste (I used about 1 teaspoon of my Herbamare and 1/4 teaspoon pepper)

2 teaspoons date syrup (or date sugar if you don’t have date syrup, or 1 teaspoon agave)

Stir to combine and then stir every minute or so to keep the bottom from burning. When sizzling, reduce heat to medium and continue stirring every minute or two until caramelized, about 15-20 minutes. The onion and the cabbage will release liquid as they cook and that needs to evaporate before the mixture can begin to caramelize. Most important to stir often once the liquid is gone. Deglaze the pan with:

1 1/2 cups chicken stock (or 1 cup stock and 1/2 cup white wine if you can have it)

Add:

1 bay leaf

1 teaspoon lightly crushed caraway seeds (I put them in my spice mill for about 2 pulses)

Stir and reduce heat to medium low and simmer until about half the liquid has evaporated, about 10 minutes. Sauce should thicken slightly as it reduces.

As the cabbage mixture is simmering, in a separate skillet over medium high heat:

1 tablespoon olive oil

Add:

4 pork bratwurst, casings removed*

Brown on all sides then reduce heat to medium, cover, and let cook until cooked through, about 7-8 minutes. Slice into bite size pieces and add to the cabbage mixture. Be sure to remove the bay leaf before serving. Can be served over noodles.

*Feel free to use any sausage your family prefers.

Oatmeal and Pear Cookies

This are very easy to put together and tastes delicious. Per usual, I can’t eat apples, peaches, nectarines, etc., but if you can, this cookie would work with any of those fruits, probably cherries as well. Just be sure that the fruit is not overripe or the mixture will be too wet.

In a medium bowl, combine:

1 tablespoon ground flax

1/3 cup aquafaba

Whisk and let sit for at least 5 minutes then add:

2 tablespoons avocado oil (or coconut oil)

1/2 cup agave or honey (or date syrup)

1/2 cup diced pears (or other fresh fruit)

1 teaspoon vanilla extract

Combine and add:

1 cup quick gluten-free oats

3/4 cup all purpose gluten-free flour

1 teaspoon xanthan gum (or guar gum)

1 1/4 teaspoons ground cinnamon

1/4 teaspoon allspice

1 1/2 teaspoon baking powder

1/4 teaspoon salt

Stir until all the dry ingredients are mixed into the wet. Set aside and let sit for 45-60 minutes. Preheat oven to 325 degrees. Prepare a large cookie sheet by covering it with parchment paper (or a silicone mat). Scoop by tablespoon the cookie dough placing cookies at least 1 inch apart (they don’t spread). Bake for 13-15 minutes. Makes approximately 18 cookies.

Easy Swordfish Steak

This is a very simple recipe. All you need is a nice piece of swordfish, a skillet, a little olive oil and a couple of lemon slices, oh and don’t forget the salt and pepper!

To serve two:

1-2 swordfish steaks, approximately 3/4 of a pound

In a medium size skillet (depending on if you have 1 or 2 steaks), over medium high heat:

1 tablespoon olive oil

When shimmering, add:

1-2 swordfish steaks which are dried and seasoned with salt, pepper and garlic powder

Sauté for about 3-4 minutes, depending on the thickness of the steaks. Want to get a nice sear on the first side before turning. Flip and cook again for 2-3 minutes depending on thickness. Cover with:

3-4 lemon slices per steak

Cover the pan and cook for another 3-4 minutes, again it depends on the thickness. Steaks should be solid to the touch but don’t overcook or they will dry out.

Turkey Hash

Hash is a favorite of mine. It’s so tasty and so versatile. Any meat, any vegetables can be used in hash. It’s not just corned beef hash anymore! After I made the roasted turkey breast the other day, I had over half the breast left (since there’s only one of me and the recipe served 4). I’d already cooked plenty of sweet potatoes (but there’s nothing wrong with cooking more!) and had some rainbow carrots in the freezer. Hash is so easy to make, hope you’ll give it a try.

I served this with the leftover turkey pear gravy! Oh so delicious

In a large skillet (12″), heat over medium heat:

2 tablespoons olive oil

When shimmering add:

1 medium onion diced

3-5 celery stalks, diced

When the onion is becoming translucent, add:

2 cups diced cooked sweet potato (or white if you prefer)

1 cup cooked rainbow carrots, sliced or diced

2 not quite ripe pears, peeled and diced

1-2 teaspoons minced garlic

Salt and pepper to taste

Mix to combine and continue cooking until sweet potatoes start to brown. Stir in:

2-3 cups cooked turkey, diced

Lower heat to medium low and cover. Cook for approximately 2-3 minutes until turkey is hot. Remove lid, stir. At this point, if eggs are allowed in your diet, crack 4 eggs on top of the hash, cover and cook until eggs are ready. Serves 4.

Roasted Turkey Breast with Pears and roasted sweet potatoes

I’m always looking for new ways to cook chicken and turkey. A couple months ago, I blogged a recipe for pork loin with a pear gravy. It came out so good I wondered how pear would go with turkey. Turns out placing sliced pears (or you could use apples) under the skin of the turkey breast keeps it moist while it’s roasting (just be sure not to over cook it!). And yes, I made gravy and added some cooked pears to it, oh so delicious!

Preheat oven to 400 degrees. To feed four:

4-5 pound bone-in turkey breast

Clean thoroughly, removing any feathers or pin feathers left behind along the outside of the skin. Push your fingers under the skin and break the membrane holding the skin to the meat. Prepare a baking dish large enough to hold the turkey along with 2 cups of diced sweet potato. Spray the dish with non-stick cooking spray. Place the turkey in the dish, skin side up.

Wash, peel, core and slice:

1 medium, not too ripe pear making sure all the slices are about the same thickness

Place the pear slices, overlapping slightly between the skin and the meat of the turkey breast. When the pears are in place, , salt and pepper the pears. Using small skewers, pin the skin to the meat to hold the pears in place. Salt and pepper the skin (I also used some garlic powder along with some sage).

Peel and dice up (large pieces) 2 medium sweet potatoes and place around the breast, spray the sweet potatoes with a non-stick cooking spray (or before you add them, add 1 tablespoon of olive oil to them and stir to coat). Salt and pepper the potatoes. (My mother always used white potatoes.)

Bake at 400 degrees for approximately 20 minutes then reduce heat to 350 degrees for about an hour to 75 minutes or until the breast measures 155 degrees when a thermometer is inserted in the thickest part. (It should be cooked to 160 degrees but it will continue cooking after you take it out of the oven.)

Remove the pins and the skin. Cover loosely with a large pan or, if no alternative is available, aluminum foil (should be a last resort!). Let rest for about 10 minutes before slicing. Serve with the pear slices.

If gravy is desired in a 4 cup saucepan heat:

1 cup turkey (or chicken) stock

1 medium ripe pear, peeled cored and mashed

Bring to a boil. While it’s heating whisk together:

1/2 cup turkey (or chicken stock)

2 tablespoons all purpose gluten-free flour

When the stock is boiling, whisk in the flour slurry and keep whisking until the mixture thickens, turning it down to medium heat after adding the slurry. Simmer for about 5 minutes to cook the flour and serve. If you have lumps of flour or large chunks of pear, feel free to run the gravy through a medium sieve to remove them before serving.

“Irish” Potatoes

I hit 200 recipes on the site the other day! This is a recipe I learned from a dear departed friend of mine. She called it Irish potatoes. Easy side dish to prepare and very delicious. My grandson would rather have this with a meal than practically anything else. He especially likes to have the leftovers for breakfast the next day with eggs (and bacon if his mother will let him!).

For 4 people, I use:

2 medium to large sized russet potatoes, peeled and diced*

2 medium sized sweet potatoes, peeled and diced (I had some purple on hand but any sweet potato will work)

1 medium onion, diced

1-2 sweet peppers, diced

1 teaspoon minced garlic

1/4 cup olive oil

Salt and pepper to taste

Place the diced potatoes in a pot of cold water, just covering the potatoes, and cook until a fork will pierce but not split the pieces. If the potatoes cook to fully done, they will be mushy when you fry them.

In a skillet large enough to have a single layer of potatoes (about 12″) heat over medium heat:

1/4 cup of olive oil (or other if preferred)

Add:

Diced onion

Diced pepper (I used the yellow and orange because I can’t digest the green)

Cook until the onions and peppers are softened. Add the potatoes and garlic, salt and pepper. Stir to combine and cook for about 3-5 minutes depending on the size of the potatoes before turning and repeating. A crispy outside and soft inside is what we want here but hard to achieve if you flip the potatoes too often or too soon. Also difficult if there’s not enough oil in the pan. Might have to reduce the heat if the sweet potatoes start to brown too quickly (they will burn easier than the russet chunks). The dish is ready when a majority of the potatoes are crispy and golden brown. Feel free to garnish with chopped parsley.

*Try to make the dices roughly the same size so that they will all cook at the same speed. Having large and smaller pieces will give you mushy fried potatoes since the smaller ones will cook so much faster.

Seafood Linguini

This is a dish I’ve been making for years, thought I’d already posted it but I don’t find. It’s a nice change of pace from pasta with a tomato-based sauce. And very easy to make, just be sure not to overcook the bay scallops and the calamari! Cooking the pasta takes a lot longer than making the sauce. And of course, feel free to use the seafood your family likes best. Makes 2 servings.

First, put on a pot of water to boil for the pasta.

Cook 1/2 box of gluten-free linguini according to package directions. Be sure to salt the water when it comes to a boil before adding the pasta.

When there’s about 5 minutes left on the pasta cooking time add to the boiling water:

1 cup green peas (thaw out if using frozen)

When the pasta is almost cooked, heat a medium saucepan with a high edge over medium heat. Add:

1/4 cup olive oil*

When the oil is hot, reduce heat to medium low and add:

1 finely diced scallion

When the scallion is translucent, add:

1/2 pound bay scallops

2 teaspoons minced garlic (for a more garlicy flavor, add more minced garlic)

1/2 pound small cleaned shrimp

Cook over medium low heat for about a minute or two, just until the shrimp are starting to color, then add:

1/2 pound cleaned and sliced calamari (I use both the parts, chop up the tentacles just a little into bit size pieces)

1 small can chopped or baby clams with the liquid**

Cook for about 30 seconds, the calamari don’t take very long at all to cook. They will change color just a little, especially the tentacles and the white slices will curl when they are cooked. Immediately take the pan off the heat, cover if the pasta isn’t quite ready.*** Add:

Juice of 1/2 lemon

When the pasta and peas are drained, put back into the pot and add the sauce. Cover and let sit for 5-10 minutes so that the pasta can absorb some of the sauce. Toss, season with salt and pepper to taste. Serve garnished with minced chives.

*For a lower fat sauce, reduce the olive oil to 1 tablespoon and add 1/4 cup clam juice when you add the scallops and shrimp.

**Feel free to use fresh clams in the shell but add them before the scallops and cover the pan for about 2 minutes, or until they are just starting to open, before adding the remaining ingredients.

***To avoid overcooking the seafood, I generally cook the pasta before I make the sauce. Drain the pasta and rinse to remove residual starch. Place the strainer in the pot with a little water in the bottom, cover so that there’s a little steam to keep the pasta warm while you make the sauce, and place over a very low heat.

****I used chickpea pasta and I wouldn’t recommend it for this dish. I also only had spaghetti which is a little thick and didn’t play well with the seafood. Linguini is really the pasta to use.