Sesame Pork Roast

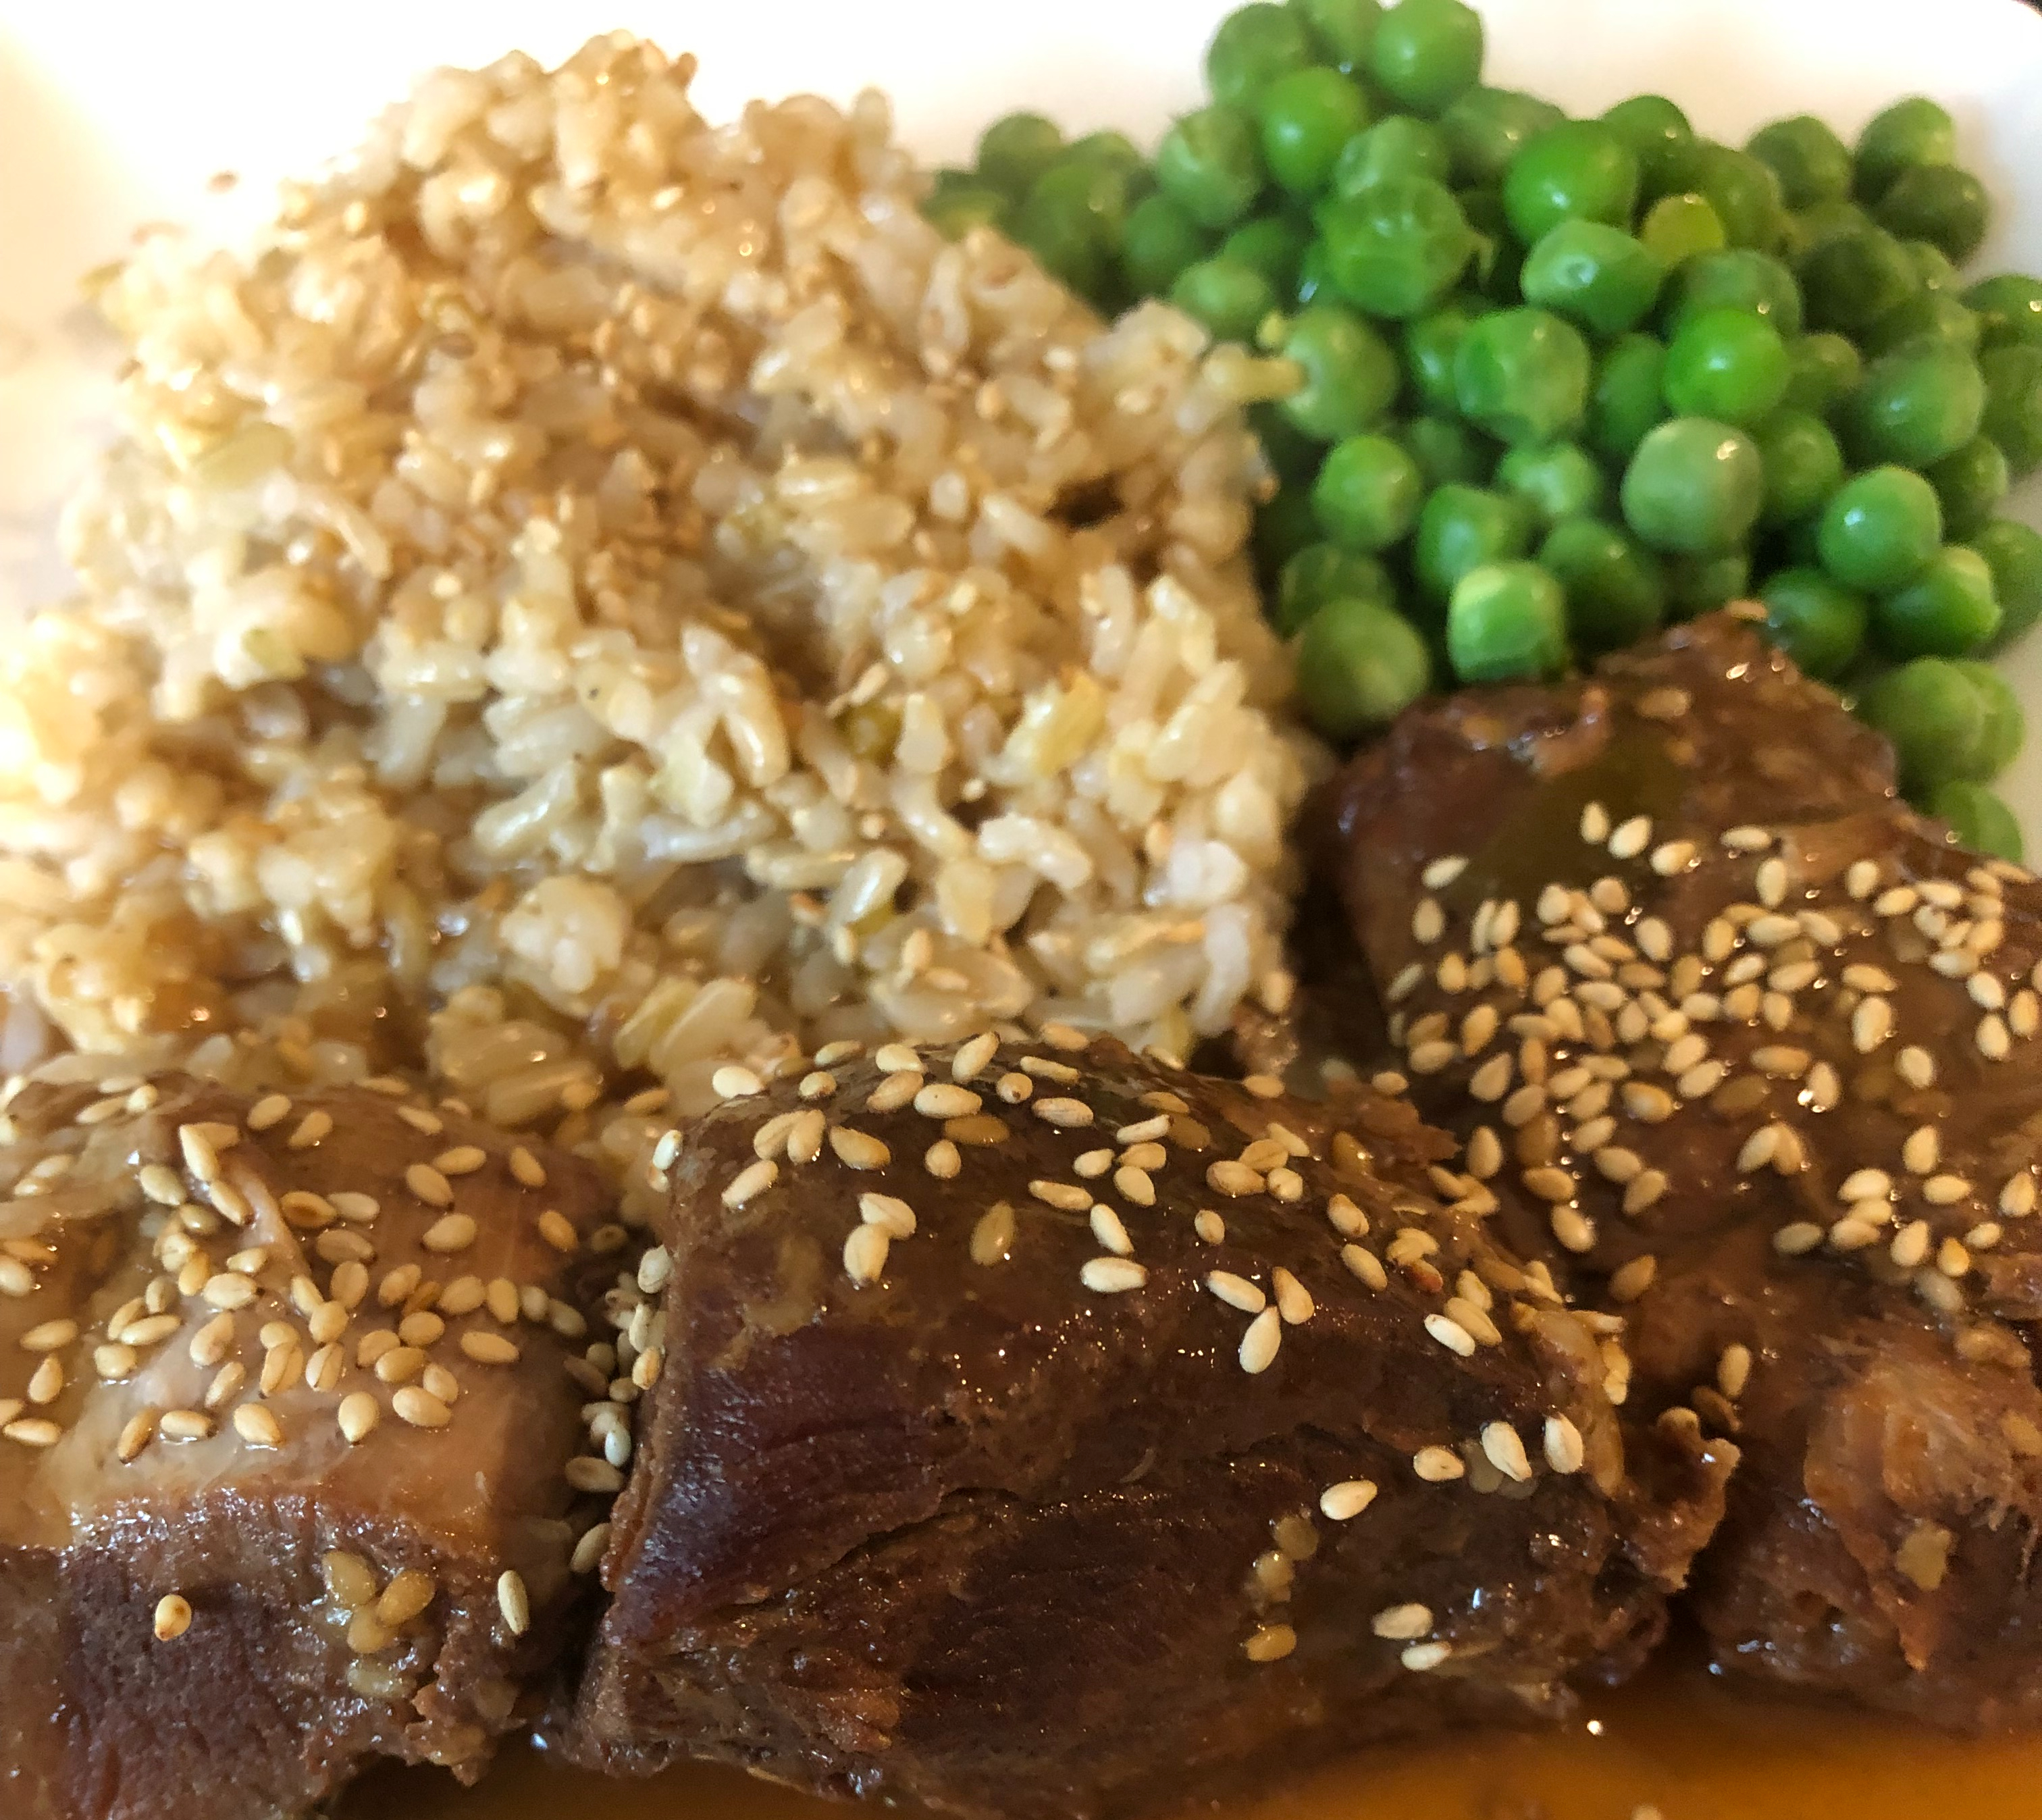
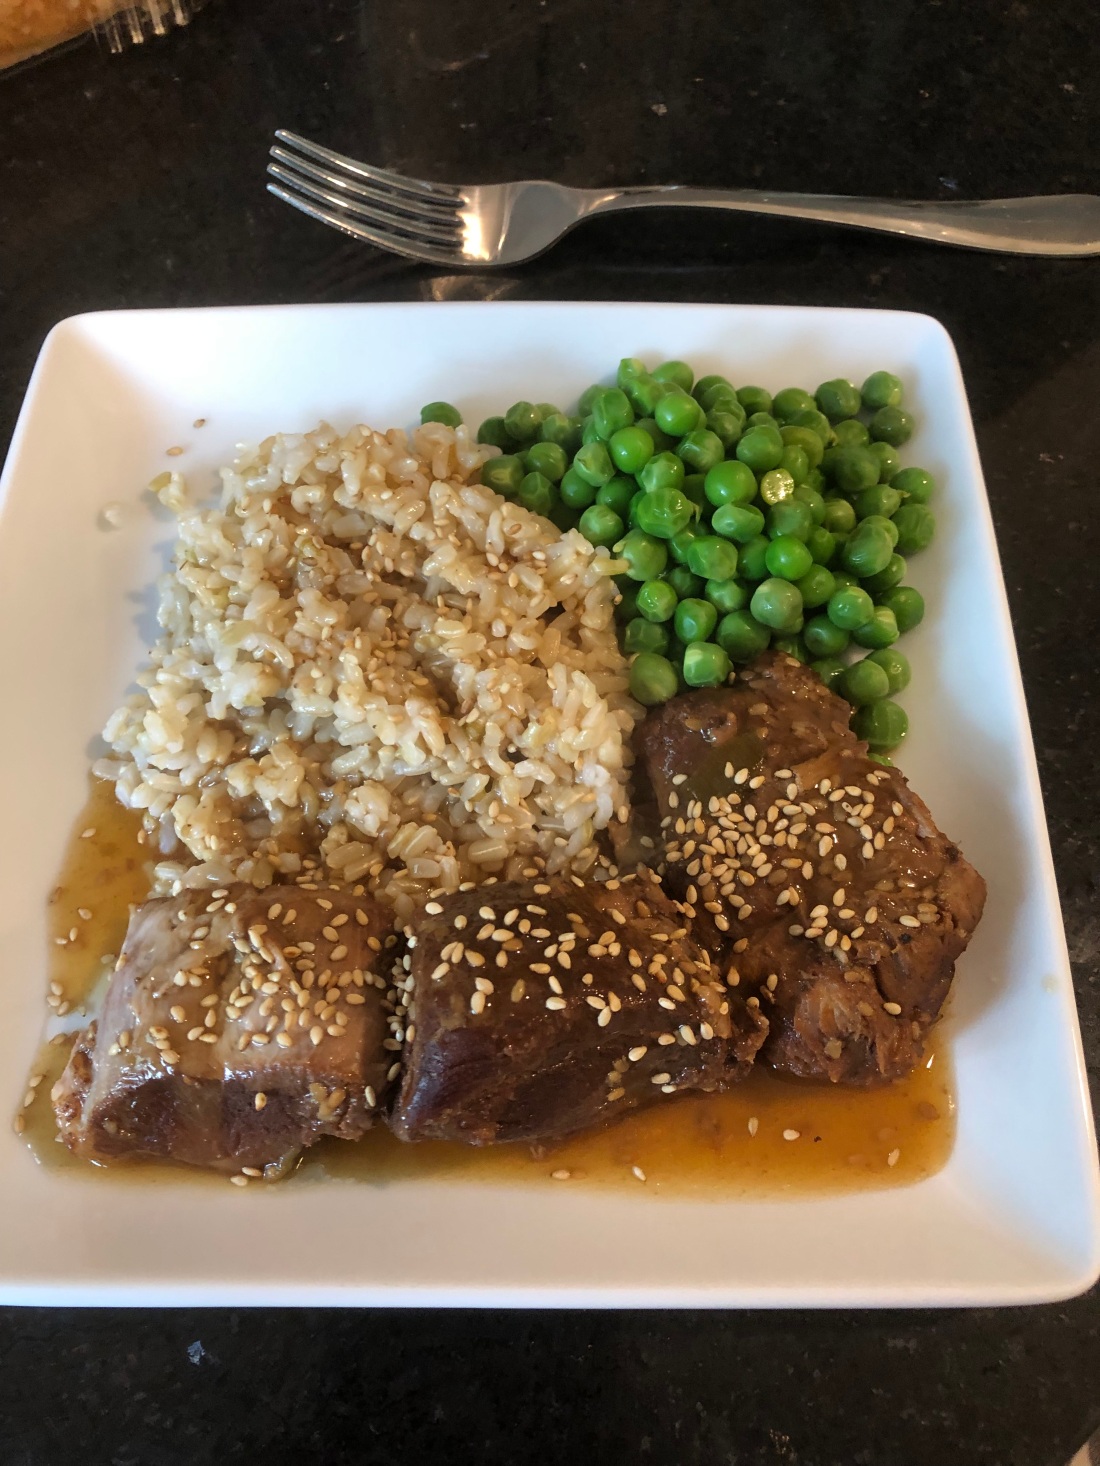
My son and I share a love for pork. Mine definitely comes from growing up on a farm where my father raised at least four pigs every year. I have fond memories of driving about twenty miles south to a butchery outside of Concord where my parents sent the hams for smoking every year. And a local grocer in Tilton would turn much of the meat that wasn’t usable as roasts or chops (or ribs) into ground pork and especially, my father’s favorite, pork sausage. I’ve tried several recipes for pulled pork but they turn out so dry and stringy. Here’s one that’s quite the opposite probably because it’s marinated overnight. Good umami flavor!

Combine in a bowl:

2 1/2 cups mushroom stock (if you can use soy, use 2 cups water and 1/2 cup soy sauce)

1/4 cup toasted sesame seeds

1/4 cup unsulfured molasses (or date syrup)

1/4 cup white or rice vinegar

2 teaspoons garlic powder

1/4 teaspoon paprika

Whisk to combine and then pour half the marinade into a large gallon food storage bag. Pour the other half into a storage container and refrigerate. Then add to the bag:

4 pounds of pork – if using a boneless roast, cut in half to make two thinner pieces and then cut each half in half; if using a bone in roast, slice into thinner pieces leaving the bone area intact

Make sure all the meat is covered by the marinade. I put the bag into a casserole dish in case of leakage and placed it in the refrigerator. Marinate overnight (I actually left mine in the fridge for two days).

When ready, drain the marinade from the bag and discard. Put the roast into an instant pot, add the reserved marinade, cover and cook for about 35 to 40 minutes. (Of course, if you prefer you can use a slow cooker on high for one hour and then on low for approximately 8 hours.)

When done, remove the meat to a serving dish. Shred, if you like, using two forks. Pour the liquid from the cooker into a fat separator and then pour the juices into a small saucepan. Combine:

2-3 tablespoons arrowroot depending on how much liquid is in the saucepan

1/4 cup water

Whisk to dissolve the arrowroot before adding the mixture to the juices in the saucepan. Bring the sauce to a boil whisking constantly until it thickens, about two minutes. Garnish the roast with:

1/2 cup sliced green onions

and more sesame seeds if desired. Serves four.

Salmon Cakes

Not my favorite fish by a long shot but my grandson loves salmon. So I thought I’d give these a try and to my amazement and his delight, they turned out delicious. Quite easy to make as well but it does take some planning ahead since the mixture has to sit for several hours before the patties are formed. This allows the bread crumbs to absorb some of the liquid so that the patties will hold their shape. It could be done the night before so that the next day the patties can be formed and cooked.

First, in a small skillet heat over medium heat:

1 tablespoon olive oil

When hot, add:

1/4 cup sweet onion, minced

2 tablespoons minced red pepper

2 tablespoons minced celery

1/4 teaspoon salt

1/8 teaspoon ground black pepper

Cook mixture about 5 minutes or until onion is translucent. Next mix together in a medium bowl:

1 1/4 pounds fresh salmon, roughly minced

1/4 cup vegan mayonnaise

1/4 cup gluten-free bread crumbs, unseasoned

1 teaspoon minced garlic

1 teaspoon mustard

1/8 teaspoon paprika

1/8 teaspoon Old Bay seasoning

1/4 teaspoon salt

1/8 teaspoon ground black pepper

Mix thoroughly then cover bowl and refrigerate for at least two hours (but it can sit overnight). Then form the salmon mixture into four patties about 1 inch thick. In a plate with an edge (like a pie plate) mix together:

1/4 cup gluten-free bread crumbs

1/4 teaspoon salt

1/8 teaspoon ground black pepper

1/8 teaspoon garlic granules

1/8 paprika

Coat the salmon patties with the breadcrumb mixture. Heat a large skillet that will hold all four patties. Add:

1 tablespoon olive oil

4 salmon patties

Cook on each side until golden brown and cooked through (the patties will not give when touched) on both sides, about 4-5 minutes per side. Serve with lemon slices or a tartar sauce.

Air Frier Turkey Tenderloins

With all my food allergies, protein is difficult sometimes. And since I live alone, most meats except for individual things like pork chops or chicken pieces are always too much for one meal. So when I find turkey tenderloins, I always buy several packages and freeze the tenderloins individually. And then look for new and different ways to cook them. If you have an air fryer, this is so easy and quick. Otherwise, it could be cooked in the oven but it’ll just take a little longer. Of course, the essential thing about tenderloins, whatever type of animal they come from is not overcooking them and drying them out. This air fryer method worked very well for that. And, of course, this rub works on any protein, not just animal. And try mixing it up with different herbs and spices.

Preheat air fryer at 400 degrees for about 5 minutes.

Spray the air fryer basket with non-stick spray.

In a small bowl, combine:

1 teaspoon paprika

1 teaspoon garlic granules (or powder)

1/2 teaspoon dried thyme

1/2 teaspoon sea salt

1/4 teaspoon ground black pepper

1 teaspoon dried sage

1/2 teaspoon onion powder

Using paper towels, dry:

2 turkey tenderloins

Once dry, rub with:

1-2 tablespoons olive oil

Then sprinkle the rub mixture over the tenderloins being sure to coat both sides. Using dry hands, rub the herb mixture into the tenderloins. Place in the air fryer basket and cook for 12-15 minutes. Turn and repeat. Check turkey temperature (should be at 165 degrees) before removing. Let rest about 5 minutes before slicing.

Honey Garlic Chicken Wings

I’ve posted other wings recipes. This one is slightly different because it mixes a little tomato paste into the soy sauce substitute base along with some pureed garlic (find it in grocery store next to minced garlic in the Ethnic Foods aisle; Emperor’s Kitchen has an organic one). It also omits any coating, other than spices, on the wings themselves so no extra carbs from flour or breadcrumbs. Added to the delicious flavor and the fact that they take only a couple of minutes to prepare and a half hour to 40 minutes to bake, they can’t be beat!

In a gallon food storage bag combine:

up to 3 pounds split chicken wings

1 teaspoon paprika (sweet or smoked, whichever your family prefers)

1 teaspoon onion powder (NOT salt)

1/2 teaspoon sea salt

1/8 teaspoon ground black pepper)

Press the air from the bag before sealing, seal the bag and then massage the spices into the wings. In a small bowl mix together:

1/4 cup soy sauce substitute (see recipe under sauces)

2 tablespoons honey

1 tablespoon tomato paste

1/2 teaspoon sesame oil*

1 teaspoon pureed garlic

1/8 teaspoon Garlic Chili Sauce (OPTIONAL)

Add half to two-thirds of the sauce to the bag and shake to coat all the wings. Place on a baking sheet lined with parchment paper (be sure there’s room between each wing) and bake at 400 degrees for 15-20 minutes. Remove and brush with the remaining sauce and turn the wings over so that they brown on both sides. Bake for another 15-20 minutes (depending on size, larger may need a few more minutes) and serve. Garnish with sesame seeds, sliced scallions or chopped parsley.

*TIP: This can be omitted for totally oil free wings. Pour your 1/2 teaspoon of sesame oil into the tablespoon (or quarter cup measure) that you’ll use for the honey and swish it around to coat. This will let the honey slip right out.

You can find the recipe for my Cole slaw under Soups and Salads.

Eggplant Schnitzel

I just searched the site and can’t believe I haven’t posted a recipe for fried eggplant! It’s my grandson’s favorite so I make it quite often this time of year. It’s slightly different since it’s only floured or battered. Schnitzel has a bread crumb crust instead. It’s pretty easy to make, just be sure to salt the eggplant and let them sit awhile before proceeding. (This actually keeps the eggplant from absorbing oil when fried or sauteed as well as removing any bitterness. So this isn’t necessary when using the thinner eggplants such as Japanese or graffiti.)

Step 1 is to peel and slice the eggplant into about 1/2″ slices. Then salt them generously on both sides (I usually do this on my cooling rack over the sink), place some weight on top of them (usually use a cookie sheet with some cans on top of it) and let sit for at least a half hour.

So peel and slice:

1 large eggplant or 4-5 small graffiti eggplants

Prepare the breading station by placing in 3 separate low-sided (1-2″ high) bowls large enough to accommodate the slices of eggplant):

Bowl 1:

1/4 cup gluten-free all-purpose flour

1/4 teaspoon salt

1/8 teaspoon ground black pepper

1/4 teaspoon garlic powder

1/4 teaspoon sweet paprika

Stir to combine.

Bowl 2:

1/2 cup non-dairy milk

1 teaspoon rice vinegar

Bowl 3:

1 cup gluten-free breadcrumbs

1/4 teaspoon sea salt

1/8 teaspoon ground black pepper

1/4 teaspoon garlic powder

Again stir to combine. Breading stations are now ready for the eggplant.

Preheat oven to 425 degrees. Prepare a baking sheet by covering it with parchment paper and then spraying it with non-stick cooking spray. Remove the weights and cookie sheet and rinse off the eggplant. Dry with a paper towel. Then dip each slice of eggplant into Bowl 1 being sure to coat both sides with flour. Then dip each slice into the milk mixture in Bowl 2, letting excess milk drip off before dipping each slice into Bowl 3. Place on a cookie sheet and then sprayed with non-stick cooking spray. Bake for 20-25 minutes until golden brown and crispy. Serve immediately. Number of servings will depend on the size of the eggplant and slices. Approximately 4-6 servings.

Thai Chicken Tenders

My husband loved chicken tenders. I think more because they’re usually deep fried than for their texture which I find generally to be stringy because they’re often overcooked. I found an adaptable recipe online so I decided to give them a try. It’s quite an easy recipe to make but I’d suggest you make the sauce first so the tenders don’t sit around after frying waiting for the sauce. Like most things that are fried, once dipped in the sauce, they will quickly lose their crunch so serve immediately after you finish preparation. Makes 2 servings.

First, put the oil on to heat. In a deep 12″ skillet heat over medium high heat:

approximately 3/4″ of oil (I used a mix of olive and avocado oil)

Next prepare the sauce. In a small saucepan, whisk together:

1/3 cup soy sauce substitute

1 tablespoon date sugar

1/2 tablespoon sriracha sauce

1 teaspoon pumpkin seed butter (or any butter you like – sunflower, peanut, tahini, etc.)

1 teaspoon grated ginger (optional)

2 tablespoons water (more may be added if the sauce gets too thick)

1-2 teaspoons arrowroot (I used 2 and the sauce got much too thick)

1 teaspoon minced garlic or garlic puree

Cook over medium heat until thickened. I had to add about 1/4 cup of water to thin mine out and I think now that I probably should have made it even thinner so that the sauce wasn’t as thick on the tenders but I didn’t mind it since the sauce is so delicious!

Next coat ONE POUND of chicken tenders. Mix together in a shallow dish:

1 cup gluten-free panko bread crumbs

1/4 teaspoon sea salt

1/8 teaspoon ground black pepper

1/4 teaspoon paprika (or if you want them really spicy, use red pepper flakes instead)

In a separate shallow dish add:

1/2 cup non-dairy milk

1 teaspoon rice vinegar

Dip each tender into the milk to coat and then into the crumb mixture. Gently place in the oil that should now be at 350 degrees (after you add the tenders if the oil is still at temperature, reduce heat from medium high to medium). Cook on the first side for approximately 3-4 minutes before turning and browning on the other side for another 2-3 minutes or until firm. Remove from fat. Be sure not to crowd the tenders in the skillet. Drain on paper towels. When all the tenders are fried, dip each one into the sauce making sure to coat evenly. Serve immediately. Garnish with fresh cilantro or green scallions.

I know, I know, more brown food. But as Anne Burrell says “Brown foot GOOD!”

Honey Barbeque Sauce

I gave you a recipe for barbeque sauce when I made the Barbeque Beans side dish a while ago (see recipe under side dishes). That one included some oil so here’s an oil free, spicy recipe that I just love and I hope you will too. I’m making some pork Ribbletts tomorrow and since my usual Organicville Barbeque Sauce isn’t available at my local store at the moment, I decided to try making my own. I’ll pass on the recipe for the ribbletts tomorrow.

In a small saucepan combine:

1 cup tomato sauce

1/4 cup honey (maple or date syrup, coconut or agave nectar)

1/4 cup white vinegar (or apple cider)

2 tablespoons molasses

1/2 teaspoon salt

1/4 teaspoon ground black pepper

1/4 teaspoon smoked paprika

1/4 teaspoon onion powder

1/4 teaspoon garlic powder

1/4 teaspoon chili sauce (in the Asian section of your market just be sure to purchase one without any sugar) (Optional)

1/2 teaspoon sriracha (Optional)

1/4 teaspoon cumin

Stir or whisk together and taste. Just remember that all these flavors will be accentuated as the sauce reduces. Heat over medium heat until it just starts to bubble then reduce to low and simmer for about 15-20 minutes until thickened. Add additional salt, etc., if needed per your taste. Makes about 1 1/2 – 1 3/4 cups of sauce.

Creamy Turkey Tenderloin with Garlic and Shallots

Here’s a one dish wonder that’s very easy to make and so delectable to eat. When we don’t want to heat up the oven on these hot summer nights, this is a great recipe to fall back on. It’s pretty simple to make and takes very little time, less than a half hour to prepare. The addition of the garlic and shallots adds some flavor as well as heat (we’re talking over a tablespoon of minced garlic here). This would also work well with skinless boneless chicken breasts or pork tenderloin.

First, dry off using paper towels, one:

1 pound (approximately) turkey tenderloin

Then slice it in half lengthwise to expose the tendon running down the middle (that tough white string). Remove the tendon, easier if you cut the tenderloin so that the tendon is on the outer part of one half. On a plate or pie plate (I used a paper plate) combine:

2 tablespoons gluten-free all purpose flour

1/4 teaspoon sea salt

1/4 teaspoon ground black pepper

1/4 teaspoon paprika

1/4 teaspoon garlic powder

Whisk to make sure the herbs are even throughout the flour mixture. Dredge each half of the turkey tenderloin in the flour mixture, on both sides. In a 12″ skillet, heat over medium high heat:

1 tablespoon olive oil

When the oil is shimmering, add the turkey pieces, lower the heat to medium and saute the turkey on each side for approximately 3-5 minutes or until firm, turning once.* Remove from the skillet and add:

3-4 small shallots, sliced and/or diced

1-2 tablespoons minced garlic

You may need to add a little more (about 1 teaspoon) olive oil. Sauté over medium low heat for about 1 minute until the shallots are softened and the garlic is just beginning to brown. Add to the skillet:

1/2 to 3/4 cups chicken (or turkey) stock (start with 1/2 cup and add more if the mixture needs thinning after the next step)

Scrap the bottom of the skillet to release the browned bits left from the turkey. Mix together:

1 cup dairy-free milk (I used oat but for a creamier texture, use a non-dairy creamer)

1 1/2 tablespoons gluten-free flour

Whisk to combine before adding to the skillet. Stir the ingredients to mix thoroughly and continue stirring until the sauce thickens before reducing the heat to low, about 2-3 minutes. Add the turkey pieces back into the sauce and simmer for several minutes to reheat the turkey. Serves 2-4. I served mine over brown rice but it would pair just as well with mashed potatoes, mashed sweet potatoes, quinoa, sorghum or millet, or even a puree of root vegetables.

*The amount of time needed to cook the turkey will depend on the thickness of the turkey slices.

Spiced Carrot Millet

If you’re looking for something different as a side dish, here’s a tasty way to go. If you haven’t tried millet, or just used it for breakfast, this gives you a great introduction to using it as a savory side dish. Per usual, the recipe is very adjustable – carrot is one way to go but parsnips, butternut squash, or even pea puree would work just as well depending on your family’s tastes. It’s fairly quick, about 30 minutes to prepare, and quite an easy, straightforward recipe. Enjoy something different!

First, in a 12″ skillet over medium heat dry toast:

1 cup whole millet

While the millet is toasting, in a 4-quart saucepan, over medium high heat, bring to a boil:

2 cups stock (I used vegetable stock but use any type you like, or even water, works)

Once millet is toasted (about 3-5 minutes, stirring occasionally), add it to the boiling stock. Stir to combine, cover and reduce heat to medium low or low, and cook through, about 20 minutes, until water is evaporated and the millet is softened.

While the millet cooks, in a double boiler, steam:

3/4 cup carrots (I used the pre-sliced but any kind will work)

Steam until soft and then blend, using a hand-held immersion blender with:

1 teaspoon onion powder

1 teaspoon garlic powder

1 teaspoon cumin (or 1/2 teaspoon cumin and 1/2 teaspoon turmeric)

1 teaspoon sweet paprika

1/2 teaspoon ground coriander

Salt and pepper to taste (about 1/2 teaspoon salt and 1/4 teaspoon black ground pepper)

In the bowl of a food processor, or using a hand grater, grate:

6-8 baby carrots

You should have about 1/3 to 1/2 cup. Once the millet is cooked, stir in these grated carrots and cover again. Let sit for 2-3 minutes. Once the cooked carrots are pureed (you could also use a food processor or stand blender), add to the millet mixture, stirring to combine.

Finish with some avocado oil, vegan butter or margarine; or a squeeze of lemon and/or 1/2 teaspoon grated lemon rind. Garnish with some cilantro, green onions or chopped carrot top if desired. Serves 8.

Salisbury “Steak”

Salisbury steak is basically a hamburger with mushroom gravy. Since I don’t eat beef, I had to change it to ground turkey but since I also wanted to make one last meatloaf before it got too hot, I used a meatloaf mixture to make the “steaks”. If you only need a couple of servings of Salisbury steak, use 1/4 or half the mixture for this dish and bake the remainder in the oven as a meatloaf. Feel free to use whatever ground meat you like, or even pieces of tofu would work. I basically used the recipe I published several weeks ago for turkey burgers with zucchini because they stayed so moist and were so delicious.

In the food processor combine:

1 large onion, cut into quarters

1 medium zucchini, cut in half lengthwise and then into chunks

1/2 cup carrots

Pulse until shredded. In a large bowl combine the vegetable mixture with:

1 pound ground turkey

1 pound ground pork OR

1 pound mild/sweet Italian sausage (pork or turkey)

Add to the mixture:

1 1/2 teaspoons ground cumin

1 1/2 teaspoons paprika (smoked or sweet)

3 teaspoons ground coriander

3 teaspoons garlic powder or granules

3 teaspoons sea salt

1 1/2 teaspoons ground black pepper

1/2 cup non-dairy Parmesan cheese (Optional)

Mix to combine (I used my hands, much easier than a spoon!). Using a 1/2 cup measure, scoop out the mixture and form each 1/2 cup into a burger shape (should make 10-12). In a 12″ skillet heat over medium high heat:

2 tablespoons olive oil

Add the burgers and saute them until cooked through, about 5 minutes per side depending on the thickness, firm to the touch when cooked). Probably have at least 2 batches, perhaps 3 depending on the size. As they are cooked, remove to a plate. Add to the pan:

12 ounces of sliced mushrooms (I used baby bellas)

Cook until softened, about 3-4 minutes over medium heat, stirring often. When the mushrooms are cooked add:

2 tablespoons gluten-free, all-purpose flour

Stir or whisk in so the flour absorbs all the oil. Cook over low heat for 1-2 minutes and then add:

1 1/2 cups chicken stock (or bone broth)

1/2 cup dairy-free milk (anything but soy), unsweetened

Salt and pepper to taste

If you are cooking all the mixture as Salisbury steak, you may need to increase the oil, flour, and liquid to make additional gravy. Cook over medium heat, stirring constantly until thickened, about 2-3 minutes. Add the patties back into the sauce to reheat before serving. Serve over rice, mashed potatoes, or pasta.

I know, more brown food! Just can’t seem to stay away from it. But it really was so delicious!