Baba Ghanoush

Yes, another eggplant recipe! And a very simple dip to prepare; the hardest part is roasting the eggplant and that’s not especially difficult, just time consuming. I can’t tell you exactly what size eggplant to buy – you’ll want about 2 cups of eggplant pulp. The 3 oriental eggplant I used only gave me about 1 cup of pulp so I would recommend a medium to large Italian eggplant for this recipe or else adjust the other ingredients to the amount of eggplant pulp you roasted.

First, roast the eggplant by slicing it into 1″ slices. Place on a baking sheet lined with parchment paper. Spray or brush the eggplant slices with olive oil then turn them over and repeat. Roast in a preheated 425 degree oven for 20-25 minutes.

While the eggplant is roasting, in a small skillet heat:

2 tablespoons avocado oil

1 teaspoon cumin

Heat only until you can smell the cumin, about 1 minute. Remove from heat and set aside to cool.

Remove the eggplant and let cool slightly before peeling the skin from around the outside of each slice. Place in a food processor and add:

2 tablespoons tahini

1 teaspoon minced garlic

salt and pepper (about 1/8 teaspoon salt and a dash of pepper)

1 tablespoon lemon juice

the cumin and avocado oil mixture

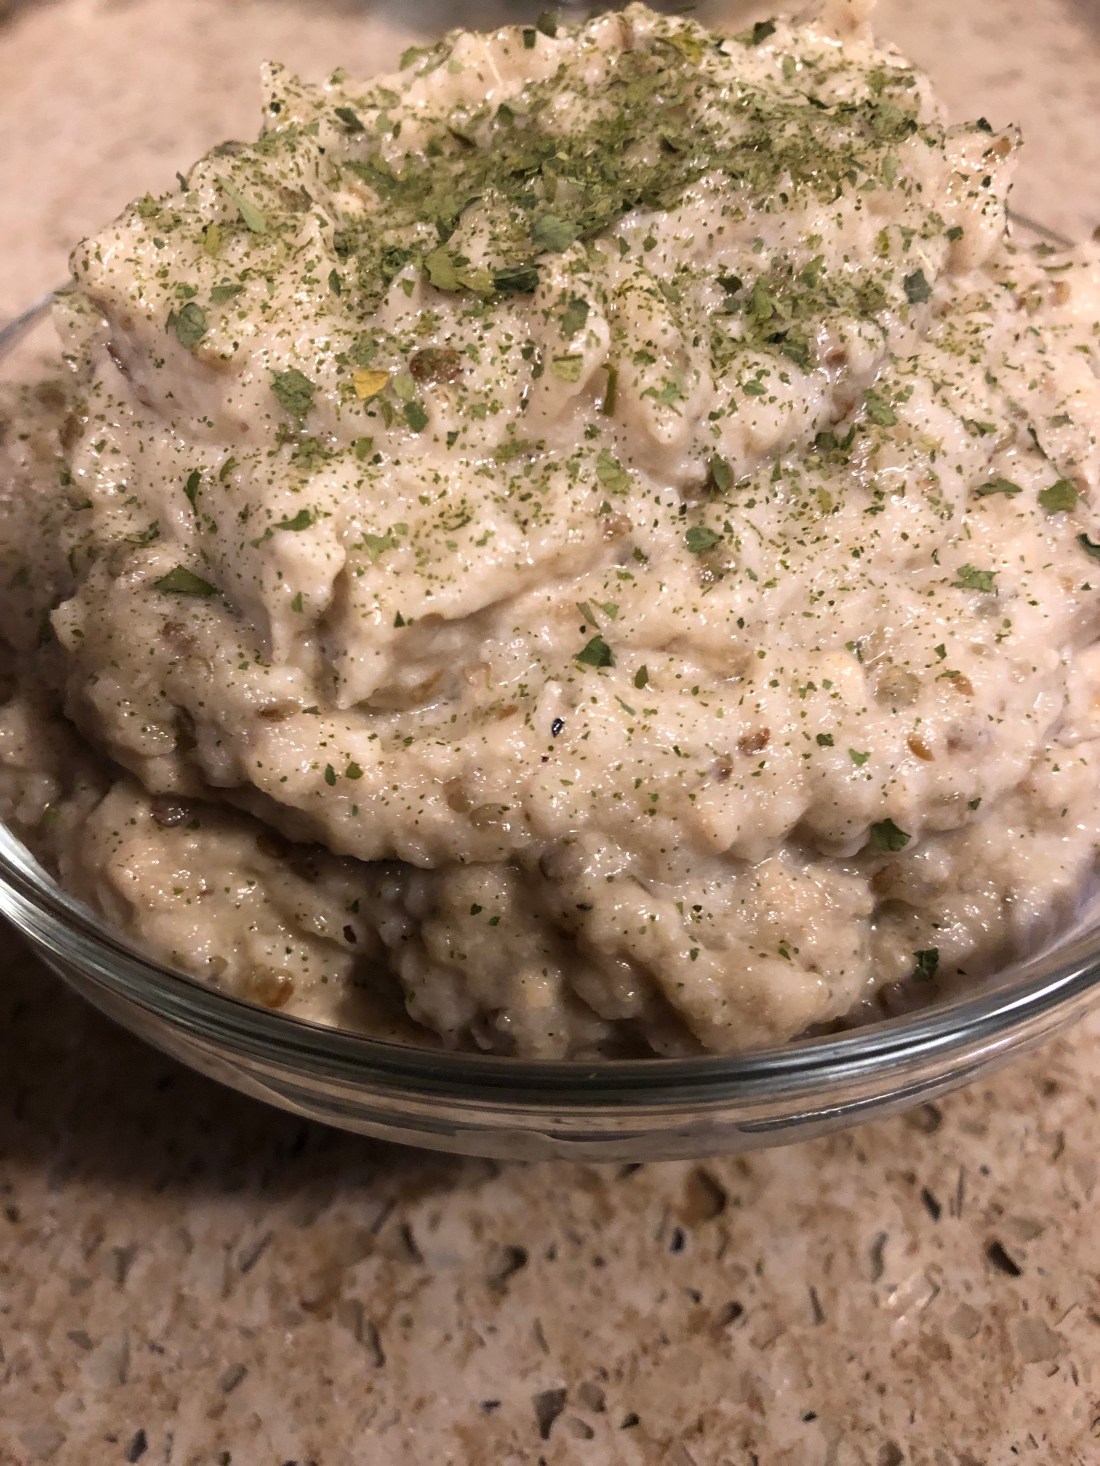
Pulse until smooth, spoon into a serving bowl and sprinkle with dried or fresh parsley. If desired, sprinkle with olive or avocado oil as well. Serve with gluten-free pita or quinoa buns (see recipe below).

Quinoa Buns

I thought these sounded interesting – avocado and quinoa with lime juice? Who puts lime juice in a bread? But I thought it sounded like it might be a good vehicle for the baba ghanoush. And it sounded very easy to make so I gave it a try and it actually is delicious but just be miserly with the lime zest or it overpowers the other flavors in the buns.

In a medium to large bowl combine:

1 1/2 cup quinoa flour (if you don’t have any but you have quinoa, simply pulse in a food processor to make flour from the raw quinoa)

1/4 cup gluten-free oat flour

2 tablespoons ground flaxseed

2 tablespoons sesame seeds

1 teaspoon baking powder

1/8 teaspoon sea salt

In a smaller bowl mash:

1 whole large ripe avocado being sure to take out any brown bruise spots which won’t mix into the batter

Add to the avocado:

1-2 tablespoons lime juice (juice from 1 lime)

1/2 teaspoon lime zest

1 tablespoon honey

3/4 cup water

Using a whisk or hand mixer, combine the wet ingredients until fairly smooth. Add to the dry ingredients and stir to combine. It’s a sticky dough so using wet hands shape into 6-7 balls. Place on a baking sheet lined with parchment paper and flatten to about 1/4 inch thickness. Sprinkle with more sesame seeds and let sit while the oven heats to 425 degrees. Bake about 25 minutes total, turning the buns over at 15 minutes to brown both sides. Test with a toothpick for doneness. REMEMEBER GLUTEN FREE BREADS CAN BE GUMMY SO EVEN IF THE TOOTHPICK COMES OUT CLEAN, THEY STILL MAY NOT BE COOKED THROUGH. Cool completely before cutting.

Blackberry Cobbler

My father’s favorite dessert! Growing up we had a blackberry patch in the back yard and every August, we’d go pick the blackberries, always getting our arms scratched from the thorns. Most went the freezer (and our mouths) except for a few cups that immediately went into the house and put into a buttered casserole dish. Some flour and cinnamon went over them and then a cottage pudding spread on top for a crust, hot water and sugar and into the oven. My father always ate it with vanilla ice cream, obviously not something I can do. This is a dessert best served warm. The recipe serves 6.

Grease an 8″ casserole dish. Preheat oven to 425 degrees. In a medium bowl combine:

3 cups blackberries (or raspberries, blueberries, apples, peaches, etc.)

2 tablespoon tapioca flour (don’t have any? use 2 tablespoon all purpose gluten-free flour)

2 teaspoons cinnamon

Pour into the casserole dish. Into the bowl you used for the blackberries, combine:

1 cup all purpose gluten-free flour

1/2 teaspoon xanthan gum

2 teaspoons baking powder

1 tablespoon date sugar

1/4 teaspoon salt

Stir to combine then add:

2 tablespoons vegan margarine

Using a fork, work the margarine into the flour mixture. Add:

1/2 cup non-dairy milk

Combine until mixed but don’t over mix. Spoon on top of the berries and spread to cover most of them. Pour over the top of the cobbler:

1/4 cup date sugar

1 teaspoon cinnamon

1 cup hot water

Most of the date sugar should wash down into the berries. The little sugar on the top will form a sweet crust when baked. Bake the cobbler for 30-40 minutes until a toothpick inserted in the cobbler crust comes out clean. Serve warm with vanilla frozen dessert or whipped topping, or I like it just the way it is although sometimes I top it with a vanilla mousseline sauce.

Pastry Sauce:

Put into a saucepan and stir to combine:

2 tablespoons cornstarch (or arrowroot)

1/3 cup date sugar

1/4 teaspoon salt

Stir into the mixture:

1/4 cup non dairy milk (any will do EXCEPT NOT soy)

Whisk to make sure it’s lump free before adding:

2 cups non-dairy milk

Heat over medium heat whisking constantly once it starts to get hot until the mixture coats the back of a spoon. Remove from the heat and add:

1 teaspoon vanilla

2 tablespoons vegan margarine

Whisk to combine. Serve hot or chill for a vanilla pudding.

Sweet Potato Sheet Pancakes

If you’re like me, the only bad thing about making pancakes is standing at the stove cooking 3 or 4 at a time when there’s at least a dozen to cook. Well, this recipe takes that away! These are the lightest, fluffiest pancakes I’ve had since I went gluten-free and oh so mouth-wateringly delicious. Of course, pumpkin or butternut squash can be substituted for the sweet potato puree, just make sure that they aren’t too wet so a drier squash would work best. I used Trader Joe’s frozen sweet potato mash in this recipe thinking canned sweet potato puree might be too wet. And it worked just fine. Also be sure to let the mixture sit in the baking pan for 10-15 minutes after you spread it. Gluten free flours take longer to absorb moisture than regular flour and letting it sit on the counter before cooking gives the flours time to absorb some of the liquid and the end product won’t be gummy.

In a large mixing bowl whisk together:

2 tablespoons ground flax

1/3 cup aquafaba (or 1/3 cup water with 1/2 teaspoon aquafaba powder)

While the flax gel is working, about 5 minutes, prepare an 15×9″ baking sheet by covering with parchment paper and spraying generously with a non-stick spray (I use Chosen Foods Avocado spray because it’s 100% avocado oil).

When the flax gel is set, add:

1/2 cup sweet potato puree

1/4 cup avocado oil

1/4 cup date syrup (or coconut or agave nectar, honey, or maple syrup)

1 1/2 cup non-dairy milk

1 teaspoon pumpkin pie spice

3/4 cup protein powder (I used Probase organic pumpkin seed protein, unflavored)

Whisk to combine before adding:

1 1/2 cups all purpose gluten-free flour

1/2 cup chickpea flour

1 teaspoon xanthan gum

2 1/2 teaspoons baking powder

1 teaspoon baking soda

1/4 teaspoon sea salt

1/3 cup dried cranberries (optional)

1/4 cup carob (or chocolate) chips (optional)

Stir to combine making sure to moisten all the flour but not overmix, batter will be thick. Spread in the prepared baking sheet and let sit 10-15 minutes while the oven heats to 400 degrees. Bake 18-20 minutes until spongy in the middle and golden brown. Cut into 12 pieces and serve with a drizzle of maple syrup. I found 2 pieces were enough for me so 4-6 servings depending on your appetite.

Sweet Potato or Pumpkin Blondies

I’ve never had a blondie since I’ve always preferred bars made with chocolate. Now that I no longer can have chocolate, it seems like a good time to check out blondies. I understand from watching people make them on TV that they should be very dense and moist, almost fudgy, rather than cake-like. This recipe, adapted from thebigmansworld.com, doesn’t have any flour and can be made without any sweetener as well. I opted for some date sugar which I think pumpkin really needs and added some vanilla to the mixture as well but if you want to intensify the pumpkin or sweet potato flavor, a teaspoon of pumpkin pie spices would go well. Be sure to chill them thoroughly before slicing and removing from the pan. And, the smaller the pan, the thicker the blondies will be (I used an 8″ square pan for the pumpkin and an 8″ round for the sweet potato.

Preheat oven to 350 degrees. Spray with non-stick cooking spray, a small baking pan (8″ or less). Put into a medium sized, microwave safe mixing bowl:

1/2 cup pumpkin seed butter (or any other butter your family likes)

Heat for about 1 minute which should thin it out a little. If you’re using roasted (brown) pumpkin seed butter or a thicker butter such as sunflower, this may take longer to melt. Add to the butter:

1 cup pumpkin or sweet potato puree

2 tablespoons carob powder

1/4 cup fine date sugar

1 teaspoon vanilla extract

Stir until all ingredients are combined. Pour into the prepared baking dish and bake for about 20 minutes depending on the size of your baking dish – the 8″ pans took the full 20 minutes in my oven. They will puff up slightly when they are cooked. Cool on the counter for 15-20 minutes and then refrigerate and chill completely before slicing and serving. Number of pieces will also depend on the size of the pan you used – I got 9 pieces from the square pan.

Pumpkin Sticky Cinnamon Buns

Who doesn’t love a sticky bun? All gooey, finger licking delicious. But many of us find working with yeast not an easy chore. I had to start this recipe 3 times because the yeast didn’t bubble up the way it should, first had the water too hot, then too cool but the third time I got it right. The water should have the same temperature as your inner wrist so that it doesn’t feel hot or cold on your wrist, just warmth. These take some time but they are so definitely worth it.

First, preheat oven to 200. While it’s heating up in a small bowl mix together:

2 teaspoons yeast

3 tablespoons warm water (around 110 degrees, see above)

3 tablespoons agave nectar (or coconut, or honey) [I actually used date sugar at the end instead of the nectar so if it doesn’t work with the nectar try date sugar; mixture will of course be much thicker so add a little more water.]

Whisk to combine and set aside for 5-10 minutes. Yeast should start bubbling fairly quickly. If it doesn’t, throw it out and start over again. While the yeast is working, in a large bowl combine:

1 1/4 cups all purpose, gluten-free flour such as 1to1 or cup4cup

1/2 cup oat flour

1/3 cup brown rice flour

6 teaspoons pumpkin pie spice

1 3/4 teaspoons xanthan gum

1 teaspoon salt

Stir to mix well. If the yeast is now activated and bubbly, stir into it:

3 tablespoons avocado oil

2 tablespoons non-dairy milk

1/2 cup pumpkin puree

1/4 cup vegan mayonnaise (or non-dairy yogurt)

Whisk and then mix into the dry ingredients until just combined. Turn dough out onto a flat surface covered with plastic wrap and knead just until it comes together. Spray the bowl with non-stick spray and return the dough to the bowl cover with plastic wrap and let rest about 15-20 minutes.

Turn off the preheated oven. Turn the dough back out onto the plastic wrap surface sprinkled with some of the flour and roll out to approximately 14″x10″ rectangle. Spread with a filling of:

4 tablespoons vegan margarine or avocado oil

6 tablespoons date sugar

2 teaspoons pumpkin pie spice

1 teaspoon cinnamon

Leave about 1/2″ unfilled along one of the 10″ sides to help seal the buns. Roll the dough beginning on the edge you didn’t leave unfilled and be sure to rub the last edge into the roll to seal it. Cut into 10-11 rolls* using a knife or pizza cutter (or even dental floss). Spray with non-stick cooking spray a baking dish large enough to hold the buns loosely. Or grease the dish generously with vegan margarine and sprinkle with chopped nuts or seeds if desired. Place the buns in the dish, leaving space for them to rise. Cover with plastic wrap and put in the oven to rise for approximately 2 hours until they’re about doubled in size. Remove and heat the oven to 375 degrees. While the oven heats, prepare the glaze by mixing:

1/2 cup agave nectar (or coconut nectar)

1/4 cup non-dairy milk

1/4 cup avocado oil

1/4 cup honey

*I actually cut my buns much smaller so I got 15-16 rather than the 10-11. Pour the glaze over the buns before baking.* Bake for 25-30 minutes depending on the size of the buns. A toothpick inserted in the middle of the dough part of a bun (in the middle of the pan) coming out clean means they are cooked. Remove and serve immediately. The sticky part will be on the bottom of the buns. Easily reheat in the microwave for about 30 seconds per bun.

*If preferred, use a glaze after baking instead of the honey bee glaze. Whisk together:

6 tablespoons vegan margarine

1/2 teaspoon vanilla extract

1 cup sugar-free confectioners sugar (there’s a monk fruit based one available)

1-2 tablespoons non-dairy milk

Pour the glaze over the buns before serving.

Oatmeal Cookies

My husband’s favorite cookie was oatmeal raisin. These are very easy to make (if you have a food processor) and very tasty. And they don’t have very many ingredients, also a pretty good thing. If you have dried dates which most of us do since fresh dates are not always available, soak them in boiling water for 5-10 minutes to soften them before using them in this recipe.

Preheat oven to 350 degrees. Spread a medium size cookie sheet with parchment paper. In the bowl of a food processor, add:

1 1/2 cups gluten-free old fashioned oats, preferably organic

1/2 cup seed butter like sunflower or pumpkin butter or tahini

10-12 softened dates, medium sized

1/4 cup date syrup (or if you don’t have date syrup, use some of the water from soaking the dates just increase the number of dates if you want a sweeter cookie)

1/4 teaspoon sea salt

1 teaspoon vanilla extract (optional)

Blend until combined and the oatmeal is partly ground and a dough forms. This should take only about a minute. Remove from the food processor to a bowl and stir in:

1/2 cup carob chips (optional)

1/4 cup raisins or dried cranberries (optional)

Scoop out several tablespoons (to a 1/4 cup depending on how large you’d like the cookies) of the dough and form into a flat, round disc. Repeat with the remaining dough. The recipe should make approximately 12 cookies. Bake for 10-12 minutes. Let cool for about 5 minutes before removing from the baking sheet.

Eggless Hollandaise Sauce

This is a very easy recipe to make, unlike egg yolk and butter based Hollandaise which can break very easily. But even without the egg yolks and butter, it has an unctuous mouth feel and an almost umami satisfaction. It’s a simple white sauce with some added vinegar and lemon zest. Great for topping asparagus (I used white, sorry the photo doesn’t have more color, I have to limit my intake of green vegetables), peas and onions, chicken or turkey breast instead of gravy, or almost any fish (although you might want a little more lemon with fish).

In a 4 cup or larger saucepan, whisk together:

2 tablespoons olive oil

1 1/2 teaspoons rice vinegar

1 teaspoon grated lemon zest (best to grate with a microplane rather than a box grater) [this comes to the zest of about half a lemon]

pinch paprika (wasn’t enough for me so I added about 1/4 teaspoon)

3 tablespoons of gluten-free all purpose flour

Dash of sea salt

This should whisk to a fairly smooth consistency except for the lemon zest. Slowly add while whisking:

3/4 cup cold non-dairy milk (any kind except soy which won’t thicken)

Put over a medium heat and whisk until the mixture begins to thicken. When it’s quite thick, whisk in:

1/2 cup non-dairy milk

Reduce heat to low and continue cooking for 8-10 minutes until the sauce is again somewhat thick (thinner than pudding), it should coat the back of a spoon. Serve hot, makes 1 1/2 cups.

TIPS:

*I added several dashes of herbamare to my sauce

*Gently brown some minced garlic in the oil before adding the remaining ingredients for a roasted garlic flavor (this won’t have a creamy smooth mouth feel)

*Some thyme, Italian herbs, or other herbs in small amounts would work well in this sauce and give it a slightly different flavor. Sage would be good if you want to serve it with chicken or turkey.

*For an eggless “Eggs” Benedict, pour over some Canadian bacon and tomato slice(s) on a gluten-free English muffin for a hearty breakfast.

Vegan Carob Soufflé

I would never have thought I could make a soufflé without eggs but here it is! And delicious although perhaps not quite as fluffy as an egg soufflé. Very easy to make, just be sure it’s coming out of the oven immediately before you want to serve it because it does fall quite quickly as it cools off. Impress your vegan friends with this one! And of course, you can use chocolate instead of carob.

First, preheat oven to 350 degrees. This makes only 3 soufflés but is easy enough to double. Prepare the ramekins but spraying with a non-stick spray and then dusting them with a mixture of:

1 teaspoon carob powder

2 teaspoons date sugar

This allows the soufflé mixture to rise without being gripped by the ramekins surface. Next, mix together:

1 tablespoon psyllium husk (I used flaked)

3 tablespoons cold water

Whisk together to mix and set aside. The next step is to melt together:

1/2 cup unsweetened carob chips (or chocolate chips)

1/4 cup vegan margarine or butter (I used 1/4 cup of avocado oil)

Melt in either a double boiler over (not in) water over low heat or place a metal bowl on top of a pot of simmering water. Keep over low heat so that there isn’t a lot of steam emerging which could break the carob or chocolate. While this melts, in a medium sized bowl beat:

1/2 cup cold water

2 teaspoons aquafaba powder*

3 tablespoons date sugar

1/4 teaspoon guar gum

1/4 teaspoon cream of tartar

If you don’t have any aquafaba powder, use a cup of liquid aquafaba that you’ve reduced over heat to 1/2 cup. This requires a stronger mix of aquafaba so the powder is the easiest way to go. [It’s readily available online.]

Start beating the mixture on the lowest speed of your hand or stand mixer. Beat on low for 2-3 minutes then increase the speed to medium, again beating 2-3 minutes before finally increasing the speed to the highest setting and again beating 2-3 minutes. Trust me, you’ll say after the second stage that the mixture looks like stiff peaks but don’t stop there! This needs the third stage of the beating to keep it’s fluffy texture when folded into the carob mixture.

Once the chips are melted, remove from the heat and whisk together the fat and carob before adding:

1 teaspoon vanilla extract

3 tablespoons date sugar (optional depending on your family’s sweet tooth!)

1 tablespoon all purpose gluten-free flour

2 tablespoons carob powder

1/4 teaspoon sea salt

the psyllium mixture you set aside earlier

Whisk together to combine and then spoon in the aquafaba mixture. Carefully fold in the whipped aquafaba (it’s okay if a few streaks remain). Spoon into the prepared ramekins. Mixture should reach almost to the top of the ramekin. Bake for 20 minutes – DO NOT OPEN THE OVEN WHILE COOKING – the mixture should reach the top of the ramekin. Serve immediately.

Gluten-Free Pizza Crust

It’s very difficult to find a gluten-free pizza crust recipe that doesn’t include at least one egg. This one is yeasted so if you have trouble with getting yeast to work, not an uncommon problem, just make sure your yeast is: 1) still viable – there should be a date on the package; 2) that your water isn’t too hot or too cold – like with a baby’s bottle, the water should be just slightly warmer than a neutral feel on your inside wrist or about 105 degrees; 3) never put the salt in with the yeast, always add it to the flour; and 4) yeast needs food to grow so add the sweetener to the yeast to help it develop.

Those types in place, here’s the recipe. Takes awhile because of letting the yeast do it’s thing but it’s a very easy recipe to make.

First, in a 8-10 cup bowl combine:

1 1/2 cups gluten-free flour (I used the 1to1 but any will work fine)

1 tablespoon date sugar

1 teaspoon guar gum (or xanthan gum)

1 teaspoon baking powder

1/2 teaspoon salt

Mix to combine. In a 2-3 cup bowl mix together:

1 1/2 teaspoons yeast (this is one packet)

1 cup warm water (see above)

1 teaspoon date sugar

1/2 cup of the flour mixture above

Use a whisk to combine until there are no lumps or very small lumps left. Set aside and let the yeast work for 15-30 minutes, it should double in size. If it doesn’t start bubbling within the first few minutes, either the yeast isn’t any good or the water was too cold or too hot. Start again in this case.

After the yeast has doubled in size add:

1 tablespoon olive oil

Then pour the wet yeast mixture into the flour mixture and stir (wooden spoon best) until all the flour is absorbed. Try not to mix too much once the mixture is combined and smooth or the dough may become tough. Form the dough into a ball, or as close to a ball as possible – if the mixture is too wet and sticky, wet or oil a spatula to form into a ball. Cover with a clean kitchen towel or plastic wrap and let sit for about 1 hour or until the ball is about double in size.

Preheat oven to 450 degrees. Grease a 10-12″ pizza pan (or a rectangular baking sheet) with:

2 tablespoons olive oil

Depending on the size and shape of the pizza desired, either scrape the entire ball of dough into the pan or cut into sections to make smaller pizzas. Personally, since I live alone, I quarter the dough and shape it into 4 personal size pizzas on a large baking sheet. Spread it on the pizza pan or shape it using wet or greased hands. I spread the olive oil on the baking pan with my hand and then have a greased hand to spread the dough out and shape it as I like.

Bake the dough for 10-12 minutes or until it just starts to brown. Remove from oven and either cover with toppings and bake for an additional 20-25 minutes at 425 degrees (baking time depends a lot on the thickness of the crust), or cool and freeze the prepared pizza crusts for later use. I made 4 small personal sized pizza but I added the toppings to all of them, baked them and then froze the extra 3 fully made to heat up at a later date.

TIP: Gluten-free baked goods take longer to bake than “normal” baked goods so don’t be afraid to let the pizza dough cook for longer if it isn’t browned on the bottom. My crusts were quite thin so the 20 minutes was sufficient.

Pumpkin Gingerbread Cake

I do love gingerbread but I also love pumpkin. This cake doesn’t have a pronounced pumpkin taste – the ginger overwhelms it so if you want more pumpkin taste, reduce the amount of ginger you add. It’s wonderfully moist and delicious served with a vanilla frozen dessert or a non-dairy whipped cream.

Preheat oven to 350 degrees and grease an 8×8 square or round pan (to take the entire cake out of the pan to serve, cover the baking pan with parchment paper and then grease). In a small bowl combine:

1 tablespoon ground flax

3 tablespoons aquafaba*

*Add 1 teaspoon aquafaba powder to 3 tablespoons hot water. Don’t have aquafaba powder or a can of chickpeas handy? Substitute 1 tablespoon vinegar and 2 tablespoons hot water. Let the mixture sit for 5 minutes or until a flax gel forms. In a medium sized bowl (at least 3 cups) combine:

1/3 cup honey

1/3 cup unsulfured molasses

3/4 cup pumpkin puree

1/2 cup hot (the hotter the better) water

Mix until the molasses and honey are fairly thin. In another medium size bowl (at least 6 cups) sift together:

1 cup sorghum flour

3/4 cup tapioca flour or arrowroot

1 teaspoon xanthan gum

2 teaspoons ginger

1 teaspoon cinnamon

1 teaspoon allspice (or nutmeg)

1 1/2 teaspoons baking soda

Pour the wet ingredients into the dry and mix thoroughly. Pour into the prepared pan and bake for 30-35 minutes or until a toothpick inserted in the center comes out clean. Cool slightly before cutting.