Vanilla Cake with Chocolate Swiss Butter Cream Frosting (dairy-free, gluten-free, egg-free, refined cane sugar-free, vegan)

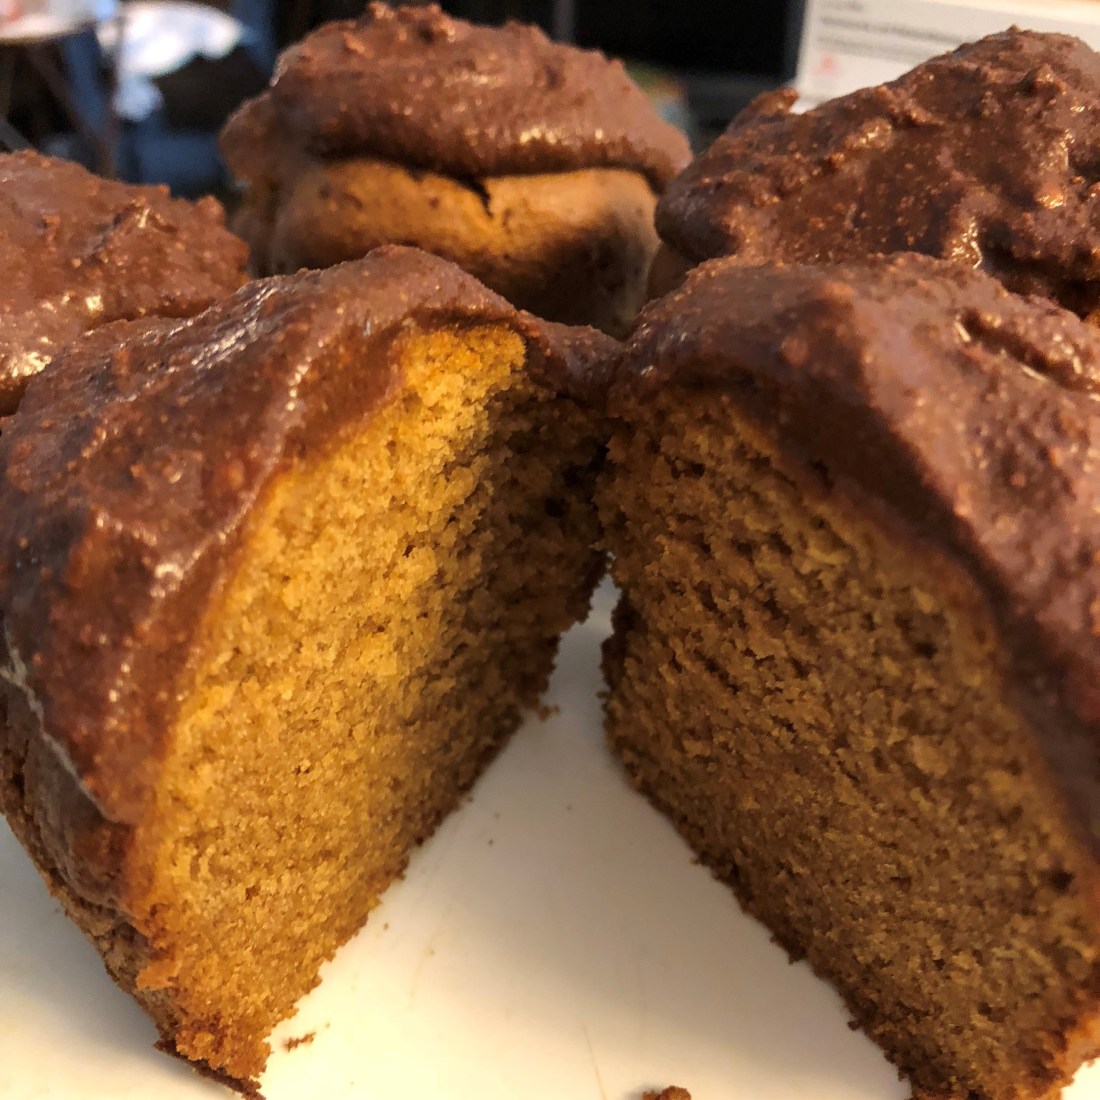
This is a fairly easy cake to make if you have a hand mixer.  Using the coconut sugar makes it look a little funky since coconut sugar is brown, it certainly can’t be called a “yellow” cake which is what one would think a vanilla cake should be.  However, I tried it out on four different people and they all said it was vvvveeerrrryyyy tasty!  Its versatile as well — the batter can be used as a bundt cake, layer cake, sheet cake, cupcakes, or as the base for a coffee cake.  In fact, that’s what tasters said it tasted more like, coffeecake, than a yellow cake.  Unfortunately, I’m allergic to coconut so I couldn’t taste it myself although it smelled REALLY good.  I’ll be trying this again with different sweeteners to see how it works so stay tuned.  It would also be very delicious with the strawberry cream cheese frosting already posted on my blog.

Preheat your oven to 350 degrees.  Grease and flour whatever baking pan used (I only had the jumbo cupcake pans and those were really too big for these cupcakes so if you want to make cupcakes, I would suggest using smaller tins).

With an electric mixer in a large bowl, combine:

  • 2 cups coconut sugar (or date sugar)
  • 1/2 cup avocado oil
  • 1/2 cup olive oil

Mix until blended (the coconut sugar will stay granular at this point.  Add:

  • 1 1/2 cups all purpose Gluten-free flour blend (I used Bob’s Red Mill)
  • 2 teaspoons baking powder
  • 1 teaspoon baking soda
  • 2 teaspoons vinegar
  • 1/2 cup non-dairy milk

Mix until blended and then add:

  • 1 1/2 cups all purpose Gluten-free flour
  • 3 teaspoons vanilla extract
  • 3/4 cup club soda

Again, mix until well blended.  I had to use a scraper to keep the batter from climbing the mixer blades.  Pour into prepared pan(s).  It will make three 8″ or 9″ cake layers, a 10×14″ sheet cake, 10-12 jumbo cupcakes, or a bundt cake.  Baking times will differ depending on what pan you choose to use.  My jumbo cupcakes took 30 minutes; a bundt cake will probably take 50-60 minutes.  Layers I would think would take around 20 minutes.  I used the toothpick into the center of the cake to be sure it was done and I could see it was pulling away from the sides of the baking pan.  Cool in pan for a few minutes before removing to a cooling rack.  This is a very moist cake so I suggest that you don’t put these cupcakes into a plastic bag (I made that mistake and they all stuck together the next day when I went to frost them).

Chocolate Swiss Butter Cream Frosting

Combine in a small pan:

  • 1 1/2 cups date sugar
  • 1/4 cup agave nectar
  • 1 1/2 cups water
  • 1/8 teaspoon salt (or a couple of dashes)

Using a candy thermometer, heat mixture to soft ball stage (220 degrees).  Stir frequently. Date sugar doesn’t dissolve like regular white cane sugar so expect it to take quite awhile to get to 220 degrees (like a half hour; I actually gave up after about 20 minutes when it finally reached 200 degrees and my frosting turned out a little softer than it should). While the sugar syrup is cooking, beat:

  • 1/4 cup aquafaba
  • 1/4 teaspoon cream of tartar

Beat at medium speed until stiff peaks form and then continue beating for another 3-5 minutes at high speed.  Slowly add the sugar mixture and beat on high for another 3-5 minutes.  Add:

  • 2 ounces melted baking chocolate OR 2 tablespoons carob powder dissolved in 1 tablespoon olive oil

When well combined, slowly add in small pieces:

  • 1/4 to 1/2 cup vegan margarine (the amount depends on how buttery and fluffy you want the frosting; I use Earth Balance Soy Free)

Continue beating until the margarine is well combined (you can tell from the picture that I didn’t quite achieve this task and that was mainly because I forgot it in the original beating so adding it later using a whisk and you can see how well that worked!).

Turkey Osso Buco (dairy-free, gluten-free, egg-free)

One of our favorite cold weather meals is a turkey osso buco (or turkey stew) made with root vegetables.  The hot gravy with the succulent root vegetables is so warming and very filling.  I don’t always use the same vegetables but they are usually root ones although I’ve been known to add both peas and string beans to the stew.

You can cook this either in a dutch oven in your oven or in a crock pot.  You’ll need:

  • Turkey leg quarter or breast
  • 1 large Russet potato, peeled and diced
  • 1 large turnip, peeled and diced
  • 3 small to medium parsnips, peeled and sliced
  • 1 medium sweet potato, peeled and diced
  • 3-4 medium carrots, peeled and sliced
  • 1 medium onion, peeled and diced
  • Salt, pepper and herbs to taste
  • 1 quart turkey (or chicken) stock
  • 1/4 cup gluten-free brown rice flour
  • 2-3 tablespoons olive oil

Cut the turkey leg quarter in pieces (leg and thigh).  Put in a gallon food storage bag, the brown rice flour along with salt, pepper and herbs to taste (I like to use some paprika, oregano, thyme, parsley, along with the salt and pepper; if I don’t have those, I’ll use a teaspoon of Mrs. Dash or other herb mix).  Shake to mix and then add the turkey piece(s) and shake to coat.

In a skillet large enough to hold the turkey piece(s), heat the olive oil and then add the turkey over medium heat to brown.  While the turkey is browning, dice the onion.  If you are using a crock pot, add the onion to the cooker.  If you are using a dutch oven, you’ll want to brown your turkey in that and add the onion when the turkey is browned.  Be sure to brown all sides of the turkey.  Remove the turkey and add the dredging flour to the oil and stir so that the flour absorbs the oils and drippings from the pan.  If you are using a slow cooker, add the flour mixture to the pot and then add the turkey along with the stock.  If you are using the dutch oven, simply add the stock and the turkey back in.

Using a slow cooker, turn it onto high and cook for 3-4 hours.  If you’re using a dutch oven, you’ll want to prepare the vegetables (peel and dice them) and add them into the dutch oven before cooking in the oven at 325 degrees for 3-4 hours.  I’ve found that the vegetables don’t cook well in the slow cooker so I peel and dice them and cook them on the stovetop separately,  mostly cooked through and then add them to the crock pot during the last hour of cooking.

Makes six to eight servings.  You’ll want to deskin and debone the turkey pieces before serving.

Stuffed Peppers (dairy-free, gluten-free, egg-free, soy-free, sugar-free)

When I make stuffed peppers, I have to make two varieties.  My husband likes the traditional pepper stuffed with a tomato-based rice while I prefer them with a cheesy rice stuffing.  We don’t have them often since he’s diabetic and all that rice isn’t good for his blood sugar so I’ve revised my recipe to include only half the rice using quinoa for the other half.  Adds more protein while cutting the carbohydrates.  So here are both recipes.  Makes two servings with a little extra stuffing.

You’ll need:

  • 2 medium peppers, whatever color you like
  • 1 cup cooked ground meat (turkey, chicken, beef or pork)
  • 1/2 cup cooked brown rice
  • 1/2 cup cooked quinoa
  • 1 cup cheese sauce (see Macaroni and Cheese recipe)
  • 1 cup tomato sauce (see Spaghetti and Meatball recipe or use one from a jar) plus 1/2 cup for the bottom of the baking dish
  • 1/2 cup diced onion, sautéed
  • Salt, pepper, and herbs to your taste
  • Sliced non-dairy provolone or shredded mozzarella for the tops of the peppers

Preheat your oven to 400 degrees.  Cut the tops off your peppers and scoop out the seeds, cutting some of the white inside rind away as well (it can be bitter).  Place them in a 2 quart pot with water filling the peppers and covering them.  Simmer for about 10 minutes until just tender; since you’re also going to bake them, don’t overcook them, just want them parboiled.  The 10 minutes includes the time it takes for the water to boil.

Mix together the onions, meat, brown rice, and quinoa, and herbs in a bowl.  When mixed, divide into two bowls and add the cheese sauce to one bowl and the tomato sauce to the other.  Mix thoroughly and fill the drained peppers.  You should have some extra stuffing for serving with them (I usually cut them in half when serving and add the extra stuffing on the top, with more cheese, if you like.

Put the 1/2 cup of extra tomato sauce in the bottom of your baking dish.  Add the peppers and bake uncovered for 20-30 minutes until very tender and the cheese melts.

Try to choose peppers with flat bottoms but if you can’t find two like-sized peppers with flat bottoms, cut the bottoms to flatten them trying not to cut into the pepper itself.  When I can’t find peppers with flat bottoms, I will often cut them in half and stuff the halves and bake them lying on their sides.  Or, of course, one could cut the bottom off entirely and place the peppers into the baking dish before filling them, allowing that the stuffing could run out during baking.

Shredded Pork Sliders with Cole Slaw (dairy-free, gluten-free, egg-free)

One of my more recent discoveries, pork sliders are so good as a meal if you eat several or as an appetizer for a party.  People love them.  I made these first last Christmas for a party I went to and they disappeared.  A large pork roast will make 30-36 sliders but for a meal for my husband and I, I use a smaller portion.  Great use of leftover pork roast.

Combine:

  • 1 cup shredded pork (I use my food processor to break up the pork)
  • 1/4 cup barbecue sauce (such as Organicsville Agave Barbecue Sauce or home-made)

Heat in a skillet for several minutes and place on gluten-free dinner rolls (or if you have a leftover bagel, that works as well).  Top with several tablespoons of cole slaw (see recipe under Soups and Salads).  The cole slaw adds a great crunch to the slider.

Baked Beans (dairy-free, gluten-free, refined sugar-free, fat-free, vegan)

Being from New England, one of my comfort foods has to be baked beans.  I like to eat mine with rice, that way I eat fewer baked beans but my husband likes to eat his plain with extra ketchup.  Whatever way you like them, this baked bean recipe makes hearty, not too sweet beans.

Soak overnight:

  • 1 16-ounce bag of dried red kidney beans (or whatever bean your family prefers)

Be sure that the water covers the beans by at least 3 inches.  Cover the bowl so that nothing falls in it while the beans are soaking.

Preheat your oven to 325 degrees.  You’ll need:

  • 1 medium diced onion
  • 1/2 cup blackstrap molasses
  • 1/4 to 1/2 cup real maple syrup (depending on how sweet you want your beans)
  • 2 tablespoons pomegranate molasses
  • 1 tablespoon dry mustard
  • 1 tablespoon baking soda
  • 1 cup sugar-free ketchup (such as Organicsville Agave Ketchup)
  • 1/2 cup diced bacon (optional) [when I add bacon, I use turkey bacon that doesn’t add any fat to the beans]

Combine above ingredients except the beans and onion.  Add the diced onion and your soaked beans to a bean pot.  If you don’t have a bean pot, a very heavy Dutch over would work (like a cast iron one).  Add 2 cups of the bean soaking liquid into the mixed ingredients and pour over the beans until they are just covered.  Don’t overfill your bean pot to start or you’ll have a mess in your oven.

Bake, adding liquid as needed, for approximately 3 hours or until the beans are soft but not mushy.  You want to check them every half hour and add liquid as needed as well as stirring them so that the beans on top don’t get undercooked while the beans on the bottom get overcooked.  Remember, once you take them out of the oven and leave the cover on the pot, they will continue to cook.  I usually let mine sit on the counter for about a half hour after taking them out and then I transfer them to a serving dish.

Three Squash Mash (dairy-free, gluten-free, egg-free, sugar-free, vegan)

My father loved winter squash — any variety, he raised them all and loved to eat all of them.  His least favorite was the most common, the butternut.  It was too wet for his taste so when we cooked one, we had to mix it with other winter squash to dry it out.  He always doused it with a good amount of gravy, so it had to be dry to begin with so the gravy would sink in (he also liked his potatoes very dry for the same reason).  There’s a wide variety of winter squash to choose from — blue hubbard, acorn, butternut, buttercup, kabocha, carnival, dumpling, delicata, etc — I used an acorn, buttercup, and delicata in my mash but you can use any combination you want.  I also use the very smallest I can find since, unless my older brother shows up, I have to eat it all by myself since my son and husband don’t like it.

Wash 3 winter squash and then stab them with a sharp knife to pierce the squash into the center so that the steam can escape while you cook them.  Put them in a baking dish with about 1 inch of water and put the dish into a 400 degree oven until the squash are soft. In my case, it took around an hour.  Remove them from the oven and allow them to cool for at least 15 minutes (unless you like burned fingers) before you clean them.

Using some paper towels to collect the seeds and strings from the center and a bowl to collect the meat, cut each squash in half and scoop out the seeds and strings onto the paper towels.  Once you have them basically out (its okay if a few strings get into the mash), scoop the meat of the squash into a bowl large enough to hold the meat from all 3 squash.  Repeat for each squash.

Once you have the meat separated, mix in:

  • 2 tablespoons to 1/2 cup avocado oil, or if you can use it, vegan margarine; the amount you’ll use depends on how much squash you have in your bowl (for my 3 very small squash, I used 2 tablespoons)
  • 1/2 to 2 teaspoons pumpkin pie spice
  • Salt and pepper to taste
  • 1 tablespoon to  1/4 cup agave, maple syrup, or honey (optional) — I actually think winter squash is sweet enough without adding any sweetener, especially if you use a delicata, carnival or dumpling in your mix

Stir briskly with a large spoon (or if you have a lot, use a hand mixer on a low setting) until the squash types and additions are well mixed.  If your squash is now too cool to serve, put the squash into a greased baking dish and return to oven to heat up, roughly 15-20 minutes if your oven is already hot.

Chicken and Dumplings (dairy-free, gluten-free, egg-free)

Another thing we always did with leftovers was make a stew and then either serve it with dumplings or put it in a pie crust and make a meat pie with it.    And you could easily do it with a rotisserie chicken or turkey breast from the store.  And you can adjust the vegetables to your taste, i.e., add some cooked diced turnip, parsnips or some lima beans, etc.

In an 8-quart dutch oven mix:

  • 2 cups diced chicken
  • 1 cup cooked peas
  • 1 cup cooked green beans
  • 1/2 cup cooked diced onion
  • 1/2 cup cooked diced celery
  • 1/2 cup cooked diced carrots
  • 1 cup cooked diced sweet potato

Add stock until the pot is 2/3 full; this should take 3-4 cups and needs to cover the meat and vegetable mixture.  Mix up your dumplings in your food processor:

  • 1 1/2 cup brown rice flour
  • 1/2 cup tapioca flour
  • 3 teaspoons baking powder
  • 1 teaspoon xanthan gum
  • 1 teaspoon sea salt
  • 1/4 teaspoon black or white pepper

Pulse in:

  • 1/4 cup vegan margarine OR 1/4 cup avocado oil

Once there are pea sized crumbs, add in 3/4 to 1 cup of non-dairy milk depending on if you used the margarine or the oil (I use rice milk but soy would work as well; you want a milk that doesn’t have a strong aftertaste).  Pulse until well mixed and the batter is smooth.  If your like your dumplings more flavorful, you can add 1/2 teaspoon of an herb mixture OR 1/4 cup fresh parsley to the sifted dry ingredients.

Drop by tablespoons into your boiling stew.  Cook uncovered for 10 minutes and then cover and cook an additional 10 minutes or until dumplings look dry on top.  Makes about 12 smaller dumplings or 6 large dumplings (the larger ones will take longer to cook so I usually make them smaller for ease of cooking and my husband usually eats 2-3 of them.

Remove the dumplings into a dish and keep warm in the oven while you thicken the stock.  Mix 1/4 cup of brown rice flour into 1/2 cup of cold stock until its smooth without any lumps.  Add to the boiling stew, stirring constantly until the gravy thickens.  If its too thin, make another slurry of brown rice flour and cold stock (a tablespoon at a time) until it reaches the desired thickness.  Be sure the gravy boils before you add more flour slurry since it will thicken more as it boils.  And be sure to stir scraping the bottom of the pot so that the gravy doesn’t burn on the bottom (also reduce the heat; you don’t want to do this on a high heat).

Return the dumplings to the pot and serve.  Makes 6-8 servings.

Chickpea Brownies (dairy-free, gluten-free, egg-free, nut-free, soy-free, sugar-free)

These are probably the best brownies I’ve ever eaten.  Fudge brownies are good but difficult to master when you’re making gluten-free and egg-free brownies.  These are always moist, unless you really overcook them, as well as rich and oh so decadent while they are still so good for you!  Unbelievably good.  Instead of using a baking pan, I put some parchment paper on a cookie sheet, spray it with my olive oil spray and spread the batter on it.  It makes a thinner brownie that bakes faster and I’m less likely to overcook it.

In your food process add:

  • 1 drained 12 ounce can of garbanzo beans
  • 2 teaspoons vanilla extract
  • 1/3 cup tahini (or you can use any nut butter if you can have nuts)
  • 1/2 cup protein powder
  • 8-12 pitted dates OR 1 teaspoon monk fruit powder OR 1/4 cup honey
  • 2 teaspoons baking powder
  • 1/2 cup carob powder (or cocoa if you can have it)
  • 1 cup of cold water, after adding 3/4 cup, add a little at a time (1 tablespoon) until you have a smooth, mashed potato like consistency — if you use the honey, you’ll have to use less water

Process until smooth and then process for a couple more minutes.  I’ve found that even when I think all the garbanzo beans are processed, there are still some larger pieces in the mix; and if the garbanzo beans are reduced, the dates may still have some large pieces.  So keep processing it even when you think its done for at least 2 more minutes.  During these last couple of minutes add:

  • 2 tablespoons chia seeds
  • 2 tablespoons hemp hulls
  • 2 tablespoons ground flax

Spread your batter in your prepared pan; either cookie sheet or large 9×12″ baking dish.  I like to sprinkle carob chips on top but that’s optional.  Bake 20-25 minutes if you’re using a cookie sheet and 35-40 minutes for a baking dish.  Cool before cutting.

Fudgy Brownies (dairy-free, gluten-free, soy-free, nut-free, egg-free, sugar-free)

I am a brownie lover; its the only baked good where I’ll actually eat the batter as well as the baked goods.  The only technical thing with brownies is not overcooking them and this is the one thing you really have to watch out for with gluten-free brownies.  I baked mine 22 minutes and they were dry instead of fudgy.  Still very rich and decadent but I’ll probably make hemp cream sundaes out of them instead of eating them plain.  So watch the clock closely when you make these.

Grease an 8×8″ baking dish.  Pre-heat your oven to 350 degrees.

In a medium size bowl mix:

  • 3/4 cup avocado oil
  • 1 1/2 teaspoon monk fruit powder
  • 2 teaspoons vanilla
  • 1/2 cup aquafaba

When they are well mixed, add:

  • 1 cup buckwheat flour
  • 3/4 cup carob powder (you can use cocoa if you want)
  • 1/4 teaspoon salt
  • 1/2 cup protein powder
  • 3/4 cup club soda

Beat just until mixed; don’t overbeat.  You can also add 1/2 cup of carob chips (or chocolate if you can have it) and some hemp hulls (or nuts if you can have them).  Batter will be very thick.  Spread evenly in your baking dish and bake for 15-20 minutes or until a toothpick comes out with some crumbs but not raw batter.  Cool and cut into 9-12 pieces.

Clam Chowder (dairy-free, gluten-free, fat-free)

Growing up in New England, chowder was part of everyone’s diet.  Fish chowder, seafood chowder, corn chowder, clam chowder, didn’t make any difference.  Several times a month we ate chowder (pronounced chow-dah for those of you not from New England).  This recipe can be altered to make any of these very easily, just substitute corn (and chicken for protein) for the clams; or add some crab and/or lobster and shrimp; or put in some white fish, usually cod.  Recipe makes enough for 4 appetizer servings or 2 entrée servings.

You’ll need:

  • 1 medium to large sweet potato, peeled, diced and cooked (if you prefer, you can use russet potato instead)
  • 1/2 cup cooked peas (I usually add them to the pot with the sweet potatoes)
  • 1/2 medium onion, sautéed until soft
  • 2-3 slices of bacon, cooked and diced (I use uncured turkey bacon but feel free to use whatever bacon your family likes)
  • 1 can of diced or chopped clams (6-8 ounces) OR 1 pound of fresh clams steamed, cleaned and diced (be sure to save 1/4 cup of the steaming liquid to add to the chowder)
  • 2 cups of rice milk (you could use any milk you like but rice is the mildest and in chowder, you don’t want a milk that interferes with the taste of the clams)
  • 1 tablespoon brown rice flour made into a slurry with 1/2 cup of the rice milk
  • Salt and pepper to taste

After you cook the sweet potatoes and peas, drain and put back into the pot.  Add the onion, clams (don’t drain them but add the juice as well as the clams), and the milk to the pot.  Bring to a boil and add the slurry of brown rice flour and stir until the chowder starts to thicken.  We don’t want it really thick, just enough to get a good “mouth feel” when you eat the chowder.  Add the bacon and serve.  You can garnish it with diced scallion or chives if you like.  My mother always served chowder with oyster crackers but those are also optional.  Its so thick and hearty that you really don’t need crackers with this chowder.