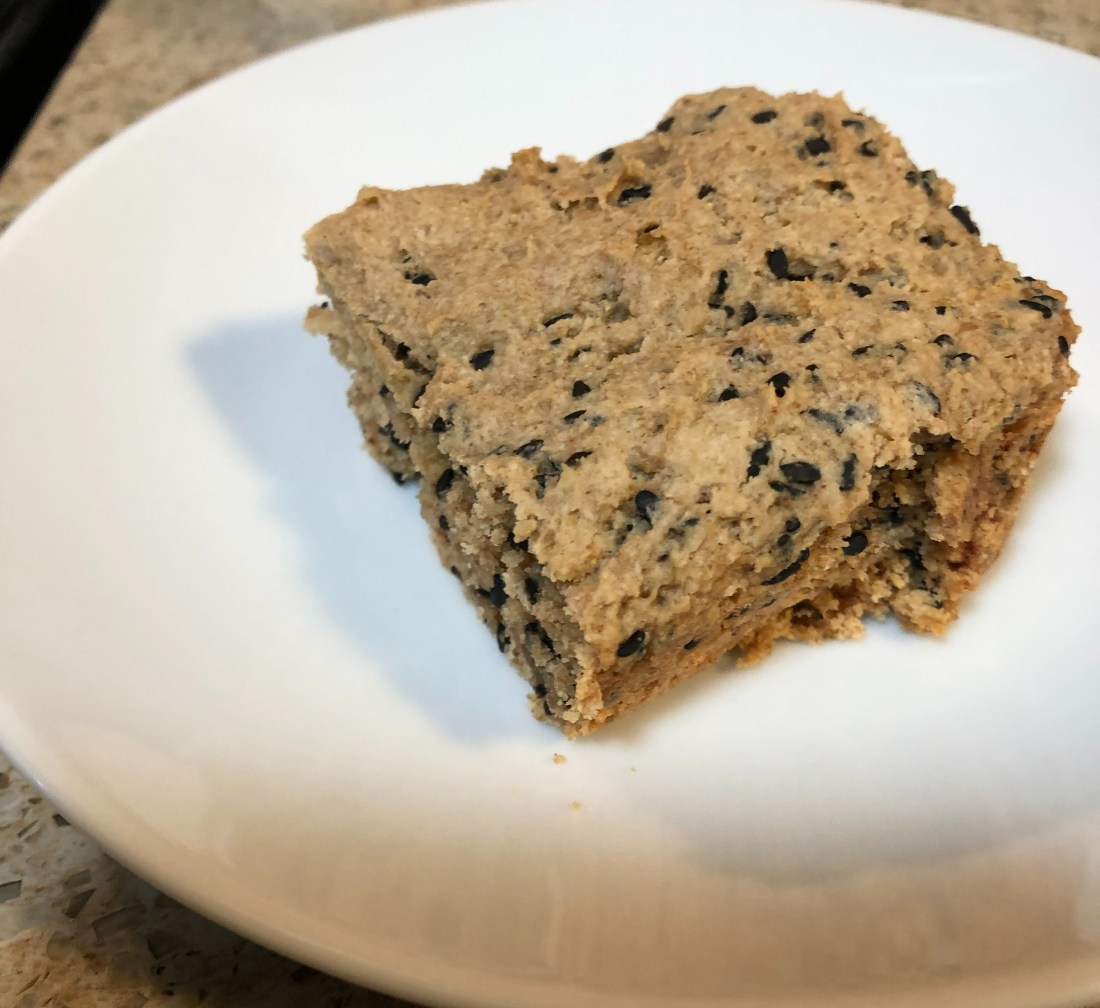
My mother used to make a sesame seed cake recipe that she found in the NEW YORK TIMES. She frosted it with chocolate ganache and it was so delicious it never lasted more than one meal in our household. I’ve been searching for years trying to find that original recipe without any success. However, recently I’ve found several gluten-free sesame seed cake recipes, one of which I’ve adapted here. Of course, if you can have eggs, go ahead and substitute back the one egg for the flax gel. This makes one 8×8″ square or round cake so for a two layer cake, double the recipe or make it twice.
Preheat oven to 325 degrees. Grease an 8×8″ baking pan. In a medium size mixing bowl combine:
1 tablespoon ground flaxseed
3 tablespoons warm water
Whisk together and let sit for approximately 5 minutes until it forms a gel. To it add:
1/2 cup date sugar
1/3 cup Spectrum shortening (or vegan butter or margarine at room temperature)
1/4 cup black sesame seeds (or toasted regular ones if you prefer the taste)
I just used a spoon to mix this cake together but feel free to use a hand mixer. Combine the above until smooth and the shortening is incorporated. Add:
3/4 cup non-dairy milk (minus 1 tablespoon)
1 tablespoon rice vinegar
1 teaspoon vanilla extract
Stir in the liquid ingredients before adding:
2 cups oat flour (make sure it’s gluten-free)
1/2 teaspoon xanthan gum (or guar gum)
2 teaspoons baking powder
Stir until all ingredients are combined. Spoon into prepared pan and bake for 30-35 minutes or until a toothpick comes out clean. Frost with chocolate or carob ganache if desired (see recipe under Sauces, Condiments and Dressings).
I’m updating this recipe. Just spoke with my son and daughter-in-law who said it was good but it wasn’t sweet enough! I admit, I don’t like my desserts as sweet as most people so I’ll adjust the recipe so that those of you who want a sweeter cake can still use this recipe.
I love carrot cake but I love my carrot cake to be more like a spice cake with some carrots in it. So unlike most carrot cakes, I add more spices. If you don’t, feel free to stop with the cinnamon. I was easily able to divide this cake into two bowls and mix some ground walnuts into one bowl (for my son and his family) and some chopped dates and pumpkin seeds into the other for me. This cake only takes one bowl and is fairly easy to mix even for me with 2 rotator cuff tears.
First, preheat oven to 350 degrees. Grease and flour 2, 8″ baking pans (I used one square and one round so that I knew which was which!). In a medium-large bowl, combine:
3 tablespoons ground flax
7 tablespoons warm water (1/3 cup + 1 tablespoon)
Whisk to combine and then let sit for 5 minutes or so to form flax gel. When ready add to it:
1/3 cup avocado oil
1/4 cup maple syrup
Whisk or stir to combine and then add:
1 scant cup unsweetened fruit sauce (apple, pear, peach, oh pineapple would be good) [I actually only had 7/8 of a cup and it worked fine]
1/2 to 1 cup date sugar (depending on how sweet you want it)
3/4 teaspoon sea salt
1 1/2 teaspoons baking powder
1 1/2 teaspoons baking soda
1 teaspoon ground cinnamon
1/2 teaspoon ground allspice
1/2 teaspoon ground cardamom
1/4 teaspoon ground cloves
Stir or whisk to combine. Add:
3/4 cup non-dairy milk
Stir or whisk to combine (by now the whisk will be having a difficult time so use a hand mixer if necessary). Add:
1 cup grated carrots
1 1/2 cups all-purpose gluten-free flour
1 cup oat flour
Stir to combine adding another 1/4 cup of non-dairy milk if necessary. Stir in:
1/2 to 3/4 cup chopped walnuts, feel free to mix it up using chopped pumpkin seeds, sunflower seeds, and/or dates, chopped raisins, cranberries, or dried pineapple also work (Optional)
Spoon the batter equally between the two pans and bake for 40-50 minutes or until a toothpick inserted into the center comes out clean (I would actually bake it about 5 minutes more after the toothpick comes out clean). Don’t worry if it’s slightly overbaked since gluten-free baked goods take longer to cook than regular ones, it still comes out fine.
Remove from oven and let cool, on a cooling rack, for 15-20 minutes before removing from pan. Let cool completely before frosting or serving. For faster cooling, place in the refrigerator for about a half hour. Serves 8-12.
Vegan “Cream Cheese” Frosting
One just has to have cream cheese frosting on carrot cake! I’ve tried several nut-free, tofu-free recipes for vegan cream cheese and none of them worked very well until I found this one, delicious! Of course, if you don’t care for sweet potatoes, it may not be your cup of tea. It uses white flesh sweet potatoes which are starchier and not as sweet as the ones we’re used to here in the U.S. They can be called Japanese, Hannah, or Batata.
Wash, peel and dice:
1 large or 2 medium-sized white flesh sweet potatoes
Since we don’t want to add any liquid to the sweet potatoes, it’s very important that they are steamed rather than boiled. Steam until fork tender. Place in a small to medium bowl. Using a potato masher, mash and then measure out 2 cups.
Transfer the 2 cups to another medium bowl (or the same one if it used all the mashed potatoes). Add:
1/3 cup avocado oil
Juice from one lemon (about 2 tablespoons)
1 teaspoon white vinegar
1/8 teaspoon salt
There’s the basic recipe for vegan “cream cheese”. To make it into frosting, whip in using a hand mixer:
1/4 to 1/2 cup maple syrup, agave nectar, honey, etc.
1/2 teaspoon vanilla extract
Will frost two layers of a naked cake (no frosting on the sides).
My husband loved these pickles. It was the only way I could get him to eat cucumbers so I made them often. It’s a quick and easy thing to do. The longest part of the process is peeling the cucumbers so feel free if the peels don’t bother you to leave them on. And it’s so variable – by simply changing the type of vinegar and herbs/spices used, the taste changes completely. I’ll give you some variations at the end of the basic recipe.
In a 3-cup bowl combine:
1/2 to 1 cup water, depending on how strong you want the pickle
1 cup vinegar (I use a blend of white and rice – a strong and a mild vinegar)
2 teaspoons date sugar
1/4 teaspoon alum (keeps the cucumbers crunchy)
1/2 teaspoon sea salt
Add:
6 mini cucumbers, sliced
That’s the basic recipe and they are very good just this way. I like to change it up though so think about adding the following, remembering that spices are always better once they’re a little roasted.
Variations:
1/2 teaspoon of: mustard seed, cumin seed, celery seed, coriander seed or just one of these
2 bay leaves
1/2 small onion, thinly sliced or several scallions, sliced
1 tablespoon of: fresh dill weed or 1 teaspoon of dried dill weed
1 tablespoon of: fresh tarragon or fresh rosemary or fresh thyme or fresh basil or parsley
Using all white vinegar makes for a very pungent pickle where you may want to increase the date sugar or even use a couple of tablespoons of honey or agave nectar
Using all rice vinegar will make a very mild pickle where the date sugar can be totally eliminated
As I said at the top, changing the vinegar, and there are plenty of them out there these days, will totally change the taste of these pickles so use the vinegars your family likes best
This recipe is quite involved and takes some time but it’s not a difficult dish to make. And to be sure, every minute spent on this is well worth the effort! The herbs and spices used amp up the flavor profile and adding some freshly grated lemon zest and lemon juice at the end takes it over the edge! Rather than adding the lemon juice at the end, some sliced lemons on the side would also work.
First, peel, cut in half and then thinly slice:
2-3 medium-sized sweet onions
If you don’t have sweet onions, add 1 teaspoon date sugar when you cook them. Let them sit while heating a medium-sized Dutch oven over medium heat with:
2 tablespoons olive oil
When the oil is shimmering add:
1 1/2 to 2 pounds bone-in chicken thighs or boneless, skinless chicken breasts
that are seasoned with:
1/2 teaspoon sea salt
1/4 teaspoon pepper
If using skin-on, bone-in thighs, cook skin side down. Loosely arrange chicken in pan (may take more than one batch). Brown on all sides, about 6-8 minutes.Remove to a plate. Drain all but 2 tablespoons oil from the pan before addingthe onion slices.Reduce heat to medium low and cook, stirring frequently until well caramelized (browned). If not using sweet onions, here’s where to add the:
1 teaspoon date sugar
It can take 25-30 minutes to caramelize the onions because they need to cook slowly so that they don’t burn, we want them browned – caramelized, not burned. Once the onions are ready, add to the pot:
1/2 teaspoon ground coriander (or cardamom, nutmeg, or allspice)
1/2 teaspoon ground cumin
1/8 teaspoon saffron threads, crushed
Sauté for about 30 seconds until the herbs and spices are fragrant before adding:
6 ounces sliced mushrooms (Optional, peas would also work)
2 cups chicken stock or bone broth
the browned chicken pieces and any juices on the plate
If using skin-on thighs, be sure the browned side is up. Cover and let simmer for 20 minutes. Add to the pot:
1 1/2 cups uncooked rice*
1/3 cup dried fruit (I used cranberries but raisins or dried cherries would also work)
Stir in the rice and fruit, bring to a boil, reduce heat to low, cover and cook for another 30 minutes or until rice is tender and chicken is cooked. Most of the liquid should be gone from the pot so be careful not to burn the dish. Remove the chicken from the pot, moving the pot off the heat and re-cover so that it stays hot. Remove skin if using skin-on chicken and let sit for 8-10 minutes before slicing the meat (and removing the bones if using bone-in chicken). Add the chicken back into the pot along with:
1/2 teaspoon lemon zest
1 tablespoon juice
3 tablespoons fresh cilantro or parsley (Optional)
Stir to combine. Reheat until the chicken is heated through and serve. Serves 4-6.
*I used pre-cooked brown rice in my dish so I cooked the chicken 30 minutes before adding the frozen rice and then cooked it only an additional 10 minutes.
Since I don’t care for cilantro and don’t think much of parsley either, I sprinkled some green onions on top of my dish.
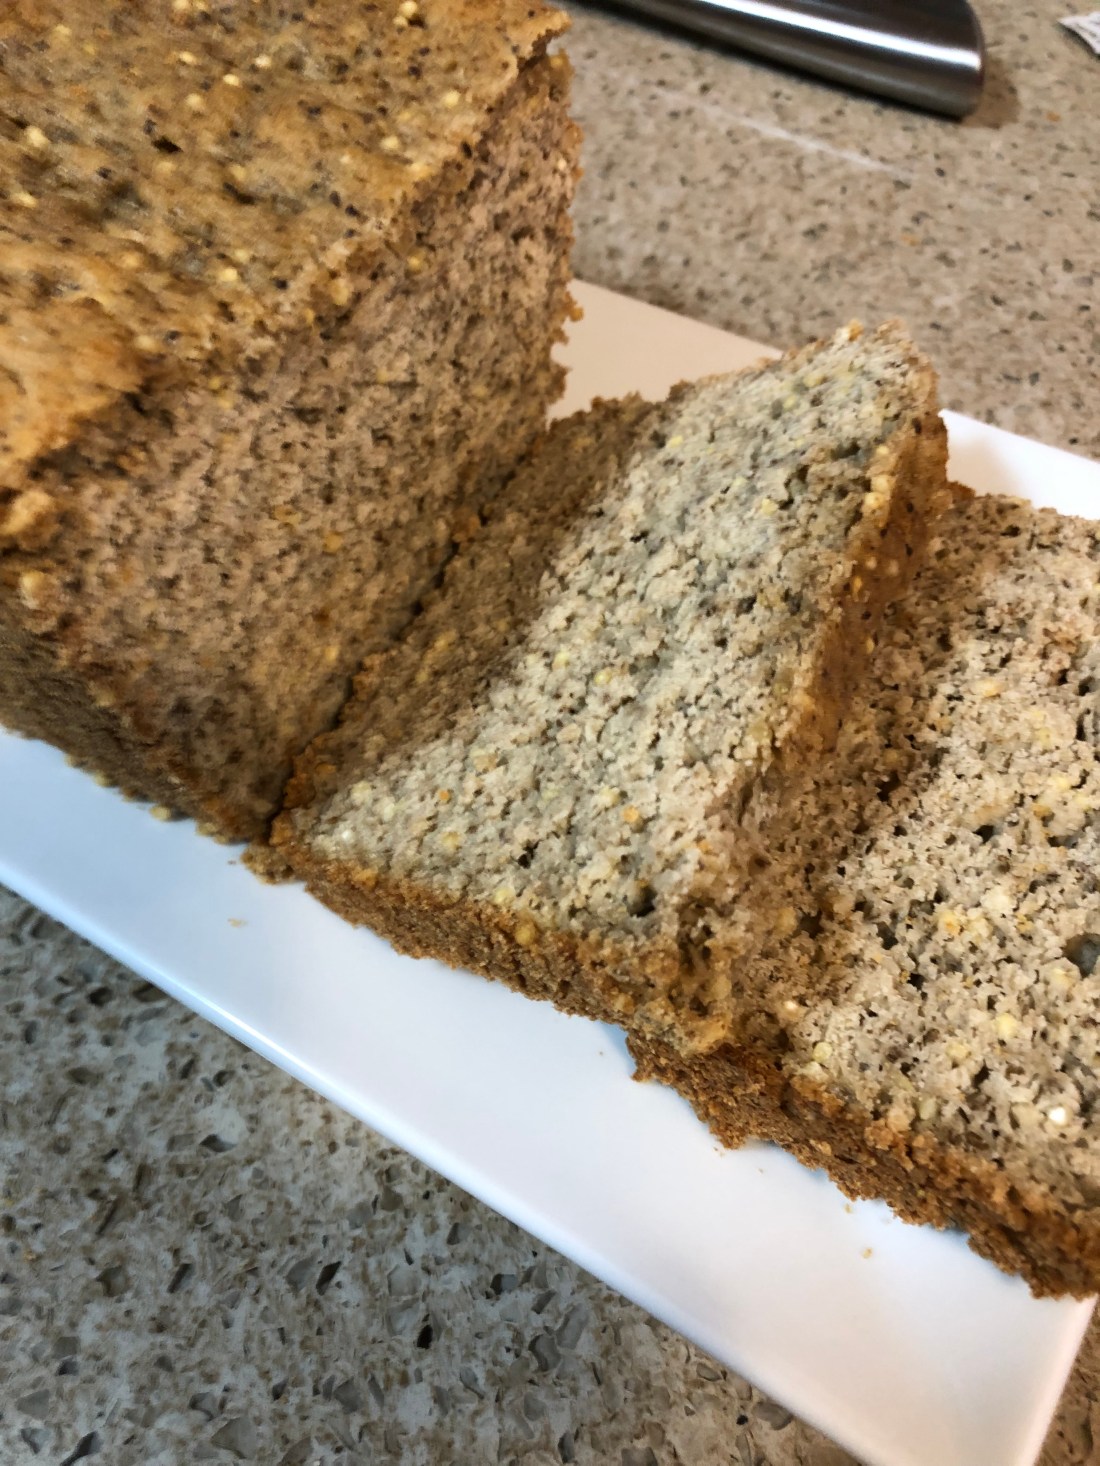
I’ve often said on this blog that I’ve been searching for a bread recipe that doesn’t turn out like a brick or is gummy. That’s very difficult when eggs aren’t included in the recipe. Flax gel and other egg substitutes just don’t seem to work well in breads. I may, however, have finally found the answer. Here’s a bread recipe that I’ve just made, raises very nicely, is very easy to make, even with the yeast. It’s really not that difficult to use yeast, the correct temperature to activate yeast is between 98 and 101 degrees so lukewarm like baby formula. And it tastes delicious!
Grease an 8×4″ loaf pan.In a 2-cup bowl, heat in the microwave for 40-45 seconds:
1 cup non-dairy milk
When you take it out, stir it a little then test it with your finger or put a drop on your wrist. It should be lukewarm, your body temperature so if you put a drop on your wrist, it shouldn’t feel hot or cold. If it feels cool, put it back in the microwave for 5-10 seconds more. If it feels too hot, stir with a metal spoon and whisk in:
2 teaspoons date sugar
This should help cool it down but test it again. If it already feels lukewarm on your wrist go ahead and add the date sugar along with:
2 1/2 teaspoons active dry yeast
Whisk in the yeast and set aside for 10-15 minutes. If your yeast/milk mixture doesn’t start bubbling (foaming) in the first 5 minutes, it’s no good, throw it out and start again.
While the yeast works, in a large bowl combine:
1 cup millet flour
1 cup oat flour
1/2 cup arrowroot
1/2 cup tapioca starch (or flour)
1/4 cup quinoa flour
1/4 cup whole millet (optional)
1 teaspoon baking powder
1/2 teaspoon baking soda
1/2 teaspoon sea salt
Whisk to combine, leaving a pit in the middle of the dry ingredients. In a small bowl combine:
5 tablespoons ground chia seeds
1 cup warm water (again test on your wrist for lukewarm)
3 tablespoons oil
2 teaspoons vinegar
Let sit for a couple of minutes (3 or 4). Add to the dry ingredients and then add:
the yeast mixture
the chia mixture
Stir to combine wet and dry ingredients but be careful not to overmix or your bread will be tough. Spoon into the prepared loaf pan, pushing down the dough to release any air bubbles and gaps along the sides of the pan. Set in a warm place for 40-50 minutes or until dough reaches the top of the loaf pan.* Preheat oven to 350 degrees. Bake the bread for 60 minutes. Remove and cool completely (3-4 hours at least) before cutting.
*I brushed the top of the loaf with avocado oil so that the top didn’t get dried out while rising. When I removed it from the oven, I brushed it again with the oil to soften the top crust which likes to crumble with this bread.
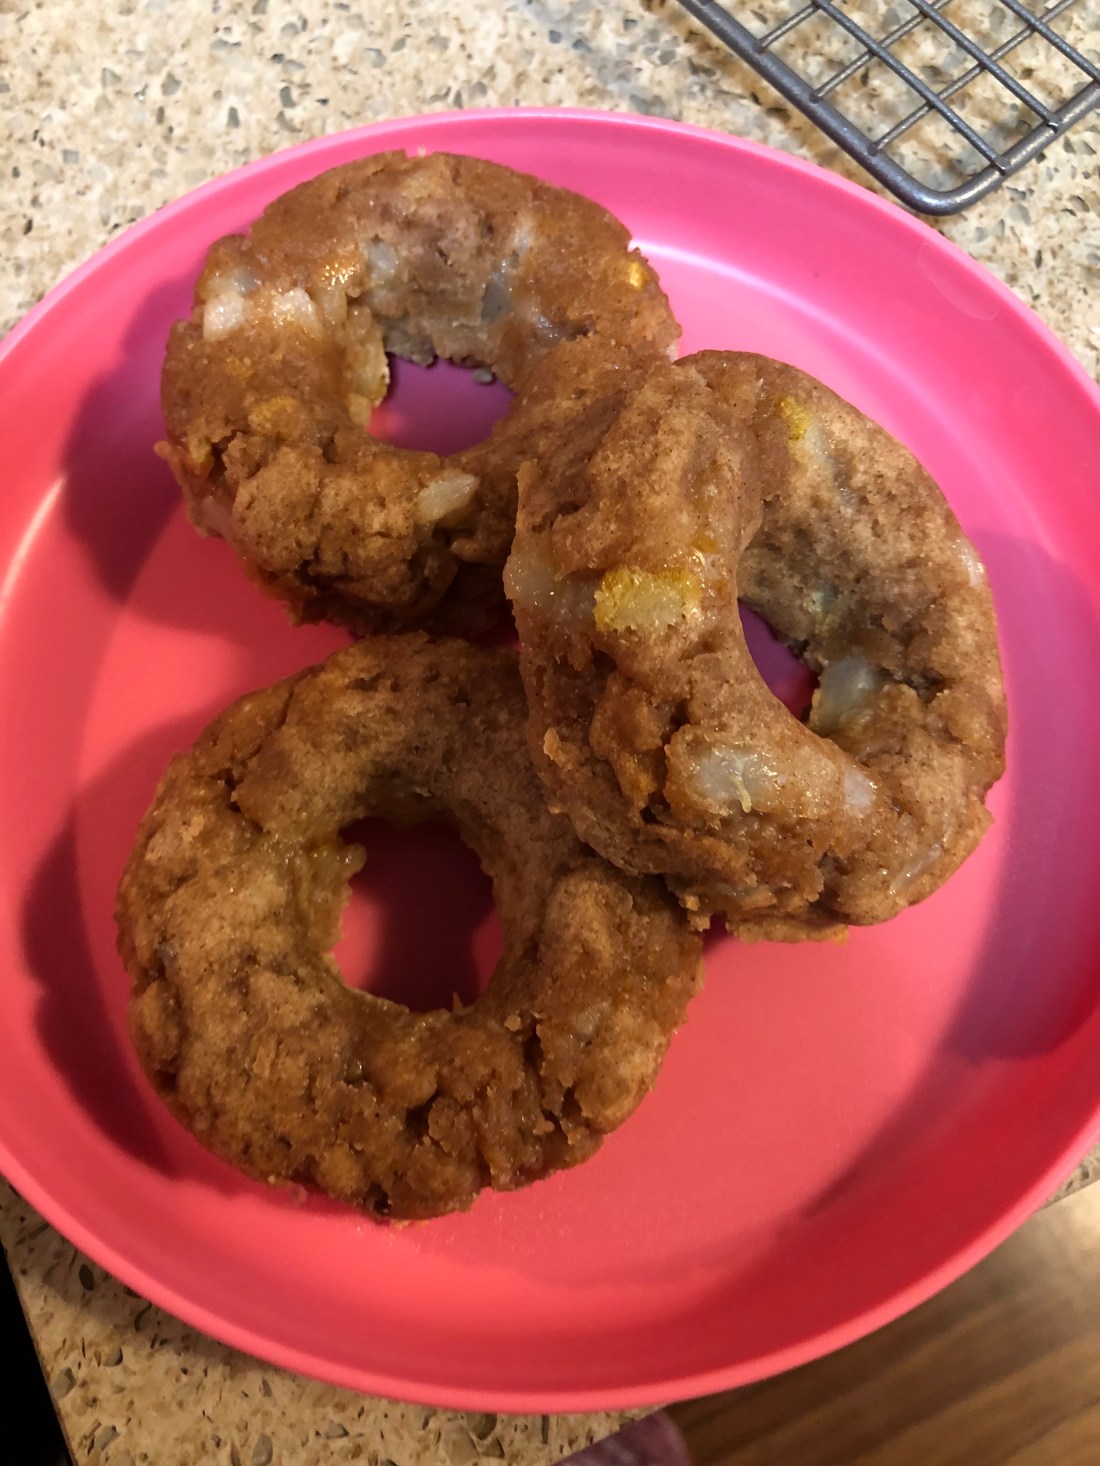
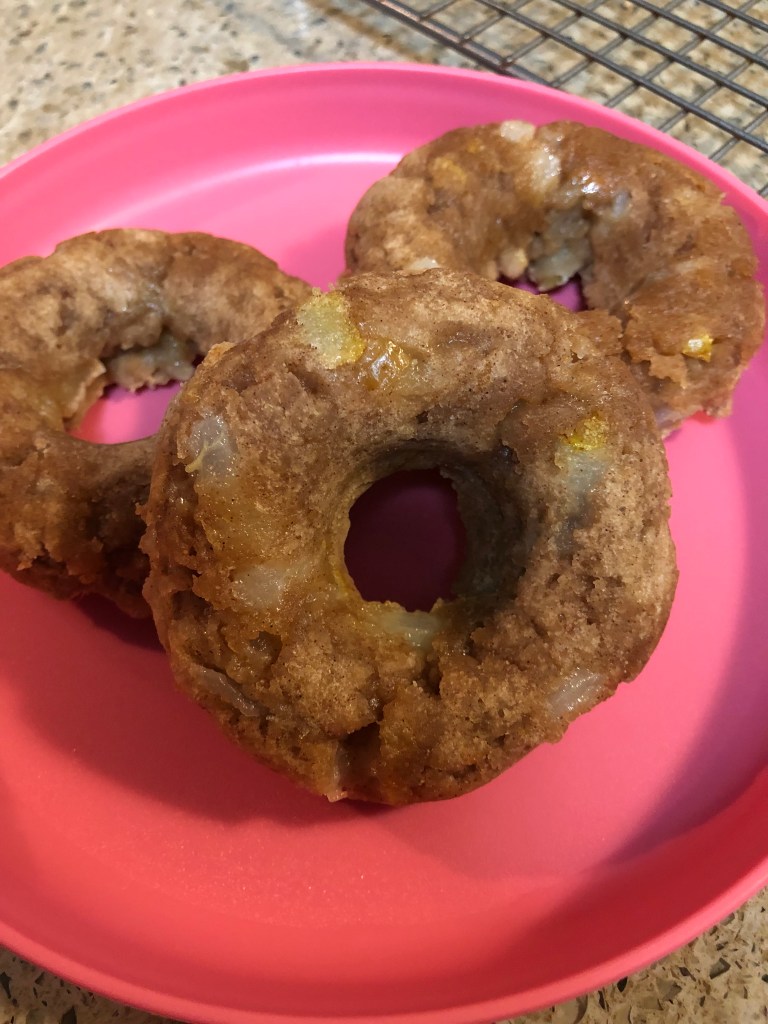
Here’s a quick and easy recipe for either a fried fritter or baked donut with fruit. I used pears but apples, peaches, plums, or any berry would work just as well. Simply substitute the other fruit in place of the diced pear and use a coulee of the same fruit in place of the pear sauce. For most people that would be apple since applesauce is readily available although it’s fairly simple to make fruit sauces, or coulees, from other fruits. Simply wash, core, and slice the stone fruits (no need to peel), place in a pot with a couple of tablespoons of water and cook until the fruit is soft, then puree. With the berries, it’s even easier because all you have to do is wash the fruit like blackberries or strawberries, and then cook them down (with a little water) before pureeing. Brown food again!
Stir just until the dry ingredients are combined with the wet. Don’t overmix. In a 4-quart sauce pan or heavy, high-sided fry-pan, add:
2″ of oil (I used a combination of olive and avocado)
Heat to 375 degrees (use a cooking thermometer). For fritters, scoop out about 1/3 cup of the dough, form into a ball and flatten (use wet hands for this) before dropping into the hot fat. Cook 3-4 minutes per side (for a dough circle about 1/2″ thick). Should be golden brown. Only cook one or two circles at a time in the pot, more in the frypan.
For baked donuts, grease two 6-donut baking pans and spoon in dough. Bake at 425 degrees about 12-15 minutes or until the donut bounces back when touched. Cool slightly before unmolding.
Quick and easy, especially with pre-mixed cole slaw mix, this is a delicious, fat-free side dish that won’t spoil if left out because it has no mayonnaise.
I find it hard to believe that this is my 300th blog! How time flies and how the recipes just keep adding up. Hope you’re enjoying this adventure in cooking as much as I.
In a medium size bowl, whisk:
1/4 cup date sugar
1 teaspoon mustard powder
1 teaspoon sea salt
1/2 teaspoon ground black pepper
1/2 teaspoon celery seeds
1/4 cup white vinegar
Whisk until the date sugar dissolves. Stir into the dressing:
1 1/2 cups pre-mixed cole slaw mix (green and red cabbage and carrot)
1/4 cup sliced scallion greens
Serve immediately or chill for 30 minutes before serving. Serves 2-3.
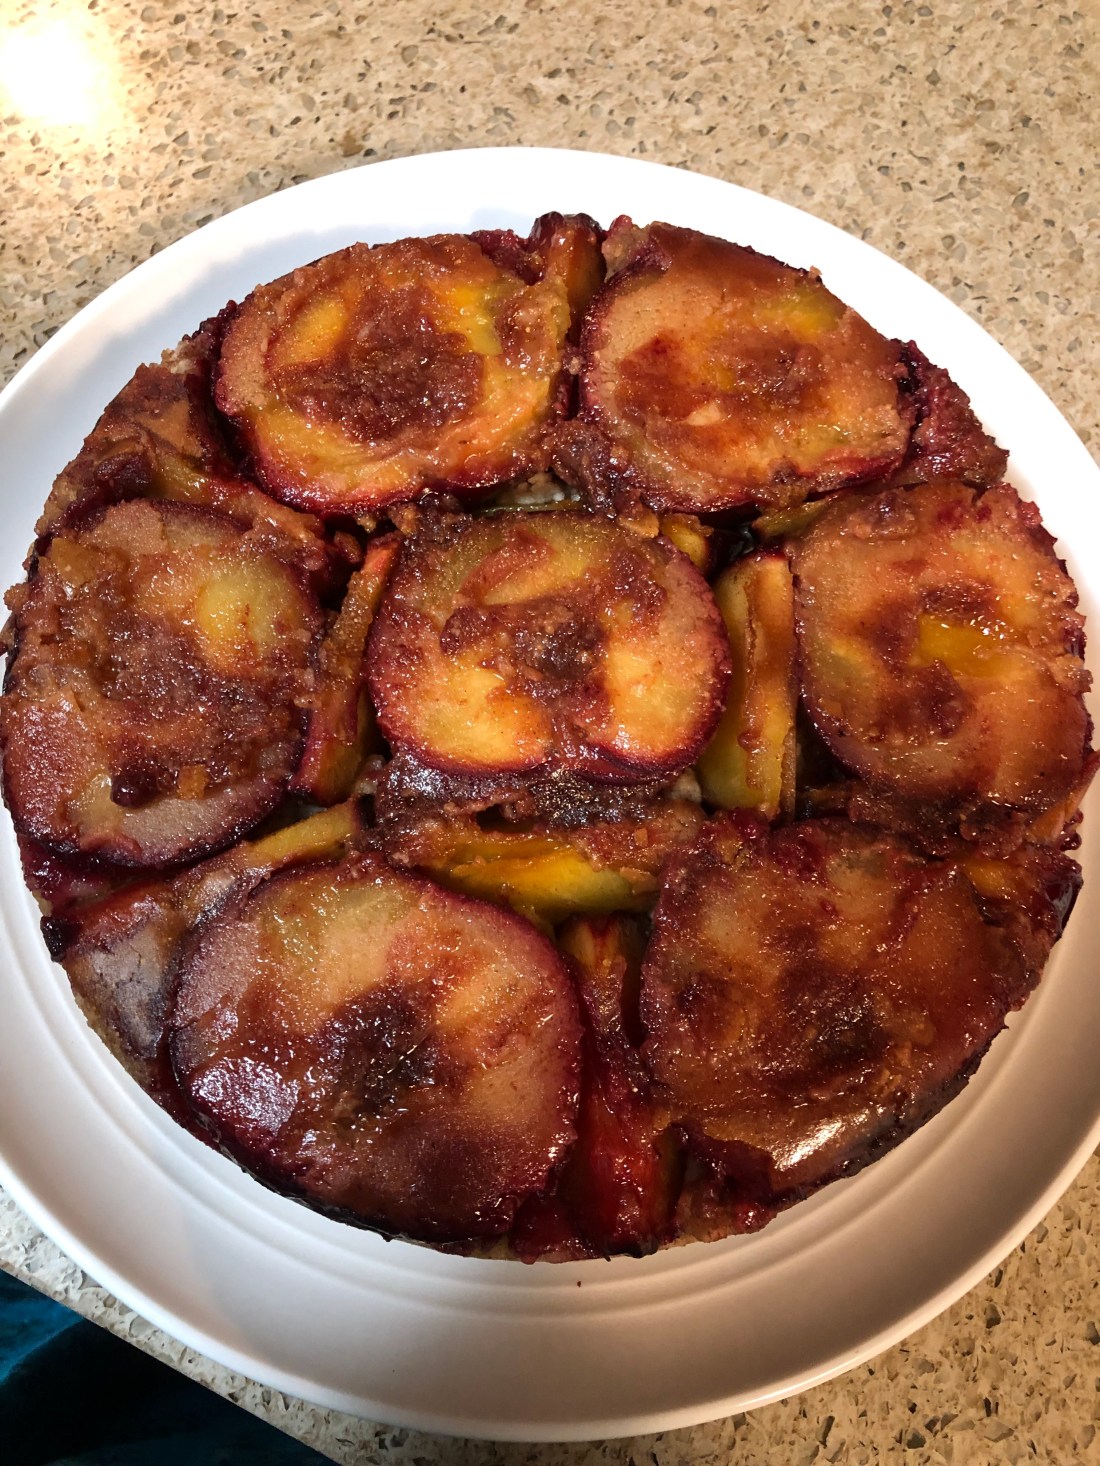
Cottage pudding is a basic fruit pudding that’s often used to make fruit puddings. It’s a lot like my recipe for blackberry pudding. Very easy to make, the consistency of a muffin batter, it can be used to top a variety of fruits or can be baked on its own and served with sauce such as my mother’s hard vanilla sauce, or a fruit coulee. If you’re looking for a fairly quick and easy to make dessert, a fruit cottage pudding is a good answer. Delicious with any kind of whipped topping, sauce, or frozen vanilla dessert. Serves 8.
Preheat oven to 375 degrees. In the bottom of an 8″ cake pan, pour:
1/4 cup avocado oil or spread 1/4 cup vegan butter or margarine
Spring the fat with:
1/4 cup date sugar
Line the pan with fruit slices. I used plums cut in half and then eighths to fit between the halves but all slices works just as well. Cut and place cut side down:
5 plums (be sure to remove the pits first!)
Sprinkle with:
2 teaspoons cinnamon
Set the pan aside and make the pudding. In a small bowl make the flax gel by combining:
1 tablespoon ground flax
3 tablespoons hot water or aquafaba
Set aside for about 3-5 minutes. In a medium size bowl combine:
1 1/2 cups all-purpose gluten-free flour
2 teaspoons baking powder
1/2 cup date sugar
1/2 teaspoon guar gum or xanthan gum
1/4 teaspoon cinnamon (feel free to use more to your taste)
1 teaspoon sea salt
Once dry ingredients are combined, add:
1/2 cup avocado oil (or melted vegan butter or margarine)
2/3 cup non-dairy milk
1 flax gel from above
Stir to combine until incorporated, batter should be the consistency of muffin batter. Spread over the fruit and bake for 30-40 minutes or until a toothpick comes out clean. Serve hot or cold.
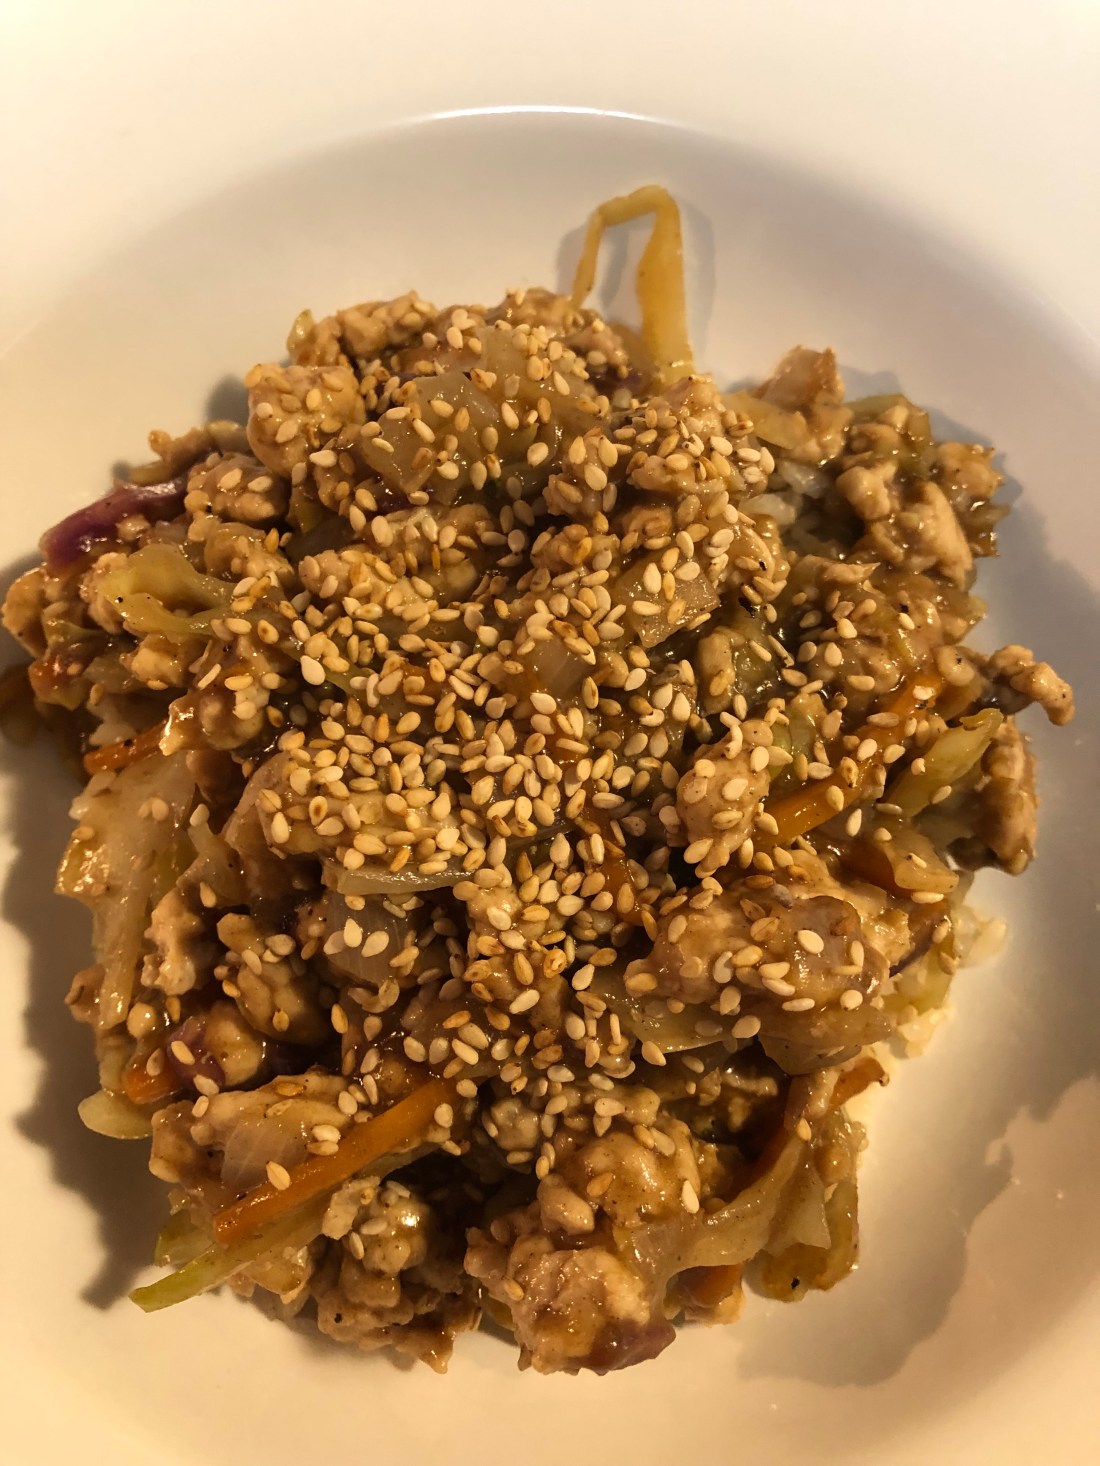
Super quick and easy, especially if you buy the pre-shredded cole slaw mix at the supermarket. The only other thing that needs dicing is the small onion and that doesn’t take long. This dish is a little sweet, spicy and tangy and the ground turkey, unless you really overcook it of course!, stays moist and succulent in the sauce. I apologize for not sprinkling the finished dish with scallion as it should be but I didn’t have any in the house and wasn’t up to going to the store today. Excellent even without them! As usual, feel free to mellow or increase the spices to fit your family’s tastes.
First, in a deep skillet (3″ or so), heat over medium high heat:
1/2 tablespoon olive oil
1/2 tablespoon sesame oil
When hot reduce heat to medium and add:
1 pound ground turkey breast
Break up the turkey and sauté for about 2 minutes before adding:
1 small onion, diced
1 cup shredded cabbage*
1/4 cup shredded carrots (in the cole slaw mix if you use that or most supermarkets now sell pre-shredded carrots)
1-2 tablespoons date sugar depending on how sweet you like it
1/4 teaspoon garlic chili sauce (or 1/4 teaspoon red pepper flakes, or 1 teaspoon siracha)
Whisk to combine. Remove cover from the turkey mixture and add in sauce, stirring constantly until it thickens which should be about 5-10 seconds. Remove from heat to a serving dish, top with toasted sesame seeds and/or sliced scallions. Serve over rice. Makes 4 servings.
*If cabbage isn’t a favorite in your family, add a small can of sliced bamboo shoots and a can of sliced water chestnuts. Or some thinly sliced bok choy would also work.
**See recipe under sauces. I generally have several 1 cup jars of it in the freezer.
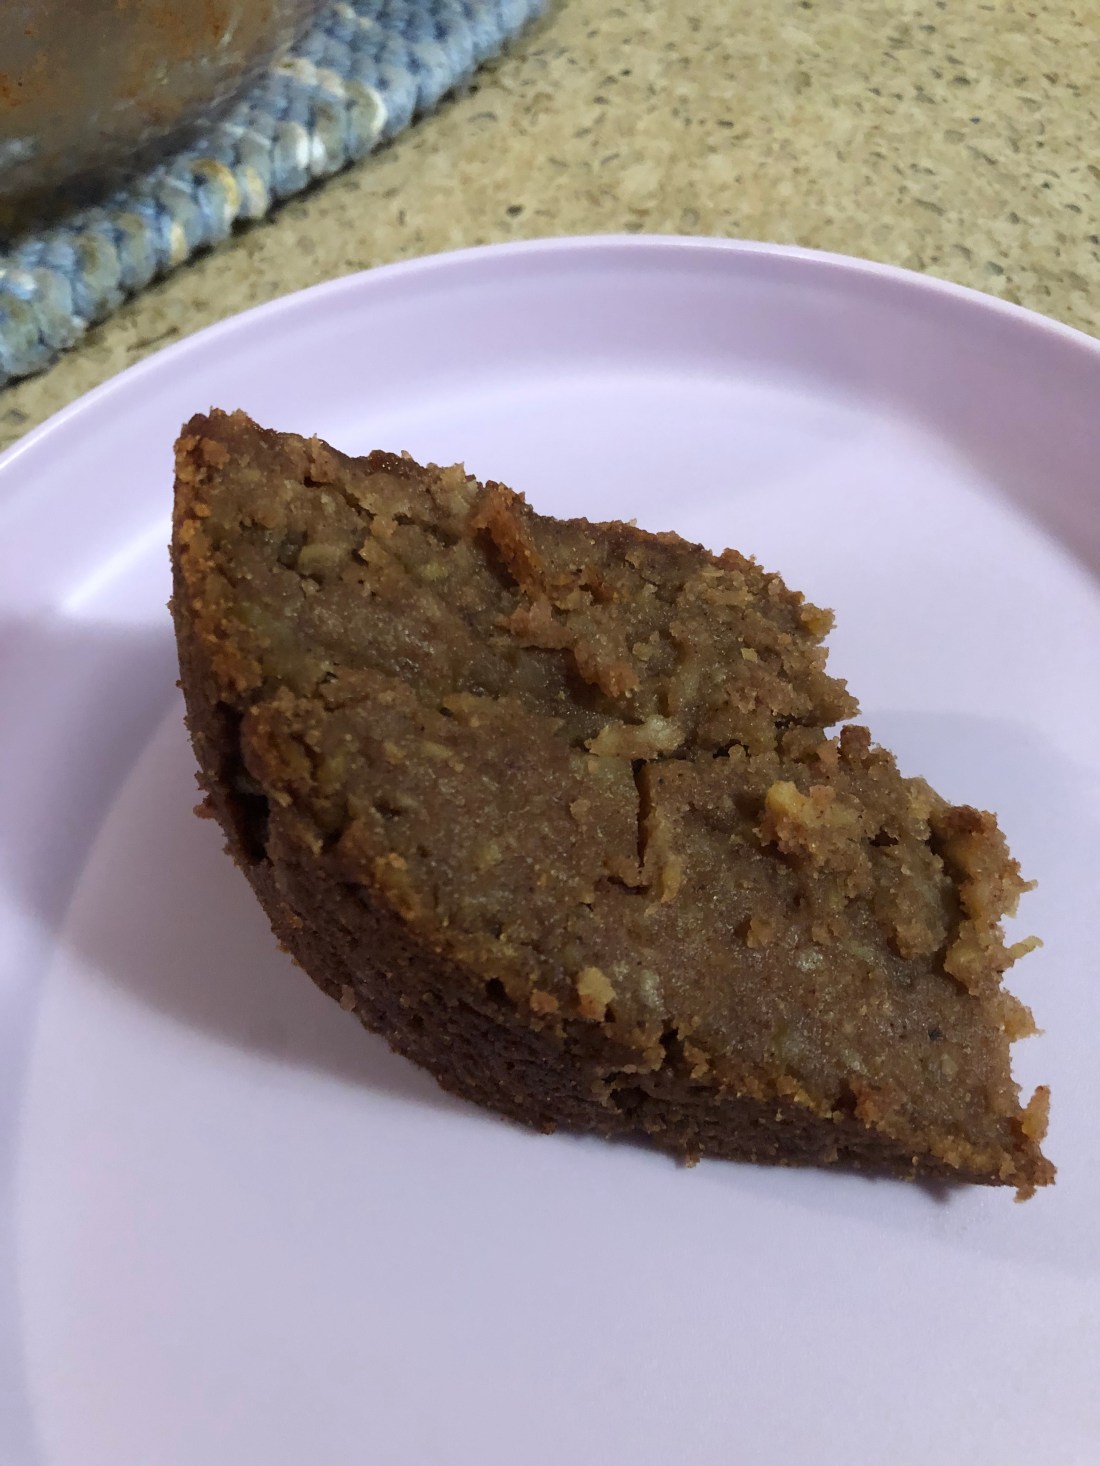
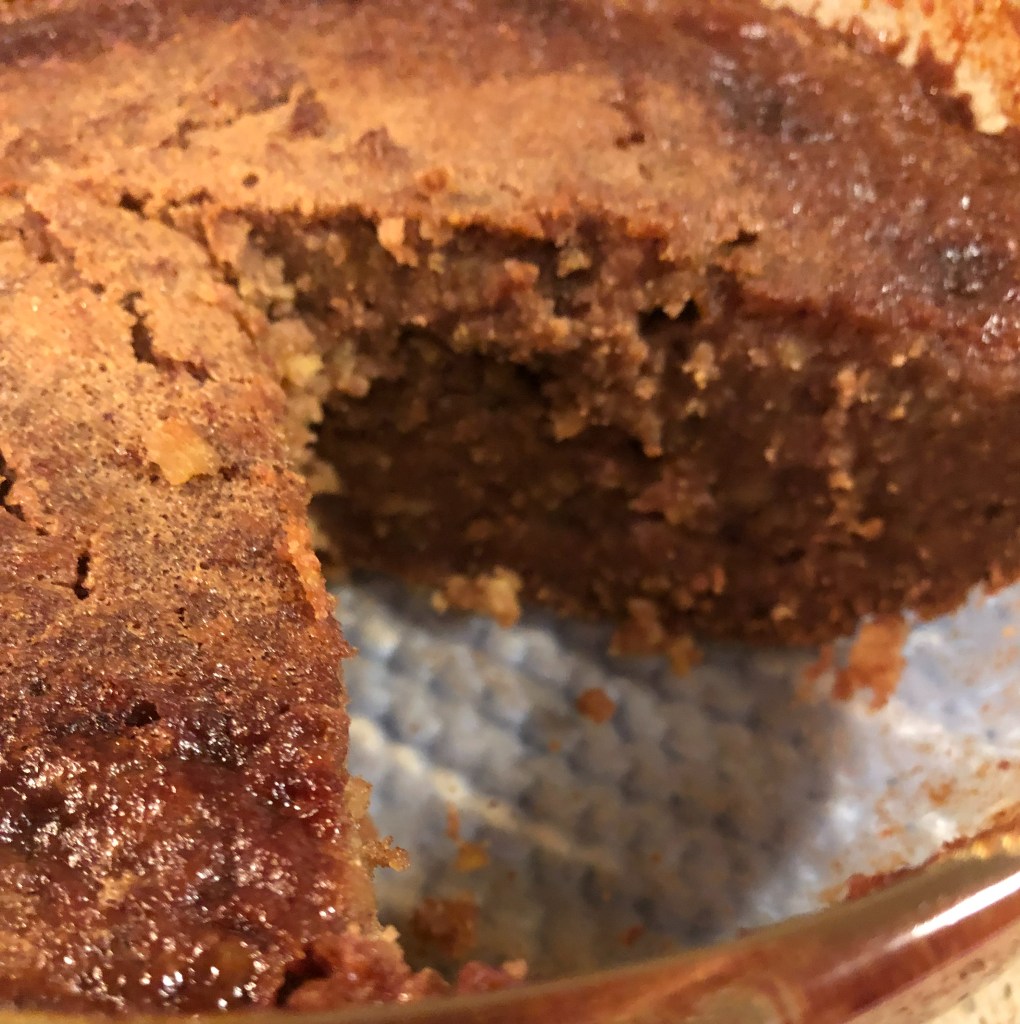
It’s called a pudding but it’s more like a cake in consistency. Easy to make but takes a while to bake. The only suggestion I have is to be sure you have enough people to eat it before you make it or else you’ll end up eating the whole thing yourself, it’s that delicious! Sweet, moist, and very satisfying. If you can use coconut milk, do so for a more authentic flavor. And it calls for batata, purple skinned and white meat sweet potatoes. The original recipe notes that orange sweet potatoes (the ones we’re mostly use here in the U.S.) can also be used but double the flour (and I would decrease the sugar as well).
Preheat oven to 375 degrees and grease a 9-10″ cake pan (I used my 7″ casserole dish which also worked fine, just harder to slice). Peel and cut into chunks:
2 pounds batata sweet potatoes (about 3 medium sized ones)
Place the chunks in the bowl of a food processor and pulse until they are finely grated. Put into a medium bowl and add:
1 1/2 cups non-dairy milk (coconut milk if possible, I used my oat milk)
2 tablespoons avocado oil (omit if using coconut milk, just add 2 tablespoons more of the coconut milk)
1 cup date sugar (or coconut if you can use it)
1 teaspoon freshly grated ginger (I used 1/2 teaspoon ground ginger)
1 teaspoon vanilla extract
1/2 teaspoon cinnamon (optional) – or cardamon
1/2 teaspoon allspice (optional) – or coriander
1/4 teaspoon sea salt
Mix together to combine and then add:
1 cup brown rice flour
Stir in the flour and pour the batter into the prepared pan. Bake for 45 minutes, uncovered. While it bakes in a small bowl combine:
1/2 cup non-dairy milk
2 tablespoons avocado oil (omit if using coconut milk)
1 tablespoon date sugar (or coconut sugar)
1/4 teaspoon vanilla
dash of cinnamon (optional)
After 45 minutes, pour the above mixture over the pudding and continue to bake for another 35-45 minutes until the top is golden brown. Serve hot for a softer pudding or cool for about 15-20 minutes for a firmer texture. Serve with a non-dairy whipped topping if desired.