Mango Chicken Salad

Before I get to the recipe, I want to apologize to all my followers for the lack of posts the past several months. Mid-February was hectic with finishing packing up my apartment and then moving in with my son and his family. I finally unpacked the last of the boxes last week and feel at home once again. I’ve been collecting new recipes the past three months and will get them posted this coming week. But lets start with one of my favorite foods – chicken salad.

I eat a lot of chicken salads this time of year and I try to vary the flavors to make them more interesting. I alternate between vinaigrette and mayonnaise based salads. I’ve also changed them by doing a honey mustard vinaigrette, a creamy cole slaw dressing as well as an avocado one.

Several days ago while at my local market, I found some very ripe mangos and wondered how they might taste in my chicken salad. So I peeled and cut them up in my food processor, added the vinaigrette ingredients and tried mixing a small amount into a little chicken salad mix. Delicious!

If you haven’t tried mango, think of a peach on steroids. But be sure they are ripe or their sweetness doesn’t come through. Right now the yellow variety is in season so look for one that is completely yellow and getting soft to the touch. When ripe, the skin will pull right off once started with a knife.

Start either with the chicken or the mango dressing, either way works.

For the mango vinaigrette, in the bowl of a food processor or blender add:

2 peeled and sliced mango (not the seed of course)

1/4 cup olive or avocado oil

2 tablespoons mustard (whatever kind your family prefers)

2 tablespoons date syrup

1/4 cup rice vinegar (if using a different vinegar, probably use less since the rice is very mild)

1/2 teaspoon salt

1/4 teaspoon pepper

Blend until no lumps of mango remain. Makes about 1 1/2 cups of vinaigrette. That’s enough to make about five cups of chicken salad. I used a rotisserie chicken that was missing it’s wings and one thigh and leg.

About 4 cups chicken

3-4 stalks celery

1/2 cup pumpkin seeds (or another nut if you can have them)

1/2 cup shredded carrot

1/2 cup cooked peas

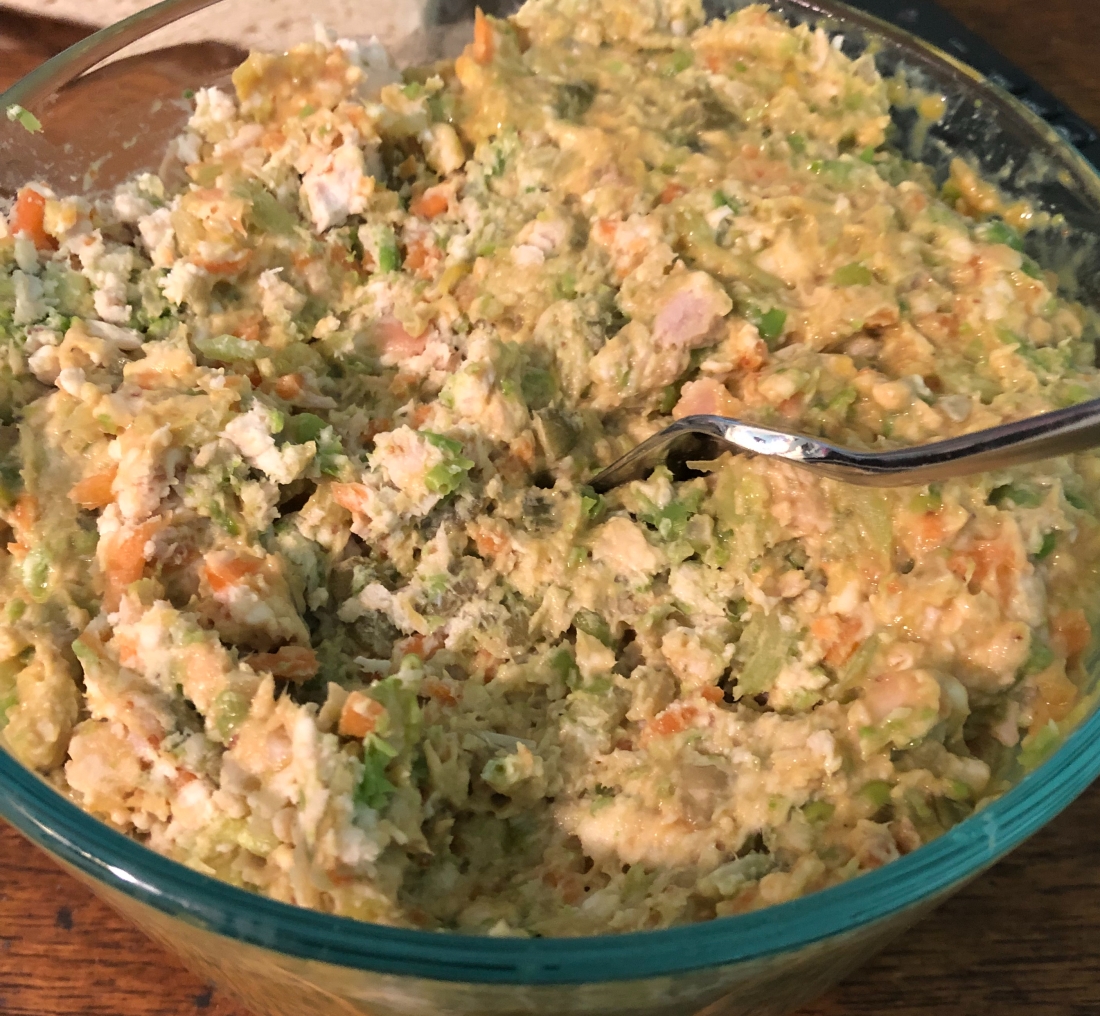
I like to grind the chicken, celery, pumpkin seeds and carrots in the food processor which makes a smoother salad. It’s a trick a friend who worked for a caterer taught me. Easy then to stuff it into a hollowed out tomato. It also makes a creamier sandwich.

Makes approximately 6 cups of salad.

Quick Pumpkin Bread

Quick breads are so easy to make and so delicious to eat. Flavorful with warm spices, they take minutes to mix together and, when gluten-free, can take almost an hour to bake. But definitely worth it. Here’s a pumpkin quick bread recipe that will delight your whole family. I used allspice and ground cloves but feel free to use cinnamon, nutmeg, and/or ginger (pumpkin pie spices) instead. Various flours can also be used including all-purpose (I use the 1 to 1) but whatever one you choose will work. For a lighter bread, eliminate the protein powder and use an additional half cup of one of the other flours.

First make some flax gel by combining in a small dish:

2 tablespoons ground flax meal

1/4 cup warm water

Whisk to combine and set aside to gel. Preheat oven to 350 degrees. Spray a bread pan (9×5″) with non-stick cooking spray and set aside. Into your mixer’s bowl or a medium bowl (if using a hand mixer), add:

1 cup pumpkin puree

1/3 cup maple syrup (date or agave syrup, honey)

1/4 cup avocado oil

1 tablespoon vanilla

1 tablespoon rice vinegar

Mix until combined before adding:

1 cup oat flour

1/2 cup millet flour

1/2 cup quinoa flour

1/2 cup pumpkin protein powder (or another 1/2 cup of any of the flours)

2 teaspoons allspice

1/2 teaspoon cloves

1/4 to 1/2 cup date sugar (depending on your taste)

the flax gel

1/2 cup dried cranberries (optional, you could use chocolate or carob chips instead)

1/4 cup pumpkin seeds (optional to sprinkle on top in the pan)

Mix until all ingredients are well combined. This is a thick dough. Spoon into the prepared bread pan and smooth the top. Sprinkle with the pumpkin seeds if desired. Bake for 50-60 minutes. When a toothpick inserted in the center comes out clean cook for another 5 minutes. Cool on a rack. Great warm or toasted the next day. Will keep for several days in an airtight container.

Asian Pear Coleslaw

I love coleslaw, probably even more than potato or pasta salad. It’s often my go to vegetable if I have everything on-hand. But when my stomach started have a bad reaction to leafy green vegetables, I found it more difficult. At the store the other day, they had some small red cabbages. Red ones I can eat so I bought one, about 3-4 inches in diameter, just enough for a couple of servings of coleslaw. It’s also Asian pear season so I’ve been buying them as well and wondering what to do with them since I always seem to buy more than I can eat just as fruit, especially since the ones I find at the market are extra-large in size. So, of course, this recipe seemed ideal. Feel free to use any cabbage you like be it green, Chinese or red or any combination thereof. I’m rather lazy when it comes to chopping these days with my two rotator cuff tears so I chopped everything in the food processor. Feel free to do the chopping whatever way you like.

In the bowl of a food processor, add:

1 small cabbage, cut into chunks after removing the tough core

4-5 trimmed scallions

1 small or 1/2 of 1 large Asian pear (or slice into thin slices for more crunch)

2 stalks celery, cut into chunks

Pulse until chopped to your liking. Remove the chopped vegetables to a medium bowl. Set aside. In a blender combine:

1/4 cup extra virgin olive oil

2-3 teaspoons roasted pumpkin seeds (or sunflower seeds)

Juice of 1 lemon (about 1/4 cup)

1 tablespoon mustard (whatever type your family likes)

1/4 teaspoon salt

1/8 teaspoon ground black pepper (a dash or pinch)

2 teaspoons maple or date syrup

Blend until most of the seeds are ground and the olive oil is emulsified, about 1 1/2 to 2 minutes depending on your blender. Pour dressing over the cabbage mixture and combine. Makes 4 servings. To serve garnish with:

1/4 – 1/3 cup roasted seeds

Non-dairy cheese (optional)

Pumpkin Pie Squares

Here’s another take on those Sweet Potato pie squares I blogged a couple years ago. This one is lower in sugar and is fat-free as well. But, just as tasty! Makes 9 servings and will keep in the frig for about 5 days (if it lasts that long!).

Preheat oven to 350 degrees. Spray a 9×9″ square baking dish with non-stick spray and set aside. In a small bowl combine:

2 tablespoons ground flaxseed

5 tablespoons warm water

Set aside for a few minutes to form a flax gel. In a food processor bowl, combine:

1 cup pumpkin seeds (or any seed your family likes, even walnuts or pecans if you can have them)

1 cup rolled oats

1/2 teaspoon salt

1 teaspoon cinnamon, allspice, nutmeg, cardamom, etc., whichever you prefer

1 teaspoon date sugar

Process until the mixture forms a fine crumb. Add the flax gel and blend until the mixture forms a dough, about 30 seconds. Pour into the prepared baking dish and using your fingers, a spatula, or the bottom of a measuring cup, press firmly into the pan and up the sides. Set aside.

In a medium bowl, whisk together:

4 cups pureed pumpkin (2 15-ounce cans of pumpkin puree)

1/3 cup date sugar (or maple syrup, honey or agave)

3 tablespoons arrowroot

1 tablespoon pumpkin pie spice

1 teaspoon vanilla extract

dash of salt

Whisk until combined. Pour into the prepared dish and bake for 35-40 minutes. Cool in pan for at least one hour before cutting. I like mine really cold so I cool on the counter for an hour and then in the refrigerator for several hours before I cut into squares. But as you see in the photo, I couldn’t wait that long this time and cut it before it was fully cooled. Once cooled it does stand up like it should! Can be topped with any non-dairy topping or frozen “nice” cream.

Easy No Bake Tiramisu Cookies

I remember as a child my mother would give us mocha in place of cocoa or coffee. Of course, back then, decaffeinated coffee didn’t exist and parents were told caffeine was bad for growing children. Thankfully, it didn’t occur to her that chocolate has as much caffeine as coffee! So she would put a little instant coffee into our cocoa. I must admit to this day, I much prefer mocha to plain cocoa. Now that chocolate is no longer on my menu, I’ve substituted carob in it’s place and I think it works just fine. These are more like a flat fudgy truffle than a cookie. Very quick and easy to make using a food processor. These are the perfect “cookies” to make during the summer when no one wants to turn on their oven.

In the bowl of a food processor, combine:

1 generous cup gluten-free rolled oats

1 tablespoon carob powder (of course you could also use cocoa powder)

1 tablespoon instant coffee or expresso

1/4 teaspoon sea salt

1/4 cup protein powder

2 tablespoons date sugar

1/4 cup pumpkin seeds*

1/4 cup seed or nut butter

1 teaspoon vanilla extract or vanilla powder

Blend until the mixture is slightly crumbly and most of the oats are ground along with the whole pumpkin seeds. Slowly pour in the non-dairy milk, about 1-2 tablespoons at a time, until the mixture forms a dough. It should be a little sticky but mostly dry. Scoop out about 1 to 2 tablespoons, depending on how large you’d like the “cookies”, roll into a ball and then flatten in your palm. Place on a sheet of waxed or parchment paper after coating each cookie with a mixture of:

1 tablespoon carob powder

1 tablespoon crushed instant coffee or expresso powder

1 tablespoon date sugar

I mixed the above in a small bowl and then coated each side with the carob mixture by putting the cookie flat into the bowl and then turning it over. The mixture stuck just fine without any pressure. Makes 10-12 depending on size. Remove to a large plate or small baking dish and refrigerate for about 15 minutes. Store in zip-lock bags in the refrigerator.

*I used pumpkin seeds and pumpkin seed butter but any type of seed or nut will work – sunflower seed butter and sunflower seeds would be just as good.

Cucumber Boats

It’s getting very hot here in Minnesota, will hit the mid-90s this coming week. I wanted an easy, lighter meal and had seen cucumber boats on-line stuffed with tuna salad. These work best with regular cucumbers but I generally buy either the English or the mini cukes so that’s what I used. If you also use the mini cucumbers, pulse the salad in the food processor for a few seconds to grind it up. It fits in the smaller boats much better that way. Any kind of salad will do – I made some curried chicken salad but tuna would also work.

First thing, prepare the salad:

1 rotisserie chicken, meat removed from the bones and pulsed in the food processor for a few seconds

4 stalks celery, chopped

1/4 to 1/2 cup pumpkin seeds (or walnuts if not allergic)

Mix the dressing in a separate bowl:

1 to 2 tablespoons green curry paste

1/2 teaspoon sea salt

1/4 teaspoon ground black pepper

1 cup vegan mayonnaise (if not allergic to eggs, feel free to use any mayonnaise)

2 teaspoons mustard

1 teaspoon to 1 tablespoon sriracha (optional)

1 tablespoon lemon juice

1/2 teaspoon garlic granules

1/4 cup dill pickle relish (optional)

Pour the dressing over the chicken mixture and stir to incorporate. Salad is ready. Next, peel and cut lengthwise:

12 mini cucumbers (probably 2 regular sized cucumbers)

Using a small spoon, remove the seeds to create the “boats”. Fill with the salad and serve. May be garnished with sliced scallions, chopped chives or chopped parsley.

Pumpkin Seed Butter

Lots of us are allergic to nuts so use butters made from seeds instead. I know sunflower butter is very popular along with tahini but I prefer pumpkin seed butter. I find, however, the cost to be almost prohibitive – over $20 for 8 ounces or less. Ridiculous price to pay. So I purchased two pounds of raw pepitas at the store, brought them home and roasted them (place on a large cookie sheet and stick in the oven, set it to 425 degrees and when it comes to temperature, turn off the oven and let the seeds sit in there for about 10 minutes) and then proceeded to make my own pumpkin seed butter which came out quite delicious and creamy, with a little bit of crunch. It’s very simple but it does take awhile because the food processor gets too hot so one has to wait about 10 minutes for it to cool down between each 3-5 minute of processing.

Place in a food processor bowl:

3 cups roasted (or raw if you prefer) pumpkin seeds (pepitas)

Feel free to add a little sea salt if preferred. Process seeds for about 3-5 minutes or until food processor gets hot. Stop and repeat until nuts are creamy, about 6-7 times, scrapping down the sides of the food processor during every rest period. Place in sealed jars and store in the refrigerator for up to 2 weeks or in the freezer for up to 3 months. Makes about 2 1/2 cups.

FYI, the seeds will start off quite grainy, then become crumbly and clump up in one spot before they get creamy. The longer they’re processed, the creamer and smoother the butter becomes.

Sweet Potato Pie Squares

I ate only one little slice of pumpkin pie on Thanksgiving and its one of my favorites so I thought about the pie squares that were so popular in the 70s and 80s, especially those lemon and pumpkin ones and decided to see if I could make an allergy free alternative. Low and behold, no pumpkin in the cupboard but sweet potato puree in excess. And they turned out sooooooo good! Creamy and delicious. I topped the pan with roasted pumpkin seeds which added a nice contrast of textures to the dessert. If desired, of course, pumpkin could be substituted but probably you’d want to add more sweetener and I’d recommend using coconut or date sugar rather than additional liquid.

Preheat oven to 400 degrees. In the bowl of a food processor, pulse until combined into a crumbly texture:

1 cup gluten-free all purpose flour

1/2 cup old fashioned oats

1/2 cup date sugar

1/2 cup vegan margarine or cold olive or avocado oil (it will get thick and turn white when frozen or chilled for a day or two)

When crumbly, press into the bottom of a 9×13″ baking pan. Mix in a medium bowl:

1 can sweet potato puree or 2 cups of mashed sweet potatoes

1/4 cup maple syrup

3/4 cup non-dairy milk (any except soy)

1 tablespoon avocado oil

2 tablespoons corn starch or arrowroot

1 teaspoon vanilla

2 teaspoons pumpkin pie spice

1/3 cup pumpkin seed protein or any protein powder you have on hand

1/4 to 1/3 cup roasted pumpkin seeds (optional)

Whisk together until combined and smooth. Pour into the prepared pan, sprinkle with the seeds if desired, and bake for 25-30 minutes until set. Chill thoroughly before cutting. Top with a non-dairy whip if desired.

Baked Oats and Pumpkin Puddings

I’ve been looking at all kinds of recipes for baked “oats”. But none of them have actual oatmeal in them, they all use oat flour. So here’s my alternative. I’ve added some quinoa flour and oat protein powder to the mix to increase the protein content of the pudding as well as increasing the sweetener a little because the flour, at least in my opinion, overrides the taste of the pumpkin and spices. I didn’t think of it until after they were in the oven but adding some roasted pepitas would some crunch.

As a reminder for those of you new to my blog, there are a number of allergen-free recipes here to make your Thanksgiving dinner allergen free such as gluten-free gravy (and fat free), string-bean casserole, vegan pumpkin pie, and a delicious mushroom and Italian sausage stuffing (which I made this year with a loaf of that quick and easy oat bread on the blog).

Lightly grease 6, 6-ounce ramekins and pre-heat oven to 350 degrees. In a medium bowl whisk together:

1 can pumpkin puree

1 cup quinoa flour

3/4 cup oat flour

1/4 cup pumpkin protein powder (or any protein powder you use, vanilla or even chocolate would work)

1/3 to 1/2 cup maple syrup (or honey, coconut nectar, date syrup, etc.)

2 teaspoons pumpkin pie spice

2 teaspoons baking powder

1 cup dairy-free milk (any will do but I would advise against using soy)

1/4 cup roasted pepita seeds

1/4 teaspoon of salt

Whisk until smooth then scoop into the ramekins to about 1/2″ from the top. Dust top with more pumpkin pie spice. Place on a baking sheet and bake for 15-17 minutes or until set.

Thai “Peanut” Sauce with Spaghetti Squash

My obsession with eggplant has been demolished and replaced with spaghetti squash. Such a versatile vegetable, low in carbs, and good either as a “spaghetti” type vegetable or as a mashed squash. In this instance, it’s used as a spaghetti. And of course, I’ve left out the peanuts and substituted tahini but really any seed or nut butter will work in this recipe. And feel free to adjust the last four ingredients in the sauce to meet your family’s tastes. I used a lot more of the red curry paste because I just didn’t taste it at the prescribed amount.

First, preheat oven to 375 degrees. Cut in half:

1 small to medium spaghetti squash (size depending on how many you want to feed)

Sprinkle with about 1 tablespoon of olive oil, salt and pepper and place face down on a baking tray. Bake in preheated oven for approximately 30 minutes or until a knife can be easily inserted into the skin side of the squash. Baking time will depend on the size of the squash. When tender, set aside to cool while you make the sauce.

In a medium size saucepan, combine:

1 1/2 cups non-dairy milk (if you can have coconut milk, it would work well here)

2/3 cup tahini, sunflower, pepita, or other seed or nut butter

1/4 cup date sugar

1/4 cup water

2 tablespoons fish sauce (or soy substitute for vegans)

2 tablespoons rice vinegar

2 teaspoons sesame oil

2 teaspoons red curry paste (I used about 2 tablespoons)

Whisk to combine thoroughly although some heat may be needed to break down the seed or nut butter. Cook over medium high heat until it reaches a boil and then reduce heat to medium low and cook, stirring frequently, until thickened, about 5 minutes. Remove from heat.

In a 12″ skillet, heat over medium heat:

1 tablespoon olive oil

Add:

1/2 cup peas

1/2 cup shredded carrots

1 teaspoon minced garlic

Cover and cook until the carrots and peas are tender, about 5 minutes. Reduce heat to low. Using a fork, scrap the flesh from the inside of the spaghetti squash from end to end. Add to the skillet with the other vegetables along with 1/2 to 1 cup of the sauce. At this point, add:

1/4 cup chopped parsley (OPTIONAL)

Toss and cook for 2-3 minutes until squash is heated through. Serve with chopped nuts or seeds (I used roasted pumpkin seeds, delicious!). With a small squash as a side dish, serves 4.

This recipe makes about 3 times as much sauce as is needed for the dish. I spooned the remainder into 1 cup canning jars and put them in the freezer.