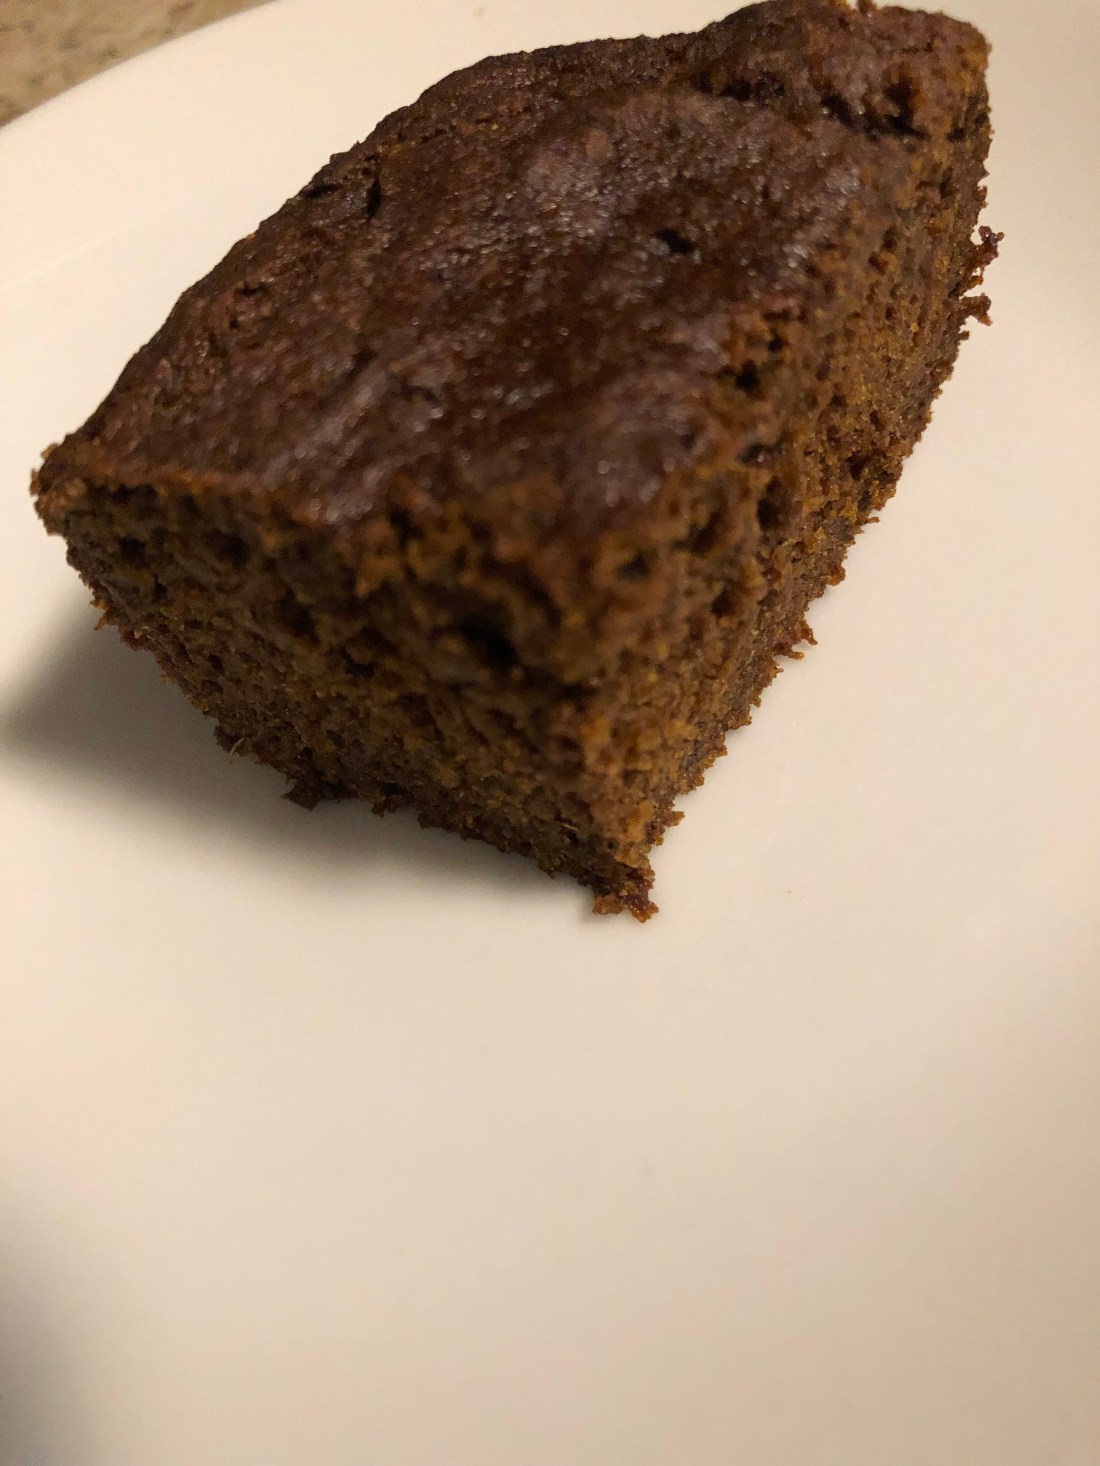
I do love gingerbread but I also love pumpkin. This cake doesn’t have a pronounced pumpkin taste – the ginger overwhelms it so if you want more pumpkin taste, reduce the amount of ginger you add. It’s wonderfully moist and delicious served with a vanilla frozen dessert or a non-dairy whipped cream.
Preheat oven to 350 degrees and grease an 8×8 square or round pan (to take the entire cake out of the pan to serve, cover the baking pan with parchment paper and then grease). In a small bowl combine:
1 tablespoon ground flax
3 tablespoons aquafaba*
*Add 1 teaspoon aquafaba powder to 3 tablespoons hot water. Don’t have aquafaba powder or a can of chickpeas handy? Substitute 1 tablespoon vinegar and 2 tablespoons hot water. Let the mixture sit for 5 minutes or until a flax gel forms. In a medium sized bowl (at least 3 cups) combine:
1/3 cup honey
1/3 cup unsulfured molasses
3/4 cup pumpkin puree
1/2 cup hot (the hotter the better) water
Mix until the molasses and honey are fairly thin. In another medium size bowl (at least 6 cups) sift together:
1 cup sorghum flour
3/4 cup tapioca flour or arrowroot
1 teaspoon xanthan gum
2 teaspoons ginger
1 teaspoon cinnamon
1 teaspoon allspice (or nutmeg)
1 1/2 teaspoons baking soda
Pour the wet ingredients into the dry and mix thoroughly. Pour into the prepared pan and bake for 30-35 minutes or until a toothpick inserted in the center comes out clean. Cool slightly before cutting.
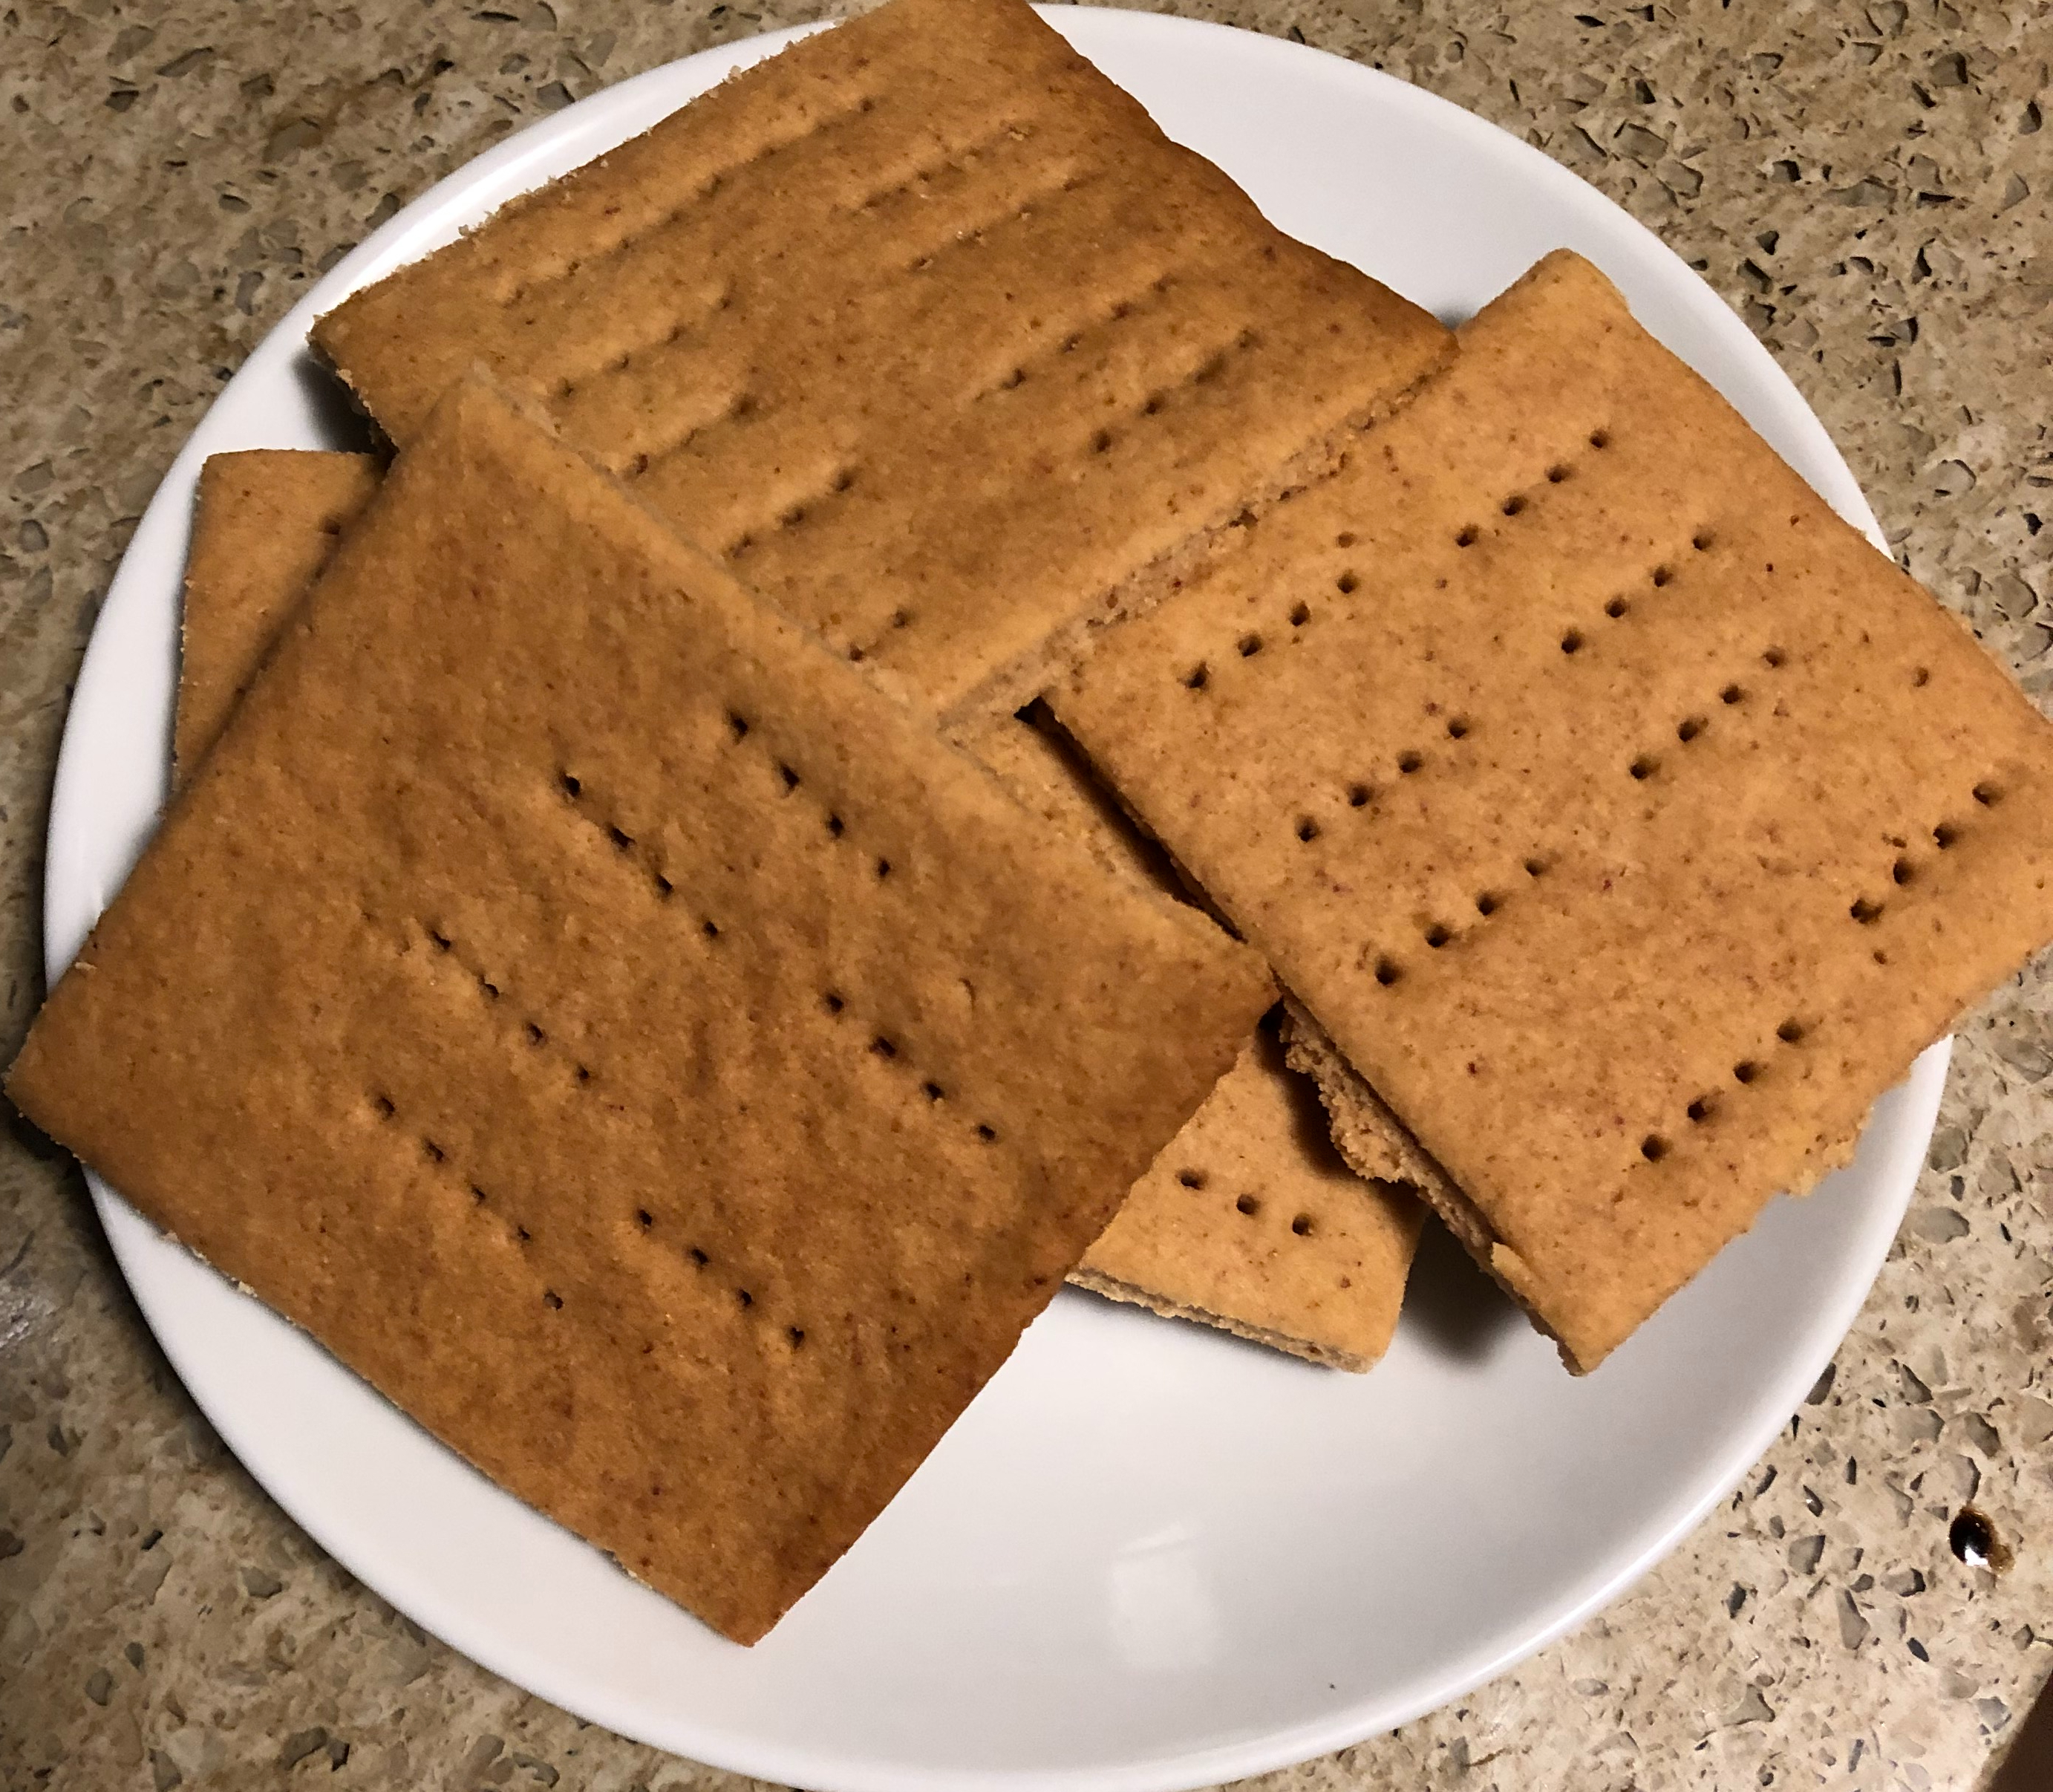
Never one of my favorite foods, graham crackers are generally made with lots of brown sugar, whole wheat flour, and an egg or two. Here’s a recipe for graham crackers that I actually really like. In fact, I made them this afternoon for a recipe I’m going to make tomorrow which calls for graham crackers (Pumpkin Cheesecake Bites). That is, I’ll make it tomorrow if there are any left! These are so tasty, you might want to make a double batch if you need some for another recipe like I do. Maybe I’ll also make some marshmallow and post up a recipe for smores, that is if there are any leftovers.
Preheat over to 350 degrees.
In a food processor, combine:
1 1/4 cup brown rice flour
2 tablespoons corn starch (or tapioca or potato starch, or arrowroot)
1/3 cup date sugar
1 teaspoon baking powder
1/2 teaspoon salt
Pulse to combine and break up any clumps in the date sugar. Add:
Pulse to combine until the dough resembles little peas. Add:
1/3 cup non-dairy milk (I used oat but any will work)
3 tablespoons honey (put a little oil on the measure so the honey will slide right out)*
Again pulse until the dough comes away from the sides of the processor bowl. If the dough is too thin, add more flour(I used about 1/4 cup more brown rice flour) until the dough is no longer sticky and comes away from the bowl. Place a 14×16″ piece of parchment (more or less) on the counter and dump the dough onto the parchment. Form into a rectangle as much as possible. Top with a second piece of 14×16″ parchment and using a rolling pin, roll out the dough until it’s almost the size of the parchment and about 1/8″ thick. Slide the parchment onto a baking sheet (an extra large cookie sheet without sides works best) and refrigerate the dough for up to a half hour. Remove from refrigerator and remove the top piece of parchment. Using a knife, pizza cutter, or pastry wheel, cut the dough into pieces either rectangular or square (mine were about 3×3″). Pierce each piece with a fork like you would a pie crust. Bake for 9-11 minutes and then turn the pan and bake for an additional 9-11 minutes or until the edges of the crackers are brown and the center is a golden brown. Cool completely before eating. The crackers should separate easily (mine actually mostly separated during baking). Delicious! Store in an airtight container (if there are any left to store) or in the freezer for long-term storage (haha, not in this household!). Makes approximately 16 crackers depending on size cut.
*By a little, I mean put a drop on your finger and rub it in the measuring spoon. It doesn’t take much.
HINTS: 1 teaspoon of cinnamon or allspice could be added
1/4 cup carob or cocoa could be substituted for some of the flour
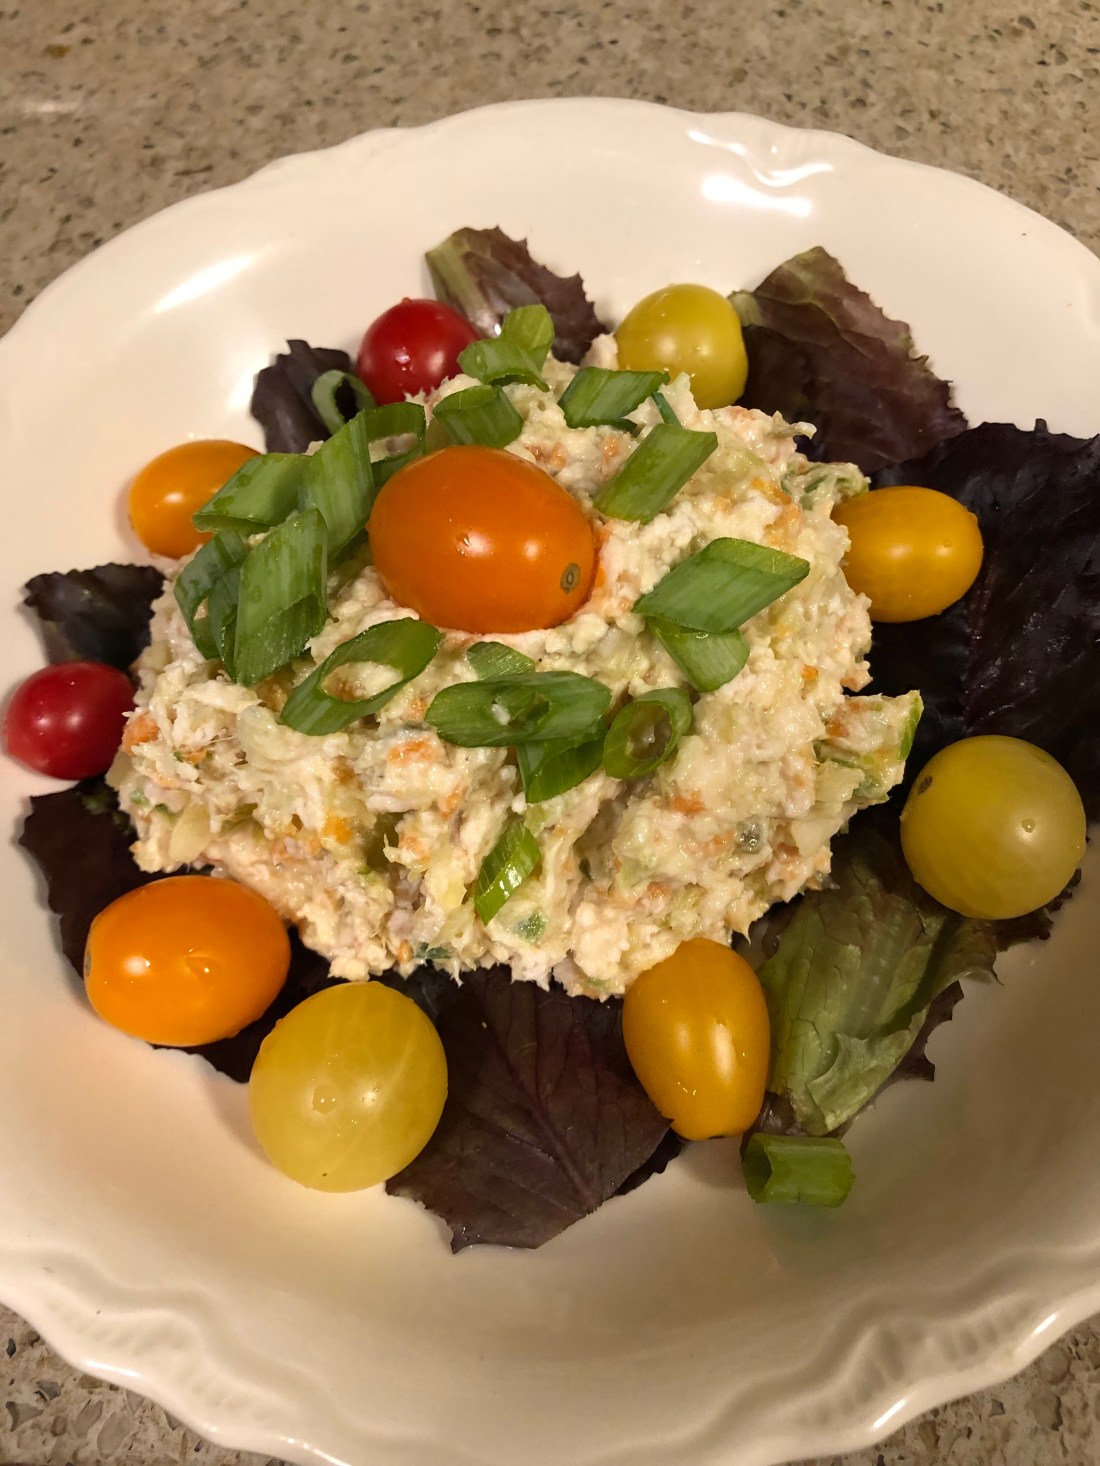
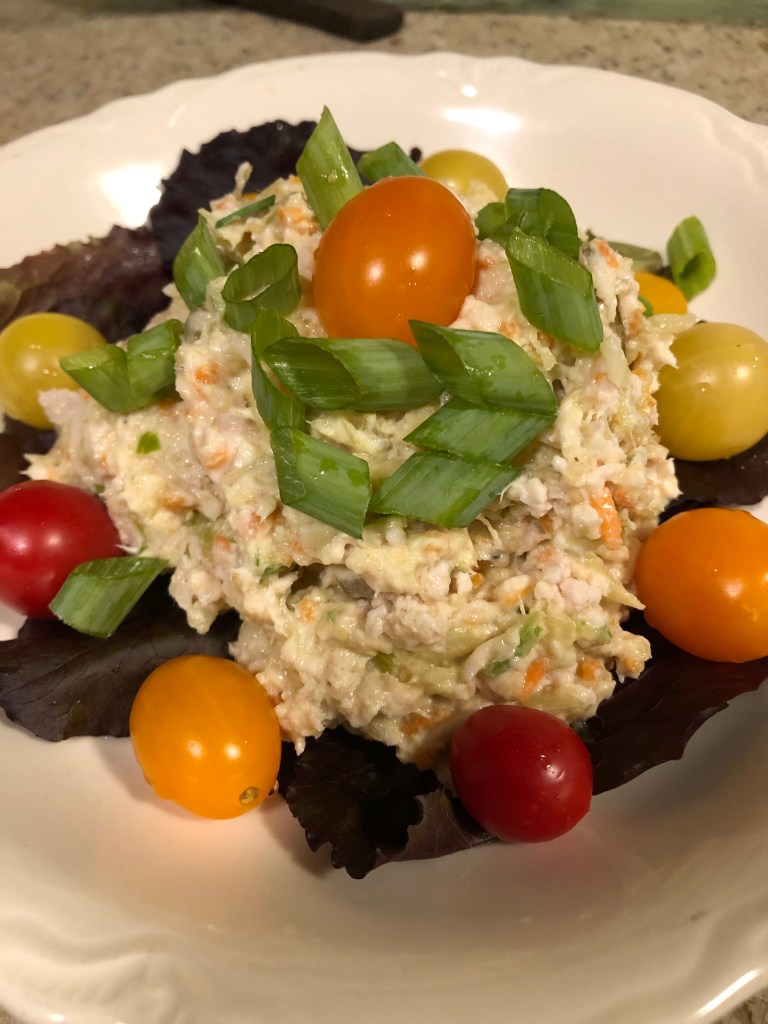
I often buy a rotisserie chicken, it’s a quick and easy meal. I’m careful of course, all rotisserie chickens are not equal. I read the ingredients until I found one that had no soy, canola, or corn oil. But since I live alone, this chicken always has lots of meat left over. I do so love chicken salad but even that can get boring when always made the same. I’ve added curry powder and made curried chicken salad which is delicious but I recently tried using a sweet and sour dressing, much like one used for coleslaw. Delicious, very easy and tasty at the end of summer when we’re getting tired of the same old salads.
I like to pulse my cooked chicken in my food processor to produce a slightly chunky chicken. Don’t take it to the extent of puree, just a fairly rough chop, almost like cooked ground chicken meat. For 4 servings, dice or pulse:
2 cooked chicken breasts, of medium size
Remove from food processor or cutting board into a bowl. Dice or pulse:
4-5 stalks celery, cleaned and quartered
4-5 scallions, cleaned and quartered
1/2 cup shredded carrots (or diced carrots)
Add to the chicken meat. I also add:
1/2 cup cooked baby peas
Mix these ingredients together. In a separate smaller bowl make the dressing using:
Whisk the dressing to combine and then add to the meat mixture. Mix well, chill and serve over a bed of mixed greens. Tomatoes and avocado on the side are a nice addition to this meal. I’ll often also garnish my chicken salad with pumpkin seeds or mix into the salad sesame or poppy seeds.
I’m reposting this recipe that I original developed in 2020 because I have some additional tips for you about it that I thought made it so much more scrumptious. Many of us can’t (and shouldn’t) eat corn. I know because I’m one. But I grew up eating corn and I do so love it. Especially when it’s corn season, like it is right now. I happened to get to the market this morning right after they’d put out a fresh batch of local corn.
If you don’t know when corn is fresh, here’s what to look for: check that the tassels are still moist or at least still have some green to them and are not turned completely brown and that the stem end is still green. If the stem end is brown, the corn is old and will have lost much of it’s flavor. Also don’t husk the corn until you’re ready to put it in the pot! A definite no no. And always steam corn, it should never be boiled.
My mother was a great admirer of Craig Claiborne, the food critic for the New York Times in the 1970s. When he published a cookbook, she had to have it. About a week later, she found a recipe in it for corn in which he said corn should be boiled. She slammed the book shut, said the man was an idiot and never read anything else he ever wrote.
Having grown up on a farm where my father wouldn’t eat corn unless he went out and picked it, husked it and brought it to my mother who had the steamer all set to cook it. And the bushels of corn that we’d blanch and cut off the cobs in September to freeze for the winter. My, it was a two-day affair.
So please, another tip, never reheat or cook corn in water. If you have frozen corn off the cob, it should be simmered in milk (such as oat milk) and some fat (of course my mother always used butter!). Corn has a milky base, not a watery one so cooking it in milk enhances the flavor.
So, today, even though I knew better, I added corn to this recipe. And of my goodness, it was so delicious and I suffered so desperately all afternoon after I ate it but the enjoyment and flavor was worth the few bad hours afterwards. Here’s the amended recipe, feel free to omit the corn if you can’t eat it.
You’ll need:
4 chicken thighs (I tried using a breast and it was tough)
1 cup salsa – use whatever salsa your family prefers, mild, medium, hot or spicy, doesn’t matter
Approximately 3/4 cup of freshly cooked corn cut from the cob (I used only 1 ear)
1 teaspoon honey
1 teaspoon garam masala or coriander
1/2 teaspoon hot sauce [optional]
1/2 teaspoon salt or herbamare
Spray a 9×9″ pan with cooking spray. Mix the salsa, honey and spices together (I use a small whisk) and put a thin layer on the bottom of the pan. Arrange the thighs on top and then spread the remaining salsa mix on each thigh. Bake at 350 degrees for approximately 30-45 minutes depending on the thickness of the chicken thighs.
It’s that easy! You can serve it with brown rice to sop up all the wonderful flavors of the salsa.
PS: I gave the rest of the corn to my grandson so I wouldn’t be tempted to eat it myself!
There are about as many recipes on the internet for watermelon gazpacho as there are for regular tomato based gazpacho. Naturally sweet from the watermelon, my recipe is very simple and easy to make with just a few ingredients. Again, the most difficult part is peeling the tomatoes so get the ripest ones you can find.
First, just as with tomato gazpacho, put a pot of water on to boil. When it’s boiling drop in:
4 small Roma (or plum) tomatoes with + cut in the blossom end (as opposed to the stem end)
Turn off the heat and let them sit for just a minute or so before dousing them in an ice bath. Peel and cut out the stem end (about 1/4 inch into the tomato). Set aside.
Cut into pieces:
1 mini personal watermelon (about 8″ diameter or a little smaller)
Cut the meat off the peel and place in a blender or food processor. Process until smooth. Add the tomatoes and blend until smooth. Add:
1 small English cucumber, peeled and cut into 3-4″ pieces
Add to the mixture and blend until smooth. At this point, there are options:
1/2 small jar of mild (or hot if heat is desired) chili peppers
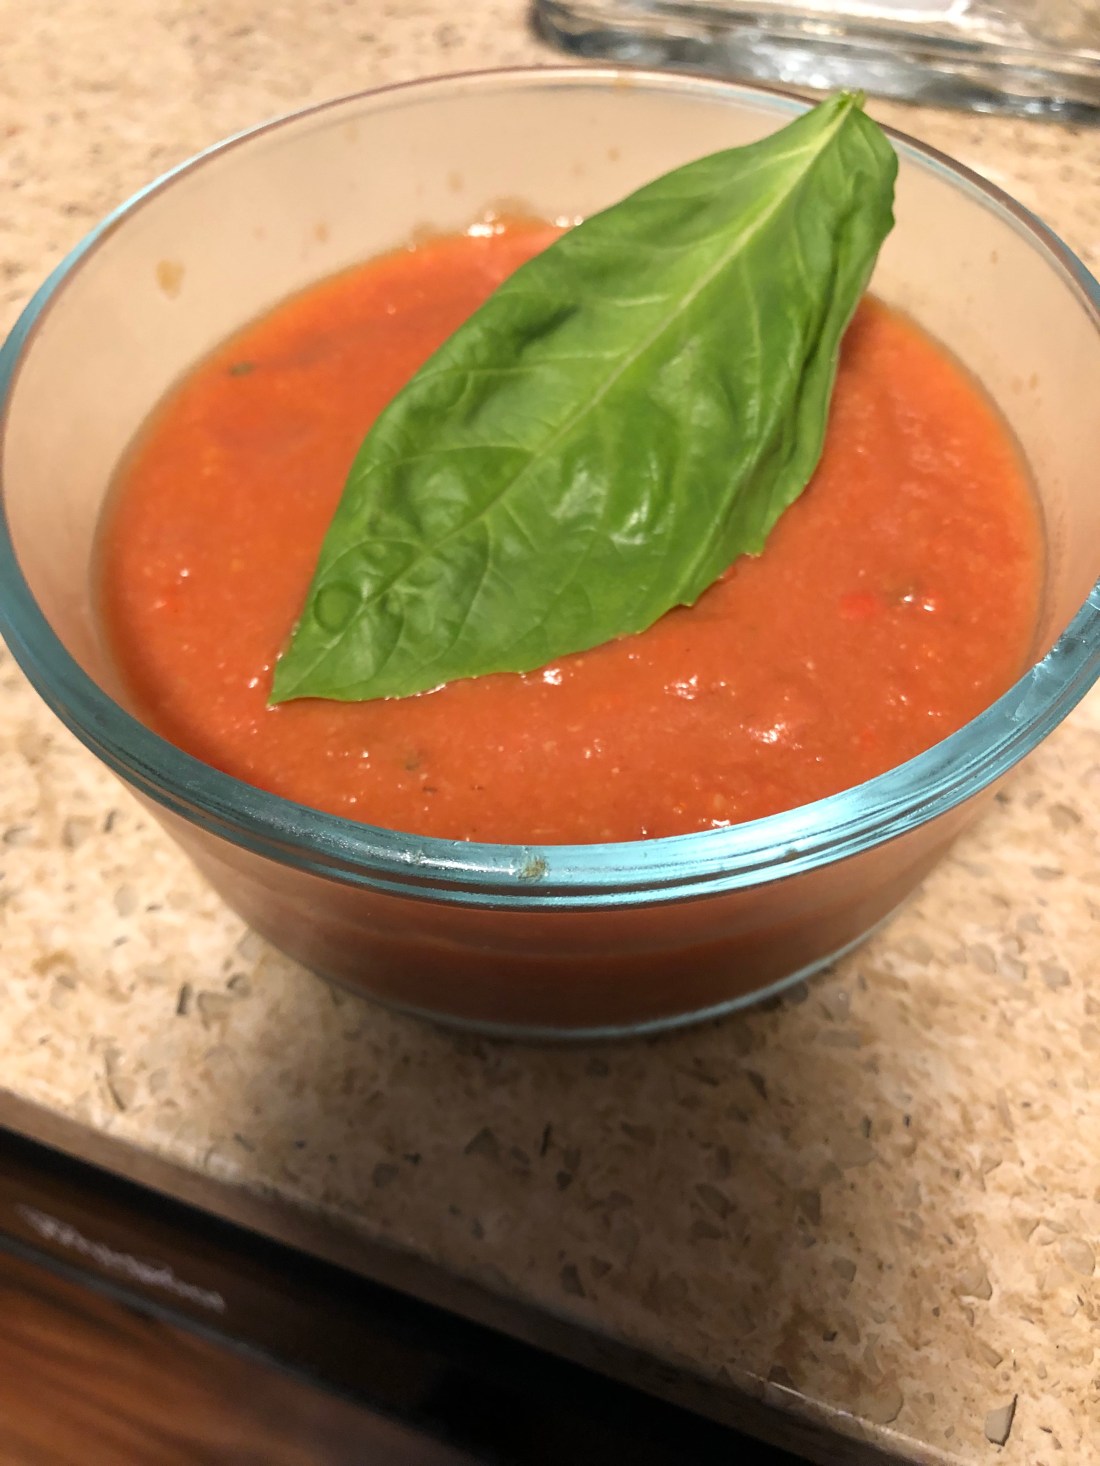
This is the time of year for one of the best things to eat on the planet, fresh picked tomatoes! But for anyone who grows them, it soon becomes an overabundance and the issue becomes, “okay, what am I going to do with all these tomatoes?”. For many, this abundance becomes canned (or frozen) pasta sauce, tomato juice, or we even start picking them green and making fried green tomatoes (see recipe under side dishes). Here’s another tasty way to use up some of these extra tomatoes and, with the temperatures around here in the high 80s and low 90s right now, it’s also a very refreshing meal. And it will use up some of those extra cucumbers from the garden as well!
First, put on a good size pot of water to boil. Wash and cut slits (+) across the bottom (the one opposite the stem end) of:
8 medium to large plum tomatoes (use plum or Roma tomatoes because they aren’t as seedy or juicy as other tomatoes)*
While the water comes to a boil, prepare an ice bath in a large pot or bowl by filling the container about half full of cold water and then adding a tray of ice cubes. When the water boils, add the tomatoes, turn off the stove, and let the tomatoes sit for 1-2 minutes in the hot water. Remove with a slotted spoon and put into the ice bath. Let sit for a minute before peeling them. The riper the tomatoes, the less time they need in the hot water and the easier they are to peel. Peel them and cut out the stem end along with the tough part that extends into the tomato for about a quarter inch. Place them into a food processor or blender after peeling.
Pulse until coarsely chopped (or blend). I like my gazpacho fairly smooth so I used my Vitamix and made it fairly smooth. Put into a large bowl (at least 5 quarts). Pulse in a food processor or blender:
3-4 roasted red peppers (fresh can be used by I prefer the flavor of roasted peppers)
2-3 small red onions, peeled and quartered
1 large English cucumber (peeled if not organic otherwise just cut into chunks before pulsing)**
When chopped finely, add to the tomato mixture and stir to blend. Add:
1/4 cup extra virgin olive oil
1/4 cup rice vinegar
1 tablespoon garlic powder (if you like the taste of fresh garlic, pulse 6-8 garlic cloves along with the vegetables)
1/4 cup chopped fresh basil (reserve 2 teaspoons for garnish)
Chill thoroughly before serving. WARNING: This makes 16 cups of gazpacho so unless you’re hosting a large dinner party (or want to freeze some), this recipe can be cut in half. Garnish with extra chopped basil, diced cucumber and tomatoes. You can also garnish it with a spoonful of Greek yogurt or sour cream as well as croutons.
*Regular cucumbers can be used instead, just be sure to seed them before pulsing.
Delicious side dishes that the entire family will enjoy are hard to come by, especially if one believes the television commercials! Here’s one that takes a little time but is worth the effort. And it’s quite easy to adjust to a particular taste – the dill can be replaced by one of a dozen herbs or spices. Potatoes are the type of food that can be enjoyed with a multitude of preparations. I made the mushroom stuffing several days in advance, prepared the mashed potatoes for the cakes a day ahead so it cooled overnight (no one wants to try to form hot potatoes into disks!), and then assembled them on the third day. They take very little time to assemble and fry so plan accordingly. About 15 minutes before my protein was ready, I started and had them fried and salted just as the ribs were coming out of the oven.
First prepare the mushrooms. In a 12″ skillet heat over medium high:
1 tablespoon olive oil
then add:
1 small onion minced (the food processor does this very quickly and easily)
8 ounces chopped mushrooms (again, a mince is best although not required)
1 teaspoon minced garlic
When the mushrooms and onion are soft and slightly browned, about 5-7 minutes, remove from heat and add:
1 large stem dill, chopped (fronds only)
Salt and pepper to taste
Pinch of red pepper flakes (or a dash of hot sauce) [Optional]
Set aside to cool. Peel and dice:
2-2 1/2 pounds russet potatoes
Cover with cold water and boil until soft. Depending on the size of the dice, this could take 10-30 minutes. Once cooked, drain the water and mash the potatoes, being sure to remove all lumps. DO NOT ADD ANY LIQUID TO THE MASH POTATOES.
In a large soup dish or pie plate (or paper plate), mix together the dredge:
1/4 cup all purpose gluten free flour
1 tablespoon tapioca flour
Salt and pepper to taste (about 1/8-1/4 teaspoon)
1/4 teaspoon garlic powder
1/4 teaspoon paprika
To assemble the potato cakes, in the palm of a hand, scoop:
1/4-1/2 cup mashed potatoes (depending on the size cake desired)
Flatten until about 1/4″ thick and then make an indenture in the middle. Add about:
1-2 tablespoons mushroom mixture
Cover with about 2 tablespoons-1/4 cup scoop of mashed potatoes, spread to cover the stuffing and then lightly seal the edges of the disk to form a cake. Roll in the dredge mixture and set aside. The mixture should make 6-8 medium sized cakes.
Heat in a large skillet over medium high heat:
1/2 cup olive and avocado oil (the avocado oil has a much higher smoke point than the olive so a combination works best)
When shimmering hot, add the cakes to the oil and lower heat to medium. Fry on each side until well browned, about 3-5 minutes per side. Remove to a paper towel and salt to taste. After a minute remove from the paper towel so that the cakes don’t get soggy. Serve immediately. Garnish with chopped dill or scallions.
TIP: When I next make these, hopefully when my grandson comes to visit, I’ll add some crispy bacon bits to the mushroom mixture!
TIP 2: I think I’ll also try this recipe with sweet potatoes but it will need different handling since they are quite moister than russet potatoes. Flour will need to be added to the sweet potatoes before shaping. I’ll give it a try and let you know how it works out.
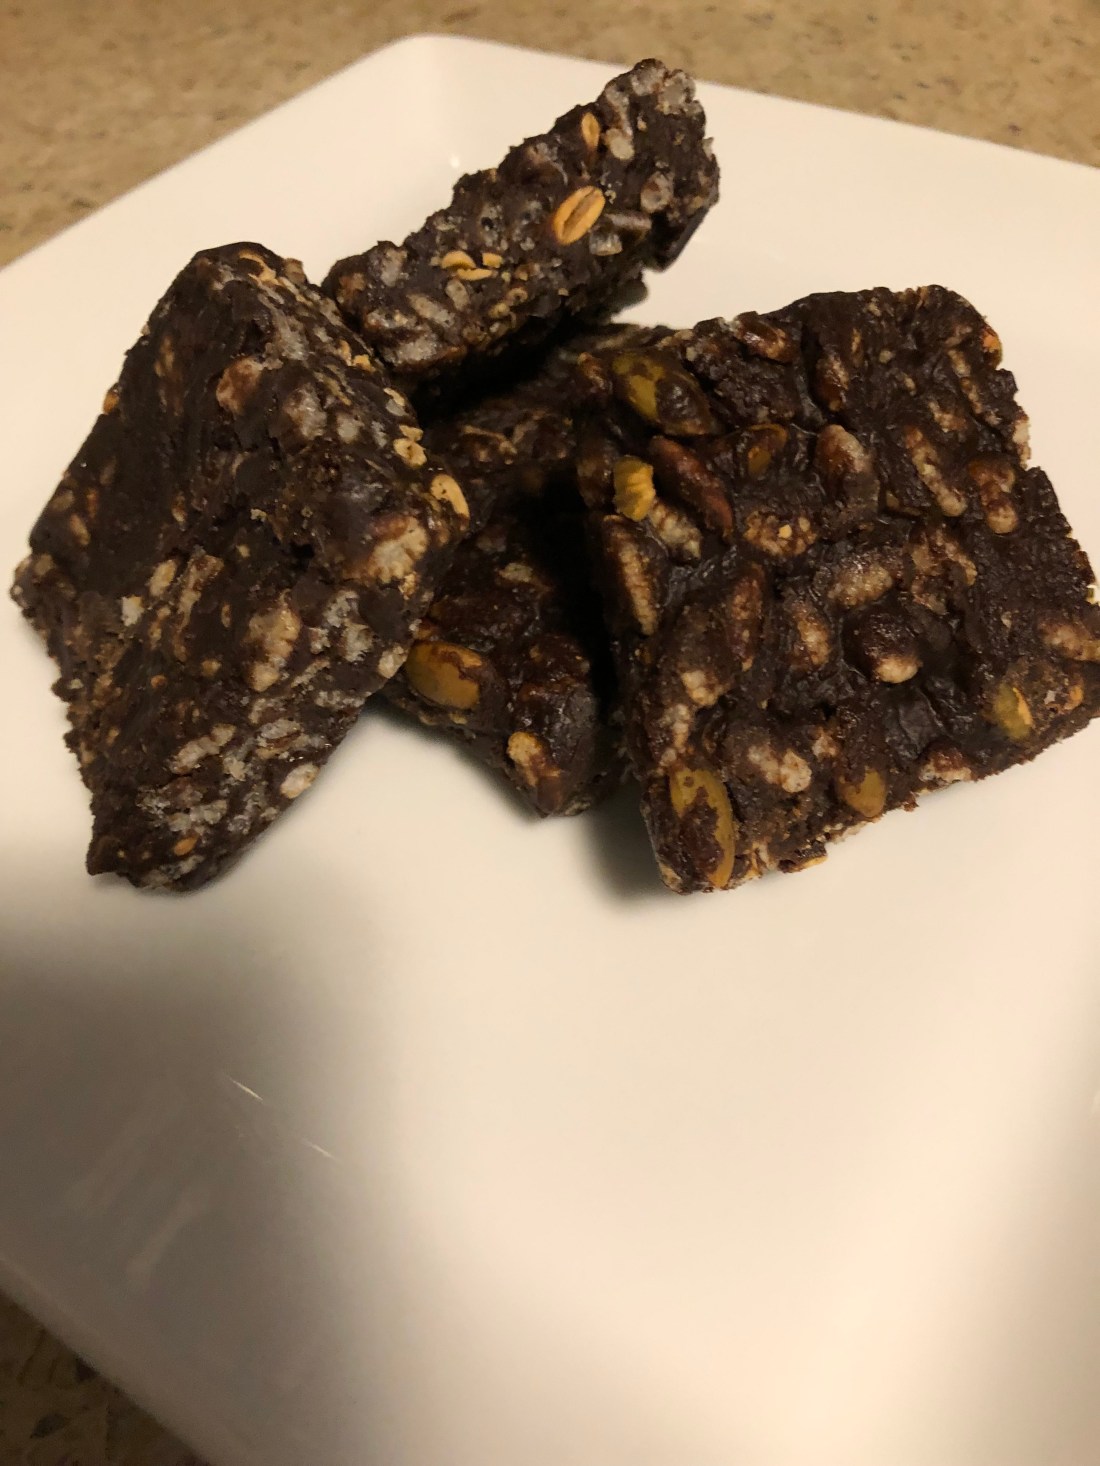
This is a rice bar that is carob rather than marshmallow based so it’s much simpler to make. Quick and easy it makes a tasty treat. I cut them, put several into a baggie and put them in the freezer so I can take one out when I really need something sweet.
Prepare an 8×8 or 9×9 baking dish by lining it with parchment paper. Into a medium size bowl place:
1/3 cup avocado oil
2/3 cup tahini (thicker rather than thinner tahini) or pumpkin butter (or any seed or nut butter you like)
1/4 cup agave or coconut nectar, date or maple syrup
1 teaspoon vanilla extract (or 1/4 teaspoon mint extract if a minty flavor is desired)
Whisk together until smooth. Add:
1/2 cup carob powder (or cocoa if you can have it)
1/4 cup pumpkin seeds (or any other seed or nut chopped that your family enjoys)
1 1/4 cup puffed rice cereal (or any puffed cereal your family likes)*
Stir to combine. (*More or less cereal may be needed depending on the consistency of the butter added.) Spread in the prepared dish and put in the freezer for 1 hour or until it is solid when you lift the parchment paper out of the dish. Slice and enjoy!
Any white fish will work with this recipe – cod, flounder, sole, swordfish or even sea bass (my very favorite fish!). The most difficult part of the whole recipe is roasting the garlic and that’s really very easy in the oven. If you’re not familiar with the process, here are the instructions:
Heat oven to 400 degrees. Peel most of the paper off the outside of the head of garlic being careful to leave the head intact. If a faster process is desired, the cloves can be separated and baked individually, it takes about half the baking time of doing a whole head. With kitchen scissors, trim about 1/4 inch off the top of the head, or each individual clove. Drizzle with 1 or 2 teaspoons olive oil per head. Wrap in parchment paper and bake for about 30-40 minutes depending on the size of the heads (or 15-20 if doing individual cloves). Cool then press the bottom of each clove to squeeze out the garlic. Stores in the refrigerator for 2 weeks or in the freezer for 3 months. Be sure to open windows or turn on the stove vent because the kitchen, and whole house if you have a small house, will be filled with the aroma of roasted garlic.
For each pound of fish, preheat oven to 350 degrees, prepare a baking dish large enough to accommodate the fish without crowding. Spray with non-stick cooking spray or coat with olive oil. Dry the fish with paper towels, salt and pepper to taste and arrange in the dish. Bake, depending on thickness, 15-35 minutes, until fish is flaky but still moist. Fish turns quite white in color when it’s cooked.
Want to make it vegan? Use firm tofu in place of the fish but fry it in a skillet instead of baking.
Make the lemon garlic sauce. In a small bowl, mix together:
Set aside and prepare the bok choy. In a large 12″ skillet, heat over medium:
1 teaspoon olive oil, then add:
1 small onion diced
6-8 baby bok choy, cleaned and cut in half or quarters
1 teaspoon minced garlic (or some of the roasted garlic)
Cook, stirring for the first few minutes, then reduce heat to medium low and cook 5-7 minutes until the onion and bok choy are softened.
Place the sautéed bok choy in the bottom of a serving dish, add a serving of the fish. Spoon about 2 teaspoons of sauce over each fish, garnish with scallions, chives or dill (chopped). Serves 4.
*Don’t have any vegan mayonnaise? See my recipe under sauces for egg-free mayonnaise.
Ever look for something, not much, you just need a little something to lift you up in the middle or towards the end of your day? These will work – full of energy (and carbs), these bites will get you going and the whole grain oats and flax will sustain your energy for awhile. Easy to make, variable by your taste, and chock full of flavor, can’t beat the combination!
1 cup whole grain gluten-free oats (organic if possible)
1/2 cup ground flax
1 tablespoon instant coffee granules*
1/4 cup dried berries (small pieces work best but not powder)
1/4 cup carob chips (or chocolate if you can have them)
Mix to combine evenly. In a small bowl stir together:
1/2 cup tahini (slightly thick better than runny)**
1/4 cup honey, agave or coconut nectar, or maple syrup depending on taste
1 teaspoon vanilla
Pour the wet ingredients into the large bowl with the oat mixture and stir with a large fork to combine. Mixture will be slightly sticky but shouldn’t be too sticky. It should easily stick together when pressed into your hand. With DRY hands, form into roughly 1″ balls. I found I had to rinse off my hands every 2-3 balls to keep the mixture from sticking to me instead of itself! Should make 20-24 balls. Store in airtight container.
*I used 2 tablespoons of instant coffee granules and after eating several of these bites, I’ve decided it was a little too much coffee – they taste a little bitter to me so depending on your love for coffee, add 1 or 2 tablespoons.
**I used tahini because of my nut allergy but feel free to use any seed or nut butter you like. But if you use a really thick butter, add a little water or liquid sweetener to it to thin it slightly. If your tahini is too thin, add a little more of the dry ingredients.