Gluten-free Waffles (dairy-free, gluten-free, egg-free, sugar-free)

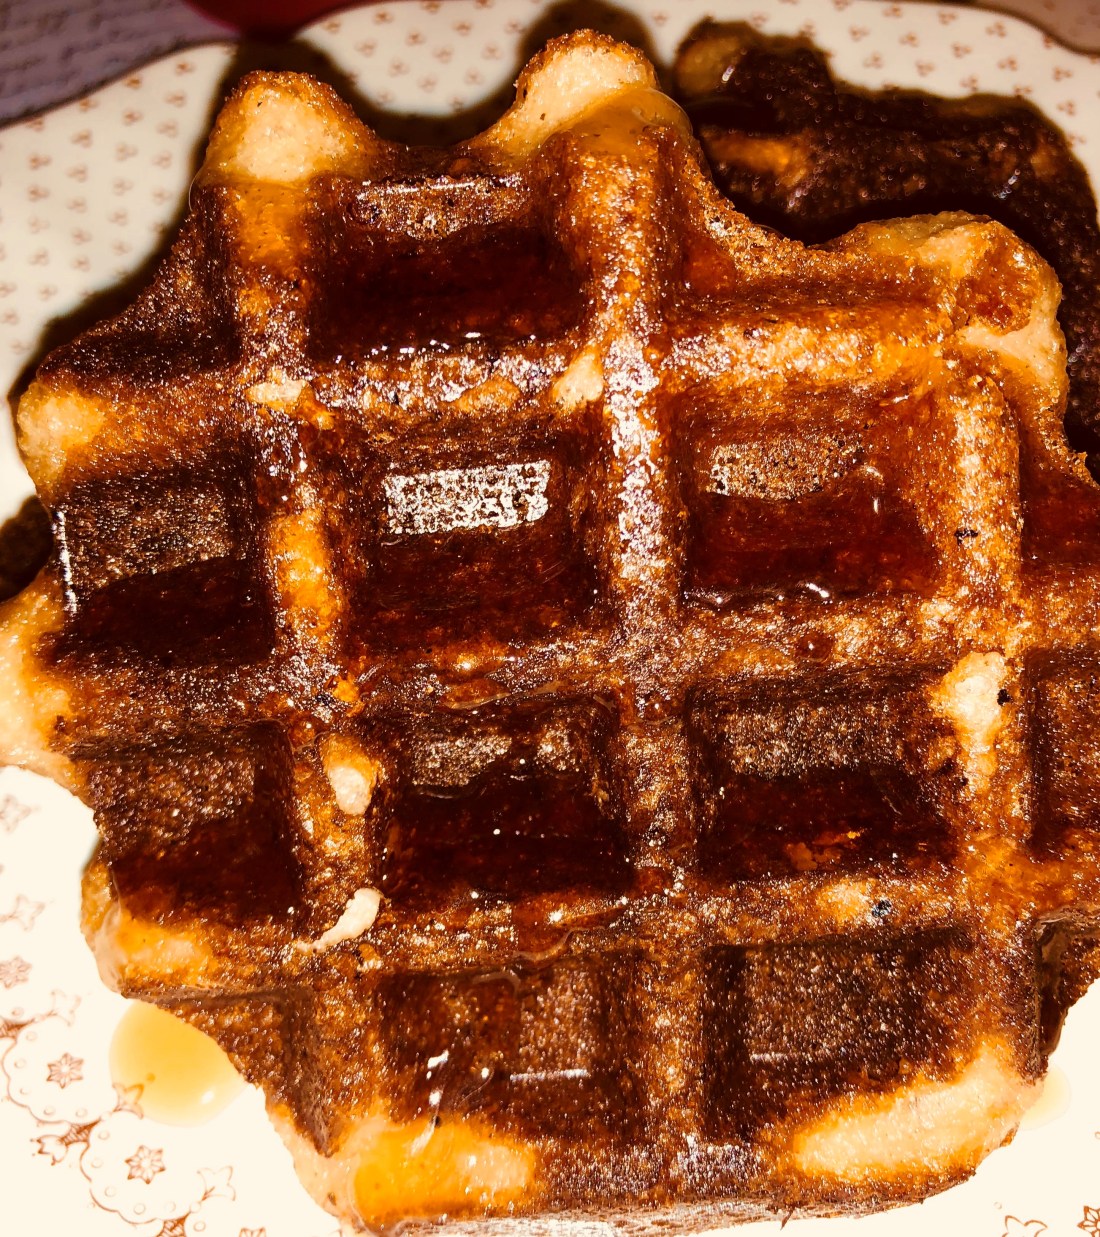
One of the most difficult recipes to adapt, in my opinion, has been waffles and pancakes.  If they taste great, they’re gummy.  Not these — light and fluffy and at the same time very crispy and oh so good.  And I learned a great tip for cleaning my waffle iron (that doesn’t come apart to wash) — after you’re done cooking your waffles and the iron is still hot, place a flat wet paper towel inside the iron and close the lid and it will steam clean your waffle iron.  In my 4-waffle iron, this batter made 8 waffles.

In a small bowl combine:

  • 1 1/4 cups non-dairy milk
  • 1 tablespoon vinegar

In a medium size bowl place:

  • 3/4 cup brown rice flour
  • 1/2 cup millet flour
  • 1/4 cup tapioca flour
  • 1/2 teaspoon xanthan gum
  • 3 teaspoons baking powder
  • 1/4 teaspoon sea salt

Stir dry ingredients to mix.  In another bowl (4-cup capacity), beat on medium:

  • 3 tablespoons aquafaba
  • 1/8 teaspoon cream of tartar
  • 1/4 teaspoon monk fruit powder

Beat until stiff peaks form and then increase speed and continue to beat for another 2 minutes until they become marshmallow like.  Increase to highest speed and beat for an additional 2-3 minutes.

Make a well in the middle of the dry ingredients and add:

  • 2 teaspoons vanilla extract
  • 1/4 cup applesauce or other fruit puree
  • 1/2 cup avocado oil

Add the milk mixture and combine until well mixed.  Gently fold in the aquafaba mixture.  Grease your waffle iron and make sure it is hot.  Pour 1/4 cup of batter (per waffle) into your waffle iron and cook.  You may need a little more than a 1/4 cup — as you can see from the picture, mine could have taken a little more batter to completely fill the waffle iron.  Add syrup and enjoy!

Savory or Sweet Seed Crackers (dairy-free, gluten-free, sugar-free, egg-free)

Sometimes the best comfort food is something small, quick and within reach.  These seed crackers fit that need for me since I can’t have anything pre-made like store-bought cookies or crackers.  The savory crackers go well with hummus, guacamole, or other dips and even with some non-dairy cheeses.  The sweet ones are tasty by themselves or with some hemp cream.  And with both of them, you can vary the herbs and seasonings to fit your taste.

Preheat oven to 375 degrees.

For the savory or sweet crackers, put in your food processor:

  • 1 1/2 cups cooked quinoa
  • 1 cup cooked brown rice
  • 1/4 cup chia seeds
  • 1/4 cup flaxseeds
  • 1/4 cup sesame seeds
  • 1/2 teaspoon sea salt
  • 1/3 cup water

Process until blended and the rice is broken down, adding small amounts of water as needed.  The amount of water used will depend on the moisture in your rice and quinoa. The mixture should have a dough consistency.  Remove half from the processor and form into a ball.  Make a hollow in them middle and add herbs such as:

  • 1/2 teaspoon garlic powder
  • 1/2 teaspoon onion powder
  • 1 tablespoon dry parsley
  • Salt and pepper to taste

Need herbs into the dough.  Place dough on a piece of greased parchment the size of your baking tray (preferably one without sides so you can slide the rolled out dough onto the sheet easily, before and after baking.  Place a second greased parchment sheet on top and using a rolling pin or heavy can, roll out dough until very thin.  The thinner you can make it, the crispier the crackers after baking.  Place on baking sheet, remove top layer of parchment and bake 20-25 minutes.  Remove from over, flip over (this is always difficult for me and I usually end up with some of the dough underneath so I have to pull it open again but if you’ve cooked it long enough, this is easily accomplished), and cut into cracker sized squares.  Put back into the oven for another 20-30 minutes until crackers are crispy and browned on the edges.  If you have some that are thinner than others (usually the middle of my crackers are slightly thicker), remove the thinner ones and continue cooking the thicker ones until they are dry and crispy.

For the sweet crackers, you should have left half the dough in the food processor.  Return the bowl to the processor and add:

  • 2 tablespoons carob or cocoa powder
  • 1 teaspoon vanilla
  • 1/2 teaspoon monk fruit powder
  • 2 tablespoons hemp hulls

Process until well mixed; you shouldn’t need to add more water but if you do, add it by tablespoons being careful not to get mixture too wet.  Remove from processor, and follow rolling and baking directions above.


Tahini Cheesecake with Chewy Brownie Crust

What a wonderful combination!  Who can resist a rich, decadent, chewy fudge brownie topped with a nutty creamy cheesecake.  This is not one of my quick, easy desserts; it takes some doing but not a great deal of skill, other than folding the brownie dry ingredients into the meringue.  Well worth the trouble.

First make the brownies.  Heat oven to 350 degrees; grease 8×8″ pan.  In a medium size bowl, combine:

  • 1/2 cup aquafaba (bean water)*
  • 1/4 teaspoon cream of tartar

Whip the aquafaba and cream of tartar to stiff peaks and then continue whipping for several more minutes.  Slowly beat in the monk fruit powder and then the date sugar and continue beating for 2-3 more minutes.

  • 3/4 teaspoon monk fruit powder
  • 1/3 cup date sugar

Sift:

  • 3/4 cup carob powder (or cocoa if you can use it)
  • 1/2 cup brown rice flour
  • 1/4 cup tapioca flour
  • 1/2 teaspoon baking powder
  • dash of salt

Pour into the meringue.  Add on top of the dry ingredients:

  • 1/4 cup avocado oil
  • 3 tablespoons hemp milk (or soy or rice milk) [If you use almond butter in the cheesecake, you could use almond milk here]
  • 2 teaspoons vanilla extract

Using a folding mix technique (using a spatula, bring the meringue from the bottom middle out to the edge in a sweeping motion; turn the bowl 1/4 of the bowl and repeat until the mixture is well mixed) mix the dry and wet ingredients into the meringue.  It will deflate somewhat.  Pour into the baking dish and spread out in an even layer.  Bake 12-15 minutes, remove from oven and top with the cheesecake mixture.

For the cheesecake mixture, combine in your food processor:

  • 12 ounces non-dairy cream cheese
  • 1/2 cup tahini (or nut butter if you can have one)
  • 1/2 cup agave nectar (or 1 teaspoon monk fruit powder, or 1/2 cup date sugar)
  • 2 teaspoons vanilla extract
  • pinch of sea salt
  • 1 tablespoon lemon juice (optional)

Blend until smooth.  Pour over brownie in an even layer.  Return to oven and bake an additional 25-40 minutes depending on your oven.  If you have some sugar free chocolate or carob chips, you can sprinkle them on top of the cheesecake mixture before baking.  Turn off oven and open door and let cool for a half hour before removing from the oven.  Cool on draft-free counter for an hour before placing in the refrigerator.  This will keep the cheesecake layer from splitting.  Serve ice-cold, if you can keep your family from eating them sooner!

*Aquafaba is the liquid you drain from a can of beans and usually discard.  It is a great substitute for eggs.  Usually used is garbanzo bean liquid.

Peach Melba Cobbler (dairy-free, gluten-free, egg-free, sugar-free, vegan)

One of my father’s favorite desserts was cobbler, didn’t matter what fruit we used, he loved it with some vanilla ice cream on top.  Its a fairly easy, quick recipe that appeals to those who like to think their dessert is also good for them.  This one has the classic combination of peaches and raspberries.

Preheat oven to 425 degrees.  Grease an 5×8″ baking dish.

Combine:

  • 2 cups sliced peaches
  • 1/2 cup fresh or frozen raspberries
  • 1/2 teaspoon stevia or 1/2 cup date sugar
  • 1 teaspoon cinnamon
  • 2 tablespoons brown rice flour whisked with 1/2 cup cold water

I spread the peaches and raspberries in the baking dish, then sprinkled them with the cinnamon and stevia and then drizzled the flour mixture over the top.

In a medium size bowl mix:

  • 3/4 cup brown rice flour
  • 1/4 cup tapioca flour/starch
  • 1 1/2 teaspoon baking powder
  • 1/4 teaspoon salt
  • 1/2 teaspoon stevia or 1/2 date sugar

Cut into the flour mixture using a pastry cutter or a fork:

  • 1/4 cup non-dairy margarine

When the margarine is combined and you have a crumbly mixture, stir in:

  • 3/4 cup non-dairy milk

Spread the mixture evenly over the top of the fruit (its okay if not all of the fruit gets totally covered), being sure that the cobbler dough is even so that you don’t have an inch of it in one place and only a 1/2 inch somewhere else so that the cobbler will cook evenly.

Bake 20-25 minutes and cool slightly before serving.  Best served warm.  Serves 6-8.

Tomato Pie (dairy-free, gluten-free, egg-free, vegan)

Another very easy to make recipe, tomato pie takes some planning and most of the day but the time is spent waiting for the tomatoes to dry and that takes 4-6 hours.  So if you want to try this easy recipe, plan ahead and make sure you have plenty of time available.  Not something you can throw together at the last minute.  It’s one way for me to use all the overabundance of tomatoes I have this time of year.

You’ll need:

  • 5-8 tomatoes depending on size
  • one small onion
  • a gluten-free pie crust, bottom layer only (see my recipe under desserts)
  • 1 to 2 cups of non-dairy mozzarella cheese (depending on how much cheese you like)

Line a large baking tray with 4 or 5 layers of paper towels

Slice:

  • 5-8 tomatoes, depending on the size (you’ll want about 30 slices)
  • one small onion

Let the tomatoes and onion dry on the paper towels, turning every couple of hours, for 4-6 hours.  I also put a couple of layers over the top so that nothing gets into the tomatoes and I can help dry out the slices.  Make sure that its a single layer of tomatoes on the tray.  If you don’t dry your tomatoes thoroughly, you’ll have tomato juice in your soggy pie.

Heat your oven to 350 degrees.

Prebake a 9 inch gluten-free pie crust.  Blind baking the bottom crust helps make sure that it doesn’t come out soggy.

When the crust is cool, add about a half cup of cheese and then place the tomato slices into the pie crust trying to cover the entire surface.  Add a layer of onions.  Continue to add tomatoes and onions until you have three rounds and the crust is mostly filled.  Cover the top of the pie with cheese and bake for 45 minutes.  Cool slightly before serving.

As a variation, you can add some cooked Italian sausage, either slices or ground,  into the pie as you’re layering the tomatoes and onions.

Roasted Root Vegetables (vegan)

I can only make this dish when I have company coming because if I make it when its just Earl and I, I eat the whole bowl!  These are sooooooo good, soft on the inside and crunchy on the outside.  Feel free to add or subtract vegetables you prefer.  A very easy recipe to make and I’ve never had anyone complain that they didn’t like it.  In fact, my brother doesn’t care for sweet potato but he really love this dish.  You can make your life easier by purchasing already diced root vegetables.  My local Whole Foods store sells a mixture of sweet potatoes, carrots, and parsnips so all I have to dice is the turnip.  I’ve also used butternut squash.

Heat your oven to 400 degrees.  Into a large bowl add:

  • 1-2 sweet potatoes, peeled and diced
  • 3 large carrots, peeled and diced
  • 3 large parsnips, peeled and diced
  • 1 large turnip, peeled and diced
  • 1 large red onion, peeled and cut into large chunks
  • 2 tablespoons olive or avocado oil
  • dried herbs of choice (I use about 1 teaspoon of an herb mix like Mrs. Dash or McCormick)
  • Salt and pepper to taste

Mix thoroughly.  Pour onto a large baking pan making sure that you have only one layer.  If you don’t have a non-stick baking pan, be sure to grease it before adding the vegetables.  Bake for 30 minutes or until vegetables are soft and bottoms are browned.  If you like, after 15 minutes, you can take them out of the oven and turn the vegetables over so that the other side will also get brown and crunchy.

String Bean Casserole (dairy-free, gluten-free, egg-free, vegan)

A Thanksgiving classic, this is a side dish I had to give up years ago because of the milk and gluten.  Here it is revisited and so delicious with the home-made cream of mushroom soup along with the onion and bread crumb topping.  I like to use the mixed string beans — green and yellow.  It takes a few more steps than your old fashioned green bean casserole but it tastes just as good.

Steam 1 pound of green beans.  While they’re cooking, cut half a large sweet Vidalia onion into slices and then cut the slices in half (or use all of a medium size onion).

To a medium skillet, over medium heat, add:

  • 2 tablespoon olive oil
  • the onions

Cook until soft and starting to caramelize.  Stir in:

  • 1/2 cup gluten-free bread crumbs
  • 1/2 teaspoon dried parsley

Grease a 5×8″ casserole dish.  Mix the string beans and 2 cups of cream of mushroom soup (see recipe under soups and salads).  Add to the casserole dish and top with the onion mixture.  Bake at 350 degrees for a half hour and then, if you want it browner, stick it under the broiler for 1-2 minutes.

Cream of Mushroom Soup (dairy-free, gluten-free, vegan)

One of the most versatile soups, cream of mushroom soup is delicious by itself or in any number of casserole dishes.  Its very easy to make.  This recipe makes two servings.

Add to a medium skillet:

  • 1 tablespoon olive oil
  • 1 pound of diced mushrooms (I usually buy one package of mixed mushrooms and then a small package of baby bella so that it has some variety) [I put mine in the food processor and pulse until they’re diced]
  • 1 tablespoon dry parsley

Cook until the mushrooms release their liquid and are soft, about 5 minutes.  Add to the pan:

  • 2 tablespoons brown rice flour

Mix into the mushrooms and cook over low heat for 2 minutes so that the flour starts to cook.  Whisk in:

  • 1 cup vegetable or mushroom stock
  • 1/2 cups non-dairy milk of choice

Cook it for a few more minutes until it thickens.  I then like to cook it a few more minutes so that the taste develops.   Ready to eat or use in your favorite casserole.

Figgy Hemp Cream (dairy-free, gluten-free, egg-free, vegan)

When I lived in western Massachusetts and had to go to the Albany, New York area to give a lecture or do an NPR program, I would always stop at the local co-op and get a pint of goat’s milk black mountain fig ice cream.  So good, creamy, figgy, and not too sweet.  This recipe comes very close to that goodness.  And it is very adaptable; feel free to use the type of fruit you like the best in place of the figs, peaches, applesauce, bananas would all work great.

Add to a blender:

  • 1 medium to large ripe avocado
  • 1/4 cup chopped dates
  • 2 cups fresh or stewed figs
  • 1 cup hemp milk
  • 2 scoops protein powder

Blend until well mixed and the dates are incorporated.  Pour into an ice cream freezer or put in individual serving containers, or ice cube trays to freeze.

TIP:  Don’t care for avocado?  Use avocado oil instead, it has little flavor but makes a very creamy dessert.  Use 1/4 cup of oil in place of the avocado pulp.

Carob Mint Hemp Milk (dairy-free, gluten-free, egg-free, vegan)

One of the things I’ve missed the most over the years is ice cream.  I take a water aerobics class at the Y and when we do the “stir the pot” exercise, the instructor always asks people what their favorite flavor of ice cream is and she stopped asking me the third time I said I was allergic to dairy.  But now I have an answer be it the Carob Avocado cream from a couple of weeks ago, or this new one I just made.  Hope you enjoy it as much as I do.

In your blender, blend:

  • 1 ripe avocado, this provides the fat so that you don’t end up with an “icy” cream
  • 1/4 cup chopped dates
  • 1 cup pear or apple sauce
  • 2 tablespoons of carob OR leave this out and add chips when the cream is frozen, OR if you can, you could add cocoa or melted semi-sweet chocolate
  • 2 large scoops protein powder
  • 2 cups hemp milk*
  • 1/2 teaspoon mint oil or extract

*I used hemp but coconut or soy milk would work just as well.  Rice milk doesn’t freeze well as it tends to make an icy mixture rather than a cream.

Blend until smooth.  Pour into your ice cream freezer or into ice cube trays to freeze.

TIP:  If the avocado gives too much of a flavor or you don’t care for avocado, add some avocado oil to the blender.  The oil has very little taste and will give you a creamy texture.