I’ve posted other wings recipes. This one is slightly different because it mixes a little tomato paste into the soy sauce substitute base along with some pureed garlic (find it in grocery store next to minced garlic in the Ethnic Foods aisle; Emperor’s Kitchen has an organic one). It also omits any coating, other than spices, on the wings themselves so no extra carbs from flour or breadcrumbs. Added to the delicious flavor and the fact that they take only a couple of minutes to prepare and a half hour to 40 minutes to bake, they can’t be beat!
In a gallon food storage bag combine:
up to 3 pounds split chicken wings
1 teaspoon paprika (sweet or smoked, whichever your family prefers)
1 teaspoon onion powder (NOT salt)
1/2 teaspoon sea salt
1/8 teaspoon ground black pepper)
Press the air from the bag before sealing, seal the bag and then massage the spices into the wings. In a small bowl mix together:
1/4 cup soy sauce substitute (see recipe under sauces)
2 tablespoons honey
1 tablespoon tomato paste
1/2 teaspoon sesame oil*
1 teaspoon pureed garlic
1/8 teaspoon Garlic Chili Sauce (OPTIONAL)
Add half to two-thirds of the sauce to the bag and shake to coat all the wings. Place on a baking sheet lined with parchment paper (be sure there’s room between each wing) and bake at 400 degrees for 15-20 minutes. Remove and brush with the remaining sauce and turn the wings over so that they brown on both sides. Bake for another 15-20 minutes (depending on size, larger may need a few more minutes) and serve. Garnish with sesame seeds, sliced scallions or chopped parsley.
*TIP: This can be omitted for totally oil free wings. Pour your 1/2 teaspoon of sesame oil into the tablespoon (or quarter cup measure) that you’ll use for the honey and swish it around to coat. This will let the honey slip right out.
You can find the recipe for my Cole slaw under Soups and Salads.
My search for tasty and easy chicken recipes has landed another one! This one doesn’t come from the Chicken Bible but is a combination of a recipe I found on-line and what I had in my refrigerator. Once everything is peeled and diced, including the chicken, it’s so simple to put together. Planning ahead is necessary with this recipe however since the chicken must be marinated for at least an hour in the refrigerator after dicing.
First, mix together the marinade in a gallon storage bag or large bowl:
3 tablespoons extra virgin olive oil
3 tablespoons fresh lemon juice
1 tablespoon minced garlic (about 2 cloves)
1/4 teaspoon salt
1/8 teaspoon ground black pepper
Then dice up:
2 skinless, boneless chicken breasts
Add to the marinade, and after closing the bag, swish around the chicken to make sure it’s completely covered in the marinade. If you want a stronger lemon flavor, add:
Grated rind of 1 lemon
While the chicken is marinating, prepare the vegetables:
4-6 small cipollini onions, peeled and quartered*
1 medium zucchini, washed and diced
1 pound eggplant (any type will work, I used 4 small graffiti eggplants), peeled and diced
1 clove garlic (about 1 1/2-2 teaspoons minced)
When the chicken is almost ready, heat a 10″ skillet over medium heat with:
1 tablespoon olive oil
When the oil is hot, add:
onions and garlic
Cook for 2-3 minutes just until the onions turn translucent. Then add the:
Zucchini
Eggplant
And cook another 5-7 minutes until the vegetables are softened. Remove to a bowl and set aside. Put the skillet back over the heat and add the:
Marinade and chicken mixture
Cook over medium heat for 3-5 minutes until chicken is cooked through and sauce is beginning to reduce. Stir the vegetables back into the skillet and serve immediately. Serves 4-6.
*Don’t have cipollini onions and your local supermarket doesn’t carry them? They are small and slightly sweet becoming much sweeter after cooking. So feel free to use a different sweet onion in their place but cut smaller.
My husband loved chicken tenders. I think more because they’re usually deep fried than for their texture which I find generally to be stringy because they’re often overcooked. I found an adaptable recipe online so I decided to give them a try. It’s quite an easy recipe to make but I’d suggest you make the sauce first so the tenders don’t sit around after frying waiting for the sauce. Like most things that are fried, once dipped in the sauce, they will quickly lose their crunch so serve immediately after you finish preparation. Makes 2 servings.
First, put the oil on to heat. In a deep 12″ skillet heat over medium high heat:
approximately 3/4″ of oil (I used a mix of olive and avocado oil)
Next prepare the sauce. In a small saucepan, whisk together:
1/3 cup soy sauce substitute
1 tablespoon date sugar
1/2 tablespoon sriracha sauce
1 teaspoon pumpkin seed butter (or any butter you like – sunflower, peanut, tahini, etc.)
1 teaspoon grated ginger (optional)
2 tablespoons water (more may be added if the sauce gets too thick)
1-2 teaspoons arrowroot (I used 2 and the sauce got much too thick)
1 teaspoon minced garlic or garlic puree
Cook over medium heat until thickened. I had to add about 1/4 cup of water to thin mine out and I think now that I probably should have made it even thinner so that the sauce wasn’t as thick on the tenders but I didn’t mind it since the sauce is so delicious!
Next coat ONE POUND of chicken tenders. Mix together in a shallow dish:
1 cup gluten-free panko bread crumbs
1/4 teaspoon sea salt
1/8 teaspoon ground black pepper
1/4 teaspoon paprika (or if you want them really spicy, use red pepper flakes instead)
In a separate shallow dish add:
1/2 cup non-dairy milk
1 teaspoon rice vinegar
Dip each tender into the milk to coat and then into the crumb mixture. Gently place in the oil that should now be at 350 degrees (after you add the tenders if the oil is still at temperature, reduce heat from medium high to medium). Cook on the first side for approximately 3-4 minutes before turning and browning on the other side for another 2-3 minutes or until firm. Remove from fat. Be sure not to crowd the tenders in the skillet. Drain on paper towels. When all the tenders are fried, dip each one into the sauce making sure to coat evenly. Serve immediately.Garnish with fresh cilantro or green scallions.
I know, I know, more brown food. But as Anne Burrell says “Brown foot GOOD!”
I’ll admit it, my very favorite thing in the whole world is pork ribs – any way you want to cook them, but I generally prefer them plain except when I make one of my low or sugar-free sauces. When I lived in Tempe, Arizona, we often visited a small Chinese restaurant in our neighborhood and I loved their ribs, which were in fact riblets. Wondering what riblets are? They are what the butchers usually cut off from the bottom of the ribs and often throw away so you can find them generally on the less expensive side if the butcher decides to sell them rather than just throw them away which is happening more and more in my local market. I find them very succulent because while they have some fat, they are mostly meat and bones. I always try to buy the packages they contain the least amount of fat. I also steam them in my oven slow and low for several hours which keeps them moist (I don’t own a grill). So here’s how I make my riblets (I made my St. Louis ribs the same way).
Here’s how they look before they’re cooked:
Preheat oven to 300 degrees. Spray an oven proof dish large enough to hold the riblets with non-stick spray. Add:
6-12 riblets which are seasoned with:
Salt
Ground Black Pepper
Garlic Powder
Add:
1/4-1/2 inch of water
Cover tightly with aluminum foil and bake for 1 1/2 to 2 hours. Remove from oven, turn oven up to 400 degrees, and place the riblets on a small baking sheet (spray it as well) and brush with:
Your favorite barbecue sauce (see my recipe for spicy honey sauce under sauces)
Bake for 5 minutes to heat the sauce before turning the riblets over and brushing with sauce again before baking another 5 minutes. If some caramelization of the sauce is desired, they can be broiled as well. Enjoy! Serves 2-4 depending on what else you’re serving and how much those people eat.
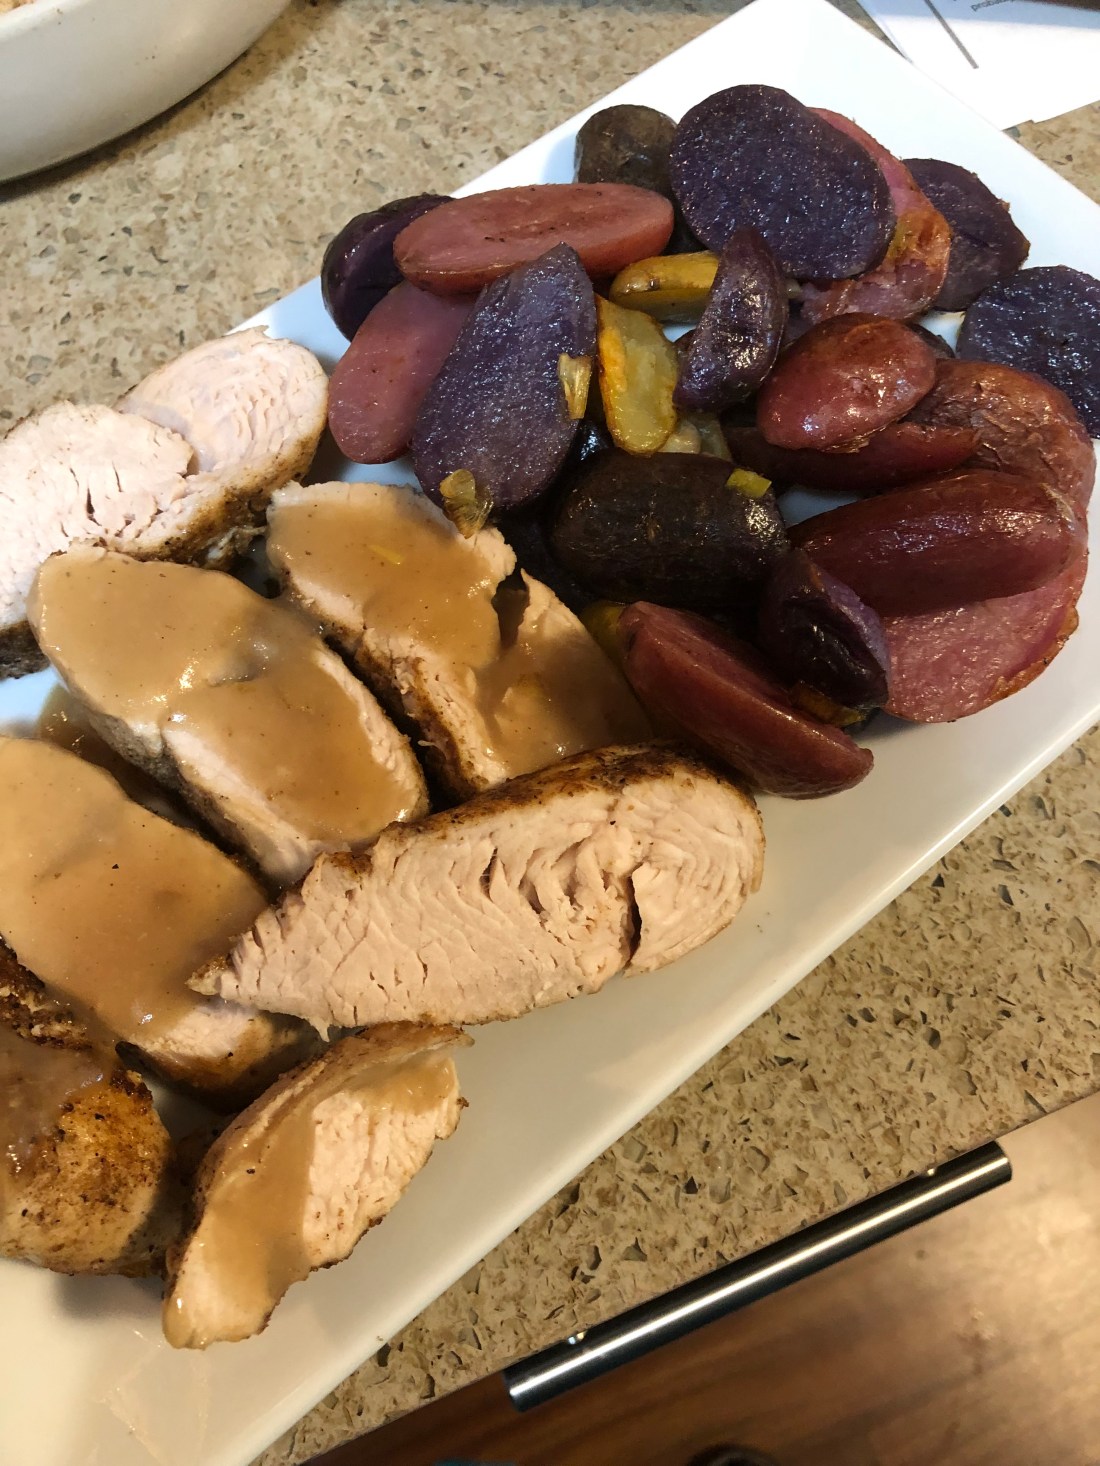
Here’s a one dish wonder that’s very easy to make and so delectable to eat. When we don’t want to heat up the oven on these hot summer nights, this is a great recipe to fall back on. It’s pretty simple to make and takes very little time, less than a half hour to prepare. The addition of the garlic and shallots adds some flavor as well as heat (we’re talking over a tablespoon of minced garlic here). This would also work well with skinless boneless chicken breasts or pork tenderloin.
First, dry off using paper towels, one:
1 pound (approximately) turkey tenderloin
Then slice it in half lengthwise to expose the tendon running down the middle (that tough white string). Remove the tendon, easier if you cut the tenderloin so that the tendon is on the outer part of one half. On a plate or pie plate (I used a paper plate) combine:
2 tablespoons gluten-free all purpose flour
1/4 teaspoon sea salt
1/4 teaspoon ground black pepper
1/4 teaspoon paprika
1/4 teaspoon garlic powder
Whisk to make sure the herbs are even throughout the flour mixture. Dredge each half of the turkey tenderloin in the flour mixture, on both sides. In a 12″ skillet, heat over medium high heat:
1 tablespoon olive oil
When the oil is shimmering, add the turkey pieces, lower the heat to medium and saute the turkey on each side for approximately 3-5 minutes or until firm, turning once.* Remove from the skillet and add:
3-4 small shallots, sliced and/or diced
1-2 tablespoons minced garlic
You may need to add a little more (about 1 teaspoon) olive oil. Sauté over medium low heat for about 1 minute until the shallots are softened and the garlic is just beginning to brown. Add to the skillet:
1/2 to 3/4 cups chicken (or turkey) stock (start with 1/2 cup and add more if the mixture needs thinning after the next step)
Scrap the bottom of the skillet to release the browned bits left from the turkey. Mix together:
1 cup dairy-free milk (I used oat but for a creamier texture, use a non-dairy creamer)
1 1/2 tablespoons gluten-free flour
Whisk to combine before adding to the skillet. Stir the ingredients to mix thoroughly and continue stirring until the sauce thickens before reducing the heat to low, about 2-3 minutes. Add the turkey pieces back into the sauce and simmer for several minutes to reheat the turkey. Serves 2-4.I served mine over brown rice but it would pair just as well with mashed potatoes, mashed sweet potatoes, quinoa, sorghum or millet, or even a puree of root vegetables.
*The amount of time needed to cook the turkey will depend on the thickness of the turkey slices.
My father managed a dairy farm so beef was a staple in our family. My mother used to make beef and pea pods, always one of everyone’s favorites. Here’s my version using turkey tenderloin rather than beef. Serves 2-3.
Into a gallon food storage bag, add:
2-3 tablespoons arrowroot
1/4 teaspoon salt
1/4 teaspoon garlic powder
1/8 teaspoon ground black pepper
Shake (close first) to combine and then add:
6-8 ounces turkey tenderloin, cut into slices (about 1/8″ thick)
Seal and shake to coat the turkey with the arrowroot mixture. Put in the refrigerator for at least 1 hour but up to overnight. When ready to start cooking, heat a 12″ skillet over medium heat with:
1 tablespoon olive oil
When shimmering add and saute until slightly softened:
1 medium onion, cut in half and then thinly sliced
2 teaspoons minced garlic (2 cloves)
1 large or 10 baby carrots, thinly sliced on the diagonal
5 celery stalks, thinly sliced on the diagonal
6-8 ounce bag of pea pods, remove the strings and then cut into several pieces on the diagonal
1 medium sweet bell pepper, sliced thin
In a 2 cup bowl, combine:
1 cup soy sauce substitute (if you can have soy, feel free to use soy sauce but reduce to 1/2 cup and increase the stock to 3/4 cup)
1 tablespoon fish sauce
1/2 tablespoon sesame oil
1/4 cup chicken (or turkey) stock
1 1/2 tablespoons arrowroot (or tapioca starch)
1 teaspoon siracha (optional)
Whisk to combine. In a separate skillet, heat over medium heat:
1 tablespoon olive oil
1 teaspoon sesame oil
When shimmering, add the turkey and saute, turning once, until cooked about 2 minutes per side depending on thickness. I had to do this in 2 batches since the turkey shouldn’t be crowded in the pan (we don’t want it to steam!). Add to the vegetables. When all the turkey is combined with the vegetables, stir in the sauce mixture and cook for about 1 minute until thickened and coating all the vegetable mixture. If needed, add more chicken stock by tablespoon. Serve, garnished with sesame seeds and/or sliced scallion greens.
Turkey is easy to overcook producing a dry, not very appetizing meat. If you don’t have a meat thermometer, I would suggest you invest in one. It makes cooking meats, especially poultry, much easier.
Turkey can also be rather bland so it needs help to bring out the flavor. This recipe combines a number of herbs to do just that. If you have time, rub the turkey breast, under the skin as well as on the skin, with the herb rub and then refrigerate for several hours.
Watch the turkey breast carefully while baking and take the internal temperature often after about 50 minutes so that it doesn’t get above 160 on the meat thermometer. This is meant for 2 people but the breast can serve up to 4, just increase the vegetables. As with many of my recipes, feel free to change out the herbs to suit your family’s taste as well as the vegetables – any root vegetables will work in this recipe.
Preheat oven to 350 degrees. Prepare a baking dish a little larger than the turkey breast and spray with non-stick cooking spray or coat with a non-dairy margarine. In a medium bowl combine:
1 large onion, sliced
5-6 celery stalks (I used celery hearts so if you have whole celery, reduce this number), cut into large pieces
12-15 baby rainbow carrots, exclude the orange ones
1 medium sweet potato, peeled and cut into medium-sized cubes*
2 tablespoons olive oil
If some of the baby carrots are on the larger size, cut them in quarters so all the vegetables will cook evenly.Mix the vegetables together to coat them with oil. In a small dish combine:
1/2 teaspoon dried thyme
1/2 teaspoon sea salt
1/4 teaspoon ground black pepper
1/2 teaspoon garlic granules
1/4 teaspoon dried marjoram
1 teaspoon dried sage
Mix the herbs together to combine.Add about 1/4 of the herb mixture to the vegetables and mix once again. Pour the vegetables into the prepared baking dish. Using paper towels, dry thoroughly:
2 1/2 to 3 pound turkey breast (this is a half breast)
Pull up the turkey skin and sprinkle the flesh with the herb mixture, reserving some for the other side. Rub into the flesh and then fold back the skin onto the meat and sprinkle a little more herb on the skin. Place the breast on top of the vegetables skin side down and sprinkle the remaining herb mixture on the bottom of the breast, rubbing it in. Flip the turkey breast so that the skin side is up. Roast in the oven for approximately 25 minutes per pound or until internal temperature is 160 degrees.** Remove from the oven and place the turkey on a serving platter, loosely cover with foil and let rest for about 10-15 minutes.
Spoon the roasted vegetables into a serving bowl.*** When the breast is rested, cut and serve. If desired, pan gravy can be made with the fat in the pan by adding gluten-free, all-purpose flour until all the oil is absorbed (probably about 2 tablespoons) and then cook the flour for several minutes over medium heat before adding approximately 1 cup of chicken (or turkey) stock for each tablespoon of flour used.Or, for fat free gravy, heat 1 1/2 cups of chicken (or turkey) stock over medium high heat. Whisk 2 tablespoons of gluten-free all-purpose flour into another 1/2 cup of cold chicken stock and whisk into the stock on the stove. Whisk constantly until the mixture comes to a boil and is thickened.
*If your family doesn’t like sweet potatoes, simply add the orange carrots and perhaps some cubes of red-skin or Yukon gold potatoes.
**FYI, my turkey breast was 2.8 pounds and I cooked it for 1 hour and 20 minutes before it reached 160 degrees. Remember it will continue to cook when removed from the oven and covered with foil.
***The carrots weren’t cooked when I removed the turkey so I increased the oven temperature to 425 degrees and cooked the vegetables for about 20 minutes more. This not only cooked the carrots but it also browned the sweet potatoes making them a little crunchy.
I found this recipe and thought it sounded interesting. Not too many changes were required to make it fit our needs. Use either a small boneless pork roast or a large pork loin (about 2 pounds) and for a quick and easy meal, instead of peeling and cutting up large carrots, use one bag of either regular or rainbow baby carrots. All together, this recipe takes just about an hour, 10-15 minutes prep time and about 40 minutes baking. Feel free to change out the herb used on the roasted carrots if your family prefers something else – thyme, oregano, tarragon or rosemary will all work. Same with the carrots – parsnips, sweet potato, cubes of winter squash, any vegetable you can roast would work.
First, preheat the oven to 450 degrees. Next, pour into baking pan, with 1 to 2 inch sides:
12 ounces to 1 pound of baby carrots
4 or 5 small to medium shallots, peeled and sliced in half lengthwise
Sprinkle the carrots and shallots with:
1/2 teaspoon salt
1/4 teaspoon ground black pepper
1/4 to 1/2 teaspoon garlic granules
1/4 to 1/2 teaspoon dried marjoram
1 to 1 1/2 tablespoons olive oil
Mix up the carrots and shallots with the oil and herbs to combine making sure all the carrots have some oil on them.Put into the preheated oven and cook for approximately 10 minutes. While the veggies are beginning to roast, heat in a 10″ skillet:
1 tablespoon olive oil
While the oil heats, season with salt and pepper:
1 1/2 to 2 pound pork loin or boneless pork roast
Sear off all sides of the pork in the hot oil, about 2 minutes per side which takes about 10 minutes. Remove from the heat. Remove the pan from the oven, push the carrots and shallots aside to make space in the middle of the pan for the pork. Return to the oven and cook for approximately 30-40 minutes until the internal temperature of the pork reaches 145-150 degrees. Take out of the oven and place the pork and vegetables on a plate, loosely over with foil or parchment paper to keep warm while the gravy is made.
To make the gravy, pour the oil from the skillet into the roasting pan and add:
1 to 2 tablespoons gluten-free all-purpose flour
Over medium heat whisk to combine with the fat. All the fat should be absorbed by the flour. Cook the flour for about a minute before adding:
1 cup chicken stock (or pork stock if you can find it)
If you used more than 1 tablespoon flour, you’ll need to add additional stock to the baking pan. Let simmer, stirring constantly, for about 2 minutes until thickened. Whisk in:
1 tablespoon mustard, whatever kind your family prefers
When the gravy is ready, slice the pork roast or loin and serve with the carrots, gravy and either mashed potatoes or rice. Serves 2-4 depending on the size of the pork.
Here’s a very easy and quick to put together recipe for dinner. I’m always looking for new recipes for poultry since I eat a lot of it so I was thrilled to find this one that only needed a few small changes. If you can use white wine, use a cup of that in place of one of the cups of chicken stock.
Preheat oven to 400 degrees. Spray or grease (with olive oil) a 10×13 (or larger) baking dish (with 2″ sides). In a 12″ skillet, heat over medium high heat:
1 tablespoon olive oil
While the oil heats, coat:
2 turkey tenderloins (about 1 1/2 pounds)
With about:
1/2 teaspoon salt
1/4 teaspoon ground black pepper
1/2 teaspoon garlic granules
1/2 teaspoon garam masala (or whatever herb your family likes)
Sear the turkey on all sides, about 2-3 minutes per side. Place in the prepared baking dish. Wash and cut in half lengthwise:
24 ounces fingerling potatoes
Arrange the potatoes around the turkey and sprinkle them with:
1/4 cup chopped scallion (whites only) or shallots
Salt and ground black pepper
In a small bowl combine:
2 cups low sodium chicken stock (or 1 cup stock and 1 cup white wine)
2 tablespoons rice vinegar
Pour over chicken and potatoes. Bake for 40-50 minutes or until internal temperature of the turkey is at least 160 degrees and the potatoes are tender. Let the turkey rest for 10-15 minutes before cutting. Pour any remaining stock* over the meat before serving. Garnish if desired with:
4 tablespoons cranberry compote (see recipe under sauces/condiments/dressings)
Makes 6 servings.
*I thickened the remaining gravy with some gluten-free all-purpose flour.
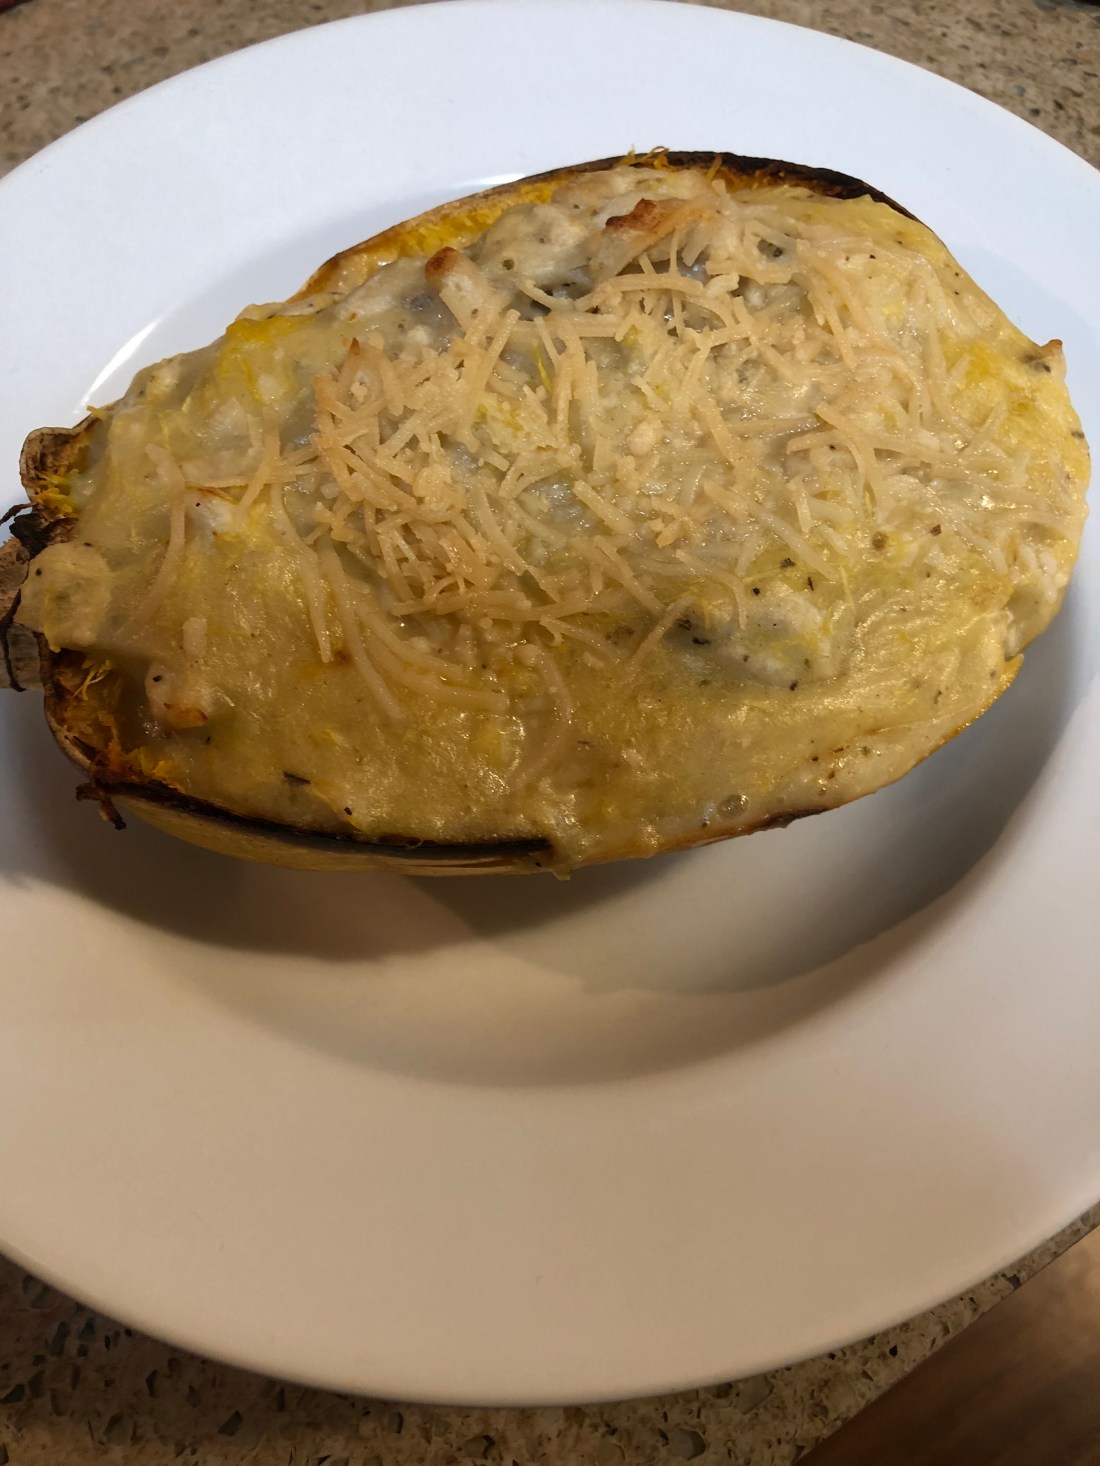
Alfredo sauce is one of the tastiest things I’ve ever eaten and it’s so easy to make. I know there are a lot of steps but it’s a very easy process, none of the steps (except maybe cutting the spaghetti squash in half! are difficult). I blogged Chicken Alfredo several years ago so just used that basic recipe for the sauce. I’ve taken out the fresh parsley because I now can’t eat it and stuffed it into a spaghetti squash which reduces the simple carbs and calories. Don’t care for spaghetti squash? No problem, just mix it up and use it as a sauce for your favorite pasta. Delicious! Enjoy.
First thing is to cook the spaghetti squash. Cut a small to medium sized one in half, scrap out the seeds (if you have a sugar spoon [with ruffled edge] it works great for this), and coat the flesh with:
1 tablespoon olive oil or olive oil spray
Place skin side down in a baking dish, add just about a 1/2 inch of water to the pan and bake in a preheated 400 degree oven for approximately 30-40 minutes depending on the size of your squash. I know, I know, most on-line recipes say to cook a spaghetti squash for 20-30 minutes. I find when I cook it for that short a time, it tends to be wetter producing more mash and fewer spaghetti strands.
While the squash cooks, make some thick rice milk but blending:
1 cup water
1/3 cup cooked rice (brown or white makes no difference)
Then make the alfredo sauce. Over medium heat, heat:
1/4 cup avocado oil
1 teaspoon finely minced garlic
Be sure the heat isn’t too high, we don’t want to burn the minced garlic which will burn very quickly. When the oil starts to sizzle, add:
1 cup thick rice milk (that you just made above)
1/2 cup non-dairy cream cheese
Whisk to combine which takes a moment since the oil must also be incorporated. I thought about reducing the oil to 1 tablespoon (which you should feel free to do if you’re on a low-fat diet) but it does reduce the richness of the dish slightly. Next whisk in:
1/4-1/2 cup parmesan cheese
1 teaspoon dried Italian herb blend (or oregano, thyme and marjoram)
Whisk constantly until cheese melts. Take off the heat. In a 12″ high sided skillet, over medium high heat, heat until shimmering:
1 tablespoon olive oil (or spray the pan with cooking spray if low fat desired)
When the oil (pan) is hot, add:
1 pound ground turkey
Salt, pepper and garlic powder (1/2 teaspoon salt and garlic powder, 1/4 teaspoon pepper)
Don’t oversalt because the parmesan in the sauce is also salty. Cook, breaking up the turkey into large chunks until cooked but not browned (or it will get too dry). Remove from the heat. Next using a fork, scrap the inside of the cooled spaghetti squash to produce spaghetti-like strands. Try to get as much of the squash out of the shell as possible without breaking or cracking the shell (I did have a large crack in one half and a small in the other and they were still useable). Put the squash into the ground turkey skillet and top with the sauce. Mix to combine. Place the squash shells in a sprayed baking dish and spoon in the turkey/squash/sauce mixture until well filled. Garnish with more parmesan and/or fresh parsley and bake for 15-30 minutes until bubbling. Time will depend on the size of your squash.