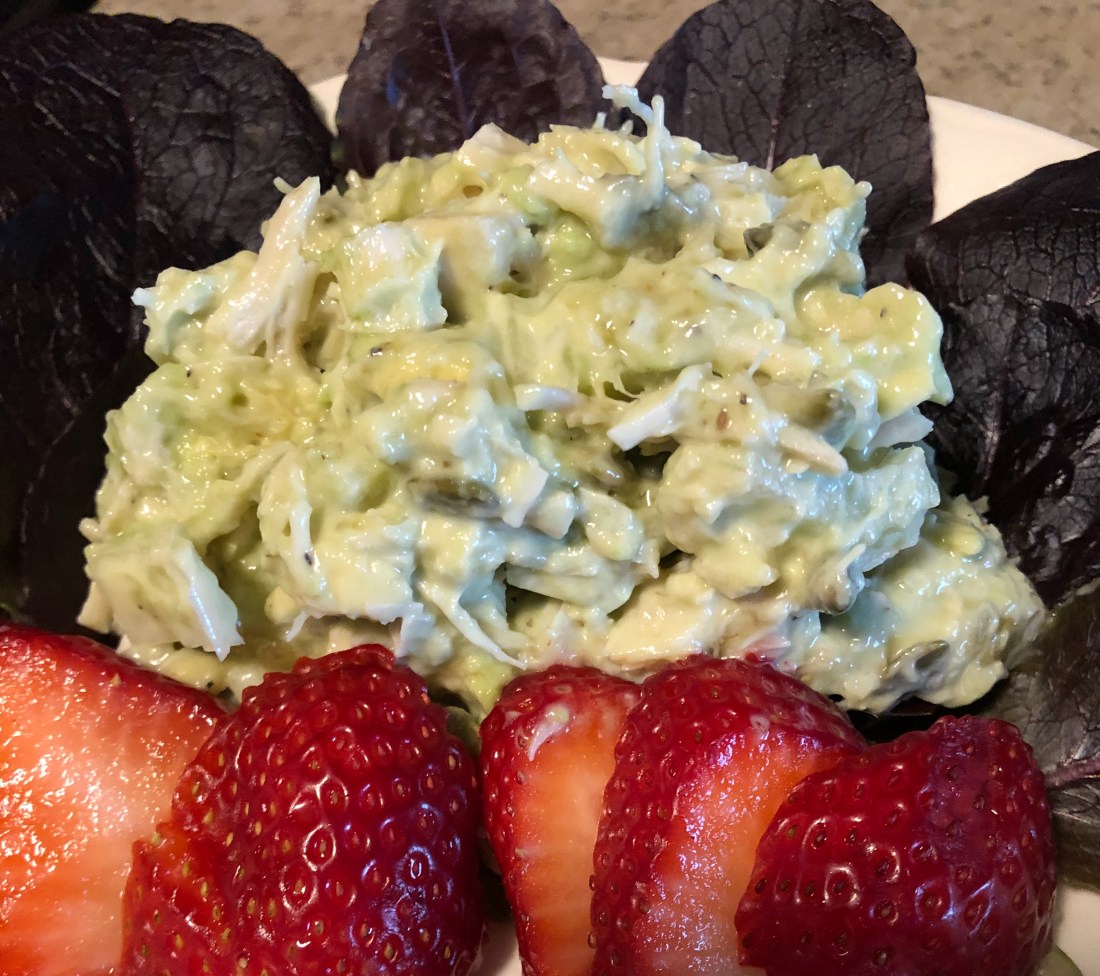
Every once in a great while I buy a rotisserie chicken at the store because, like everyone, I just don’t feel like cooking. I bought one several days ago and like so often happens, found I couldn’t eat all of it before it would spoil. In those cases, I usually dice up the chicken breasts and freeze them for later use. It’s amazing, I don’t understand why, but when cooked chicken is frozen, it makes such a better chicken salad than fresh chicken. Perhaps because it’s really cold? Anyway, try putting the diced chicken in the freezer for about an hour before making the salad and let me know if you agree with me that it has a better taste.
For the salad:
2 rotisserie chicken breasts diced
3-4 celery stalks, diced
2 tablespoons dill relish (or up to 1/4 cup depending on taste)
2 tablespoons pumpkin seeds, or diced jicama, or diced water chestnuts (just looking for more crunch)
1 avocado, diced
For the dressing:
1/2 to 3/4 cup vegan mayonnaise (depending on how much chicken there is)
1 tablespoon hot sauce
1/2 teaspoon herbamare (herbed salt)
1/4 teaspoon garlic powder
1/8 teaspoon ground black (or white) pepper
2 tablespoons honey (or agave or coconut nectar, or date syrup)
Mix all the ingredients and serve with lettuce. Garnish, if you have some, which I didn’t, with chives or scallions. Also, it’s delicious with sliced fresh strawberries or tomatoes. Makes 4 servings.
I do love raspberries but it never occurred to me to use them in savory dishes. This one takes some time to make the sauce but it’s so succulent and rich, the time is worth it. The sauce can be made ahead and frozen. In fact, with the chicken I used, I had an extra 2 cups of sauce when I was finished so I put it in the freezer for another time. The recipe may not be a fast one to complete, but it is fairly easy to make. And very easy to enjoy! I used a little vinegar and honey but if you can have white wine, feel free to substitute one cup of white wine for the vinegar and honey. Makes 4-6 servings.
In a medium saucepan, bring to a boil:
32 ounces of chicken stock
2 teaspoons minced garlic
Boil for about 15-20 minutes until the stock is reduced by half. Add:
1 cup cranberry juice
3 cups raspberries (fresh or frozen)
2 tablespoons seasoned vinegar (this is a vinegar which has a small amount of sugar and seasonings added)
2 tablespoons honey
Boil until reduced by half, about 30-45 minutes. Strain the sauce to remove most of the raspberry seeds.Return to saucepan and return to heat, low heat. Make a slurry with:
1/4 cup water
2 tablespoons cornstarch, tapioca starch, or arrowroot
Add the slurry to the sauce, increasing the heat to medium, and stir until the sauce thickens, about 2 or 3 minutes. Reduce heat to low, simmer.While the sauce is reducing, cut into chunks:
8 boneless skinless chicken thighs and/or breasts
In a ziplock gallon storage bag combine:
1/2 cup all purpose gluten free flour
1/4 cup tapioca or casaba flour
1/2 teaspoon herbamare (or sea salt)
1/4 teaspoon ground pepper
1/2 teaspoon garlic powder
When the sauce is ready, add the chicken to the mixed flour and shake to coat all the chicken chunks. Heat in a large skillet:
1/2 cup olive oil
When the oil is hot (shimmering in the pan), add the chicken chunks individually, shaking off any excess flour, and cook, turning once, for 2-5 minutes depending on the size of the chunks or until cooked. Using a slotted spoon, remove the chicken from the oil and add to the sauce.
Serve over brown rice or mashed potatoes. Garnish with fresh raspberries and scallions.
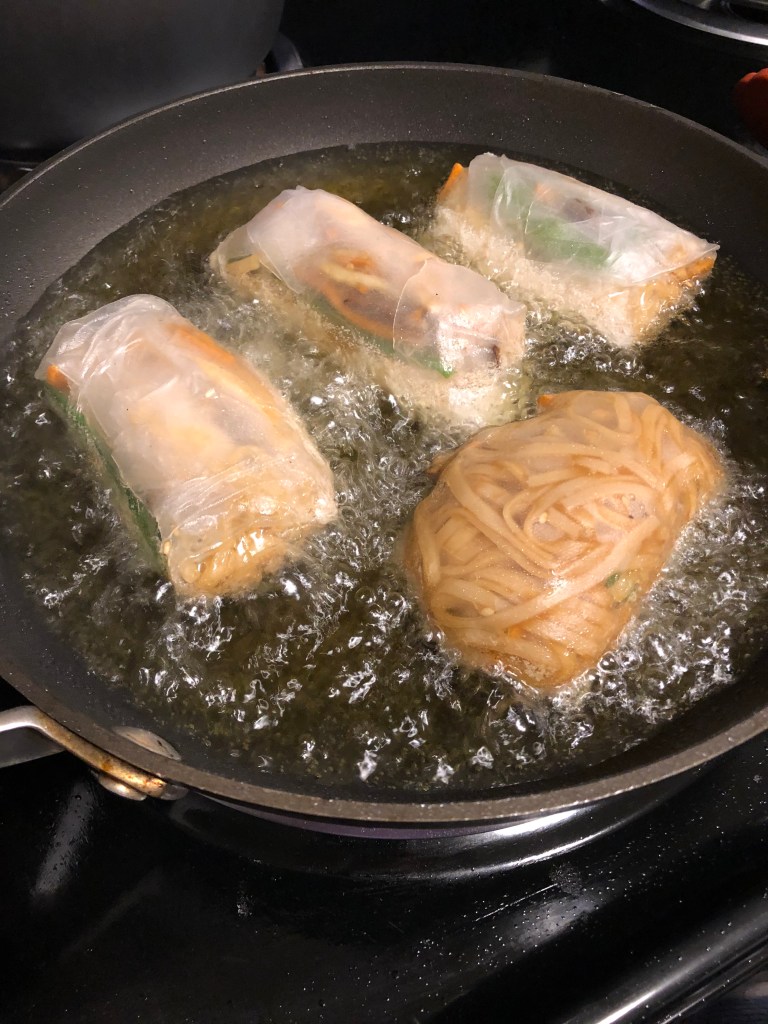
When I lived in Pittsfield, Massachusetts, there was a wonderful Vietnamese restaurant that introduced me to all kinds of new flavors. One of our favorites were their spring rolls! What a delicious concoction; meat, rice noodles and vegetables wrapped in a rice paper shell and deep fried. Oh so good. Generally a spring roll contains pork or shrimp and a summer roll (the unfried version of a spring roll) contains shrimp and no noodles but bean sprouts instead. Here I’ve substituted chicken but any meat (or meat substitute) would work. And they aren’t difficult to make as long as the steps are followed.
First cook whatever part of the filling needs cooking.
To a large pot of boiling, salted water add:
8 ounces pad Thai noodles (or linguini, gluten free of course!) [Optional but traditional]
Cook until tender, about 3-5 minutes, drain, rinse with cold water and set aside to add to the cooked vegetables later. In a medium 10″ skillet over medium heat, heat:
1 tablespoon olive oil
Add:
1/2 medium onion, sliced
1 cup of thinly sliced Chinese (or Napa) cabbage
Reduce heat to medium low and cook for several minutes until the onion and cabbage wilt. In a small bowl whisk:
1 tablespoon soy substitute
1 tablespoon date sugar (or syrup)
1/2 cup rice vinegar
1 tablespoon sesame oil
Add to the skillet and stir to combine with the onion and cabbage. Add the pad Thai noodles if used. Remove the vegetables from the skillet. Either clean that skillet or using another, heat:
1 tablespoon olive oil
Add over medium heat:
16 ounces of chicken breast, julienned (thinly sliced)
Cook, turning frequently, for several minutes, 3-5, until chicken is cooked. Remove from heat.
Let the vegetables and chicken cool thoroughly. If the fillings aren’t cool enough, they will melt the rice paper wrapper. In the meantime, prepare the uncooked fillings, any or all of the following:
1 medium carrot, any color, julienned
1 English cucumber, peeled and julienned
1 cup zucchini noodles cut into 4 inch sections
1/2 cup pea pods
2-3 green scallions (green parts only), cut into 4 inch sections
1/2 cup Daikon radish (julienned)
Avocado (julienned)
2 tablespoons sesame seeds (white or black)
Fresh herbs can also be added such as mint or basil leaves
As you can see, pretty much any vegetable could work, even string beans! You’ll also need:
10-12 rice paper wrappers (found in most oriental or specialty stores (or Whole Foods)
When the fillings are all prepared and cooled, using a 12″ container (I used a large pie plate), fill with about 1″ of warm water, not hot, just lukewarm works best. One at a time, place a rice paper wrapper , into the warm water, making sure the wrapper is covered by the water. You don’t want to soak it, just wet it completely. You’ll notice when it’s wet enough because the marks on the wrapper will disappear. Place the wrapper on a clean tea towel (cotton rather than a synthetic or fleece towel) and dry. I picked up the wrapper at this point, carefully, so it didn’t stick as much to the towel after filling.
As you see from the photo, I broke one but it was still useable. Once dried, place some of the fillings in the middle of the wrapper, horizontally, then fold the bottom of the wrapper over the filling being sure it is tight at the top. Then fold in the sides of the wrapper and roll it up from the bottom to the top. The top should stick to the rest of the roll. If it doesn’t, rub a tiny amount of water on it with your finger.
Now comes the choice – spring or summer rolls? The only difference is the frying. If spring rolls are chosen, cook all of them. I cooked half and left the others for the next day’s lunch and they totally disintegrated in the oil the next day, the rice paper didn’t hold up to being refrigerated.
If spring rolls are the choice, heat in a large, high sided skillet:
3 inches of olive and avocado oils
Heat to 350 degrees. Olive oil has a low smoke point so mixing it with the avocado (which has a higher smoke point) keeps the olive oil from burning during this process. Once the oil is to temperature, add the spring rolls being careful not to overcrowd the pan. Fry, turning once (tongs are best for this), until golden brown. Unlike most fried foods, do not place these on a paper towel as the rice wrapper will stick to it even after fried. Instead blot lightly with the paper towel after frying.
If, like me, several of your wrappers formed holes when wrapping them in the vegetables, DON’T FRY THEM! The oil will get into the roll and it will be very greasy. Use it as a summer roll instead.
Dipping sauce (or dressing) if desired. Traditionally spring rolls are served with a peanut sauce but the restaurant always served them with a spicy soy/ginger/garlic sauce. Here are several recipes for dipping sauces.
“Peanut” Dipping Sauce:
Combine in a small bowl:
1/2 cup tahini or other seed or nut butter
1 tablespoon soy substitute
2 tablespoons rice vinegar
1 teaspoon minced garlic
1 tablespoon grated fresh ginger
1-3 tablespoons hot water depending on the thickness desired
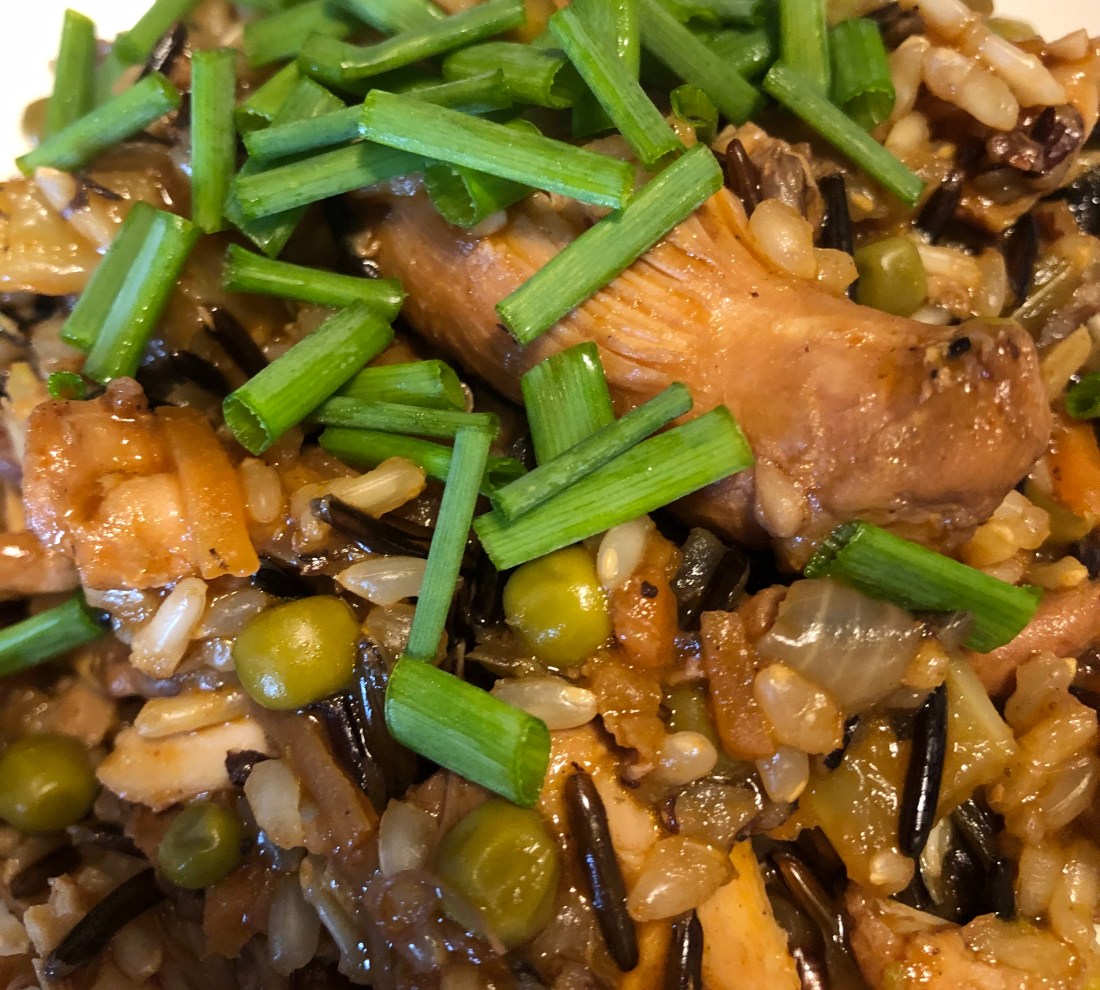
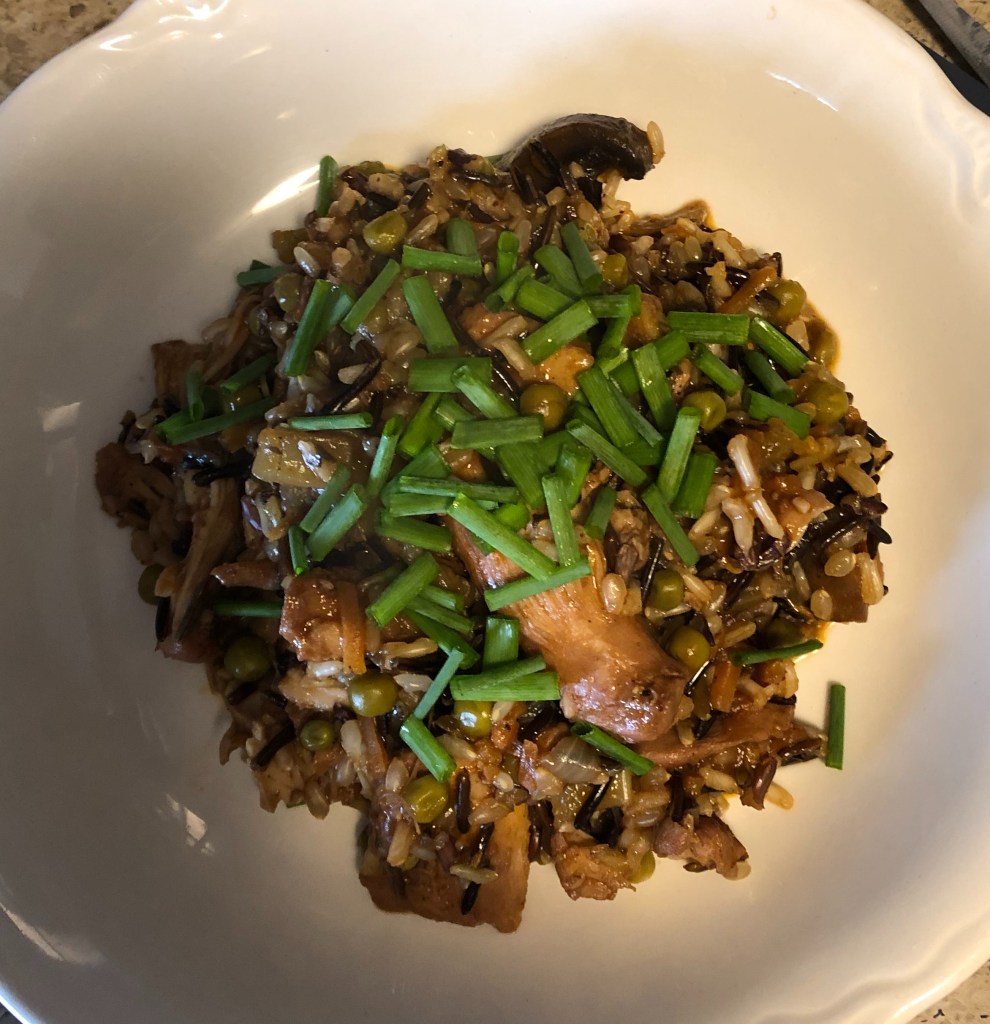
I’ve been making rice with meat for years. It’s a convenient, easy way to stretch meat when you don’t have much of it and lots of people to feed. And a great way to use up extra vegetables because it’s an adaptable recipe where any combination of meat and vegetables works fine. The recipe feeds 6 or 4 generously.
This will be my last blog post for several weeks as I now need to concentrate on finishing my screenplay which was due today but I’m not happy with it yet so have to concentrate on that for the next few weeks.
In a Dutch oven, heat over medium high heat:
2 tablespoons olive oil
Add:
6 boneless skinless chicken thighs or breasts seasoned with salt, pepper and garlic powder (if using breasts cut into large cubes
The object is to brown the meat and build flavor as well as sear the meat to keep all the juices in it. This should take about 5 minutes, 2 1/2 minutes per side. When browned, remove the chicken pieces to a plate and add to the pot:
1 medium onion diced
6-8 stalks of celery diced
1/2 cup chopped carrots (or grated)
1 cup diced mushrooms
Sauté for several minutes until onion starts to brown. Add:
1 teaspoon minced garlic
2 tablespoons tomato paste
1/2 teaspoon ground allspice
1/8 teaspoon ground cloves
2 teaspoons to 2 tablespoons sweet or spicy paprika depending on your taste
2-3 bay leaves
1 cup frozen or fresh peas (if using fresh, add with the rice)
2 cups chicken stock (or, if possible, 1 cup of white wine and 1 cup of stock)*
1 tablespoon date syrup or date sugar
Stir to mix and add the chicken back into the pot along with any juices that are on the plate. Cover and simmer on low heat for approximately a half hour until chicken is cooked. Stir in:
1 cup rice (I used a wild rice blend but feel free to use whatever rice you prefer)
Simmer covered until rice is cooked, stirring frequently to be sure rice doesn’t stick to the bottom of the pot. This should cook out all the liquid but if not, cook uncovered until most of the liquid is gone. If the rice isn’t cooked but the liquid is all absorbed, add 1/4 cup stock and continue cooking covered until rice is done. Remove the bay leaves, taste and add additional salt if needed. Serve garnished with chives.
*If using wine, deglaze the pan with the wine before adding the stock. This will cook off the alcohol.
I’m always looking for new chicken recipes and here’s one that has some sweetness from a touch of honey, agave, maple or date syrup, some spice from the cumin and ground pepper, and a touch of citrus from orange. I was pleasantly surprised at that hint of orange in the flavor, very umami! And quite an easy recipe to make. Any chicken parts can be used however, I would recommend not mixing them so either thighs, drumsticks, or breasts. Serves 2-4.
In a 1 gallon food storage bag (or small mixing bowl, mix together:
1/2 cup sugar free ketchup (such as Organicville)
1/4 cup agave, honey, maple or date syrup
1 teaspoon orange zest (zest from 1 medium orange)
1/3 cup orange juice (from one orange)
1 teaspoon Herbamare (don’t have it? Use 1/2 teaspoon salt and 1/2 teaspoon of your favorite herb mix)
2 teaspoons minced garlic
2 teaspoons ground cumin
1/2 teaspoon ground black pepper
Dash of hot sauce (optional)*
Swish around in the bag (please zip-lock it first!) until combined.
Add:
6-8 chicken parts
Again swish around to be sure the chicken is thoroughly immersed in the marinade. Refrigerate for at least 30 minutes but I left mine for about 2 hours. [If you’re unsure about using the marinade that the chicken sat in, instead of mixing it in the bag, use a small bowl and when you add the chicken to the bag, only add half the marinade and reserve the other half to pour over the chicken for baking.]
Preheat oven to 375 degrees. Spray a baking dish with non-stick cooking spray and dump the entire contents of the bag into it, making sure the chicken is in a single layer in the dish. Bake 30-40 minutes depending on the size of your chicken pieces or until the internal temperature of the chicken reaches 165-170 degrees.
One of my favorite Italian dishes is lemon chicken. Here’s an recipe that’s easy to make and ready in less than an hour. And need I add delicious! I think this is, like many Italian foods, going to taste even better tomorrow when I eat the leftovers. Serves 4.
You’ll need:
8-10 chicken drumsticks*
Herbamare (herbed sea salt) and pepper (available at specialty grocer stores, Whole Foods or Amazon)**
1 tablespoon olive oil
2 tablespoons vegan margarine
Zest of 1 lemon and 2 tablespoons juice
3 teaspoons minced garlic
Fresh parsley for garnish
Salt and pepper the chicken and let sit on the counter for 10-15 minutes so that it won’t be ice cold when you cook it. In a 12″ skillet, heat the oil and margarine over medium high heat until margarine starts foaming. If the chicken is too wet, be sure to dry with a paper towel, remember – wet meat doesn’t brown well and will spit oil! Reduce heat to medium and sauté chicken, turning to brown on all sides, this should take 6-8 minutes. Reduce heat to medium low (I actually started out on medium low but the drumsticks were getting too brown so I reduced my heat to low), cover and let cook 20-25 minutes until the chicken is cooked. Turn the chicken every 5-7 minutes making sure to move them around in the skillet as well.
In a small bowl, mix the grated lemon zest and juice along with the garlic. When the chicken is cooked, pour this mixture over the chicken, turning the chicken to be sure the sauce coats the pieces on all sides. Take off the heat and cover, let it sit for about 5-10 minutes. Garnish and serve.
* Chicken breasts would also work
** Substitute sea salt mixed with some thyme, marjoram, and basil (or an Italian herb blend)
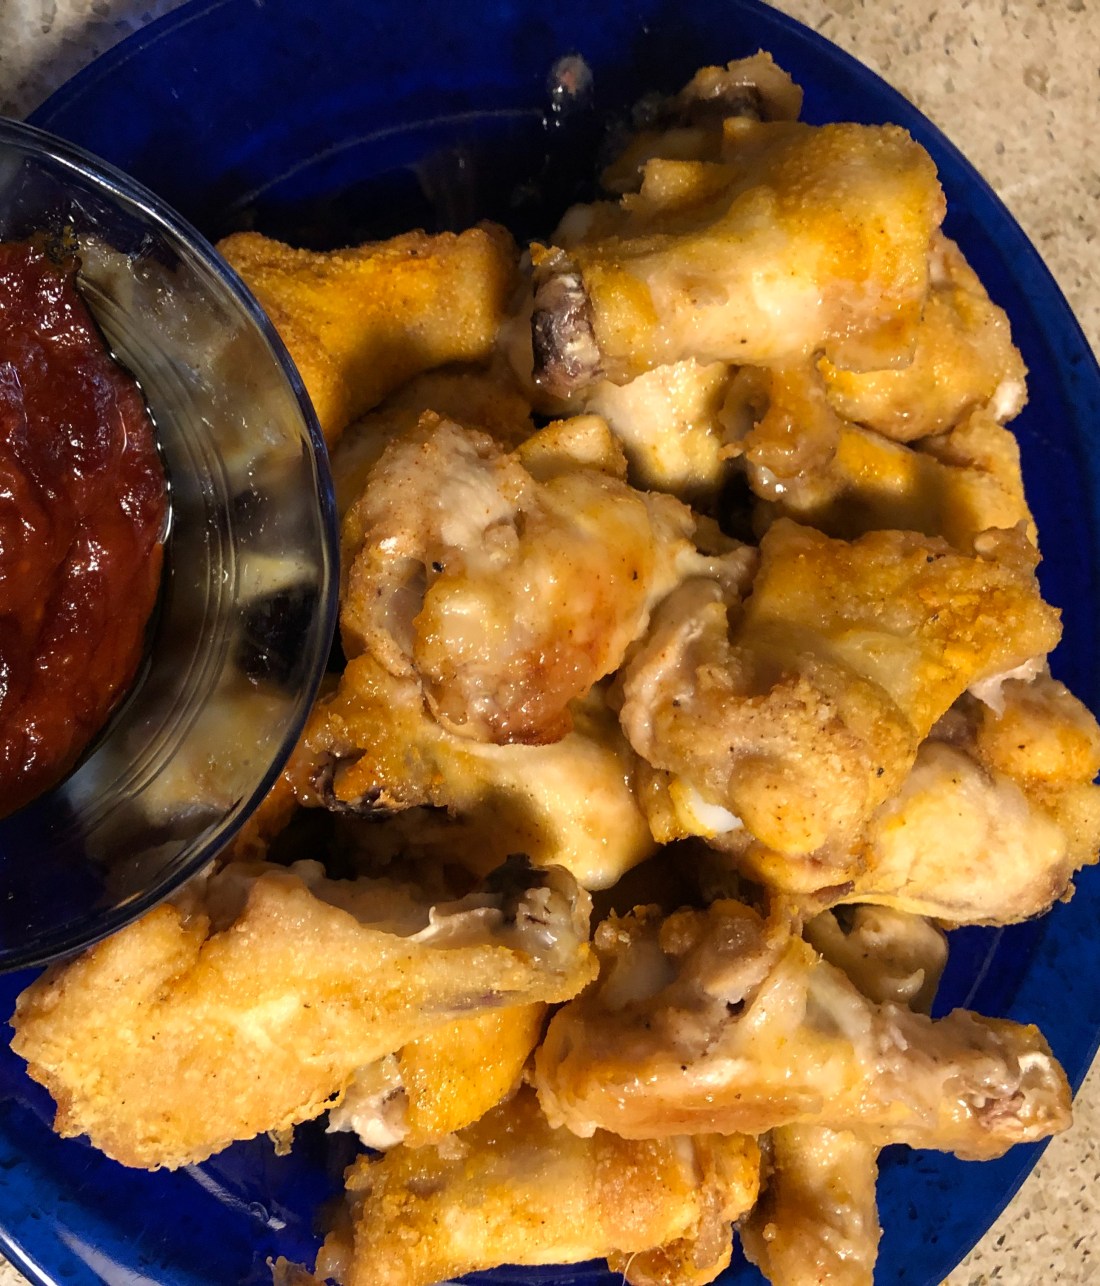
I do love chicken wings, pork ribs, all those things that are so not good for us. Since it’s my birthday today, I decided to make some of the things I love. I just put up Cinnamon Sticky Rolls and now here is my recipe for chicken wings. I bake them instead of deep frying so they are not too greasy.
Spray with a non-stick spray a cookie sheet with sides, size depending on how many wings you’re making. Preheat oven to 425 degree. If making more than a dozen, just increase the recipe.
For 10-12 drummettes, mix in a gallon baggie:
2 tablespoons cassava flour
1/2 teaspoon salt
1/4 teaspoon ground pepper
1 teaspoon garlic powder
1 teaspoon paprika
Shake to combine. Add the wings (you can use split wings if you like the fattier section as well). Shake to coat all the wings completely. Remove them from the bag, shaking off any excess flour and arrange on the cookie sheet. You don’t want them touching each other or they will stick together. Lightly spray with non-stick spray. Bake for 10-12 minutes or until you start seeing browning around the bottom. Remove from oven and turn them over so that both sides get crispy. Bake for about another 8-10 minutes.
I do love Chinese food but its been off limits since I developed an allergy to soy. With the soy substitute I gave you last year on this blog, this is really delicious! It’s not quick but it is very easy to put together; takes longer to cut everything up then to cook. Do it in stages and use precut or frozen vegetables to make it even quicker.
Start by cutting into 1/2 inch pieces 1 pound of pork, chicken or tofu
Put the pork into a zip-lock bag with 1 tablespoon corn starch, 1/2 teaspoon salt and 1/4 teaspoon ground black pepper [If you are allergic to corn, use 1 tablespoon tapioca or cassava flour or arrowroot]. Shake to coat all the pieces of pork and refrigerate for at least 1 hour.
While the pork is sitting, prepare your vegetables. I’m giving the list of what I used but feel free to use whatever veggies your family likes.
1/2 large onion sliced
2 celery stalks cut on a slant
2 baby bok choy sliced
1/2 cup grated or thinly sliced carrot
1 medium bell pepper sliced and seeded (you could cut into chunks if you prefer)
1 small can water chestnuts
1 tablespoon minced garlic
1 tablespoon minced ginger (be sure to mince it well because no one wants a big piece of ginger! Or you can buy pre-minced in a jar)
Mix the sauce together:
1/3 cup chicken or vegetable stock (use a little more if you’d like a saucier dish but increase the thickener as well)
1/4 cup rice vinegar
1/4 cup date sugar (or 1/4 teaspoon monk fruit powder, 1/4 cup agave or coconut nectar)
2 tablespoons soy substitute [See recipe under sauces and dressings or use can use coconut aminos]
1 tablespoon corn starch [or cassava or tapioca flour; I wouldn’t recommend using arrowroot because it will be very slimy]
Whisk together. Tip: Put the date sugar and corn starch in the bowl first and then the liquids. Set aside.
When the pork is ready, add 2 tablespoons olive or avocado oil to a large skillet (or if you have one use a wok). When hot, add the pork in individual pieces so that each one cooks individually. In other words don’t just dump the bagful into the skillet! Turn the skillet down to medium heat and let brown for about 1 1/2 minutes before turning. It will only take about another 1 1/2 minutes for the pork to cook through. Remove from the skillet.
And the vegetables and let cook for several minutes 2-3 before turning and then give them another 2-3 minutes covered so the celery, bok choy, and carrot soften. Remove cover and add the pork back in and stir to combine.
Add the sauce and stir until the sauce thickens. This should only take about 30 seconds. And its ready to eat! Serve over rice or quinoa, or noodles.
I eat a lot of chicken so I’m always looking for new ways to cook it. Here’s one that’s as delicious as it is spicy. Feel free to kick up the heat with some red pepper flakes. Using curry powder in place of the spices would work as well for an easy curried chicken.
You’ll need:
2 pounds boneless chicken (either breasts or thighs)
4 green onions chopped
12 ounces of plain, non-dairy yogurt (I used Oatly but Kite makes a nut based one which would also work)
1 tablespoon lemon juice (about 1/2 a lemon’s worth)
Spray a 9″x9″ baking dish with cooking spray. Add chicken.
In a separate bowl, mix all the ingredients except the chicken and green onions. Pour over the chicken and turn the chicken so all sides are coated. Refrigerate for at least 1 hour to marinate. Preheat oven to 350 degrees. Bake chicken for 40-60 minutes depending on the size of your chicken pieces. Top with the green onions. Serves 4.
With all my food allergies, I eat a lot of chicken so I’m always on the lookout for new, interesting chicken dishes. I don’t know how many of you subscribe to the magazine “Simply Gluten Free” but I’ve been a subscriber since their very early days when they were titled “Cooking Without.”
This last issue had a recipe for easy Moroccan Chicken which I thought sounded interested and it turns out it is very delicious. I’ve changed the recipe slightly to meet my tastes and decided to share it with you. Several cautions – cook in a slow cooker if you want but if you do it in the oven like me, be sure to cook at 350 degrees. I screwed up this time and used 375 and even with watching it closely and cooking no more than 1 hour, the top still scorched. So in the oven, be sure to cook at no higher than 350. It should only take 3/4 to 1 hour to bake.
You’ll need:
4 chicken thighs (I tried using a breast and it was tough)
1 cup salsa – use whatever salsa your family prefers, mild, medium, hot or spicy, doesn’t matter
1 teaspoon honey
1 teaspoon garam masala
1/2 teaspoon salt
Spray a 9×9″ pan with cooking spray. Mix the salsa, honey and spices together (I use a small whisk) and put a thin layer on the bottom of the pan. Arrange the thighs on top and then spread the remaining salsa mix on each thigh. Bake.
It’s that easy! You can serve it with brown rice, mashed potatoes or celery root.