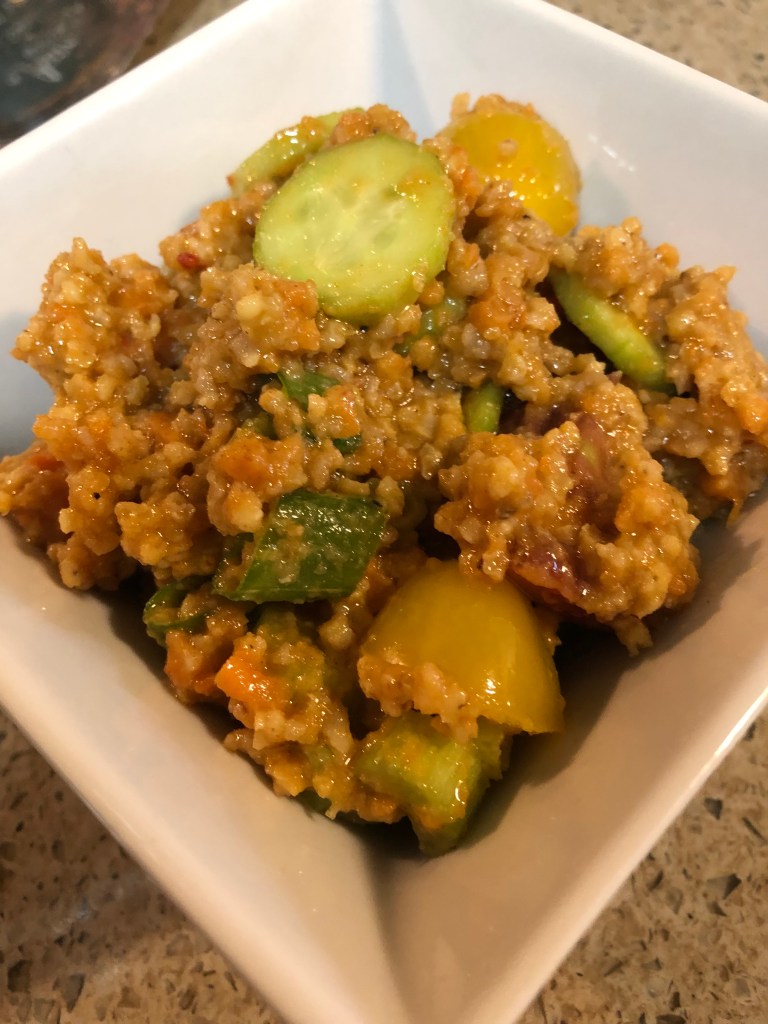
I don’t know about you but the recipe for Spicy Millet and Carrot was way too much for my household. I had about three-quarters of it left over. Now what should I do with this, I thought? Why not make a cold salad with it! It came out so good, I think I’ll use that recipe now as a basis for a salad all the time, it was so delectable. I used what I had on hand but feel free to use whatever vegetables you like – some cooked summer squash, diced avocado, chopped mushrooms, or peas would be great in this salad.
In a medium mixing bowl combine:
1 to 1 1/2 cups of the spicy millet with carrot, cold*
10-12 grape tomatoes, sliced in half or quarters
1 stalk celery, diced
1 small cucumber, peeled and sliced
1 scallion, sliced
Mix to combine the vegetables then add a simple vinaigrette of:
1/4 cup olive oil
1/4 cup rice vinegar (use less if you use a stronger vinegar such as white or cider)
2 tablespoons honey
1/2 tablespoon mustard
1 teaspoon siracha (optional)
Whisk to combine. I actually always use a small jelly jar to mix my vinaigrette – add ingredients, screw on the lid and shake for a minute or two. Mix the vinaigrette into the millet mixture and serve. Makes 2-3 servings.
*If you haven’t made the Spicy Carrot Millet, see the recipe under side dishes. You could use cooked millet and simply add some of the spices to the vinaigrette along with some julienned carrots to the salad.
Here’s a very easy, quick recipe to use instead of whipped toppings.
In a small saucepan combine:
1 cup non-dairy milk
1 tablespoon arrowroot (tapioca or corn starch also work)
1 tablespoon date sugar (agave or coconut nectar, honey, or 1/8 teaspoon monk fruit powder)
1 teaspoon vanilla extract (or vanilla powder)
Whisk over medium high heat for about 2 minutes until mixture thickens. Serve warm or hot. Mixture will thicken as it cools. Store leftover sauce in the refrigerator and reheat before serving.
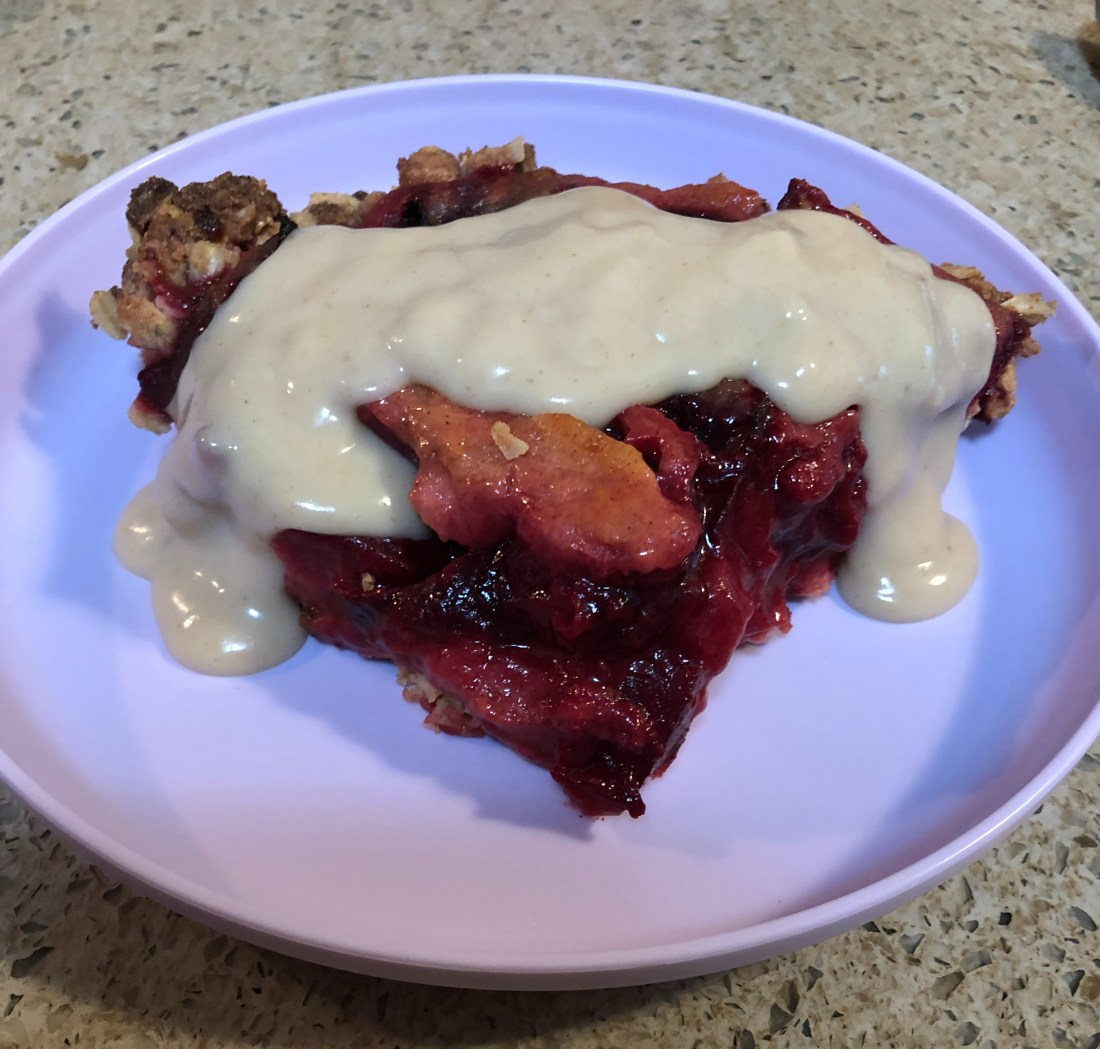
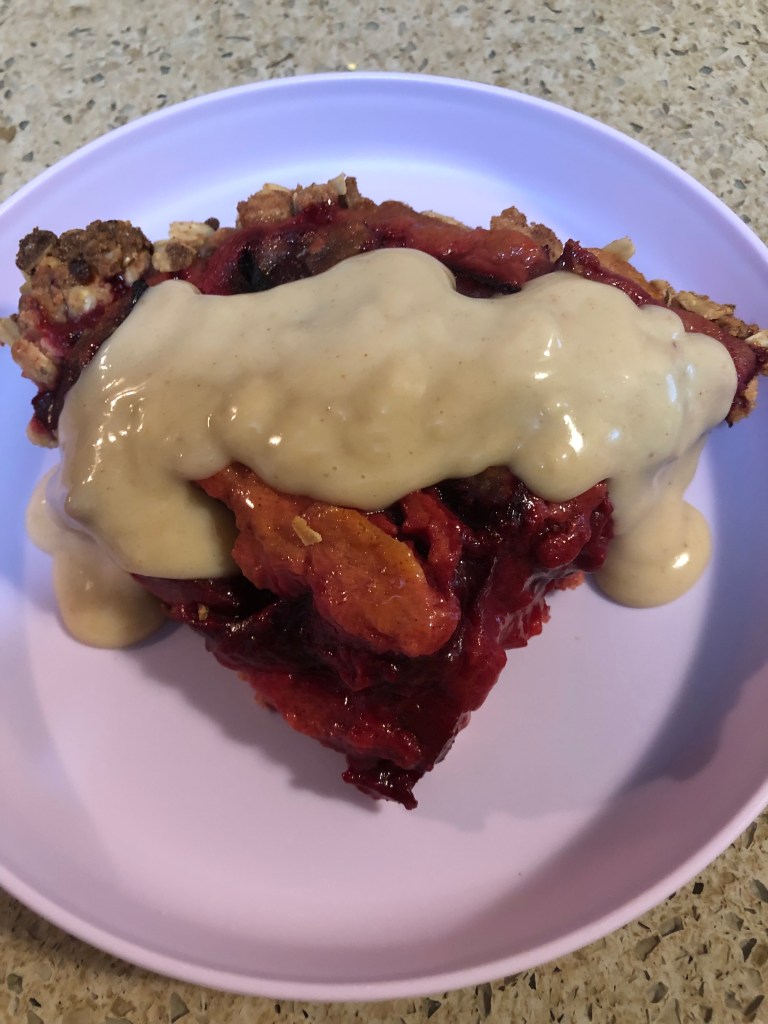
I’m always looking for ways to make desserts that don’t contain lot of sugar and/or simple carbs. So when I found a recipe for an oatmeal pie crust, the thought hit me that this would be an interesting concept to investigate. Having more plums on hand than I could eat that were ripening rapidly, I thought it would be a tasty combination and indeed it turned out to be just that. If you’d like to make a crumb crust for the top as well, increase the crust recipe by 50%.
Preheat oven to 375 degrees. In a medium bowl combine:
1 cup rolled gluten-free oats
1/4 cup gluten-free all-purpose flour (just brown rice, sorghum, oat, etc., would also work)
1/3 cup date sugar*
1/2 teaspoon sea salt
1/3 cup avocado oil (or melted vegan butter or margarine)
Stir until it forms a crumbly texture. Press firmly in the bottom of a 9″ pie plate. Cover with parchment paper and fill with dried beans or pie weights. Bake for approximately 15 minutes or until crust is browned. Let cool while the plums are prepared.
In a medium bowl combine:
3-4 cups (depending on how full you like your pie) diced plums (skins on is fine as long as they’re organic)
1/4 cup date sugar*
1 teaspoon cinnamon
2 tablespoons all-purpose gluten-free flour
2 tablespoons avocado oil (or melted vegan butter or margarine)
zest of 1 small lemon and juice from 1/2 the lemon
Stir to combine ingredients before spooning into the pie crust. If desired, cover with more crust mixture before baking for 45-60 minutes (depending on how full the pie is). Cool completely before cutting. Serve with a non-dairy whipped topping or, vanilla or lemon sauce (see recipes under sauces).
*To lower the glycemic index value of the dessert even more, substitute 1/4 teaspoon of monk fruit powder in the plums and 1/3 teaspoon in the crust. If you choose this alternative, start with 1/4 cup of oil and add by tablespoons until the mixture is a crumbly consistency.
If you’re looking for something different as a side dish, here’s a tasty way to go. If you haven’t tried millet, or just used it for breakfast, this gives you a great introduction to using it as a savory side dish. Per usual, the recipe is very adjustable – carrot is one way to go but parsnips, butternut squash, or even pea puree would work just as well depending on your family’s tastes. It’s fairly quick, about 30 minutes to prepare, and quite an easy, straightforward recipe. Enjoy something different!
First, in a 12″ skillet over medium heat dry toast:
1 cup whole millet
While the millet is toasting, in a 4-quart saucepan, over medium high heat, bring to a boil:
2 cups stock (I used vegetable stock but use any type you like, or even water, works)
Once millet is toasted (about 3-5 minutes, stirring occasionally), add it to the boiling stock. Stir to combine, cover and reduce heat to medium low or low, and cook through, about 20 minutes, until water is evaporated and the millet is softened.
While the millet cooks, in a double boiler, steam:
3/4 cup carrots (I used the pre-sliced but any kind will work)
Steam until soft and then blend, using a hand-held immersion blender with:
Salt and pepper to taste (about 1/2 teaspoon salt and 1/4 teaspoon black ground pepper)
In the bowl of a food processor, or using a hand grater, grate:
6-8 baby carrots
You should have about 1/3 to 1/2 cup. Once the millet is cooked, stir in these grated carrots and cover again. Let sit for 2-3 minutes. Once the cooked carrots are pureed (you could also use a food processor or stand blender), add to the millet mixture, stirring to combine.
Finish with some avocado oil, vegan butter or margarine; or a squeeze of lemon and/or 1/2 teaspoon grated lemon rind. Garnish with some cilantro, green onions or chopped carrot top if desired. Serves 8.
I remember as a child my mother would give us mocha in place of cocoa or coffee. Of course, back then, decaffeinated coffee didn’t exist and parents were told caffeine was bad for growing children. Thankfully, it didn’t occur to her that chocolate has as much caffeine as coffee! So she would put a little instant coffee into our cocoa. I must admit to this day, I much prefer mocha to plain cocoa. Now that chocolate is no longer on my menu, I’ve substituted carob in it’s place and I think it works just fine. These are more like a flat fudgy truffle than a cookie. Very quick and easy to make using a food processor. These are the perfect “cookies” to make during the summer when no one wants to turn on their oven.
In the bowl of a food processor, combine:
1 generous cup gluten-free rolled oats
1 tablespoon carob powder (of course you could also use cocoa powder)
1 tablespoon instant coffee or expresso
1/4 teaspoon sea salt
1/4 cup protein powder
2 tablespoons date sugar
1/4 cup pumpkin seeds*
1/4 cup seed or nut butter
1 teaspoon vanilla extract or vanilla powder
Blend until the mixture is slightly crumbly and most of the oats are ground along with the whole pumpkin seeds. Slowly pour in the non-dairy milk, about 1-2 tablespoons at a time, until the mixture forms a dough. It should be a little sticky but mostly dry. Scoop out about 1 to 2 tablespoons, depending on how large you’d like the “cookies”, roll into a ball and then flatten in your palm. Place on a sheet of waxed or parchment paper after coating each cookie with a mixture of:
1 tablespoon carob powder
1 tablespoon crushed instant coffee or expresso powder
1 tablespoon date sugar
I mixed the above in a small bowl and then coated each side with the carob mixture by putting the cookie flat into the bowl and then turning it over. The mixture stuck just fine without any pressure. Makes 10-12 depending on size. Remove to a large plate or small baking dish and refrigerate for about 15 minutes. Store in zip-lock bags in the refrigerator.
*I used pumpkin seeds and pumpkin seed butter but any type of seed or nut will work – sunflower seed butter and sunflower seeds would be just as good.
I don’t eat a lot of oatmeal since I became diabetic but I do enjoy it now and then. Here’s a twist on the standard bowl of oatmeal or the now in vogue baked oatmeal bowls. This is another instance where you can get creative and use whatever fruit sauce or jam you’d like to flavor the oatmeal such as apple, banana, strawberry, etc. Very easy to make; the food processor does all the work, especially if you buy pre-shredded carrots. And of course, feel free to adjust the spices to your families taste – nutmeg, coriander, etc.
First preheat oven to 350 degrees. Line a 9×9″ baking pan with parchment paper, overhanging on two sides so that the bars can be lifted out of the pan when cooled. In the bowl of the food processor add:
2 cups rolled oat
Pulse until it’s a coarse texture then add:
1/2 cup pumpkin seeds
1/2 cup pitted dates (softer the better so if they are hard, soak in hot water for 5 minutes)
2 tablespoons avocado oil
1 1/2 cups fruit sauce or jam
2 tablespoons chia seeds
1 generous teaspoon ground cinnamon
1/2 teaspoon ground allspice
1/4 teaspoon ground cloves
1/4 teaspoon ground cardamom
1/2 teaspoon sea salt
1 teaspoon vanilla extract
Pulse to combine before adding:
2 cups shredded carrots
1/2 cup rolled oats
1/4 cup shredded coconut (optional)
Pulse to combine and break down the carrots. Spoon into prepared pan and bake for 35-45 minutes depending on how your oven runs. Cool in pan before lifting using the overhanging parchment paper and cut into squares. Store in airtight container or in the refrigerator. Can be frozen.
Turkey is easy to overcook producing a dry, not very appetizing meat. If you don’t have a meat thermometer, I would suggest you invest in one. It makes cooking meats, especially poultry, much easier.
Turkey can also be rather bland so it needs help to bring out the flavor. This recipe combines a number of herbs to do just that. If you have time, rub the turkey breast, under the skin as well as on the skin, with the herb rub and then refrigerate for several hours.
Watch the turkey breast carefully while baking and take the internal temperature often after about 50 minutes so that it doesn’t get above 160 on the meat thermometer. This is meant for 2 people but the breast can serve up to 4, just increase the vegetables. As with many of my recipes, feel free to change out the herbs to suit your family’s taste as well as the vegetables – any root vegetables will work in this recipe.
Preheat oven to 350 degrees. Prepare a baking dish a little larger than the turkey breast and spray with non-stick cooking spray or coat with a non-dairy margarine. In a medium bowl combine:
1 large onion, sliced
5-6 celery stalks (I used celery hearts so if you have whole celery, reduce this number), cut into large pieces
12-15 baby rainbow carrots, exclude the orange ones
1 medium sweet potato, peeled and cut into medium-sized cubes*
2 tablespoons olive oil
If some of the baby carrots are on the larger size, cut them in quarters so all the vegetables will cook evenly.Mix the vegetables together to coat them with oil. In a small dish combine:
1/2 teaspoon dried thyme
1/2 teaspoon sea salt
1/4 teaspoon ground black pepper
1/2 teaspoon garlic granules
1/4 teaspoon dried marjoram
1 teaspoon dried sage
Mix the herbs together to combine.Add about 1/4 of the herb mixture to the vegetables and mix once again. Pour the vegetables into the prepared baking dish. Using paper towels, dry thoroughly:
2 1/2 to 3 pound turkey breast (this is a half breast)
Pull up the turkey skin and sprinkle the flesh with the herb mixture, reserving some for the other side. Rub into the flesh and then fold back the skin onto the meat and sprinkle a little more herb on the skin. Place the breast on top of the vegetables skin side down and sprinkle the remaining herb mixture on the bottom of the breast, rubbing it in. Flip the turkey breast so that the skin side is up. Roast in the oven for approximately 25 minutes per pound or until internal temperature is 160 degrees.** Remove from the oven and place the turkey on a serving platter, loosely cover with foil and let rest for about 10-15 minutes.
Spoon the roasted vegetables into a serving bowl.*** When the breast is rested, cut and serve. If desired, pan gravy can be made with the fat in the pan by adding gluten-free, all-purpose flour until all the oil is absorbed (probably about 2 tablespoons) and then cook the flour for several minutes over medium heat before adding approximately 1 cup of chicken (or turkey) stock for each tablespoon of flour used.Or, for fat free gravy, heat 1 1/2 cups of chicken (or turkey) stock over medium high heat. Whisk 2 tablespoons of gluten-free all-purpose flour into another 1/2 cup of cold chicken stock and whisk into the stock on the stove. Whisk constantly until the mixture comes to a boil and is thickened.
*If your family doesn’t like sweet potatoes, simply add the orange carrots and perhaps some cubes of red-skin or Yukon gold potatoes.
**FYI, my turkey breast was 2.8 pounds and I cooked it for 1 hour and 20 minutes before it reached 160 degrees. Remember it will continue to cook when removed from the oven and covered with foil.
***The carrots weren’t cooked when I removed the turkey so I increased the oven temperature to 425 degrees and cooked the vegetables for about 20 minutes more. This not only cooked the carrots but it also browned the sweet potatoes making them a little crunchy.
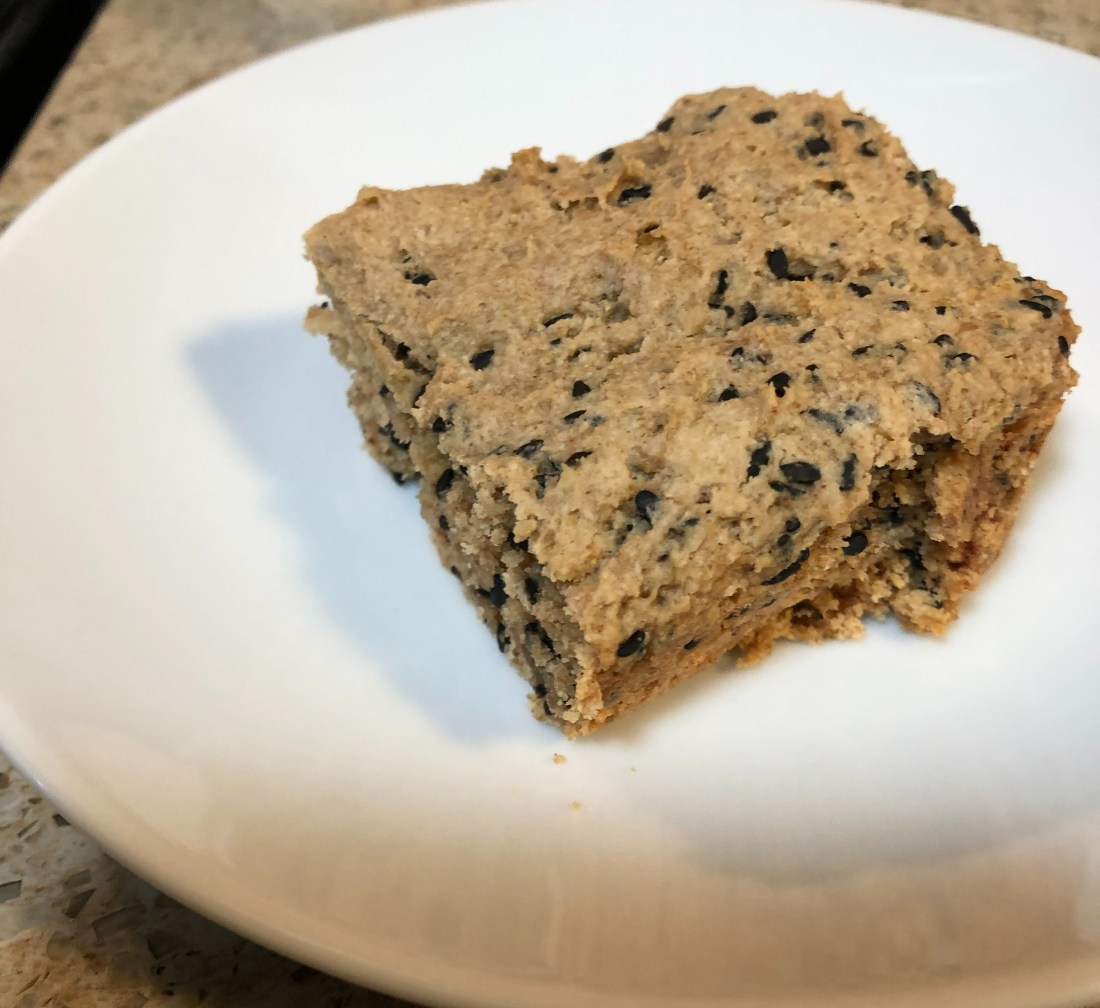
My mother used to make a sesame seed cake recipe that she found in the NEW YORK TIMES. She frosted it with chocolate ganache and it was so delicious it never lasted more than one meal in our household. I’ve been searching for years trying to find that original recipe without any success. However, recently I’ve found several gluten-free sesame seed cake recipes, one of which I’ve adapted here. Of course, if you can have eggs, go ahead and substitute back the one egg for the flax gel. This makes one 8×8″ square or round cake so for a two layer cake, double the recipe or make it twice.
Preheat oven to 325 degrees. Grease an 8×8″ baking pan. In a medium size mixing bowl combine:
1 tablespoon ground flaxseed
3 tablespoons warm water
Whisk together and let sit for approximately 5 minutes until it forms a gel. To it add:
1/2 cup date sugar
1/3 cup Spectrum shortening (or vegan butter or margarine at room temperature)
1/4 cup black sesame seeds (or toasted regular ones if you prefer the taste)
I just used a spoon to mix this cake together but feel free to use a hand mixer. Combine the above until smooth and the shortening is incorporated. Add:
3/4 cup non-dairy milk (minus 1 tablespoon)
1 tablespoon rice vinegar
1 teaspoon vanilla extract
Stir in the liquid ingredients before adding:
2 cups oat flour (make sure it’s gluten-free)
1/2 teaspoon xanthan gum (or guar gum)
2 teaspoons baking powder
Stir until all ingredients are combined. Spoon into prepared pan and bake for 30-35 minutes or until a toothpick comes out clean. Frost with chocolate or carob ganache if desired (see recipe under Sauces, Condiments and Dressings).
It’s getting very hot here in Minnesota, will hit the mid-90s this coming week. I wanted an easy, lighter meal and had seen cucumber boats on-line stuffed with tuna salad. These work best with regular cucumbers but I generally buy either the English or the mini cukes so that’s what I used. If you also use the mini cucumbers, pulse the salad in the food processor for a few seconds to grind it up. It fits in the smaller boats much better that way. Any kind of salad will do – I made some curried chicken salad but tuna would also work.
First thing, prepare the salad:
1 rotisserie chicken, meat removed from the bones and pulsed in the food processor for a few seconds
4 stalks celery, chopped
1/4 to 1/2 cup pumpkin seeds (or walnuts if not allergic)
Mix the dressing in a separate bowl:
1 to 2 tablespoons green curry paste
1/2 teaspoon sea salt
1/4 teaspoon ground black pepper
1 cup vegan mayonnaise (if not allergic to eggs, feel free to use any mayonnaise)
2 teaspoons mustard
1 teaspoon to 1 tablespoon sriracha (optional)
1 tablespoon lemon juice
1/2 teaspoon garlic granules
1/4 cup dill pickle relish (optional)
Pour the dressing over the chicken mixture and stir to incorporate. Salad is ready. Next, peel and cut lengthwise:
12 mini cucumbers (probably 2 regular sized cucumbers)
Using a small spoon, remove the seeds to create the “boats”. Fill with the salad and serve. May be garnished with sliced scallions, chopped chives or chopped parsley.